ZBrushCentral

Kitty Scratches

Hi guys and gals! I know I’ll probably get ‘killed’ in here, but I’m at the point where I feel if I don’t, I’m not going to grow… so I’m taking the plunge. :o

Little background, I’m an engineer, with no formal art training. 20 years ago when I was finishing highschool I wanted to go into visual arts, but my parents and the old government wanted me in a ‘more respectable profession’ so off to the Engineering school I went. :rolleyes: Through that and CAD I got into 3D modeling. I’m usually a half ways decent modeler. I did some architectural and engineering related viz over the years. Lot of data modeling, not a lot of artistic stuff.

My texturing, bump and displacement mapping, character or scene development, painting skills and a lot of other things that make a good 3D production artist need a lot of work.

Since I’ve been laid off a year or so ago, I’ve been making a bit of money on the side making (ugh don’t hate me please) Poser content. While I’m working within constraints of what works in that program, I also want to move in a direction of improving my skills so I can develop a portfolio some day. I also have a lot to learn about programs that I have. It’s all one big WIP.

Sowwy, I’m probably rambling a lot here - nerves.

Here are a few pictures of my current project that will also give you a bit of a feel for my current skills. I’m making an outfit that has a bit of a female construction stereotype - and a bit of a goofy engineering gal (um, like me). It’s still made for Poser, and has to fit DAZ Studio’s Vicky 4 character, and her goofy rigging, and various other program limitations. It’s the body in the picture. All the rest is my modeling.

Mostly modeled in Hexagon and Max. I intend to sculpt some wrinkles via displacement mapping on the clothing. Here we go… gulp:eek:
Tool002.jpg

Attachments

Tool003.jpg

Hardhat is my texturing and modeling.
Render is from DAZ Studio, so the materials and lighting is a bit more limiting then they would be in MAX. While I have Max, I’m not very good at a seriously nice material and lighting setup. In DAZ Studio and Poser, I have to include Materials and their settings in the package - so I’ve been focusing on those.
Body and skin testure are not mine.
Hair3.jpg

Attachments

Ped009.jpg

Welcome to ZBC, it’s ok to use Poser and Daz. I guess you can use zbrush to sculpt wrinkles in clothes and organic things.
You would really get the most out of zbrush if you had a concept or an art style that you wanted to show off.

Always wondered as to whether using poser models as a starting point is or isn’t going against the very purist ethic here at zb… like Si says though, if you make it your own…
It’s a nice start, and i like your texture work very much so far :slight_smile:

Good work! I personally OK about using Poser models as ref. why not?

Hmmm…I’m not really familiar with the whole poser issue? I got the notion that the female character model itself is not your work correct? If you are just starting out, I dont see a problem with using other models as reference and working your way up. It becomes an ethical issue if you start to claim credit for models that aren’t your own. Clearly you have been honest and are just trying to show off your own work. You can slowly work your way up to complete models that you have done all on your own. As for the wearables on the girl, the modeling looks pretty clean and nice. I would say wrinkles and such sculpted in zbrush would go a long way to adding some nice details. The helmet looks pretty good but some of the details look a little off…scratches appear to be too thick, no discoloration of the orange paint, etc. It’s a good start but getting more reference photos would help a lot. Same with the concrete texture, though I believe you said that it was not finished? All in all, you are definitely headed in the right direction! This is definitely a good place to post if you want to get better too.

I like the work so far, and we all have to start someplace. What programs are you using besides Zbrush? My recommendation to you would be go to http://www.digitaltutors.com and check out there videos, you have to subscribe but its not to bad with all the videos you get access to. And there thousands. Hope it helps.

As a Poser user ( and sometime customer) pleasure to see your
work.
Don’t see the need for apologies, Poser people are not second class
citizens.
Fact that you have been able to make money in the industry, speaks
volumes about your abilities.
Quality of belt, etc, indicates you well above beginner.
No more gulping, you have arrived.
Best of luck.

Come on in, the water’s fine!
Yes, that first step into the water can be intimidating. Take it from a longtime lurker like myself.
Did you say the gal was from poser, but you did all the clothing?
Nice work on the clothing. Very sexy! Welcome to the forums!

Here’s the deal with Poser, and why this is around a poser figure. What I’m making is clothing to fit and function with a popular Poser figure - because I eek out a bit of a living selling clothing for Poser. Right now it’s a bit of a necessity that I stick with it - till I get my foot in the door with other markets.

Sort of like traditional illustrators work with clients - you’re trying to make something that fits the parameters client (in this case Poserdom customers) are willing to pay for. Since I can’t find any decent architectural or engineering modeling or design work with this darn recession, I’m trying to do whatever I can to have a bit of an income. I’m trying to balance my time between learning, and production.

So, making it for a poser figure is actually the end result, rather then a crutch to avoid modeling a human figure of my own. Unfortunately, standalone rigged figures of humans and humanoids don’t sell well in Poserdom. It has it’s own set of challenges - to make it fit the figure and rigging idiosyncrasies. Somewhat similar to working for any client.

I think perhaps poser at times becomes a stereotype for people arguing over what matters to them vs. someone else. With that in mind, I think the point I was trying to get across was that even though I’m making stuff for poser, I’m not here trying tp push and tell everyone how great it is (I actually find it frustrating pretty often). Since I can get paid for making stuff for Poser, I look at it as commissioned work. I adjust what I do to fit the task as best as I can. Well, enough rambling about that…

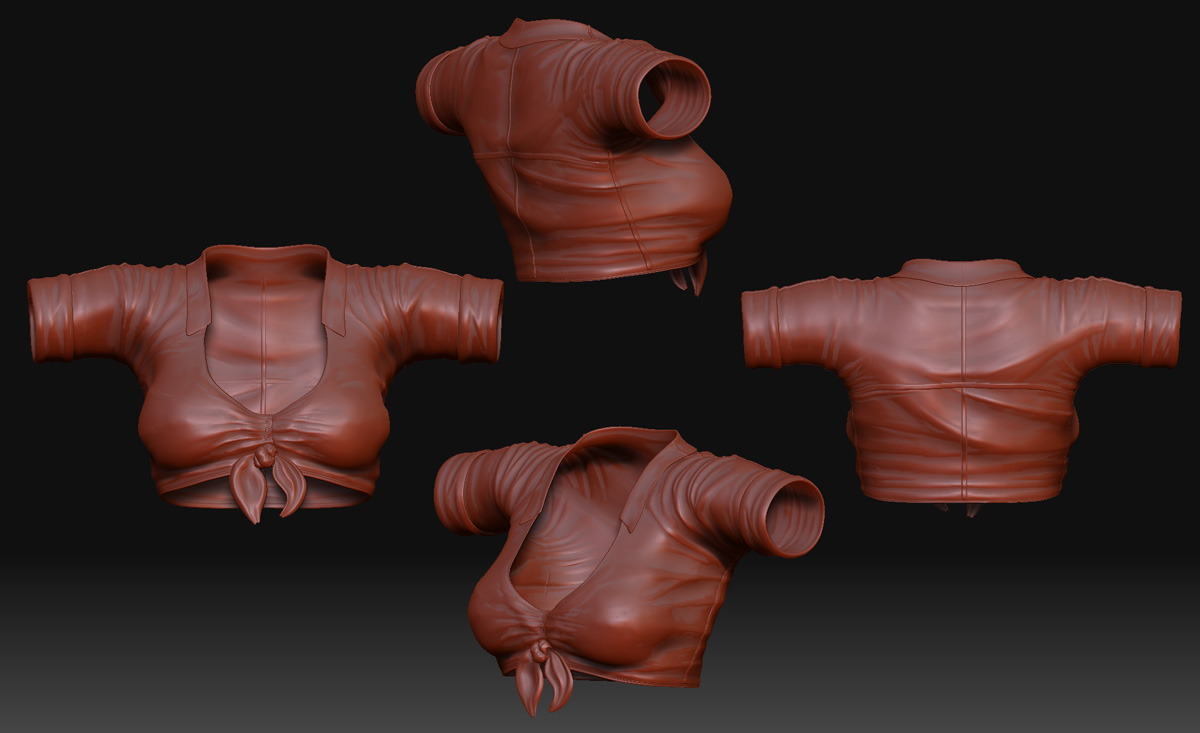
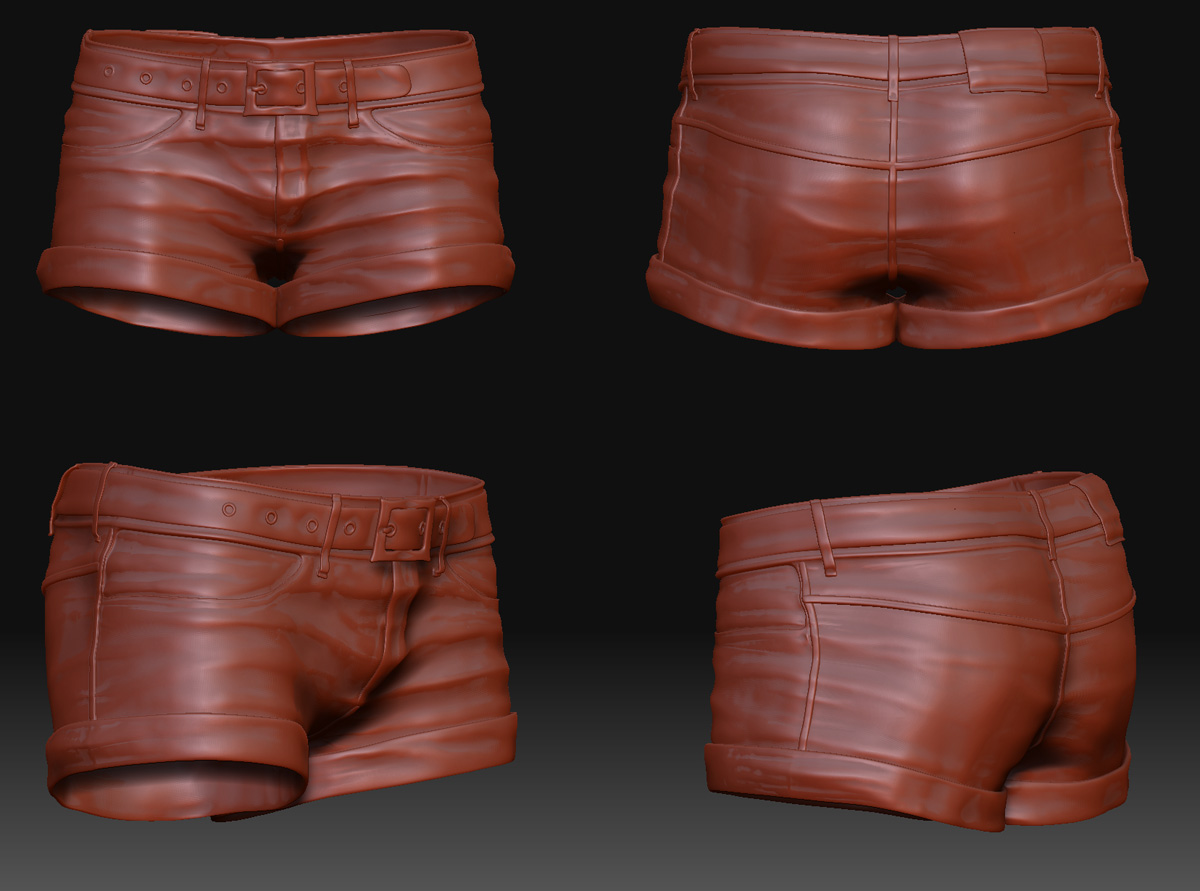
sgrell - Thanks for the welcome and for peeking in. Yes, adding wrinkles and more organic looking detail to the cloth parts is the next step, and the main reason I brought it all into Zbrush. I have a few things in progress and will post them shortly.

RawSunlight - Thanks for Peeking as well, and I’m glad the textures look tolerable at this point. As for the ‘purist thing with Poser’ it’s probably all relative. The ability to make a character from scratch and do it well is definitely a marketable skill set, above and beyond putting clothes on a pre-made figure.

eof3D - Thanks for peeking in :slight_smile:

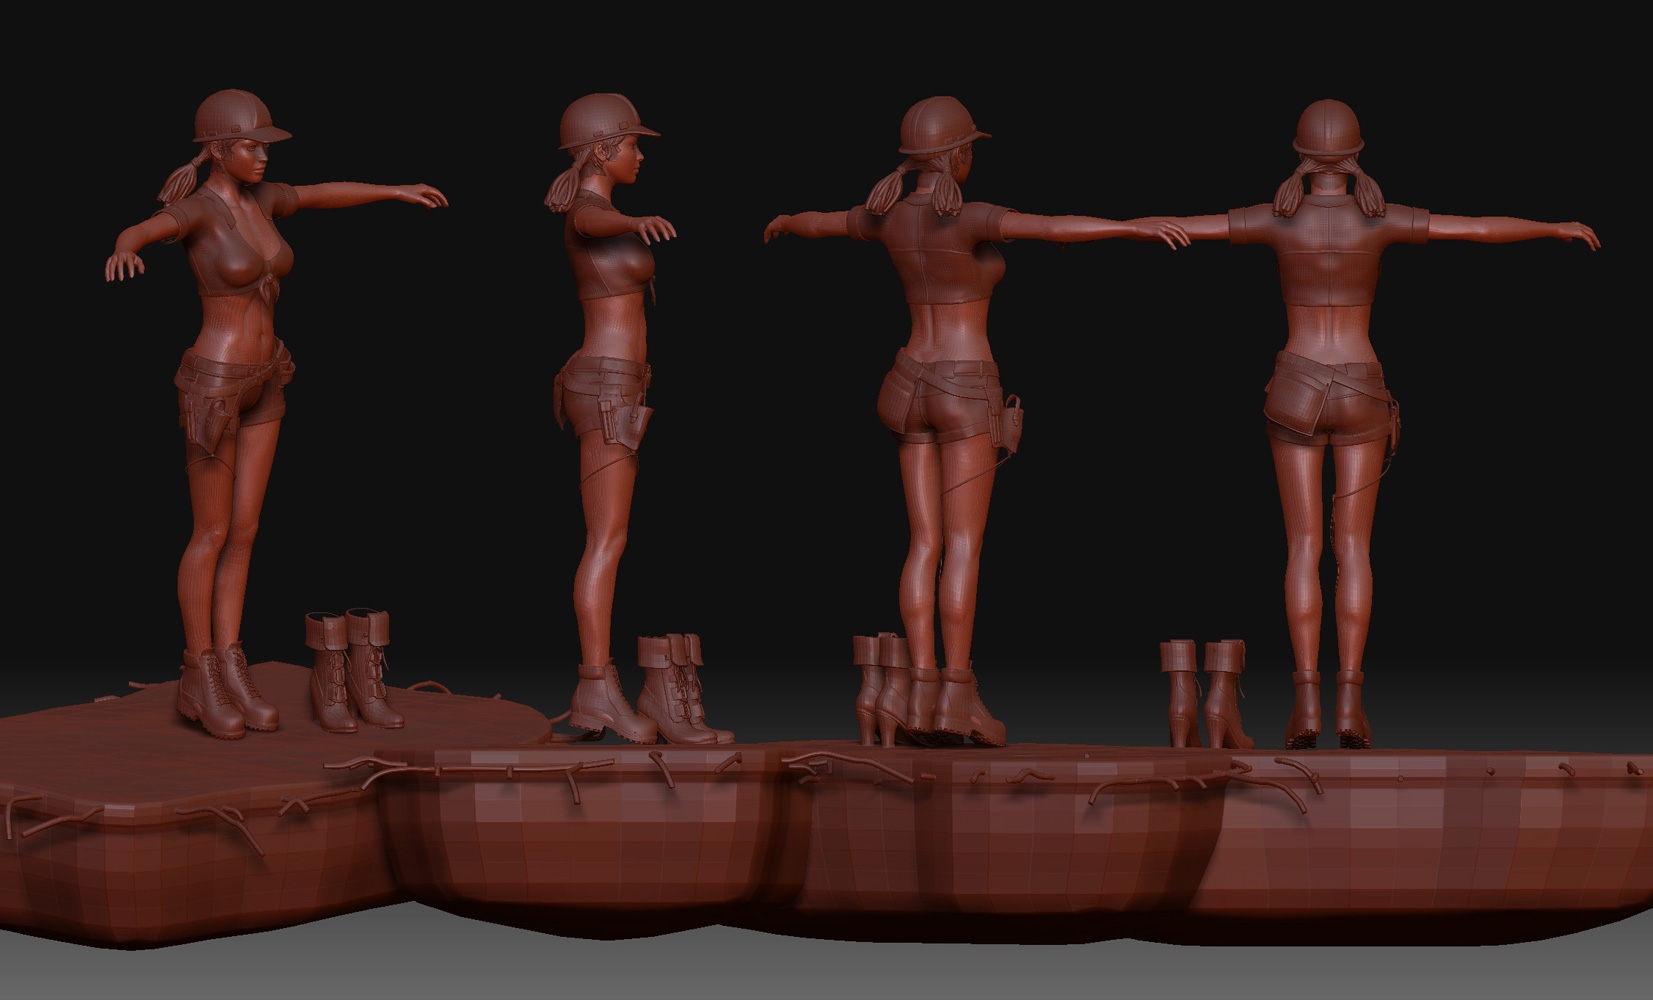
sarakawa - Hi, and thanks for peeking. Yes, the female character is not my work. It’s a starting body blank (Base V4 is sort of it’s name) that we use when making clothes for her. She can morph into a few dozen other body shapes, and as a part of making clothing for her I have to shape the clothing (make morphs) to fit each body shape. Thanks for the pointers on textures - You’re so right, there’s no coloring variation. I’ve been caught before forgetting to add that element! The textures aren’t completely finished, but they are getting pretty close to what I know how to do on my own, without outside, wiser feedback. Thanks for the pointers :slight_smile:

adio38 - Hey there, thanks for looking. Programs - I use Max, Hexagon (because it has some nifty box modeling looping and similar tools, that I don’t have in max without a plug-in). I UV map in Max, make textures in DeepPaint+Photoshop. I’m lucky enough to have pretty good set of tools from the engineering modeling days. Thanks for the tip about digitaltutors. I wasn’t familiar with that one :slight_smile:

bicc39 - hi there :slight_smile: Yea, not so much second class citizens, but Poser tends to have a large subset of low quality models… That part is my pet peeve. I’m not so new to modeling and UV mapping itself, I can model a likeness of just about anything. I’ve been doing technical modeling for a good number of years. On the other hand, giving it character, the way concept artists can - maybe I can develop that somewhere along the way. I only started modeling clothing and organics in last 2-3 years. before it was all roads, bridges, houses and a million other things, according to their technical specs and plans.

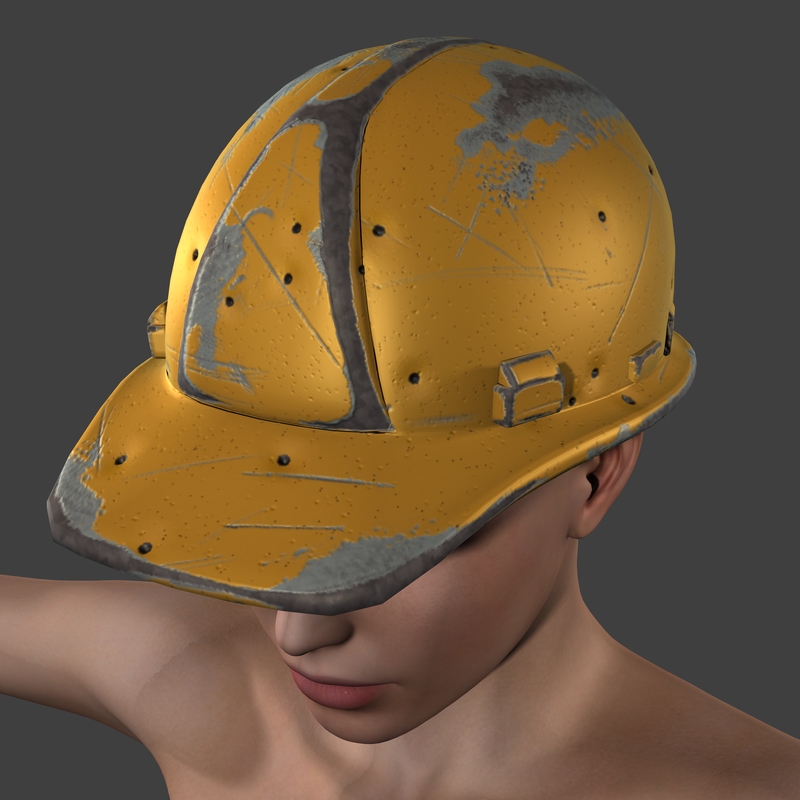
Webhead - Hey! Yes, long time lurker. I registered in '06, but lurked even before that. Yes, the base human mesh is Poser’s V4 mesh (the lighter colored active tool) All the other pieces are my modeling from scratch. I used some pictorial reference for the boots and the helmet, because i wanted them to look recognizable to what’s typically seen on construction sites. the rest I made up. I mean, it’s not all that unusual stuff, I just didn’t copy it from a picture somewhere.

whew I survived the ice braking - I’m off to pull together a few screenshots of whatever wrinkles i have on this…

Here are some wrinkles on the top. This is only about my 4th or so time trying to paint real wrinkles, so lot of room for improvement.
I’d like to create more pronounced wrinkles in certain areas, but when exporting displacement and plugging it into Poser and DAZ Studio, I get myself into a pickle if I have undercuts. (the kinds of undercuts that are often a problem in RL lost wax sculpture).
I’m also unablr to take full advantage of normal mapping, because one of the older versions of Poser (6) that us merchants still need to support doesn’t handle normal maps. I can use a combination of morphs and displacement.

I think the top would benefiot from some bump mapping too, but I don’t have any of it created. I’m actually in a mind blank about bump map at the moment… and about the texture too.
[attach=162895]Tool004.jpg[/attach]

Attachments

Tool004.jpg

You’re definitely on the right track with those wrinkles. Try rounding the side of the breast a bit more. At the moment it looks kinda weird but then again it could just be me. Same goes for those two bit wrinkles at the back. You might want to try experimenting with the gravity settings within the brush pallet. Keep up the good work!

Regards,

Hasan

Hey Bomoh, thanks for the tip. My Hubby whom has no artistic bone in him looked at the top and goes “Her boobs are lumpy” :td: :lol:

Here are the shorts, with and without textures. I don’t know how to make a textured preview look any better within Zbrush. I’ll have to experiment more with that. Wrinkles are definately more visible on the clay view. That makes me wonder if the wrinkles may not get lost under the texture in the final piece too.

I’m noticing, again, no color variation.! :o Definately something to work on.

[attach=162896]Tool005a.jpg[/attach]
[attach=162897]Tool005.jpg[/attach]

Attachments

Tool005a.jpg

Tool005.jpg

Quick test render in DAZ Studio, to see how it’s all progressing in it’s target application. Belt and boots haven’t been rigged yet. Most materials, except for hardhat and hair aren’t even close to finalized. I just plugged in the displacement map to check how it looks compared to what I see in Z.
Ped004.jpg

Thanks for peeking and feedback :slight_smile:

Hey Connie! :smiley:

Love the work. :+1: 
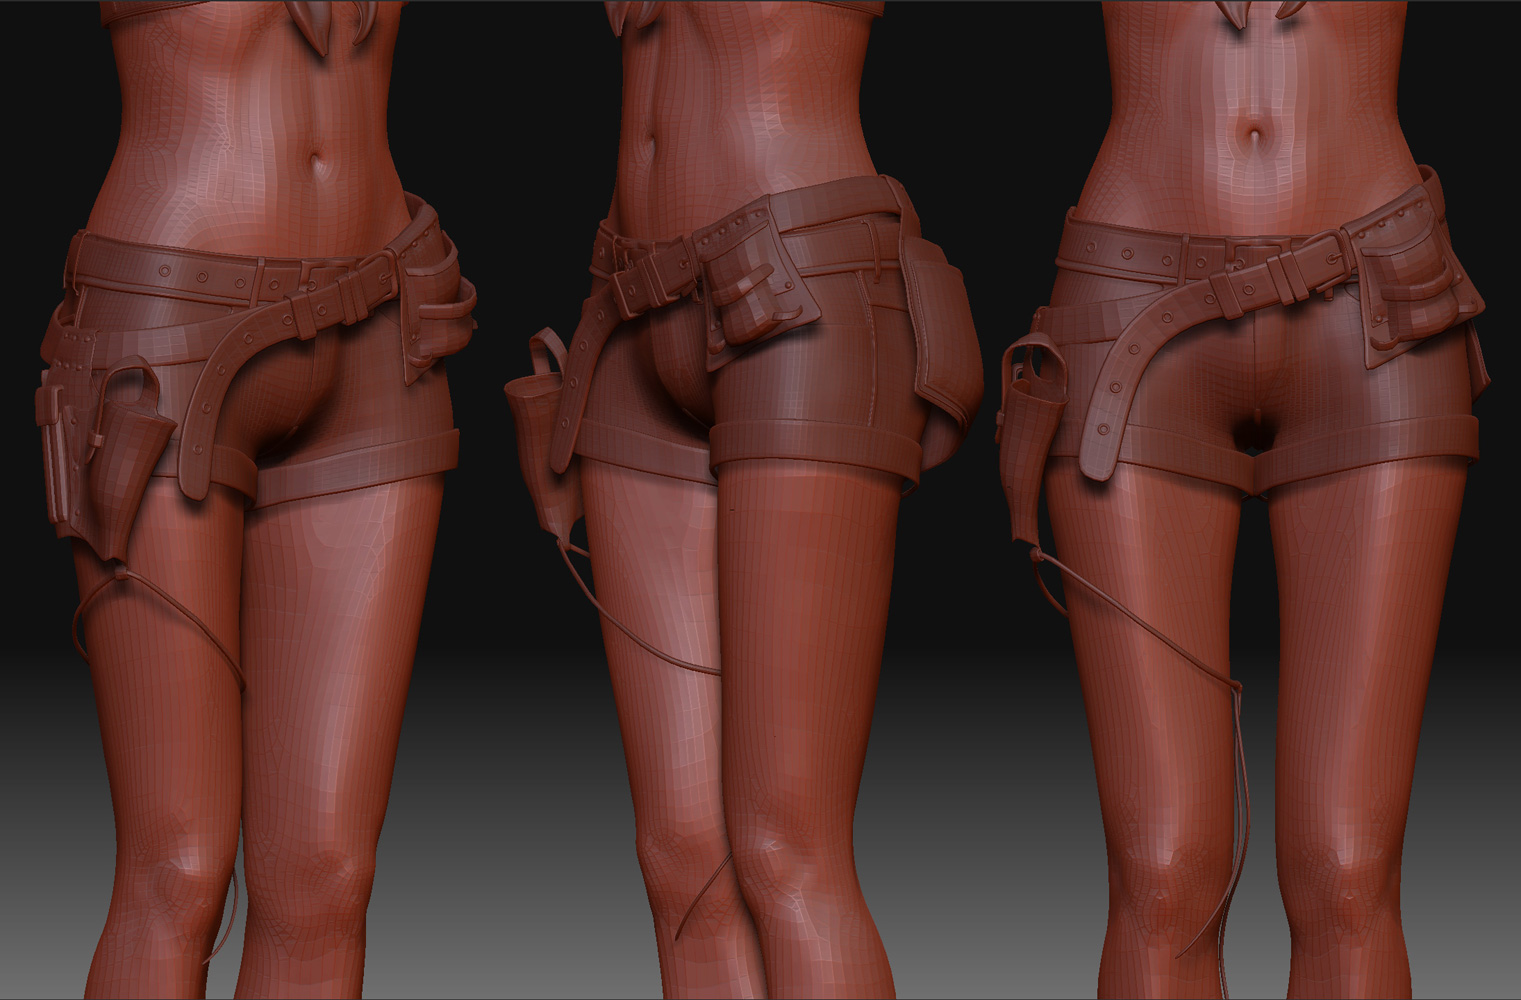
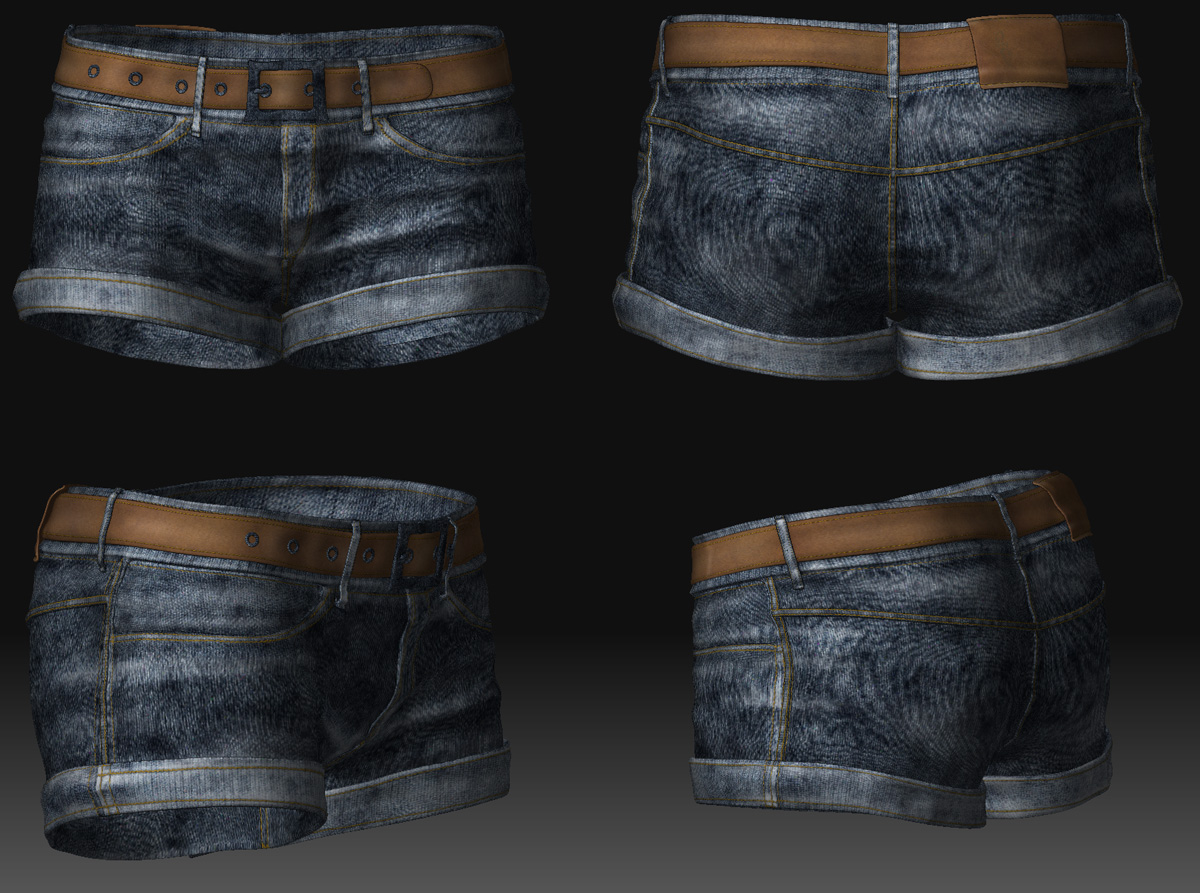
I wanted to ask though, are there going to be back pockets to these shorts?? Construction folks depend on pockets to stuff things into, not just the utility belts.

I’ll be watching for sure as I am in the other thread over at the DAZ forums. Just too busy with RL and what little time I have I like to relax and play a bit so not doing much beta testing these days. :warning:

HUGZ,
Richard ;-)~

Impressive! try this for your displacement… It’s actually being used as a bump here…

http://www.zbrushcentral.com/showthread.php?t=59813&highlight=bump+displacement

This’ll likely work better in D|S because you can actually subdivide the model 1 or 2 times as opposed to just the one level of smooth in pzr.

Hey RAMWolffie - Sorry no back pocket on this set of shorts. The low riding waist and high leg cutoff didn’t leave a lot of room for a very functional pocket. I think in the early stages I had put a pocket there, and just didn’t like the look of it. I forgot why I didn’t like it, it’s been a while.

Lumin8 - Sweet! Thanks for that info! I often make a separate bump layer or two, and sometimes end up blending them in photoshop… or having separate displacement map vs. bump map. I like new ways of doing things, you never know when they can come in handy!

How did you make the belt loops? In an external program?

You’re welcome. :slight_smile:

I made them in either Hexagon, or in Max - either way, the method would be similar. Copy a stip of polygons from the shorts where I want the loops. Offset them out a bit, add some thickness, then refine a few details from there, till they look like belt loops. I think most of the same tools - extracting part of the mesh, offsett, thickness etc are available in ZB as well. I just have more experience doing it in Max and Hex.

Here’s a wire closeup, in case that helps:
Tool006a.jpg