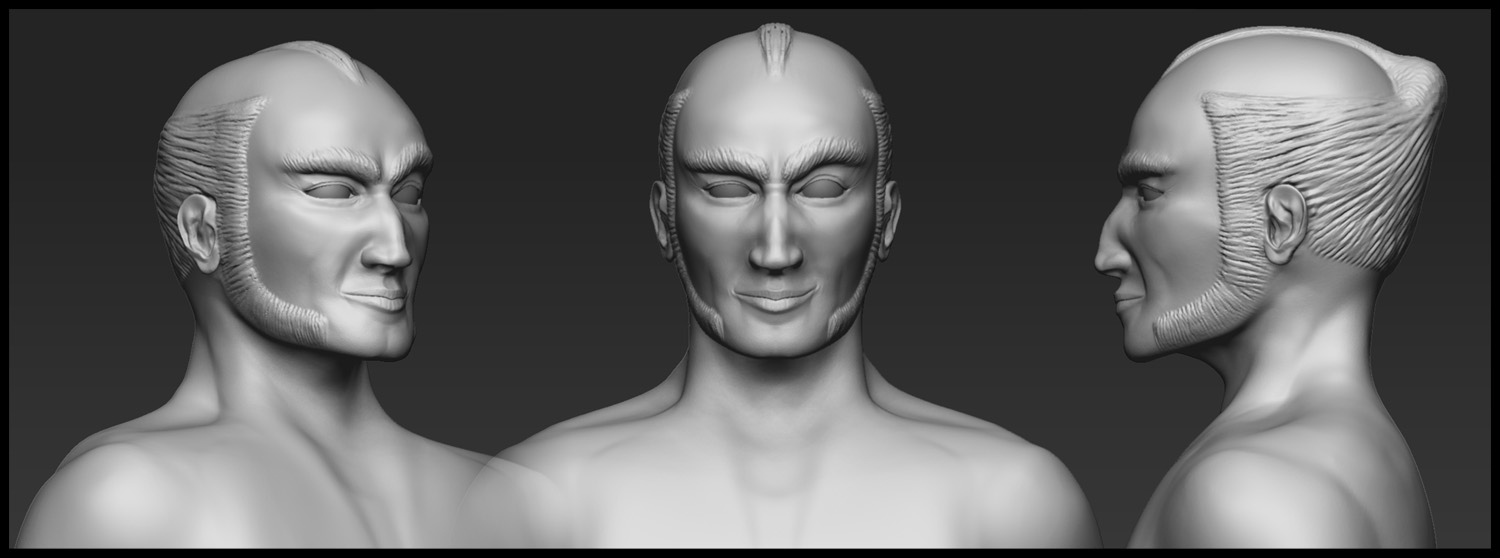
i went on and made a new samurai dude, also tried myself at a few wrinkles, pores and so on:
[](javascript:zb_insimg(‘164384’,‘headSamurai2.jpg’,1,0))
[](javascript:zb_insimg(‘164385’,‘headSamurai.jpg’,1,0))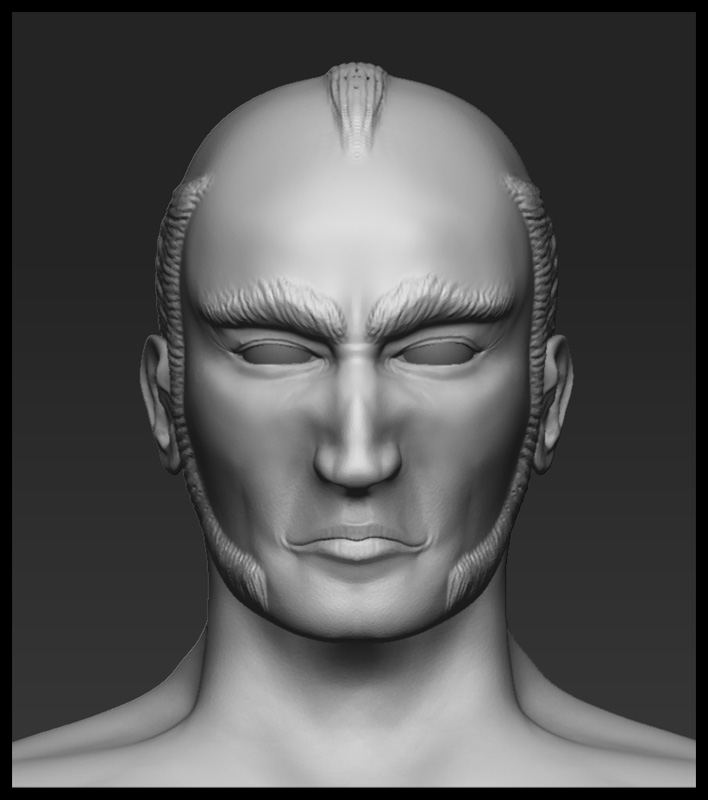
Attachments
i went on and made a new samurai dude, also tried myself at a few wrinkles, pores and so on:
[](javascript:zb_insimg(‘164384’,‘headSamurai2.jpg’,1,0))
[](javascript:zb_insimg(‘164385’,‘headSamurai.jpg’,1,0))
looks like ur on the right track. just keep staring at those reference images. i would also suggest studying muscle and bone structure to really understand how the contours of the face really flow. you are improving though…keep going!
made a minime a few days ago 
its still not perfect though,
im trying myself on wrinkles with Damian standard brush and a slight smooth over them afterwards atm, if anyone knows a better way please tell me 
[](javascript:zb_insimg(‘165562’,‘headME2.jpg’,1,0))
since im working on some underwater stuff for a game engine atm i thought i post a quick wip render from 3dmax:
[](javascript:zb_insimg(‘165605’,‘test3.jpg’,1,0))
yellow finger tree one:
750polies and 1.5h worktime
red finger one:
550 polies and 2h worktime
brain one:
250 polies and 1h worktime
all were modelled and sculpted in zbrush, the finger ones from zspheres and the brain one from a standard sphere
i pelt-mapped them in 3dmax and created the normal, cavity, AO and displacement maps in zbrush, afterwards i composited the diffuse map in photoshop
for the surface structure i used 3 different alien skins from the download section here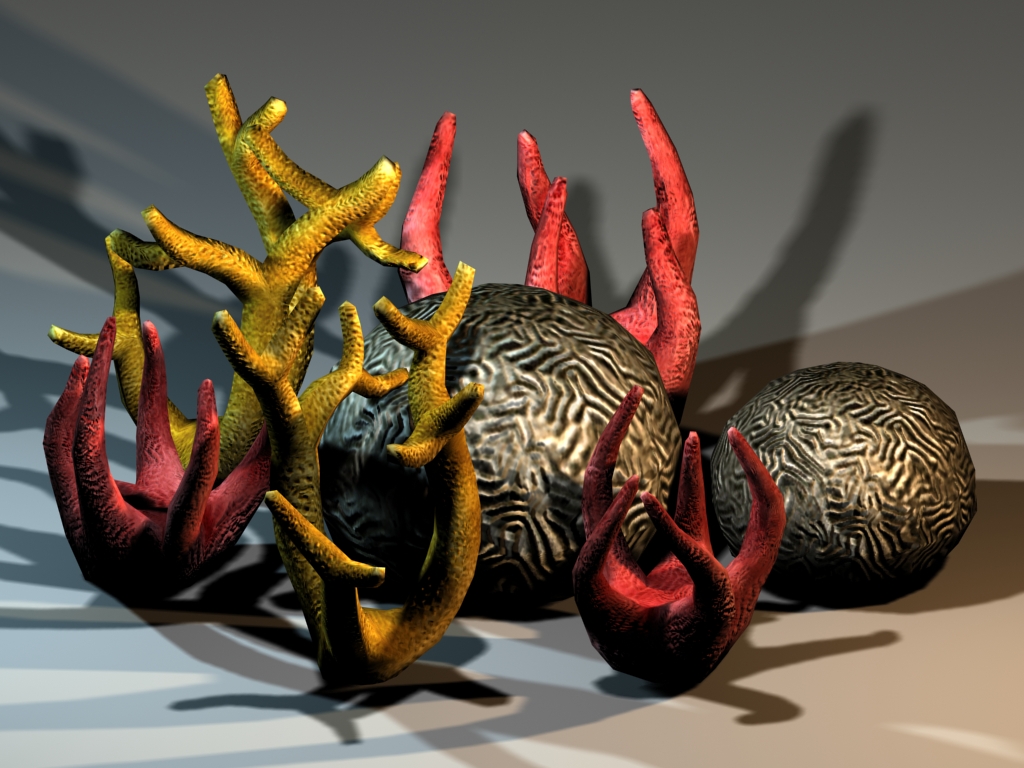
by now i created a few more corals and was also able to reduce their poly-count by roughly 50% using 3dmaxes “multi-res” modifier without loosing too much detail, this modifier keeps the uvs intakt and thus doesnt destroy textures like the “optimize” modifier would, thankfully its also a much quicker way than welding vertices by hand and an “edit-poly” modifier
polycounts:
red one: 310 polies
yellow one: 404 polies
brain one: 122 polies
purple one: 406 polies
plate one: 164 polies
sucker stone one: 198 polies
texture size is equally 512x512 px
btw, in zbrush 3.5 you can set the brush to only draw on faces which you can see and thus avoid negativ sculpting on backfaces by activating Brush->AutoMasking->BackfaceMask
i find this is a really great lil tool for thin objects like blades or corals for example in this case
[](javascript:zb_insimg(‘165834’,‘test4b.jpg’,1,0))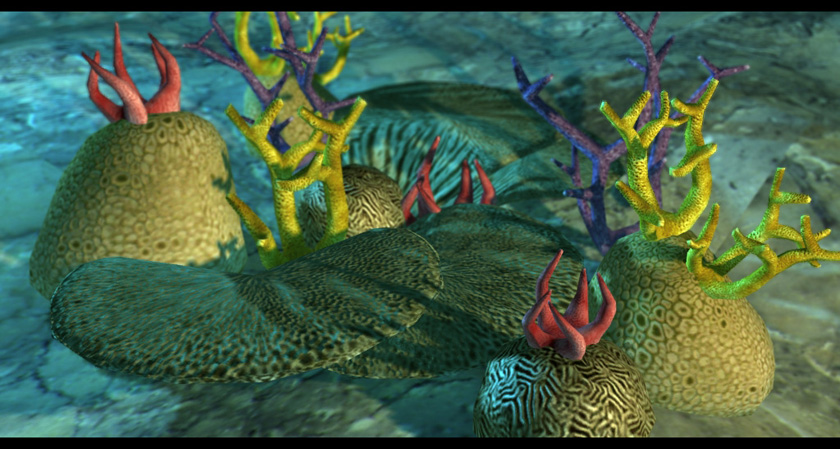
very aquatic feel nice image 
i made something completely different this time, a lighter! 
time:4-5h +1.5h material shuffeling
[](javascript:zb_insimg(‘177556’,‘7.jpg’,1,0))
rendered in mental ray with max 2010’s ProMaterials, 1 skylight, 1 front omni (white) with mental ray shadow map (raytraced produces errors on my gfx card… well i assume its my gfx card) and 2 side omnis without shadow in blue and orange (cold/warm contrast)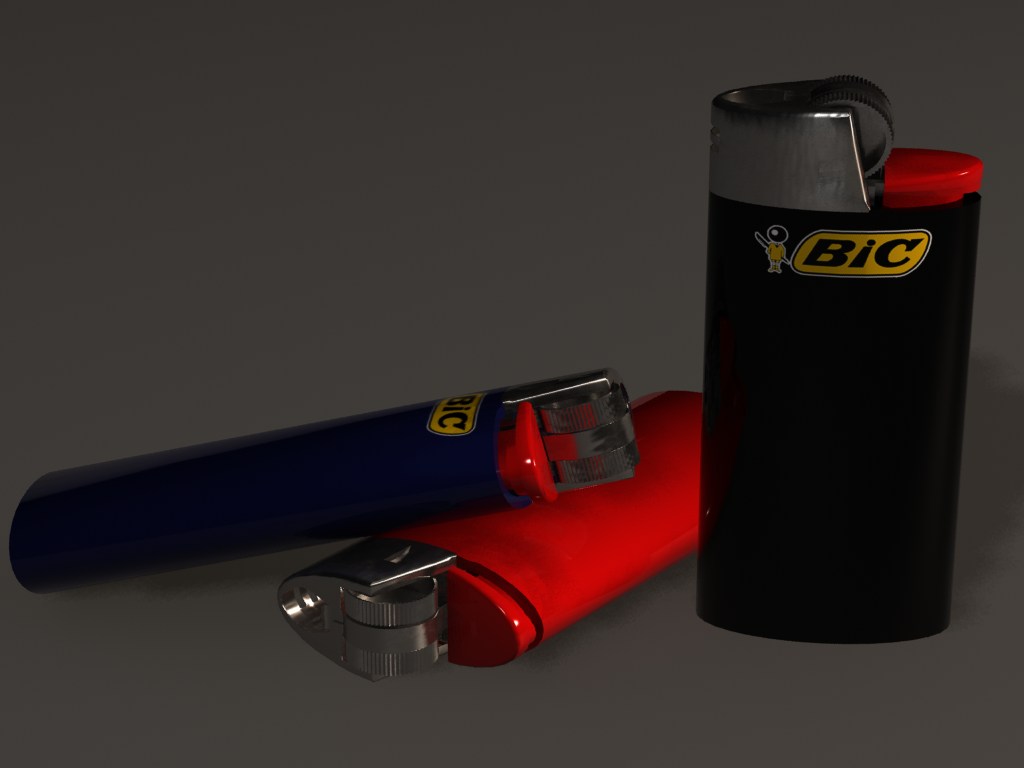
i changed the lightning setup to photometric lights with one skylight, activated “round corners” on all ProMaterials and made minor adjustments to the materials, i think it gets better 
i also added an environment map (simple bitmap) of stanstead airport, still have to learn about HDRI map creation
[]
this time i made a bunch of swords for the game Oblivion by bethesda softworks,
modelled and mapped in 3dmax, sculpted and polypainted in zbrush, rendered in 3dmax:
[](javascript:zb_insimg(‘186773’,‘1sm.jpg’,1,0))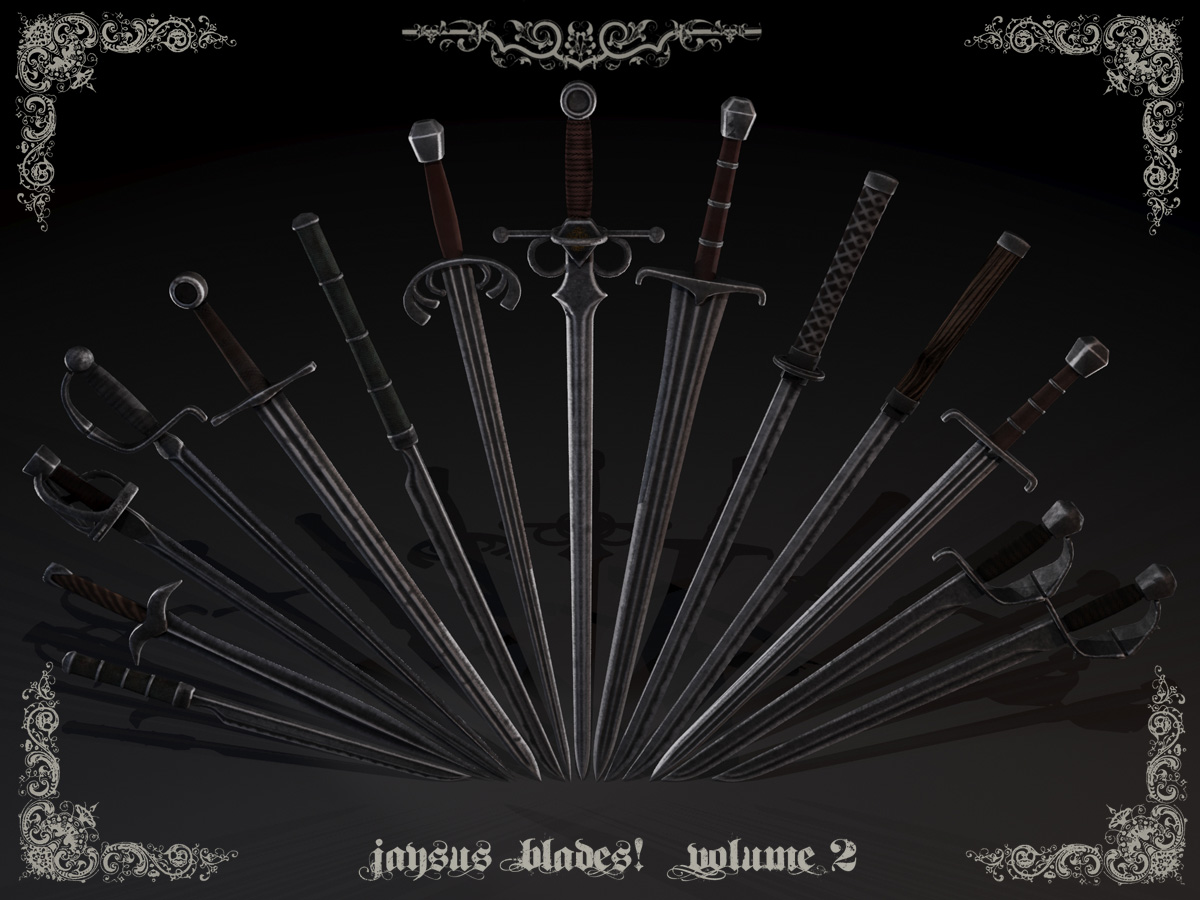
I missed this thread. I really like all these. These creatures are lovely. I also like this bronze texture, swards are great too.
Try to study ‘ears’ its critical. Some ‘topo’ difficulty there.
Its badly rated though, it seems that anatomy knowledge is the key in this forum. Soon we’ll understand that this magic key, out of the magic castle, its just a piece of metal. 
working on a new armor suit for Fallout 3 by bethesda softworks now, this time its an adaption of Masane Amaha’s Armor from the anime Witchblade
i importet a body for that game, “quadified” it in max and then simply painted the armor ontop of it, i used layer and claytubes to create outlines, then filled those with clay to create mass and finally used flatten, flattenfinish and smooth to polish them until i achieved those hard edges
boots, gloves and several details are still missing
[](javascript:zb_insimg(‘191896’,‘3.jpg’,1,0))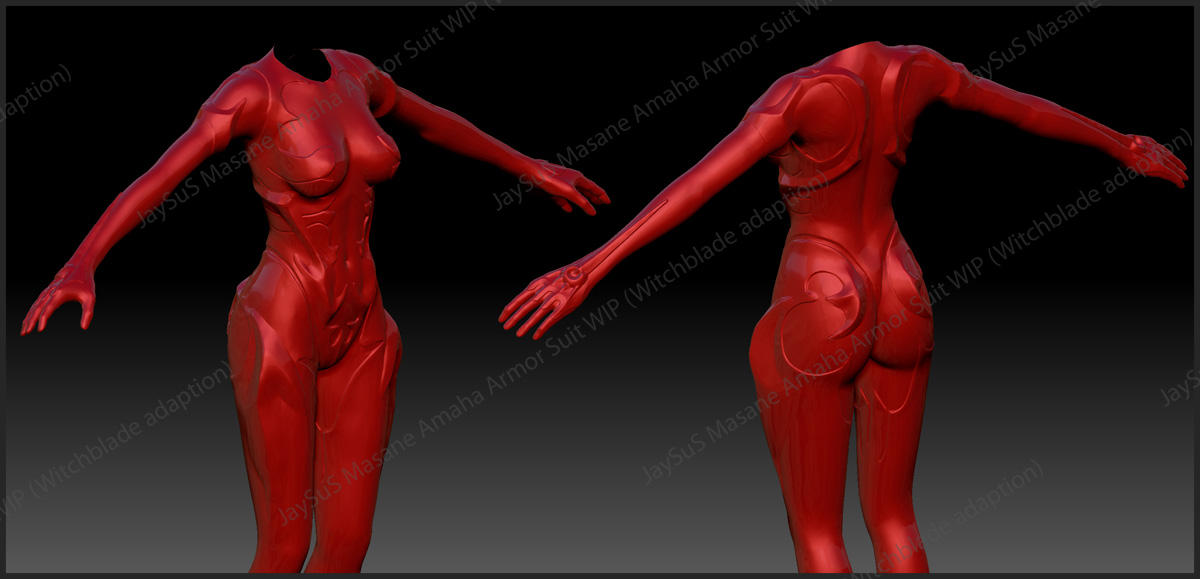
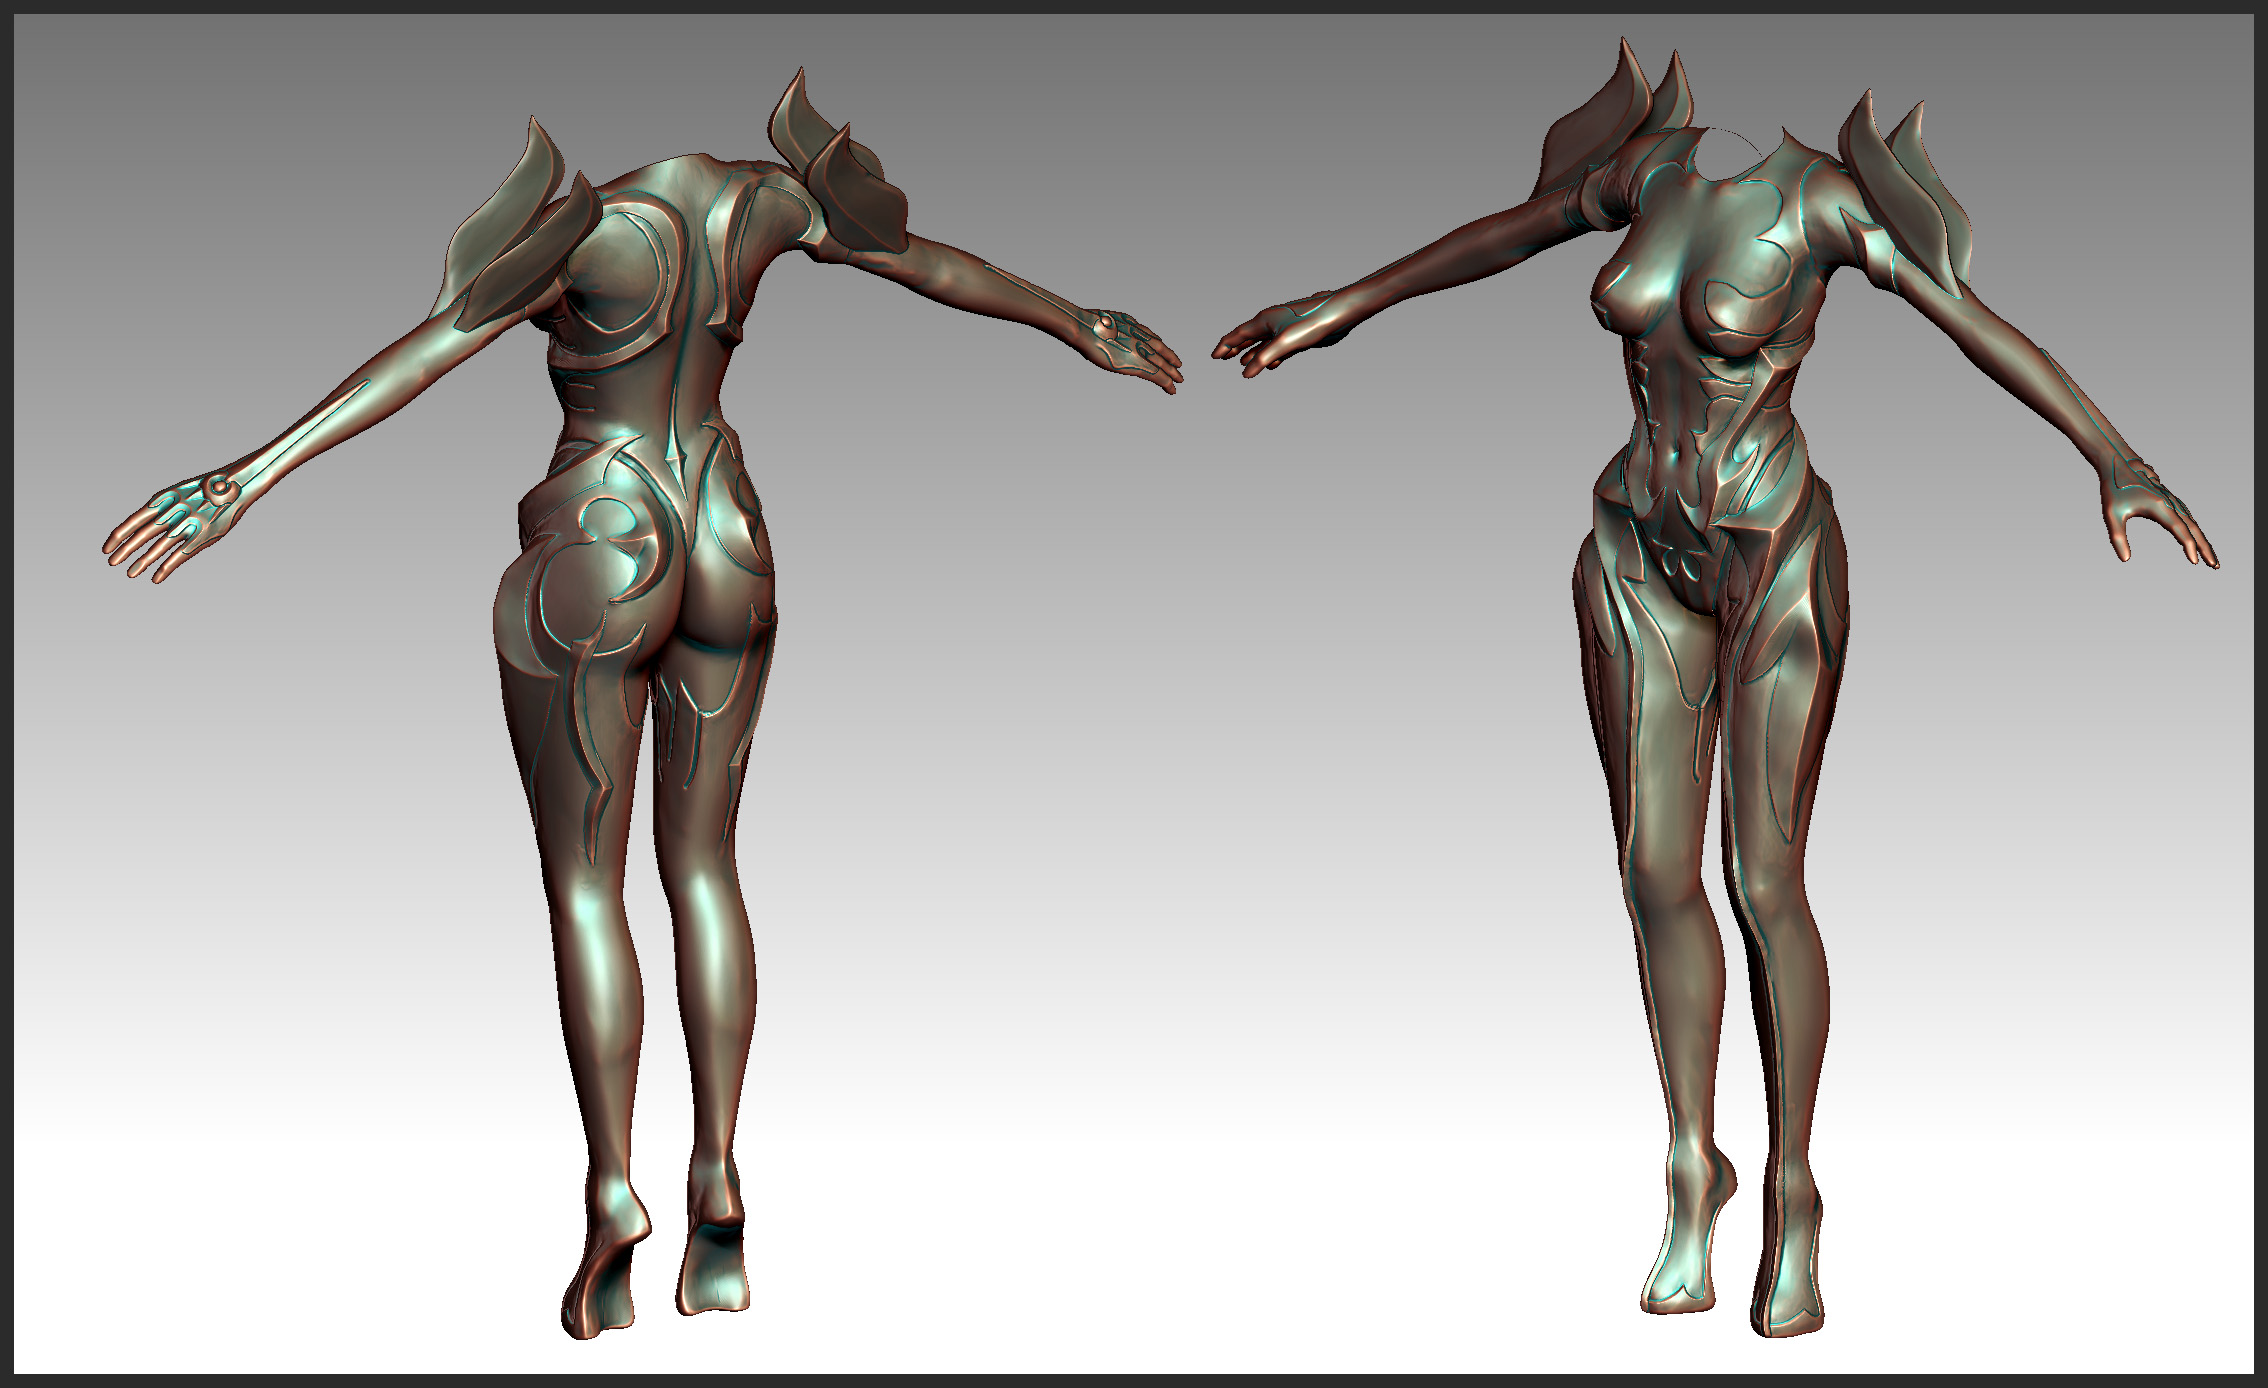
im still working on [](javascript:zb_insimg(‘192455’,‘1.jpg’,1,0))that witchblade adaption, here comes a progress shot:
[](javascript:zb_insimg(‘192455’,‘1.jpg’,1,0))
am still kinda clueless tho how i’ll get those high heels in the game, they are not supported by the vanilla skeleton rig nor animations -.-, arrr, we’ll see 
Nice work.
Groetjes Michael:D
Is a cool project. I did a model like this and modeling the volume of the suit was very funny and challenging. I have at home one of the resin statue of this character and help me a lot. If you don’t have one you can find a good reference at
http://centurysendsavior.com/blog2/
In the old files. Good job and I hope to see more soon:D.
Alessandro
http://ziopredy.deviantart.com/gallery/
http://ziopredy.blogspot.com/
thanks,
btw michael, are you the guy im making the rifle texture for atm? funny you found me here
@ABriglia
i actually didnt even know of that anime till this project started 
watched some episodes now and its not that bad actually.
Its really a pleasure working on it to be honest, i kinda like working on the female form i guess
thanks for the link, however thats the same one i used as reference so far yet 
sadly some parts are covered by her hair and i had to improvise alot on the back.
anyway,
im done modelling now and to my horror i had to realize that im not able to do much with it now. -.-
decimation master creates tris and needs perfectly clean geometry, mine is sculpted however and hence not perfect and thus DM doesnt create the edgeloops i need for the uv mapping which in turn i do need to seperate the elements to color them,
therefore im about to restart all over and use the mesh extraction method to generate subtools from the start and get much cleaner edges which DM cant mess up.
its a pity since it means many lost creditzzzz for the time i worked on it so far but i also learned alot once again and therefore think it was not all in vain.
here is a youtube turntable of the model which sadly is useless for my purpose of using it as a game asset without retopologizing it in max instead of zbrush and hence spending about the same amount of time i spend yet just to get it right, looks neat tho i think :P:
>>Turntable Video<<
well extract mesh didnt work the way i wanted and hence i swapped over to the retopo tool… just finished reworking the geometry, however this tool must have been invented by some really cruel and mean person
-no edgeloop/ring, bridge or anything along those lines which would easen the workflow,
-vertices vanish quite regulary and the model needs to get rotated for them to reappear,
-why do i have to use ctrl all the time when i cross an intersection? now its only useful for people who like to create massive poles but not for clean quading
-clicking outside of the borders to rotate or move the model places a vertice, however clicking there with ctrl to mark a starting vertex does zip
-the output model changes size, position and its origin making it kinda hard to fit it back on a body again if one creates an armor piece or anythign else that needs to be aligned to another model that wasnt retopoed, that is probably due to the parent zsphere we need to create to retopo something but why do we have to rig it to a zsphere in the first place just to retopo it anyway?
i guess this part of zrbush could really need improvement, right now it simply takes too much time and is quite a hazzle… love it tho
witchblade ingame screenshot (seems as if zbrush central doesnt like linked images):
http://fallout3nexus.com/imageshare/images/70110-1277264482.jpg
upon popular demand (:D) ill show a lil of the in-process screens from the witchblade,
this first one is a final shot of what i worked on for the final surface detail after i retopologized the base sculpt posted earlier in this thread:
[](javascript:zb_insimg(‘202437’,‘witchyfinal.jpg’,1,0))
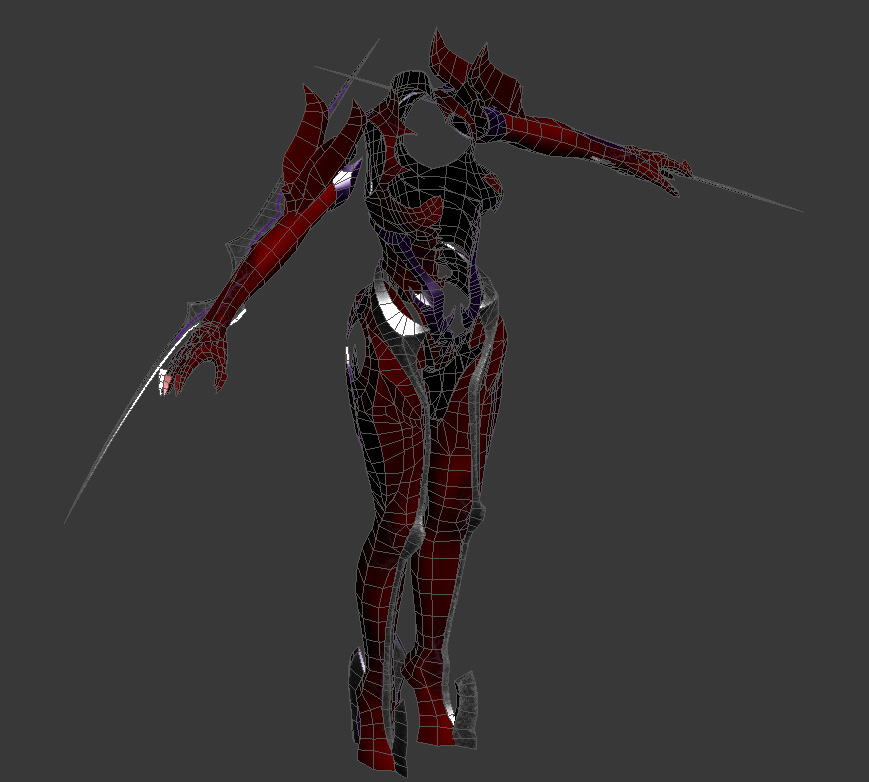
assembled in 3dmax, ready for export into fallout3 it looked like that, you can also see the edgeflow here:
[](javascript:zb_insimg(‘202438’,‘witchyfinaledges.jpg’,1,0))
basicly i did the following:
-import an ingame body,
-sculpt the armor ontop of it,
-retopo cutting the non armor parts out
-uv mapping,
-sculpting final detail,
-creating the textures
-reassembling the whole thing (legs and arms are mirrored for example)
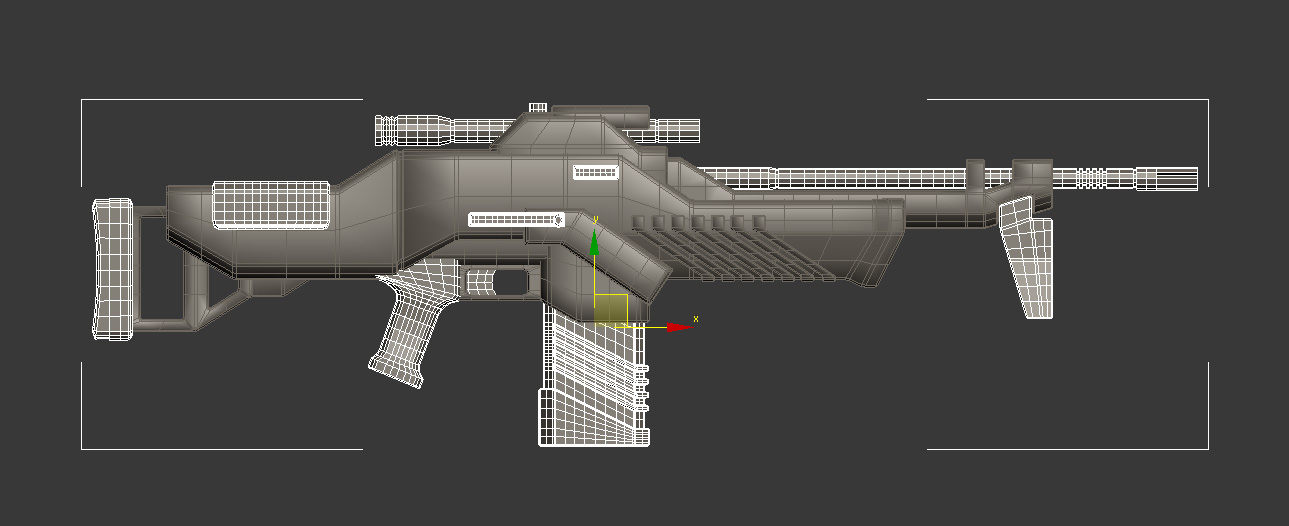
now back to my new rifle, i uvmapped it now and added the necessary edgeloops for zbrush to have a homogenous sculpting surface (of course the chamfered edges are annoying in this step but i simply hope that they wont screw up the total polycount to sculpt nicely on the main parts)
the rifle was divided into 3 parts, one for each texture i want to use (could also have gone with 2 or just 1)
[](javascript:zb_insimg(‘202439’,‘rifleC01-zbrushedges.jpg’,1,0))
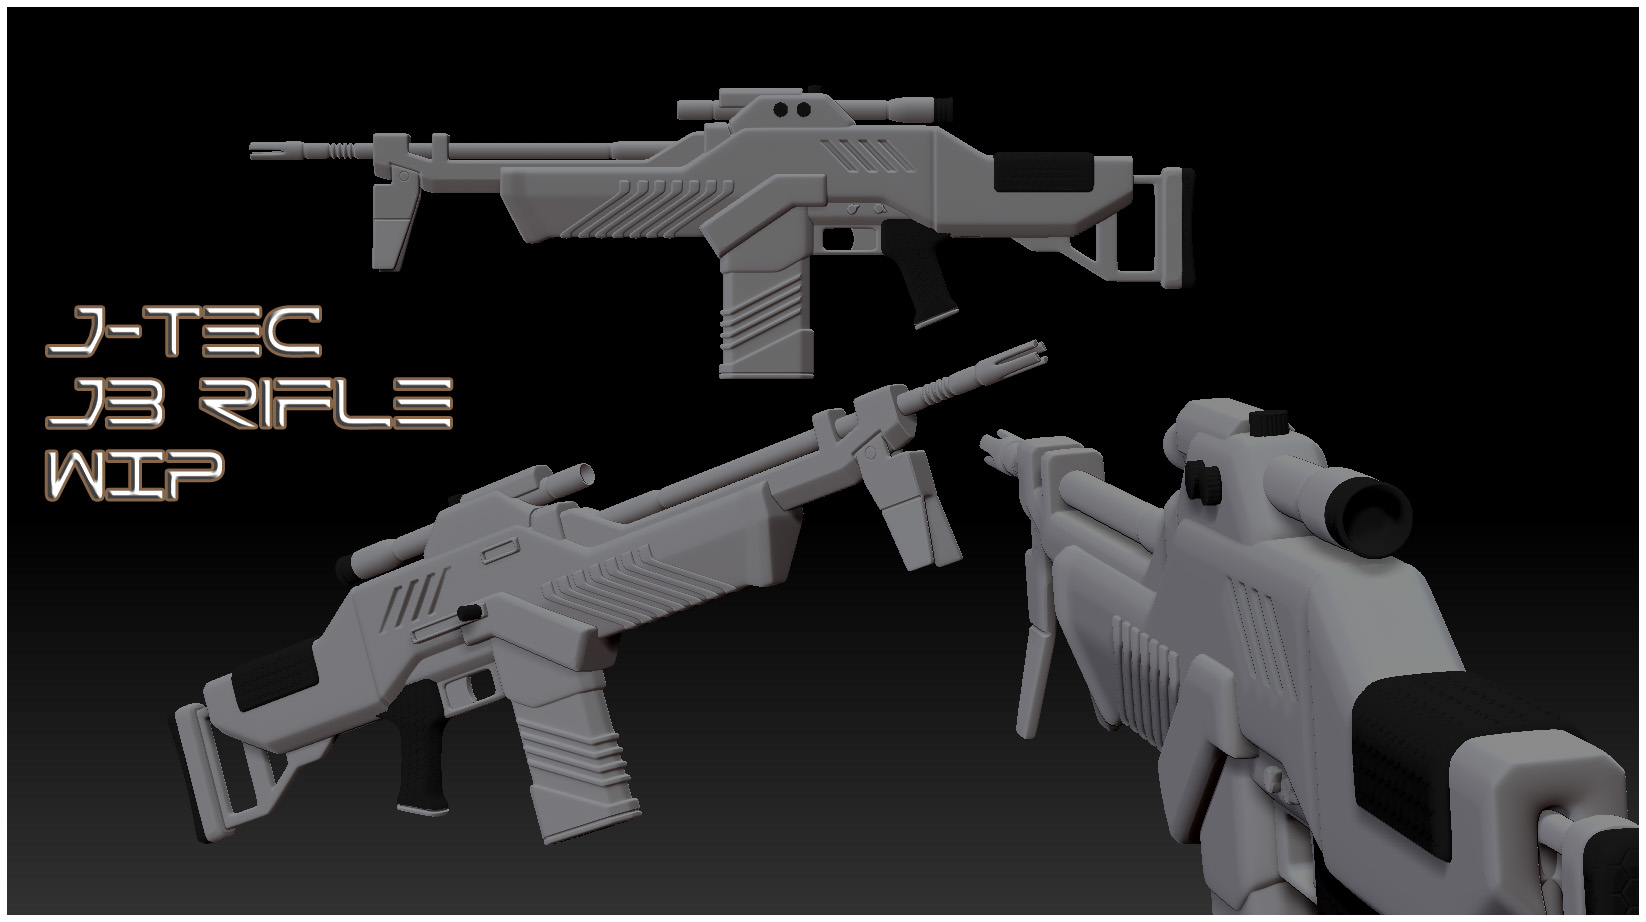
now on to sculpting it 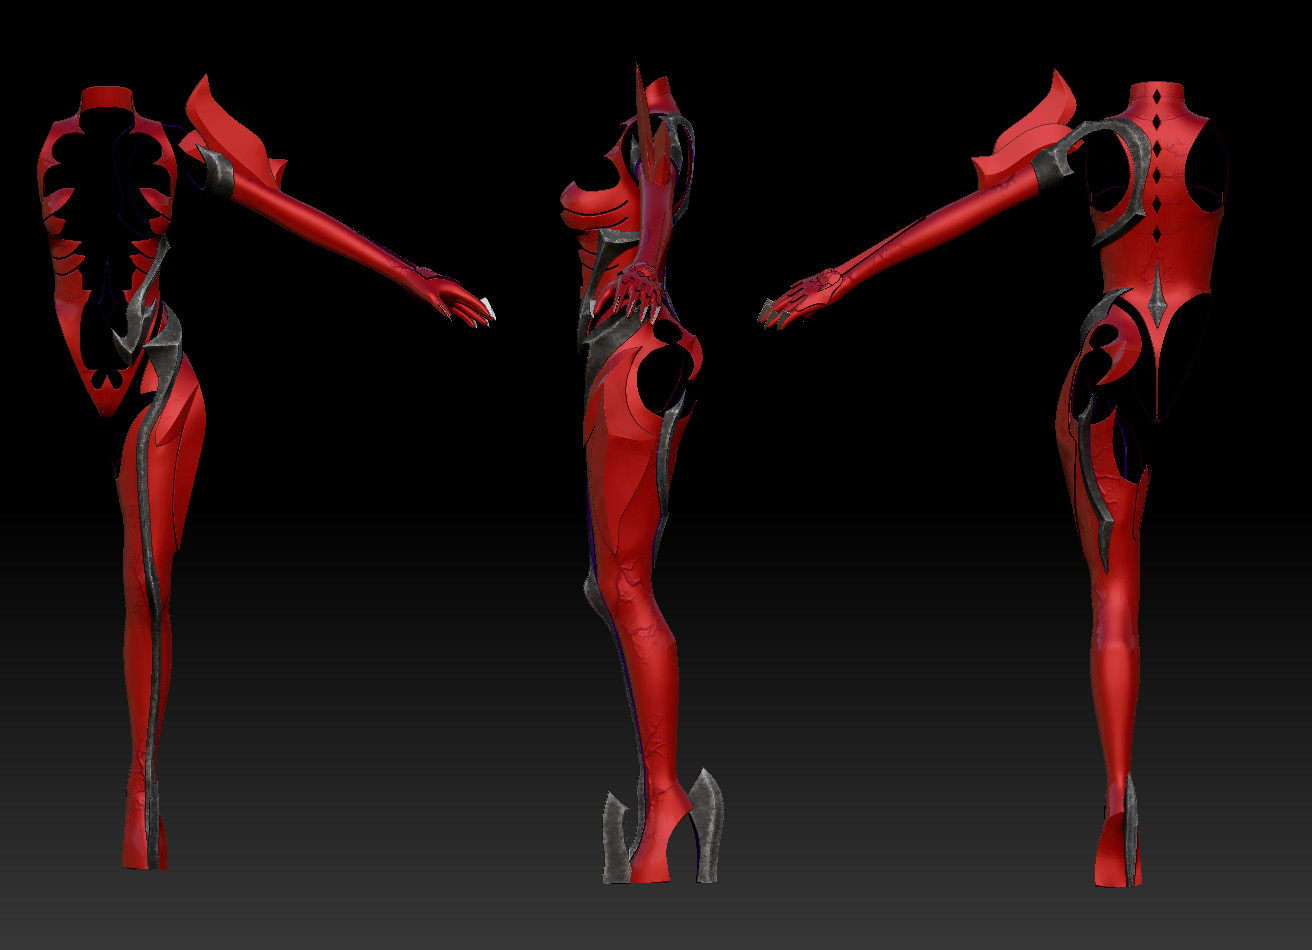
after some first sculpting tests i came up with this, i guess the shape also looks good in 1st person view, not sure about color and so on tho, and yes the bipod looks unfunctional :P, feels wicked nevertheless 
[]
allright, sadly i have to start over with the sculpting process due to the usual distortions zbrush likes to make, however i finally found the solution to my archenemy,
the mighty SUV button…
i still dont really understand what it does but in the end textures look right on the original low poly model and not the one zbrush wants to force on you if that button is activated before the first subdivision…
what i still dont know how to solve is another strange problem, the handle of the rifle has the same poly layout on both sides (left and right), the uvmap is also totally the same, just mirrored, however, i wanted to add a structure to it and used the transform symetry thing to do both sides at once, the problem now is that one side is perfectly fine whilst the other is awkwardly distorted for some reason… how could that be if both sides are equal :? (i turned on backface masking for the brush i used just to be sure)