Wow, cool render again! 
Thanks for sharing but it’s not enough))
Could you share more setup?
I mean material tree with thumbnails of overall map, diffuse, scatter etc.
Guess you have understood)
cheers
Wow, cool render again!
Thanks for sharing but it’s not enough))
Could you share more setup?
I mean material tree with thumbnails of overall map, diffuse, scatter etc.
Guess you have understood)
cheers
I will post everything once Im done with his head and before I move on to body and clothes…i still need to finish his head texture and refine some maps
That would be amazing because I posted my work in progress at CGS and CGfeedback and I’m at a stand still with my project.
http://www.cgfeedback.com/cgfeedback/showthread.php?t=1201&page=4
So I asked my friend about the dual displacement on vray and he told me the only way to apply two displacements to one object with vray is to seperate the faces…i dont think thats what you would want tho, if you dont mind my asking why is it that you need two displacements for one material?
Humm interesting so he said to fully separate the faces then apply a new shader to each… that doesn’t screw up around the seams or say sss calculations? Or rigging?
This guy got it working on CGFeedback. http://www.cgfeedback.com/cgfeedback/showthread.php?t=1106 I figured out his shader and have replicated it perfectly. But can not achieve the same results he does. I tried to talk more about it with him but he has yet to respond. He shows his render at the top and his shader network at the bottom. I can get this same shader network to work in Mental Ray but not Vray.
One 4k map isn’t big enough for the detail I want so I decided to try 3 4k maps. My mesh is broken up into 3 UV quadrants.
Fantastic… Render is amazing, very subtle and shaprh sculpting…
Futur top row
This is looking very nice, keep it up.
I did a quick correction on it, prob a tad too much, you seem to have lost your yellows,blues and even green colors
[ ]
]
Whoa…the sculpt and render are superb!
Impressive!!! really awesome work! small_orange_diamondsmall_orange_diamond
this is looking really cool:D
I don’t really agree with your changes, it’s just a different complexion. I don’t feel either your “correction” or his original are wrong but personally i prefer his. Or maybe somewhere in between.
In general I don’t like it when people modify other people’s art unless it’s typing notes and drawing some lines but it’s his piece so I’ll leave it up to him if he appreciates it or not!
Hahah, i dont mind people can play with it all they want…the art. The one i posted was a raw render comped with the hair and an AO. I didnt bother with the levels or CC. A few posts back i messed with it a bit more…once i get further with the entire model I will start messing around with renders again…i feel lopsided right now because i went this far with the head and there is so much more to be modeled for the body and clothes. BUt i do agree somewhere in between would be good.
Also thanks everyone for the input and comments
No probs Askutt, I do agree somewhere in between would be better, right now it looks too flat and pink.
tobbeo - It’s a visual crit to get my point across. It’s easier to show it then type it, I guess your Art directors type it all out for you :lol:
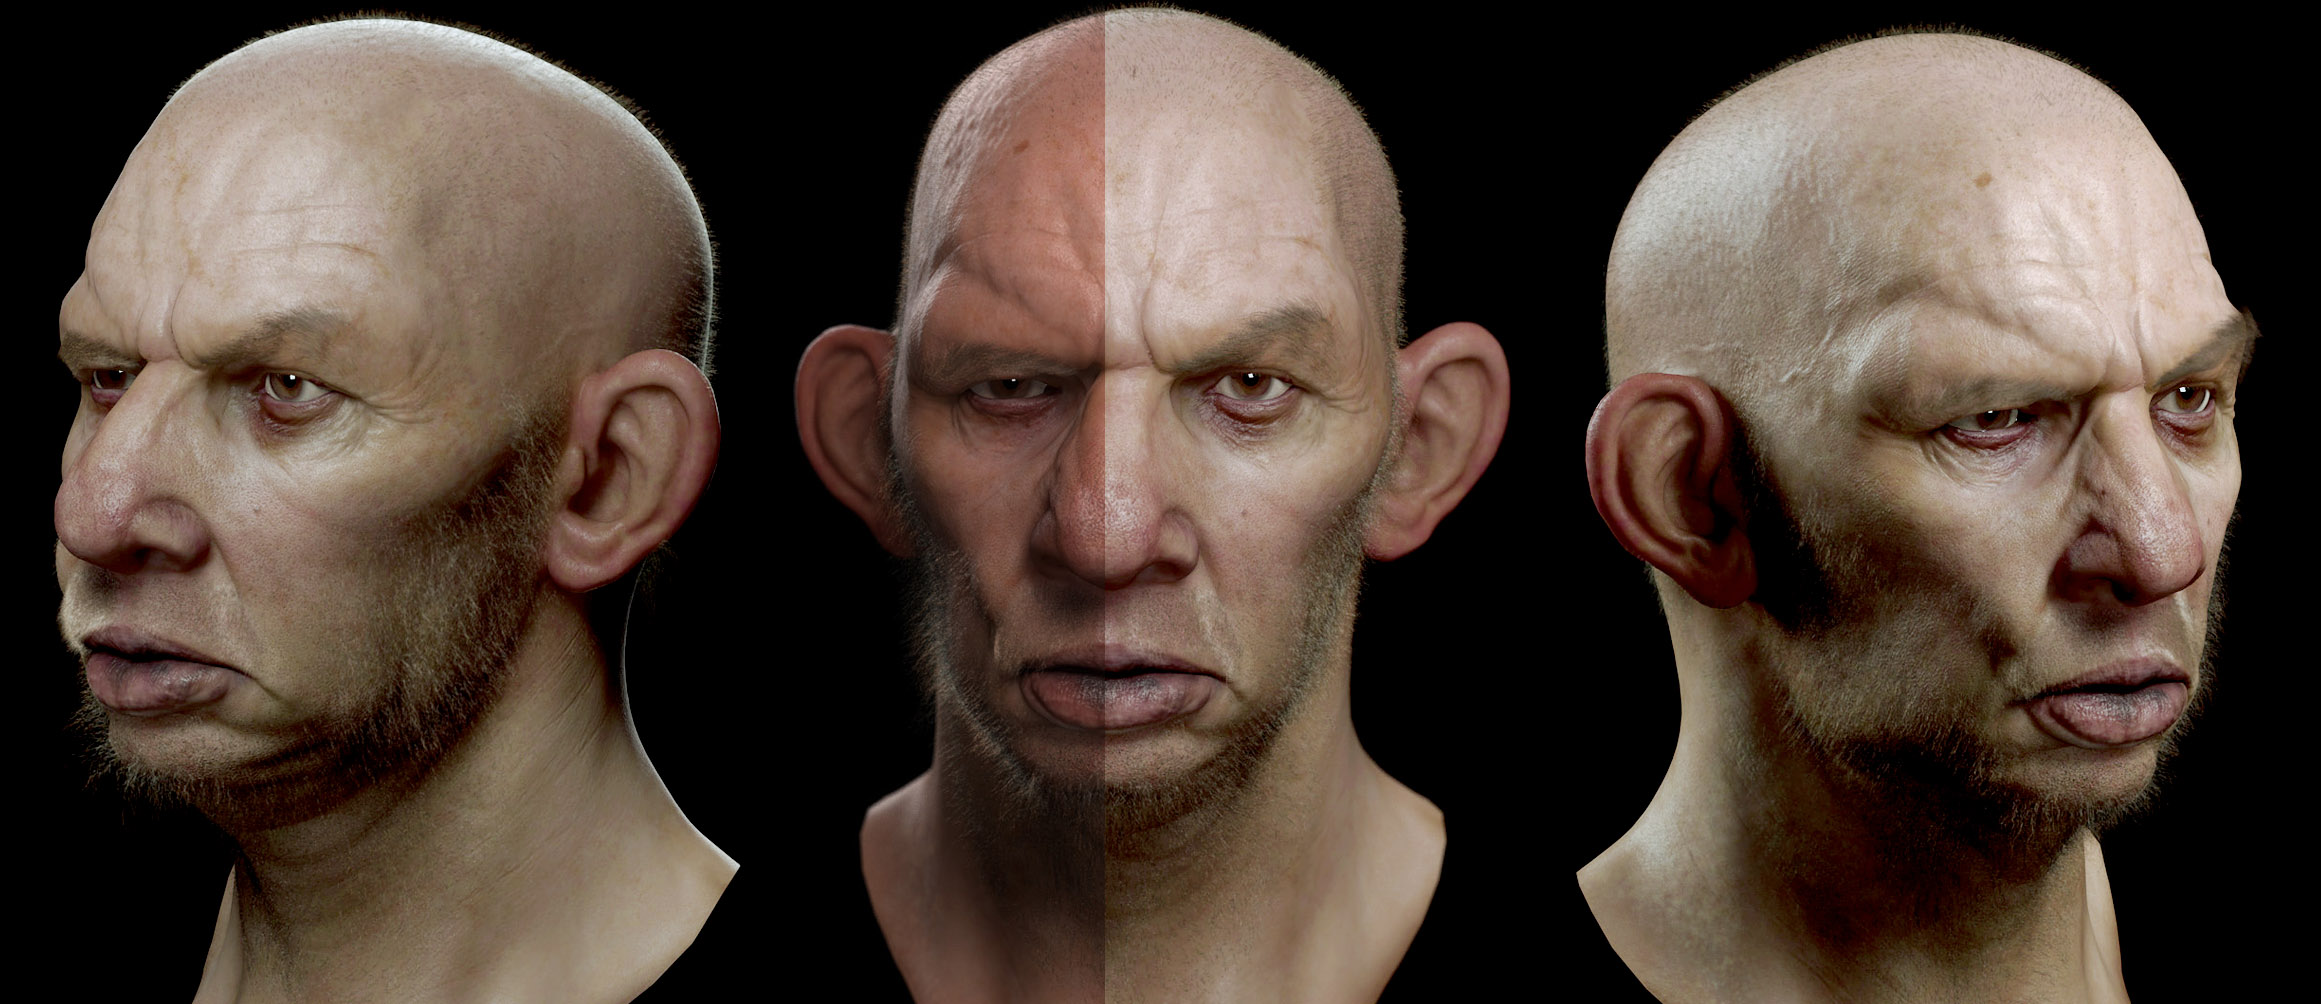
It’s been a while for this guy, but i thought I would test out some of the new features in Toolbag. I have to say I’m impressed with the real-time displacement. The upgrades to the skin are pretty nice too. This was just a fun test but it has inspired me to finish this character as a realtime model rather than a still. I wish i had Toolbag in college it would have made life so much easier. Also all the maps used for this guy are 2k and under.
[[attach=270248]hillbilly_realtime.jpg[/attach]]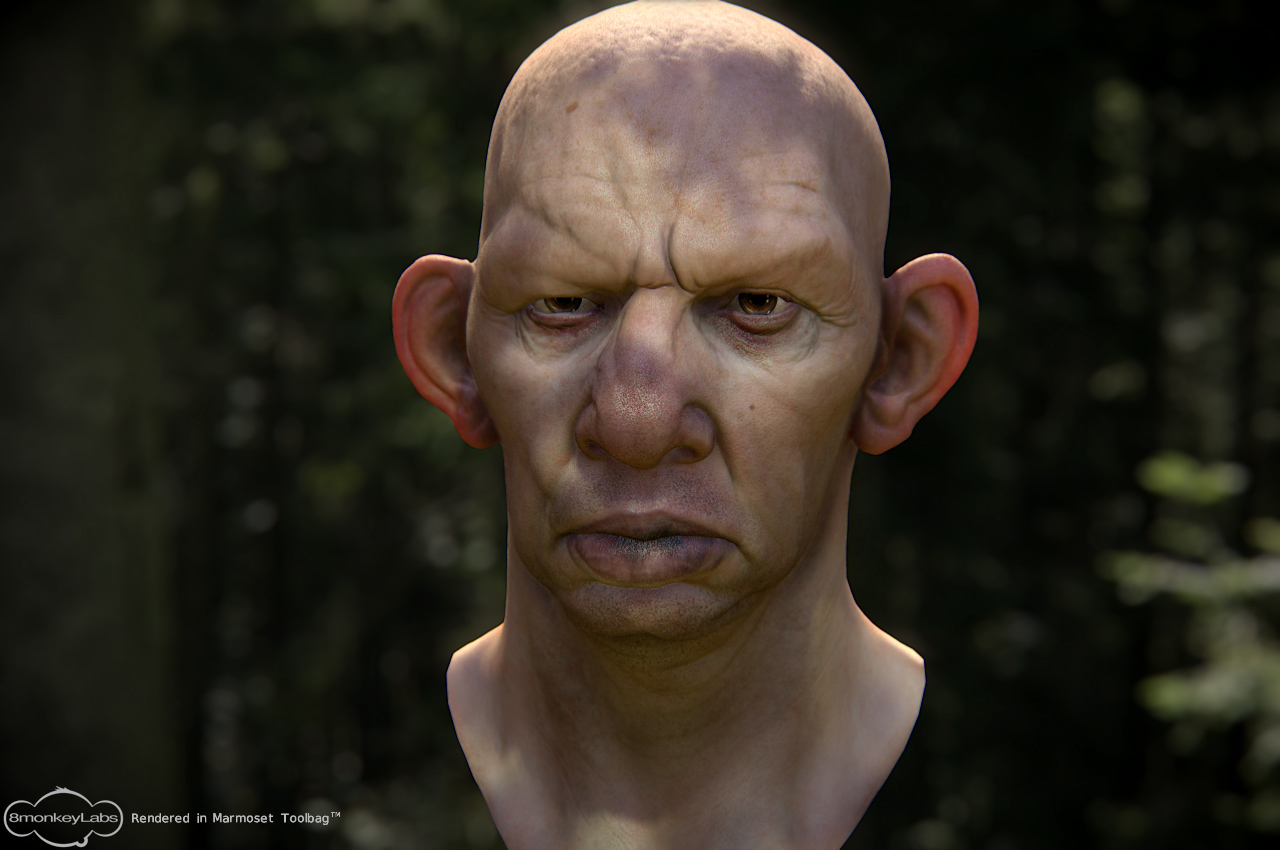
Super good work
Very nice, any chance you can post an image before the displacement applied so we can see the improvement? It would be a nice example to use when people who don’t know the technical details to show them what DX11 real-time displacement can add to a character.
Tobbeo - np
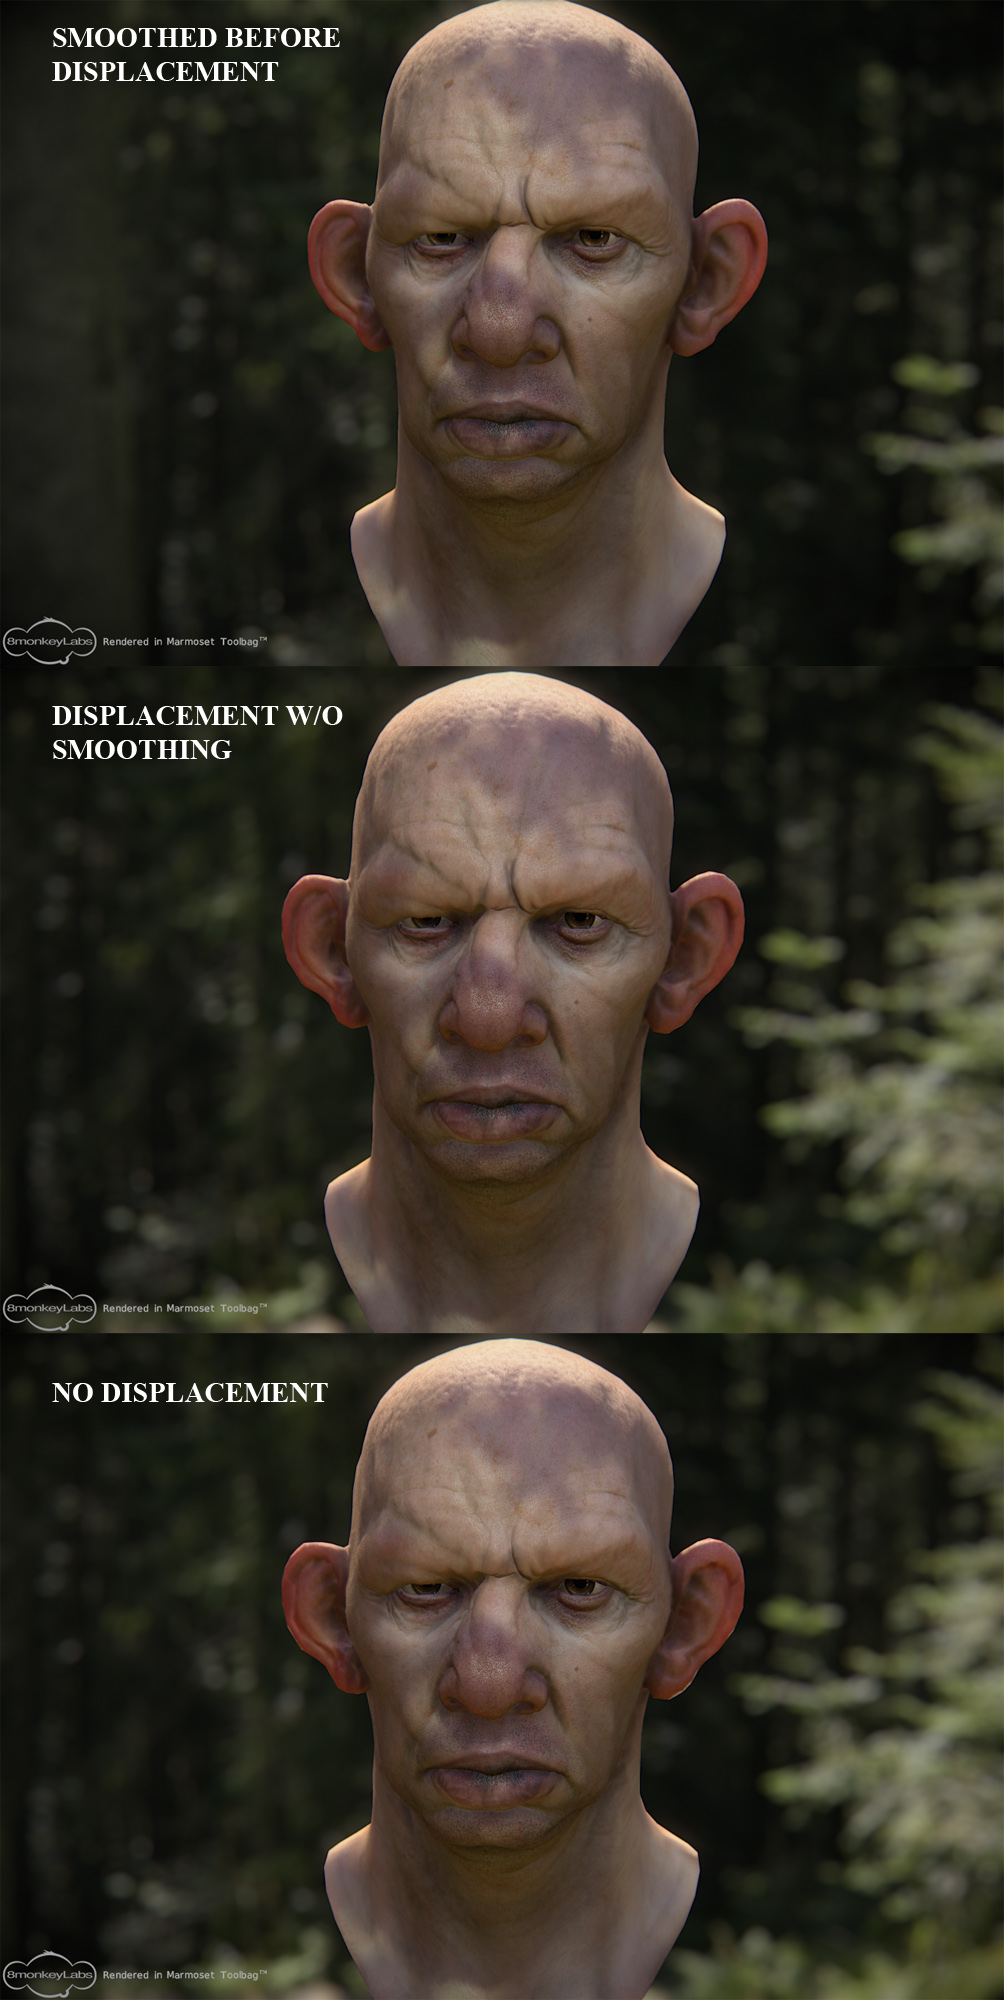
Here are three pics, from what I am aware there are a couple different types of displacement going on right now. The first tessellates without smoothing the mesh, the second smooths the geo you can read about it here
http://udn.epicgames.com/Three/TessellationDX11.html
and here
http://www.nvidia.com/object/tessellation.html
However as far as i can tell the only option for Toolbag is the first method without the smoothing algorithm. So, for the first screenshot i smoothed the geo in Maya before bringing into toolbag, the second shot is without the Maya smooth, and the third is no displacement.
Now IF there was a switch to have toolbag use a smooth algorithm I think the first and second screengrab would look the same. But that’s just my two cents. I am also using a normal map to sharpen the detail, that way i don’t have to crank the tessellation and kill performance.
[ ]
]
I took it into photoshop so I could put the displacement/smoothed version on top of the no displacement one. I was hoping for a bigger difference but your no displacement head is pretty high poly as it is. The ears show the biggest difference, which look much nicer after smoothing/displacement. There’s some slight improvements in other areas but it’d be interesting to see how a lower poly head would fare. Perhaps a non-human with, for an example, scales would show it off a lot more.
I’m interested in how far it can be pushed, other than just brick walls and stone roads that we’ve seen a lot of so far. The floating island example has a dragon that does a pretty good job at showing off dx11 displacement.
Thanks for taking the time to show me your images.
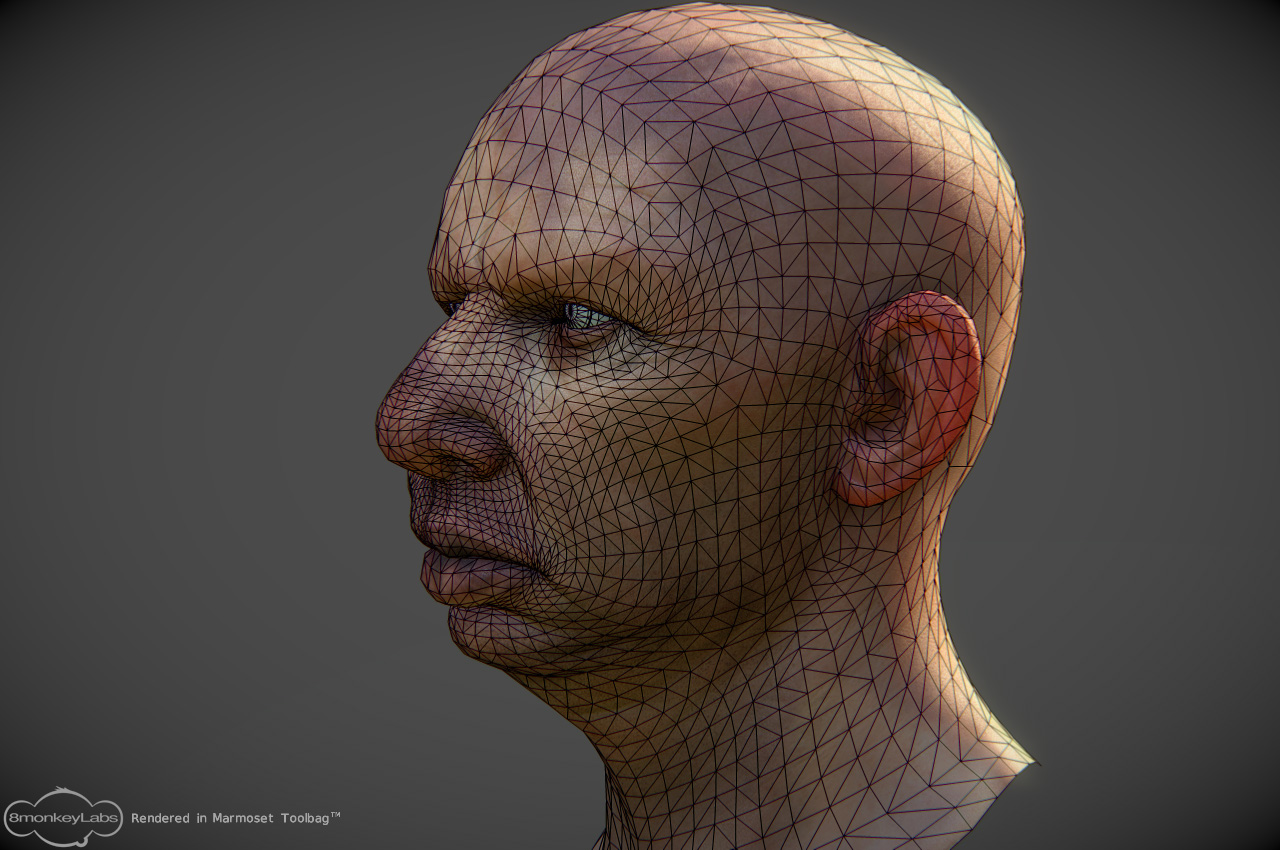
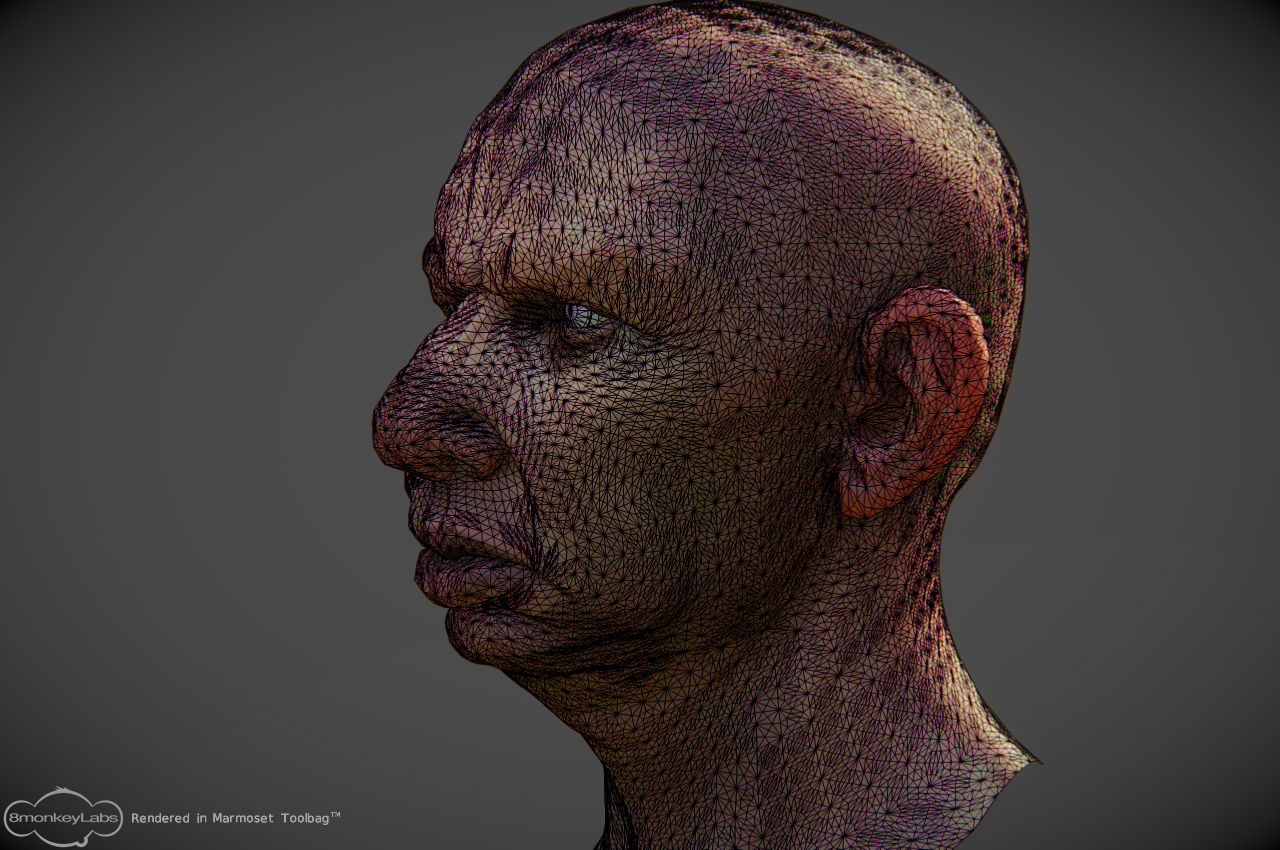
This is the low poly head, its about 8500 tris not counting the eyes, which is what a newer current gen game would push, like uncharted for example.
Here’s a couple shots from the side, the displacement is more significant from this angle, but you can see why the smoothing algorithm would be nice.
[ ]
]
Yeah from this angle I can see a lot more detail. I guess if you were to put some rim lighting on the front-on one we would pick up more of that detail.
I wasn’t saying that your model is bad, or that the poly count is wrong. Just that the changes are a bit more subtle than I was hoping for. In this 3/4 view you posted, I can see the eye-brow, and forehead area has a lot more detail as well as under the lip for an example. Smoothing algo would definitely help especially at the top of the head.
Does displacement mapping in real-time affect shadows? I would assume yes? Because that would be another important improvement over using normal maps.
I’ve seen a few games use DX11 displacement mapping now but they haven’t done it very well. Games like Deus Ex, Alien vs Predator. You can’t really tell. There’s some good stuff in the Crysis 2 DX11 patch though, and The Samritan demo uses displacement mapping really well.
Thanks for showing the wire and the different angle.