ZBrushCentral

GRIMM Creatures ("morph" time-lapse video added Pg 3)

Hey all,
here’s a Custom Ui I wanted to share…
I use it as my Start Up Ui and it’s been evolving for a while now.
When I first built it I CRAMMED it full of all sorts of things. Just too much.
After a few months of refining I ended up with this minimalist setup.
I toyed with moving all the main Icons from the Left to the Right hand side.
But came to realize it was kind of pointless due to using [Space Bar] for the quick mini menu and
[Tab] to make it all disappear as needed anyway.

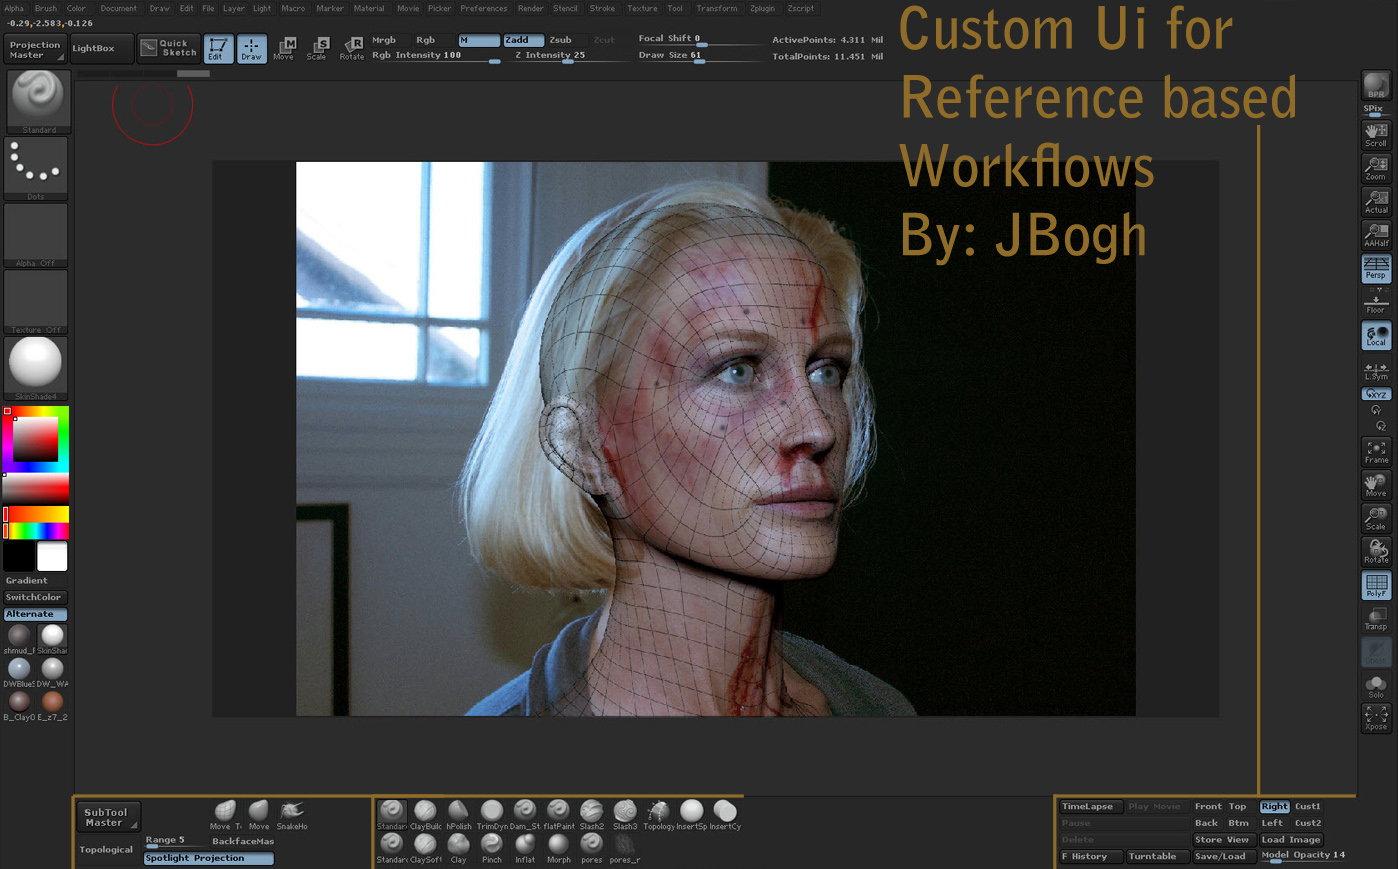
Stored Reference Views are the Basis of this entire User Interface.
So maybe some will not find it as useful. To those that are reference intensive, this should save you a little time.
I got tired of digging though the menus or being forced to keep the texture menu docked.
I should mention that this is the legacy system for stored reference views, not using the latest Grid Views.
The legacy version in my opinion is more flexible when you have more than just exact front and side views to work with.
In fact it lets you store 8 custom views.

First you should import all of your reference views. Starting with the front view lining up the corners of the eyes as best as possible.
Then storing that view using this custom Ui setup in the bottom Right corner. Work your way around the model until all necessary views are stored.
You can then quick pick through your stored views and just refine the forms to fit the reference. I always do a lot of adjusting to the stored
views as I make progress with the model and things tend to line up really well after the initial blocking out phase is over.
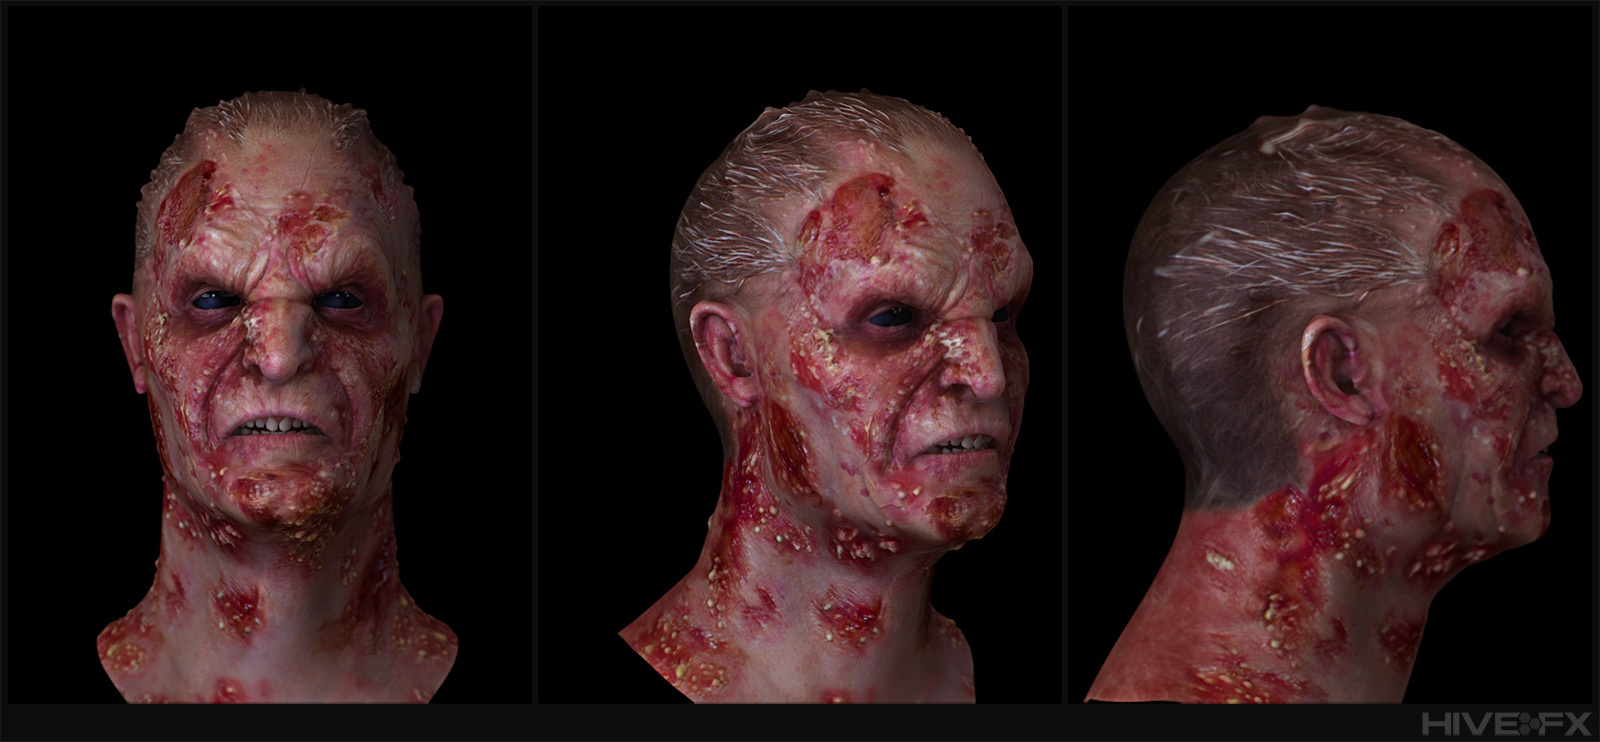
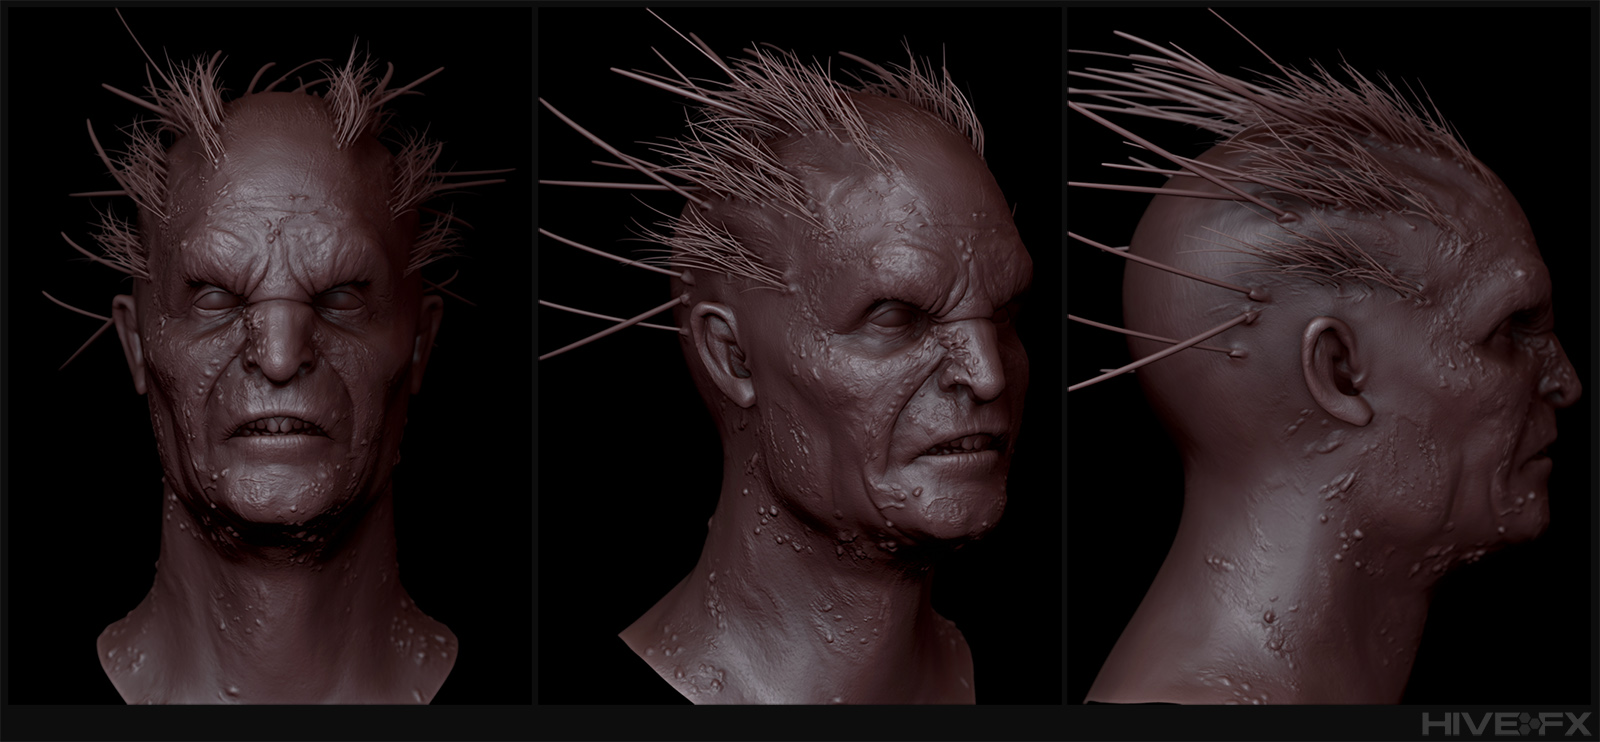
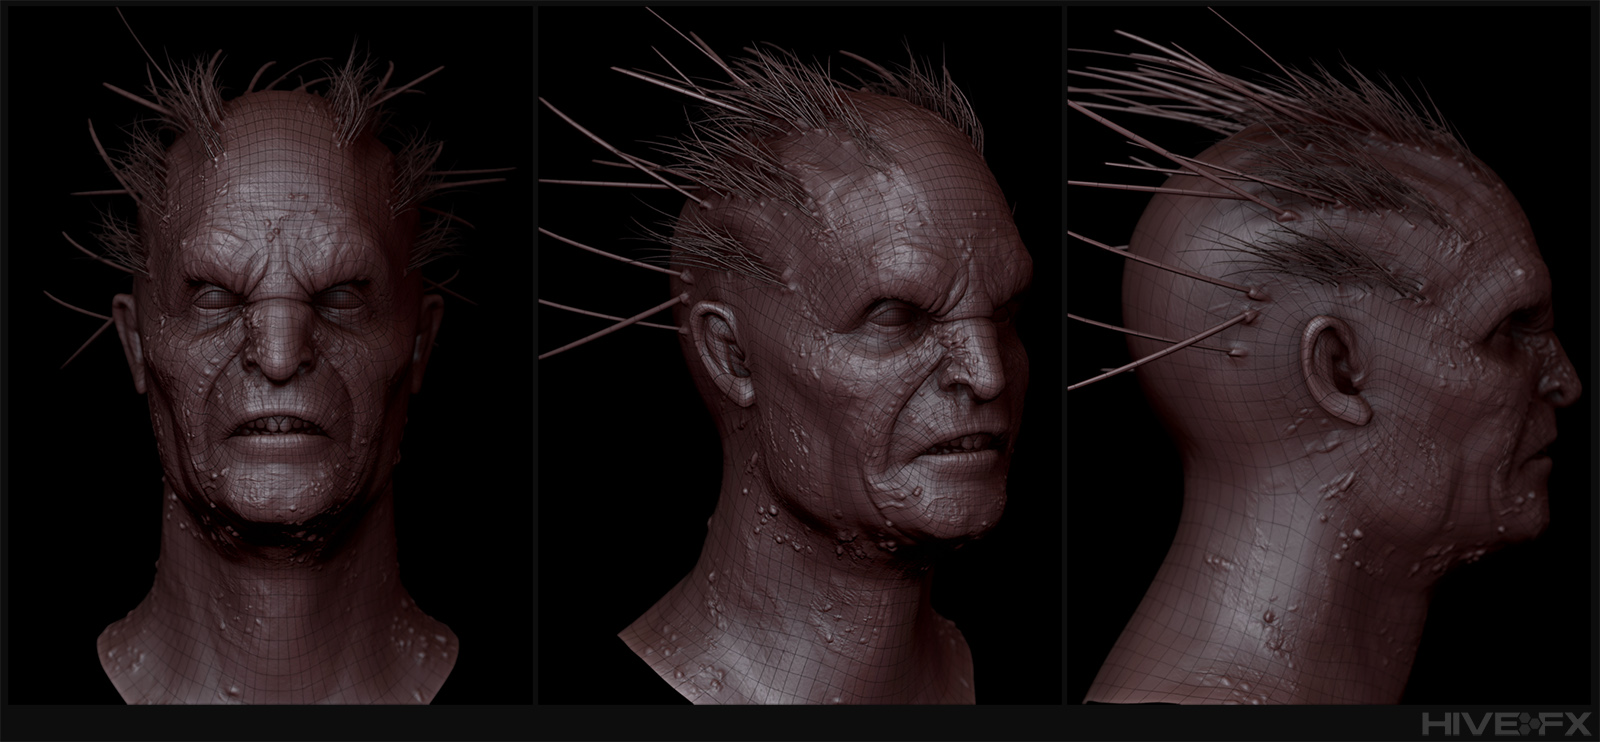
The result is a very precise representation of an actor for example, without any scan data used.

I’ve also been doing A LOT of timelapses and turntables over the last year and decided to grab most of the dedicated “recording” oriented buttons,
and put them out there as well.

Included are any Brushes or Materials that are shown as well a slew of my favorites.
I don’t take credit for any of the brushes or Materials unless indicated in the READ ME doc.
And I’m very thankful to those artists that have shared their own, allowing me to combine them into my custom setup.
This is not a complete Ui by any means and I encourage anyone that uses it to fill in any gaps with your own additions.
There’s quite a bit of space left open if you are running a 1920x1080 display.

Note: This has only been tested by me, on my rig. [and thanks to Sadicus for quick feedback!]
*Running ZBrush 4r4 and I can’t say how it fares on older versions or different display sizes.
*Please turn Off “Wide Buttons” under Preferences>Interface>UI>Wide Buttons. Otherwise you will have overlap occur.
*And if you don’t have the Image Plane Plugin Installed or cant find the “Reference Views” Drop down menu under Texture>Image Plane>Reference Views.
Install the plugin to the ZStartup>ZPlugs folder and you should be good to go.
This is the first time I’ve shared a Ui so bare with me and please let me know what you think if you end up using it.

Download:
Custom Ui - Reference Based

Ui_ScreenGrab_ZBC.jpg

Attachments

Ui_ScreenGrab_ZBC.jpg

hey i just wanted to say thanks for taking the time to share your UI. im sure it will really help my workflow in the speed department. anyway thanks again

Nice UI design, and sculpts!

issues i noticed:

  • Missing: Load/Save button as shown in your image. (what menu is that from?)
  • ImagePlane> Texture> the "Load Image button" has extra pixels to the right of the text. Making the button wider than needed.

Screen Res: 1680 x 1050, so this could be the cause.

Great work, I love the whole manimal thing, and you are doing a great job at it!

Aw RAMWolff you make me blush! I’d love to make some tutorials some day and give back to such a giving community!
I’m really glad you checked out the timelapse, and thanks a ton for sharing this with your buddies!
Take care RAM!

Thanks Namek, I couldn’t agree with you more! Very glad they changed it as well.

Adam you are welcome, I hope you find some use for it!

Sadicus thanks for the quick response!!
I appreciate that a lot. First I would suggest checking to see if you have the entire reference view panel under Texture>Image Plane>Reference Views.
Personally after upgrading to Z4r4 I had to track down the image plane plugin and drop both files that it comes with, back in my ZStartup>ZPlugs folder.
Once I did that I had access to all the old buttons again. And the Save/Load button you asked about in particular is from that Reference Views Panel.

I’m repackaging the Ui as I write this and will include the plugin from now on in case anyone else has issues.
The other thing I want you to try is turning OFF Wide Buttons. Under Preferences>Interface>UI>Wide Buttons.
That should give you the same scale I built the UI with.
I amended the .Doc that comes with the Ui so that users will be aware they will most likely need to turn off Wide Buttons manually.
Thanks that’s something I didn’t consider the first go around.
I will edit the link in my last post to point you to the newer Ui Package.

Thanks MattSkinny, means a lot!! I have a huge love for animals as well as portraits so it’s something I gravitated towards for sure!

Gilko_ViewsExtended_Stage03_ZBC.jpgGilko_ViewsExtended_Clay_ZBC.jpgGilko_ViewsExtended_Wire_ZBC.jpg

[GRIMM - Gilko Digital Double [TimeLapse] 720p](http://vimeo.com/53752777) from [Jerod Bogh](http://vimeo.com/user4592719) on [Vimeo](http://vimeo.com).

Attachments

Gilko_ViewsExtended_Stage03_ZBC.jpg

Gilko_ViewsExtended_Clay_ZBC.jpg

Gilko_ViewsExtended_Wire_ZBC.jpg

Wife and I have enjoyed this show from the first episode on. Thanks for sharing what you do with us. Great to see all the work that goes into it.

Thank you so much for posting all that! The cool creature effects are one of the main reasons why I watch this show! Awesome work!

Wow. Beautiful work. Thanks for explaining your process behind it. I’ve always been interested in creating a character that could morph though had no clue what to do to go about doing it. Maybe based on what you mentioned, I can try to accomplish this.

Does the use of layers actually cause the UVs of the original head to adjust or did you (or someone in the team) specifically alter them so the morph would appear smooth?

Thanks a lot for this timelapse.
So cool to see your workflow.
So cool to see timelapse movie creation with undo history.

hey prophet glad you and your wife enjoy the show so much! Thanks for stoppin by.

Codexus thanks!! It’s so cool to hear back from fans of the show!

Hey DemonGal great question. That’s actually what makes the morphs so challenging sometimes. Once the model is UV’d, they are locked in for both the base and the morph.
Texture stretching can be an issue, but we are usually able to resolve it well in a 3D painting workflow via ZBrush, MudBox, or Mari.
Hope that made sense! 1 UV set for both morph targets. Dont be afraid to ask for help on your future morph!

Knacki thanks!
I’m really diggin the Undo Forward History stuff too, although part of me wishes it was handled in a more Global manor.
i.e. multiple subtools tied together through history somehow. Would be nice to be able to see the reference imagery and views I stored while modeling too.
Looking forward to how these features will evolve!

jBogh, great works. I really loved watching your timelapse. I love morphs, I think it is one of the best features in the 3D world.

I have a question, how did you manage to put a reference image behind your 3d model? every time I see an artist do it in Zbrush, the reference moves around with the camera, while yours ended up being static, any tip?

Thanks for sharing your work!

Just amazing. You mentioned that you didn’t have a lot of time to put these together. What’s your average?
Thanks so much for sharing the time lapse! Awesome.

Hey Ratone, Thanks for your interest in my work! When using reference I use the Reference Views plugin under Texture>Image Plane>Reference Views.
I uploaded a Custom Ui a few posts back that is heavily based on my production use of reference. It has everything included if for some reason you don’t already have the Image plane plugin installed.
Relocating the Stored View Buttons to the bottom right corner of the interface really sped things up for me so I thought it would be a good thing to share.

Basically you are importing your reference images through the Texture menu.
Then using the Reference Image panel you can load that image onto the canvas.
Next use the Model Opacity Slider to dial the opacity down enough so you can see through your model to the image behind it.
That is Key! Wireframe will help you see your models curvature while its opacity is lowered.
SkinShade04 and a few of the lighter matcaps are better to use when you have a low opacity model.
The darker matcaps just make you strain to see anything.

I sometimes use Spotlight for reference images when I don’t need to exactly line something up or store the view.
But… Spotlight overlays the image on top of your model, where as the Reference Image route puts the image on a plane behind your model.
I find the latter much more useful. Hope that was clear enough for you. Let me know if you have anymore questions!
I’m thinking about putting a little workflow tutorial together if people are interested in seeing how I set up from the start as well as use the stored reference views in tandem with spotlight to produce some really fast texturing results.

Thanks so much Steve! The time frame per character is usually about a week to a week and a half for both the Human double and the Creature Morph. That’s about the average so far.
But there have been a few cases like with Kimura the Jackal Assassin, where I basically had a day and a half to get the morph completed.
Things change last minute quite often so flexibility and speed has been of the utmost importance.
Thanks for the kind words!

Here’s a few more…

JohnKreski_ViewsExtended_Textured.jpgJohnKreski_ViewsExtended_Clay.jpgGRM211_John_Kreski_Promo_03.jpg

Attachments

JohnKreski_ViewsExtended_Textured.jpg

JohnKreski_ViewsExtended_Clay.jpg

GRM211_John_Kreski_Promo_03.jpg

Brilliant work! I keep coming back to see what inspiring work you post next :).

Thanks so much :slight_smile: Hoping to have some more posted up in the near future!

Hey all, it’s been a while since I posted any new work here!
This is from the end of Season 2, the episode leading into the Finale.
I want to give another shout out to all my team mates @ HIVE-FX for all the hard work they’ve put into creating effects like these in such a tight time-frame!
We’ve grown a lot together as a team and I really appreciate what each one of them bring to the table, both as artists and friends!
And here’s to officially landing a 3rd season!!
[HIVE-FX GRIMM REEL 2013](http://www.hive-fx.com/#GRIMM REEL)

Baron -Pufferfish-
Frau -Hexen-
ZBrush Renders (4r6):
Baron_HiveBug_webC96.jpg
Baron_HiveBug_webC96_Desat.jpg
Frau_HiveBug_web96.jpg

Promo Stills:

Attachments