Hey Wombal. My apologies. i use Zapplink. It was a late night. haha.
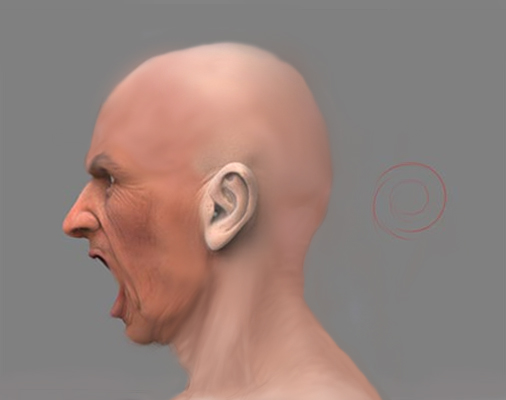
yep your right about that neck, see if this one helps a bit more.
[attach=52074]Head2.jpg[/attach]
Super was based on Alex ross amazing work, if you guessed that without reading it in my post I’m very happy.
Attachments
Thanks again for this. Its great. Ye i didnt read through your post just checked your gallery. Saw Alex Ross’ influence straight away.
Dude, it’s a sweet icthyic creature for sure… I’ve enjoyed following your progress. Did converting your Disp map to a .map make that much of a difference in detail, or just render time? I’m still unsure how to convert them, can you explain how to do it?
:+1: :+1: :+1: :+1: :+1:You’re still one of my favorite ZBrush artists, Rob. Been a long time for me, but I’m glad to see you are still posting. And getting better than ever, I might add. I really like the face on this guy. Obviously you will finish texturing him, so I won’t say anything about the pale neck. 
Brian
Sorry brett…thought this was Grub’s work…But, consider it a compliment. He’s one of the best. 
off the charts work! i just want to ask, where did you learn how to texture? school? internet? friend? dvd? its just amazing…
Hey Guys.
Seems my thread has gotten a bit confusing for some? The Grub was helping me out. Thanks again. As for the .map ye it made a big difference. My renders don’t take 3 hours anymore. haha. Edit the bat file i attached to your texture names in word pad or notepad, save the file then double click on it. the textures MUST be in the same file as the .bat. As for the texturing… No I’ve been teaching myself. This whole thread has been an educational adventure. I bought Zbrush in december for christmas and have been at it ever since. I had tried it a few times before though. But nothing where I have a full character or textured it. Zapplink is really cool cause you get the benefit of photoshop tools and i get to use zbrush tools.
Not sure when i’ll get to update again. So happy zbrushing
This is freakin’ outstanding! I love the fact that you didn’t go crazy with the specular value on his skin. It would have taken away from the wonderful texture. Modelling is top-notch as well.
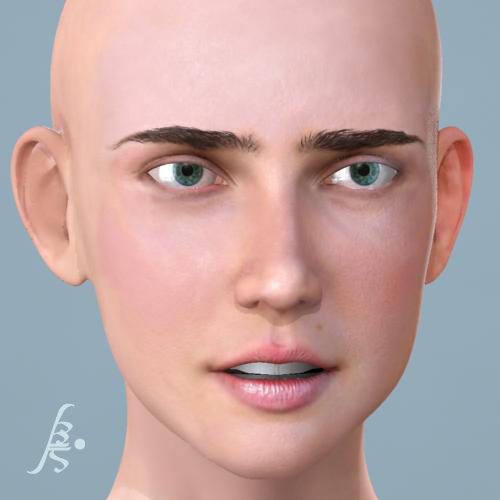
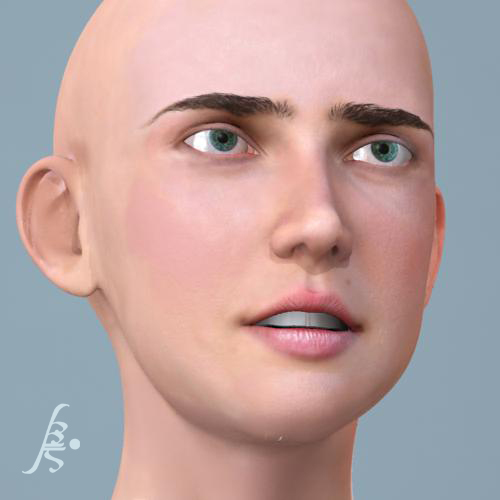
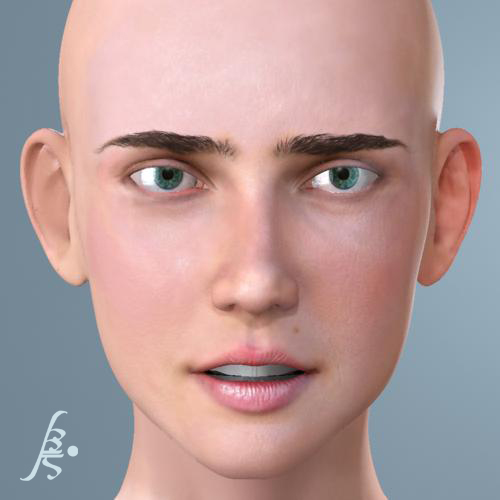
Hi guys. Did this the last four days. Base in maya, textures and fine details(which in this case cant be seen) done in zbrush. Was just a test for myself, loads to sort out. Not sure if i should post this in a new thread? Let me know what you think, I’m not sure where i’m going with her, but thats the fun of it i guess  . C&c most welcomed.
Attachments
Probably no use in posting this now as everyone is perving over beta posts. HAha. Great work from everyone by the way. So here is my doodle been working on the past 2 days in between doing real work.hehe. Inspired by the Darkness. Let me know what you think thanks.

dam nice, how many poly is that? Looks great
Really liked the Jennifer Connelly model. Has a nice cartoony feel to it 
Hey thanks guys! I didn’t expect to get replies.
Vexona: The demon head is 7 smoothes. So not sure how many poly’s that is. I’m thinkin of doing little gremlin demons for him too. But i like the thought of doodling for now.
Cezar Souza: Thank you. I didn’t think it looked anything like her.
Just another doodle. Made from a sphere today. c&c welcome as always. 
hey there, great work!! very impressive.
i have a couple of questions for you, you seem to have great control over bringing your stuff back into maya for rendering, i was wondering what you used for your settings in exporting your displacement maps from zbrush as well as your settings in maya, in the approximation editor and alpha gain under the actual displacement attributes.
im having some trouble with all the cracks and dimples/pores of the skin showing up in maya, everything displaces ok, except for those fine details, how did you get yours to show up nicely? also some areas of my model seem to blow out too much, around the ear for the most part is too bulbus (sp??) its close but its not exact to my zbrush model. i will post some pics later if that will help. thanks!
Hay love the sea creature ,
I also get the same problem when I try and render my displacements out in maya.
I have watched the head tutorial for displacement, with those settings and a bit of play around It still looks bloated with not nearly the amount of detail that was there in zbrush.
I have been playing around in zbrush off and on and tend to sit there for a long time sculpting the fine detail, it is starting to anger me that all my time and effort turns into a
model that looks like he just put on a few pounds and had botox.
In the head tutorial, he turns of the colour management settings so it doesn’t change the grays, in cs2 and cs3 there are a lot more settings, I don’t know if there is something different I should be doing there or I need to turn something ells off , I don’t know man
I am just clutching at straws hoping that there is a simple explanation why I cant get a maya render to look any good.
I have found though if I use the alpha gain number that zbrush gives you when you create the displacement it works a little better then what he dose in the head tutorial.
Any advice would be much appreciated, because swearing at my monitor isn’t working,
Hey guys. Thanks for the comments.
For the sea creature I divided my model into seperate pieces(head body arms legs) I create my uv’s before I extracted each displacement map seperately, Sometimes on level 3 as it seemed to create better maps for some reason. After I have my maps i go into photoshop and merge all my maps to create 1 displacement map. I then go into my brightness contrast and turn up the contrast to about 80%. its not always this amount. its just so that i can see the detail on my maps. After all that is done i convert my displacement map into a .map format. mental ray reads this faster and renders it out faster and better.
Once your in maya and have assigned the displacement map.map go to alpha gain. your alpha off set should be negative half of your alpha. so if your alpha is 1.00 then your off set should be -0.5. this is what may be causing your model to blow up.
I briefly went through the head tut. I dont use most of those settings. I use displacement exporter 2 i put my dpsubpix to about 2. depending on the quality map i need. I havent experimented to much with the export options like 8 bit 16 bit and all. I’m hoping in zbrush 3 creating maps will be easier. Cause its really a pain in the neck.
The convert file to .map converter is in my thread. back track through the pages it should be there. when you convert to a .map simply open the converter in word pad or whatever text editor you use and change the file names to YOUR texture file name. Place the converter into the SAME folder as your textures. double click the converter and it should work.
Good luck! I hope this helps.
Brett
thanks a lot for the tips, i guess i need to play with the alpha gain some more. right now its set at 2.2, and -1.1. (the default from the lesson) did you export a cavity map as well? or did you render an occlusion pass? im playing with the occlusion pass right now, seems to be working quite nicely. there is a weird problem im having when i render my image with the misss fast simple skin shader, i dont get an alpha!!! haha not sure why.
EDIT**
whoops, i didnt have create custom alpha turned on in my mental ray render nodes, which is why i didnt get an alpha. :rolleyes: