any suggestions on how check that or do a fix, still learning Zb and have not run into this before. any help would be great…
looks like colorize and gradiant color were turned on in the tools/texture pallete, not sure how that happend, but turning them off seems to have solved the issue i was having.
Tool>texture> create GUV tiles. Than under Texture> create a 3096x3096 texture. That should clear things up.
1 Like
is it safe to move forward with the texturing and guvtiling? or do i need the colorize on to paint the texture?..still unsure.
I don’t know about the third person. But you can disable texturing if you want to make adjustment to the mesh itself. And the color will act predictably when you add the texturemap (after GUVtiling or unwrapping outside of zbrush).
1 Like
thanks womball i’ll do that, this is my first time going thru these steps, i really want to do this well, and i’m a bit unsure, thanks for the help, check in here often, i sure could use the support while i stumble thu these next steps.
i took it down to the lowest sub div and did the guvtiles, went to texture and created a 4096 x 4096 texture instead just to see what happens , seems to have fixed the issue weather colorize or gradiant is on or off, thanks. do i now save the texture with the tool when promted or just the tool?
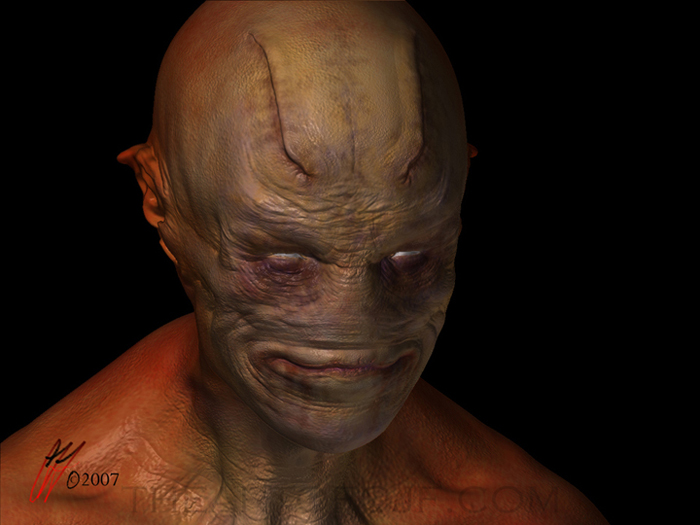
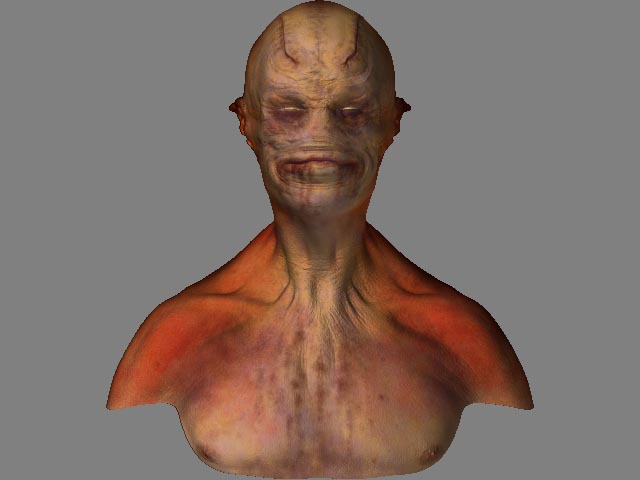
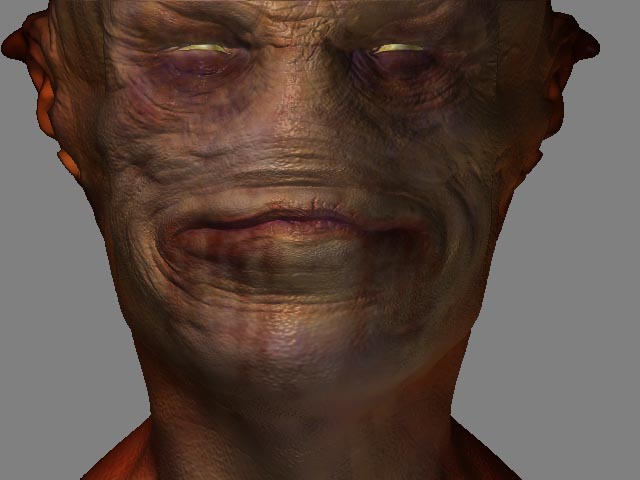
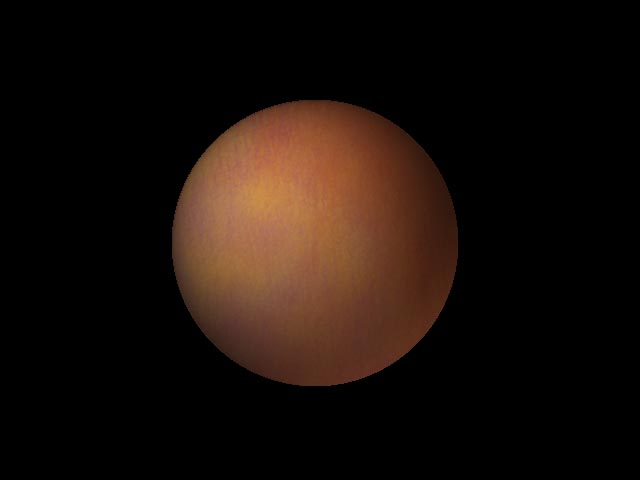
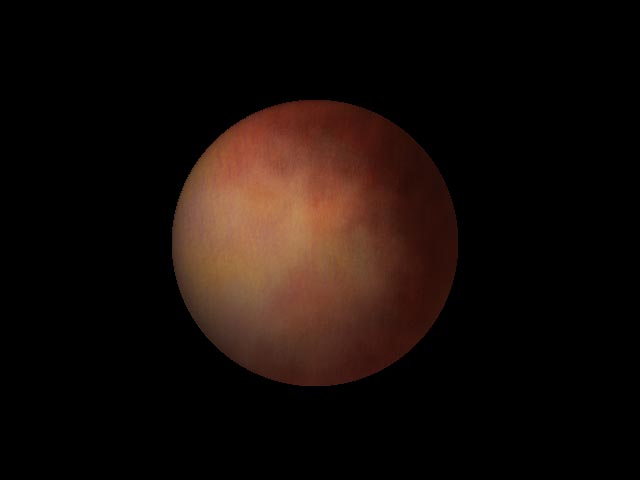
So after some help from womball and some attempts at texture this is what i ended up with. The eyes will be done later and the material is just the basic material for now, i exported the texture at 4096 x 4096. I still want to play around with the whole scheme for a while. will be trying to make my own material as well as a spec map, cavity and some shader for the ear tips. hope every one likes it and thanks again womball.
I didn’t think I did that much! Sheesh excellent coloring if this your first time. Are you painting in low opacity layers? As for all of these shader, you may have to use an external program like Maya or Softimage. The materials are a bit more advanced there and you can control SSS shading with maps. GUV tiles work fine in Blender too, so I assume they can work in those programs. If you export you have to flip the texture vertical before you export out of zbrush. Zbrush works on textures upside down for some reason.
1 Like
Hay womball, yah this is my first time painting a digital modal, but i’ve been working in other mediums for a while. There’s still so much to absorb and learn to be able to do this well. i’ve only just installed xsi so that will be the external pakage i’ll work in for animation and mabye rendering later. but so far i realy like what Zb can do. i just crused around to see what others are doing for shaders and materials, looked thru the practical guide and i think i’ll try making a skin material with four shader channels, like the head example pg 272. i havent used any layers with opacity, i painted lots of subtle colors with low intensity using the alpha 22 and 23 layering them up and leaving the area’s that i liked alone. still have some tweeks to make. like the back of the head, ears and the chest. i’ve played around with light settings to get a blue cast from bellow for this last pic.
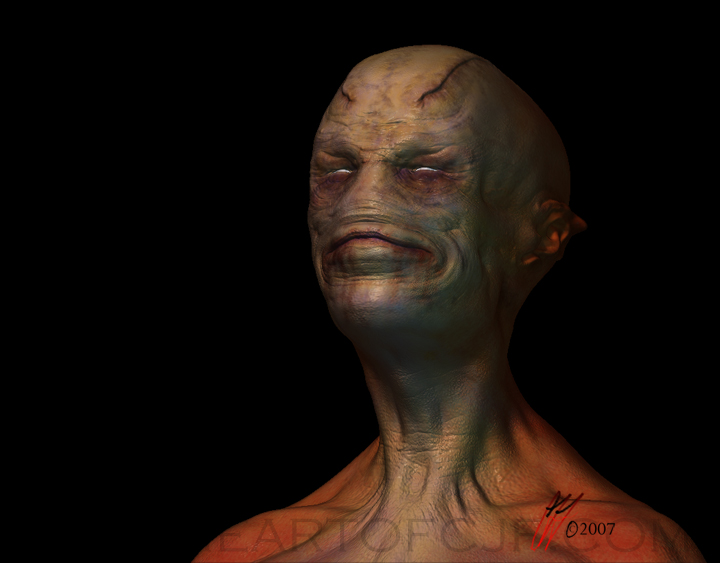
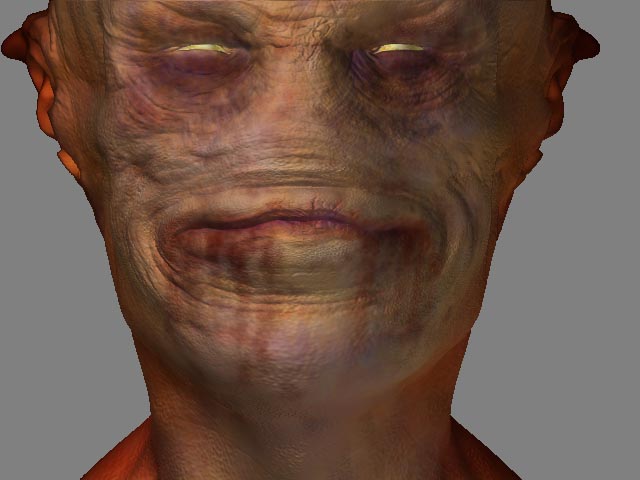
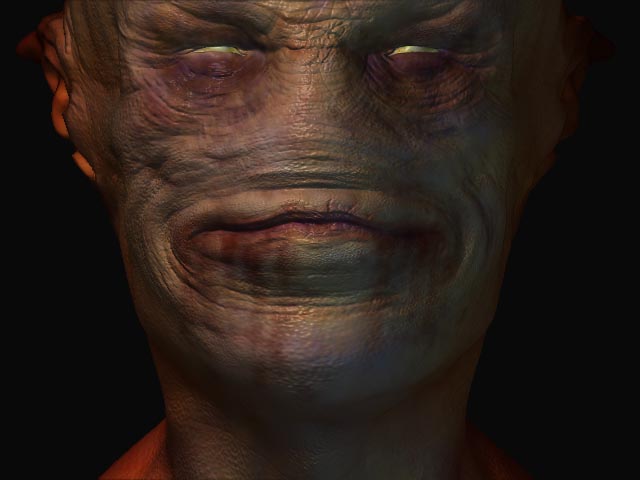
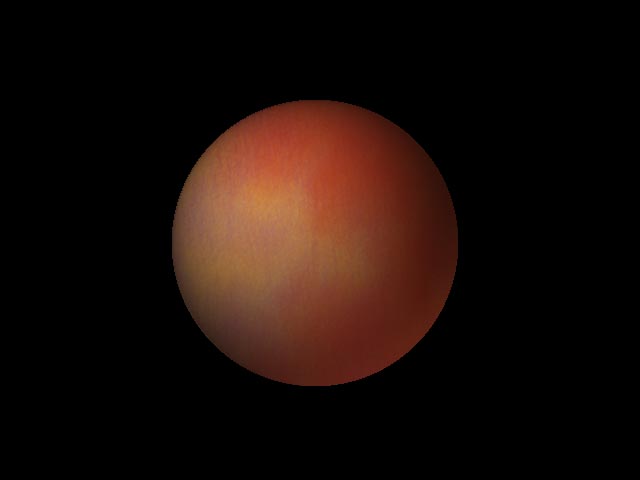
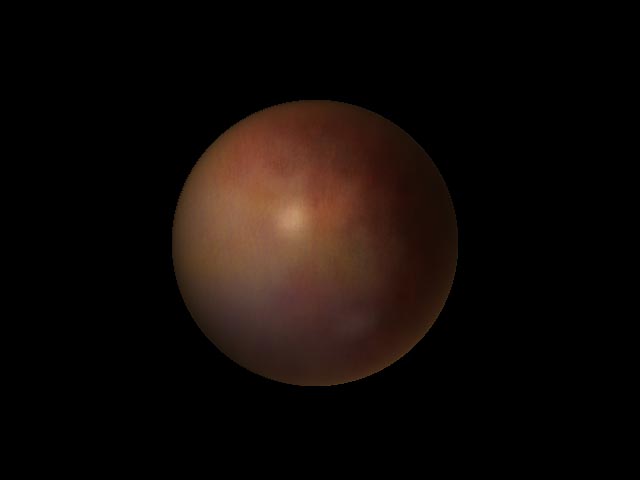
Here is the final texture with a little back light across the chin. I’ve darkend the tips of the ears and the back of the head, and finished the chest. I was going to change the eye’s but I really like them with a hint of yellow and orange. I was playing around with painting some of the gel materials onto the tips of the ears and a different material onto the lips, eyes, and the blood stains, but have not had a succesful test yet.
Has anyone played with that feature?
Do I need to remove the existing material in those area’s before painting on the new ones?
I’m not sure how to save out the material once I have it were I want it?
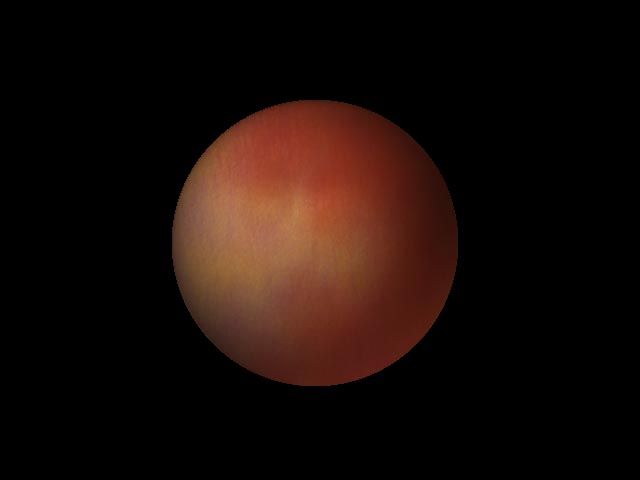
still have lots to learn, I will be adding a background in cs2 later, but for now I hope that you all like it.
Mr. Dimples has been a fun project to learn on.
threetails, this character is awesome. you’ve done a fantastic job of texturing this guy. do you have further plans for him or was this a practice piece? if it was practice, would you care to share your process?
i really hope to see more from you! 
1 Like
industripop, i was hoping to take this guy thru to an expresion animation of some kind once i’ve trained a little futher with xsi but for now i will set him in a scene and render out a still. I would be happy to throw together a process run so you can see the steps, i’ll try to do as much detail on that as i can, and include step by step texturing samples. All of this has been done inside zB from Zsphere’s to a base head and all sculpting, textures and render. i still have alot to learn myself, but i will put the process together and get it up asap. thank for the great comments.
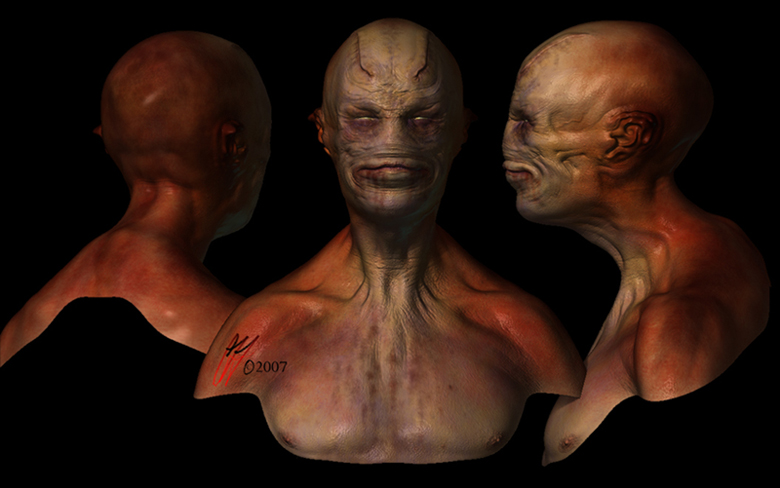
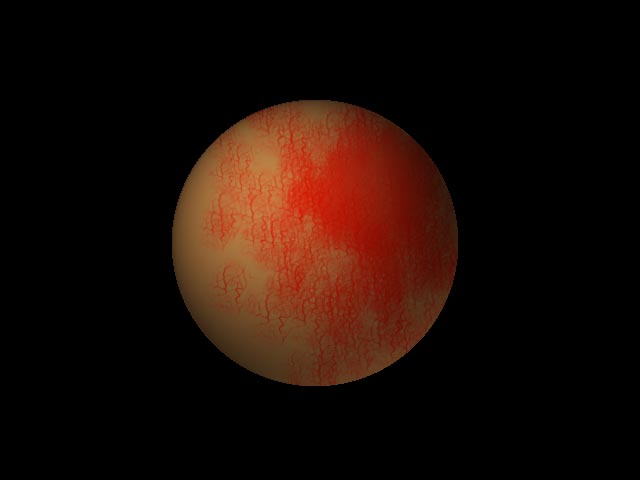
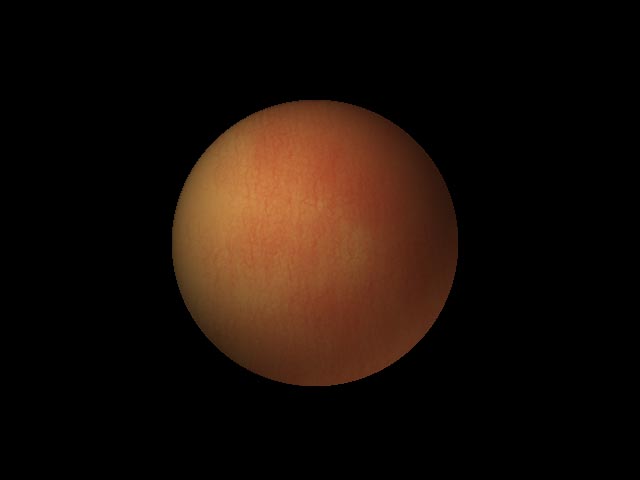
here’s a step by step for the sculpt and the textures. i’ve included the base tool that i started with, and a couple of alpha’s that i grabbed off of an illistration i did a long time ago…new uses for old things.
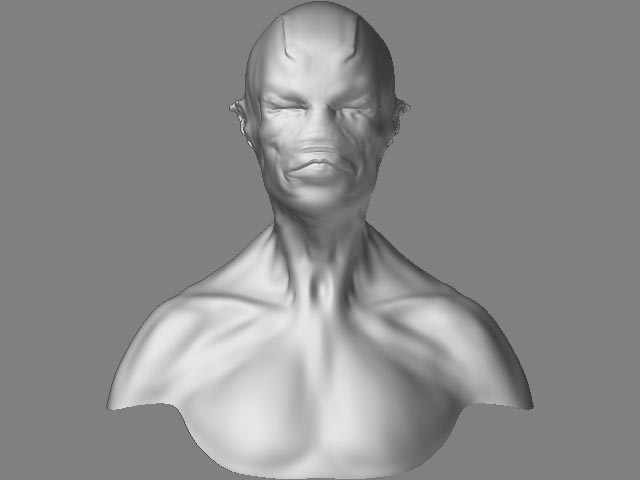
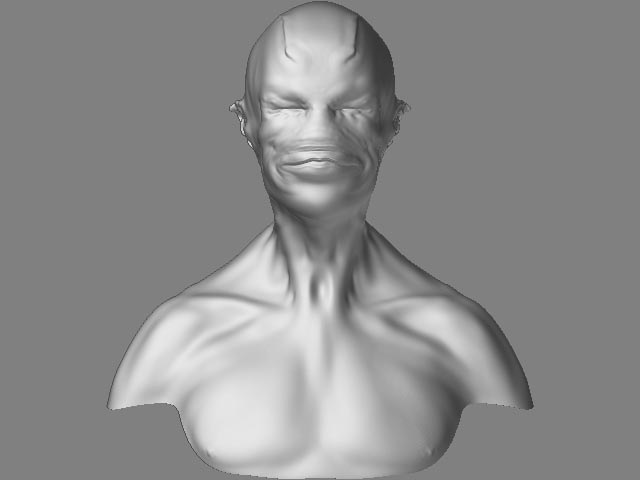
I started with this base mesh made in Zb from Z sphere’s. This general form was ment to be able to mold into alot of different shapes so I kept the forms simple. in fact it was the base shape for the razor and the tounge on the the first page of this thread.
After a few more edge loops around the eyes and the mouth and ears I dropped the draw size to one with move on, and just started to move points around getting one side to look right. I masked of that side and used the deformation/resym on the x axis to get the other side set up, then turned on symmetry across the x axis. I had planned on Mr Dimples having a nose in the standard location but changed my mind later.
Once I was satisfied with the general masses, I bumped up the sub divisions, this is at 5, and start in with the simple brush z intensity 10, varying the size. Having an illistration to work from makes it easier to get polys in the area’s you want details early, like the mouth, eyes and ears. I worked without one to see were I could go hence the unused nostrals. I switched to the layer brush again verying the intensity and size and placed the smaller forms of the neck, cheaks, eyes, ears, and the mouth area, smoothng out the edges as needed.
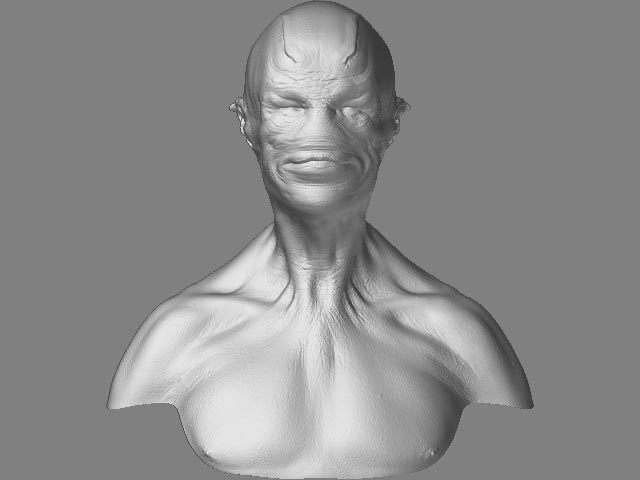
Swithing back and forth to the layer and simple brush I started to add and refine the mass of the chest, shoulders, switching to sub to press the material in when needed.

After the whole model has been touched, I picked values off the model by dragging the picker over colors I wanted to use or start with. For the blood and skin spots, I darkend the red hue under the eyes and adjusted the intensity laying the stains in with the same brush set up as before. I just tried to keep the steps light and sensitive.
With the basic material turned on it just comes to life.
I hope this helps some one, I know that ZBrush and the contributions of other artists to Zbrush Central have made me a better sculptor.
Thankyou everyone.
Attachments


Really incredible skin! I’m going to have to study this quite a bit to the coloring down. Its quite subtle. You might want to experiement with some lights and Mahlikus latest material.
1 Like
wow threetails, thanks so much for taking the time to make this walkthrough. this is looking really great! are you going to take him into an external app for rendering? this makes me want to go back and re-visit that buggy alien head i was doing a while back and finish it up. i have yet to ever finish a model! :lol:
ya know, these are the kind of nice, simple direct walkthroughs that those expensive books on the market should have. the members of this community should get together and make a book of tutorials since there aren’t any zbrush books out right now (eventhough one is slated–i know.) hell, even if it’s an e-book it would be cool.
1 Like
Had to add my thanks to you three tails for what youve done here.Ive had zb2 for about 5 months now(pleasure only)and gain a great deal from people like you.
Your modeling is terrific and your concepts breathtaking!My fav geners are summed up by your style,I look forward to more of your work and a final big thanks for the files!
Respect to you ,
cal 
1 Like
womball, industripop, calum5ZB, thanks to all of you. I’ve got more in the works and hope to have Razor from page one, up next with an eye test. I’m still trying to make some materials, but have grabbed Mahlikus latest material so i can learn a bit more about them. I really appreciate that you can find this kind of sharing here, so I’ll post some process stuff with Razor as well, and mabye a few materials of my own when I get them working. Thanks again and enjoy the files.
Mr. Dimples will be my first test for animation in xsi when I have done some more training, for now its all zb.
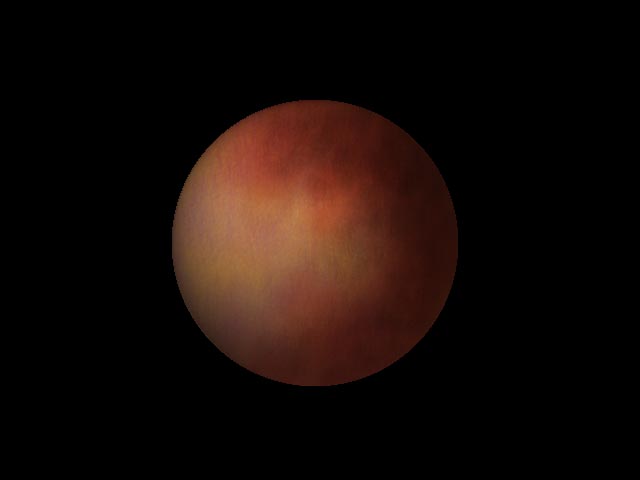
This is very well done, but I don’t think the texturing on the ears is as finished looking as the gills or the other facial features, which look really nice.
1 Like
your right, I was planning to go back and touch the ears and back of the head a little more, good eye subnormal…and i realy like your new turtleman the eye’s are great and the textures are wow.
Still working on Mr dimples changes, so i will post some new images of Razor later today…until then. cheers.