Great piece Joseph!
 Thanks for sharing such a superb in depth workflow presentation Joseph
  small_orange_diamondsmall_orange_diamondsmall_orange_diamondsmall_orange_diamond Look forward to seeing how you proceeded with the actual printing proces and the clean-up/painting small_orange_diamond
1 Like
That’s awesome Joseph! As ever, your tutorials are clear and concise, the best on the web in my opinion - appreciate it a lot! Can’t wait to see the priming and finishing tutorial.
Cheers!
Seán
Thanks mutte696, Etcher, and seanforsyth; glad to see that these are useful =)
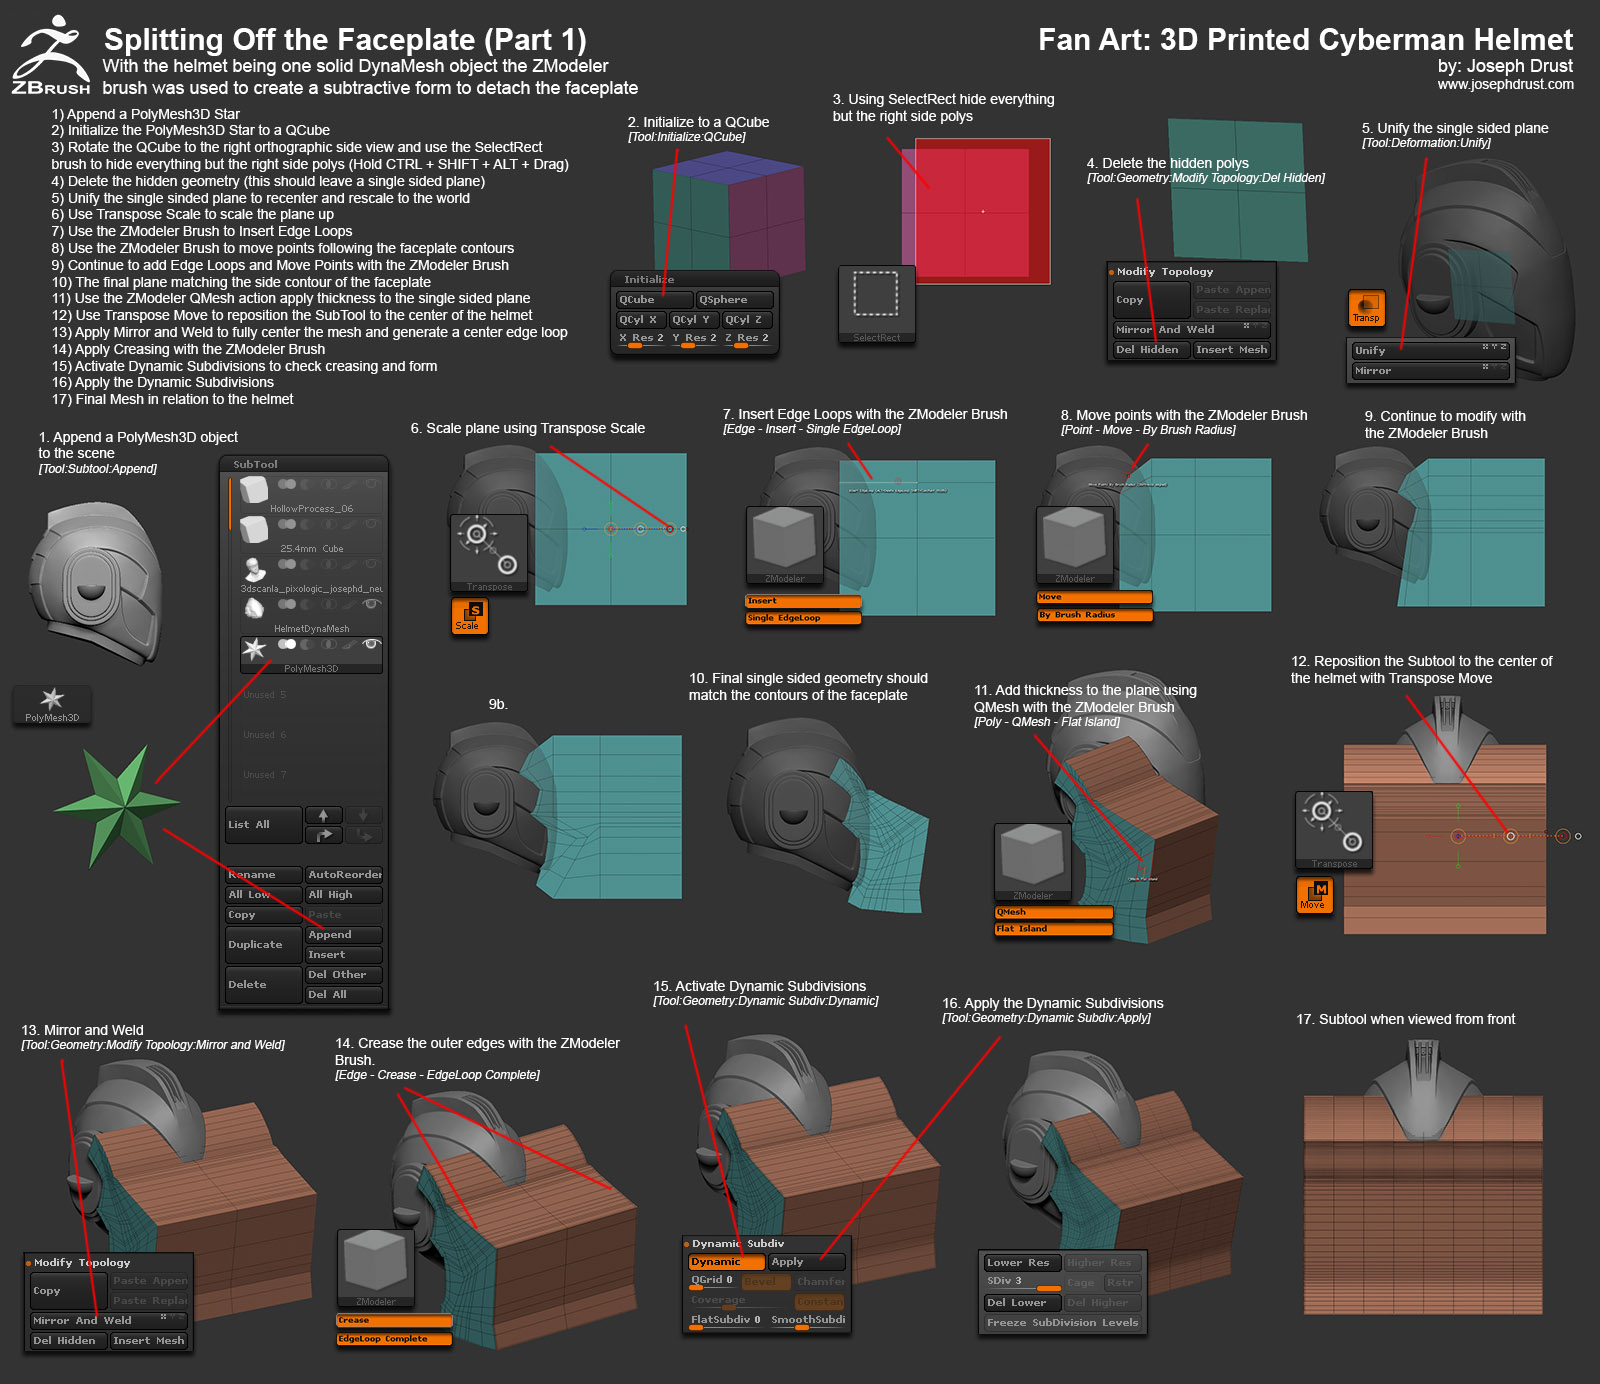
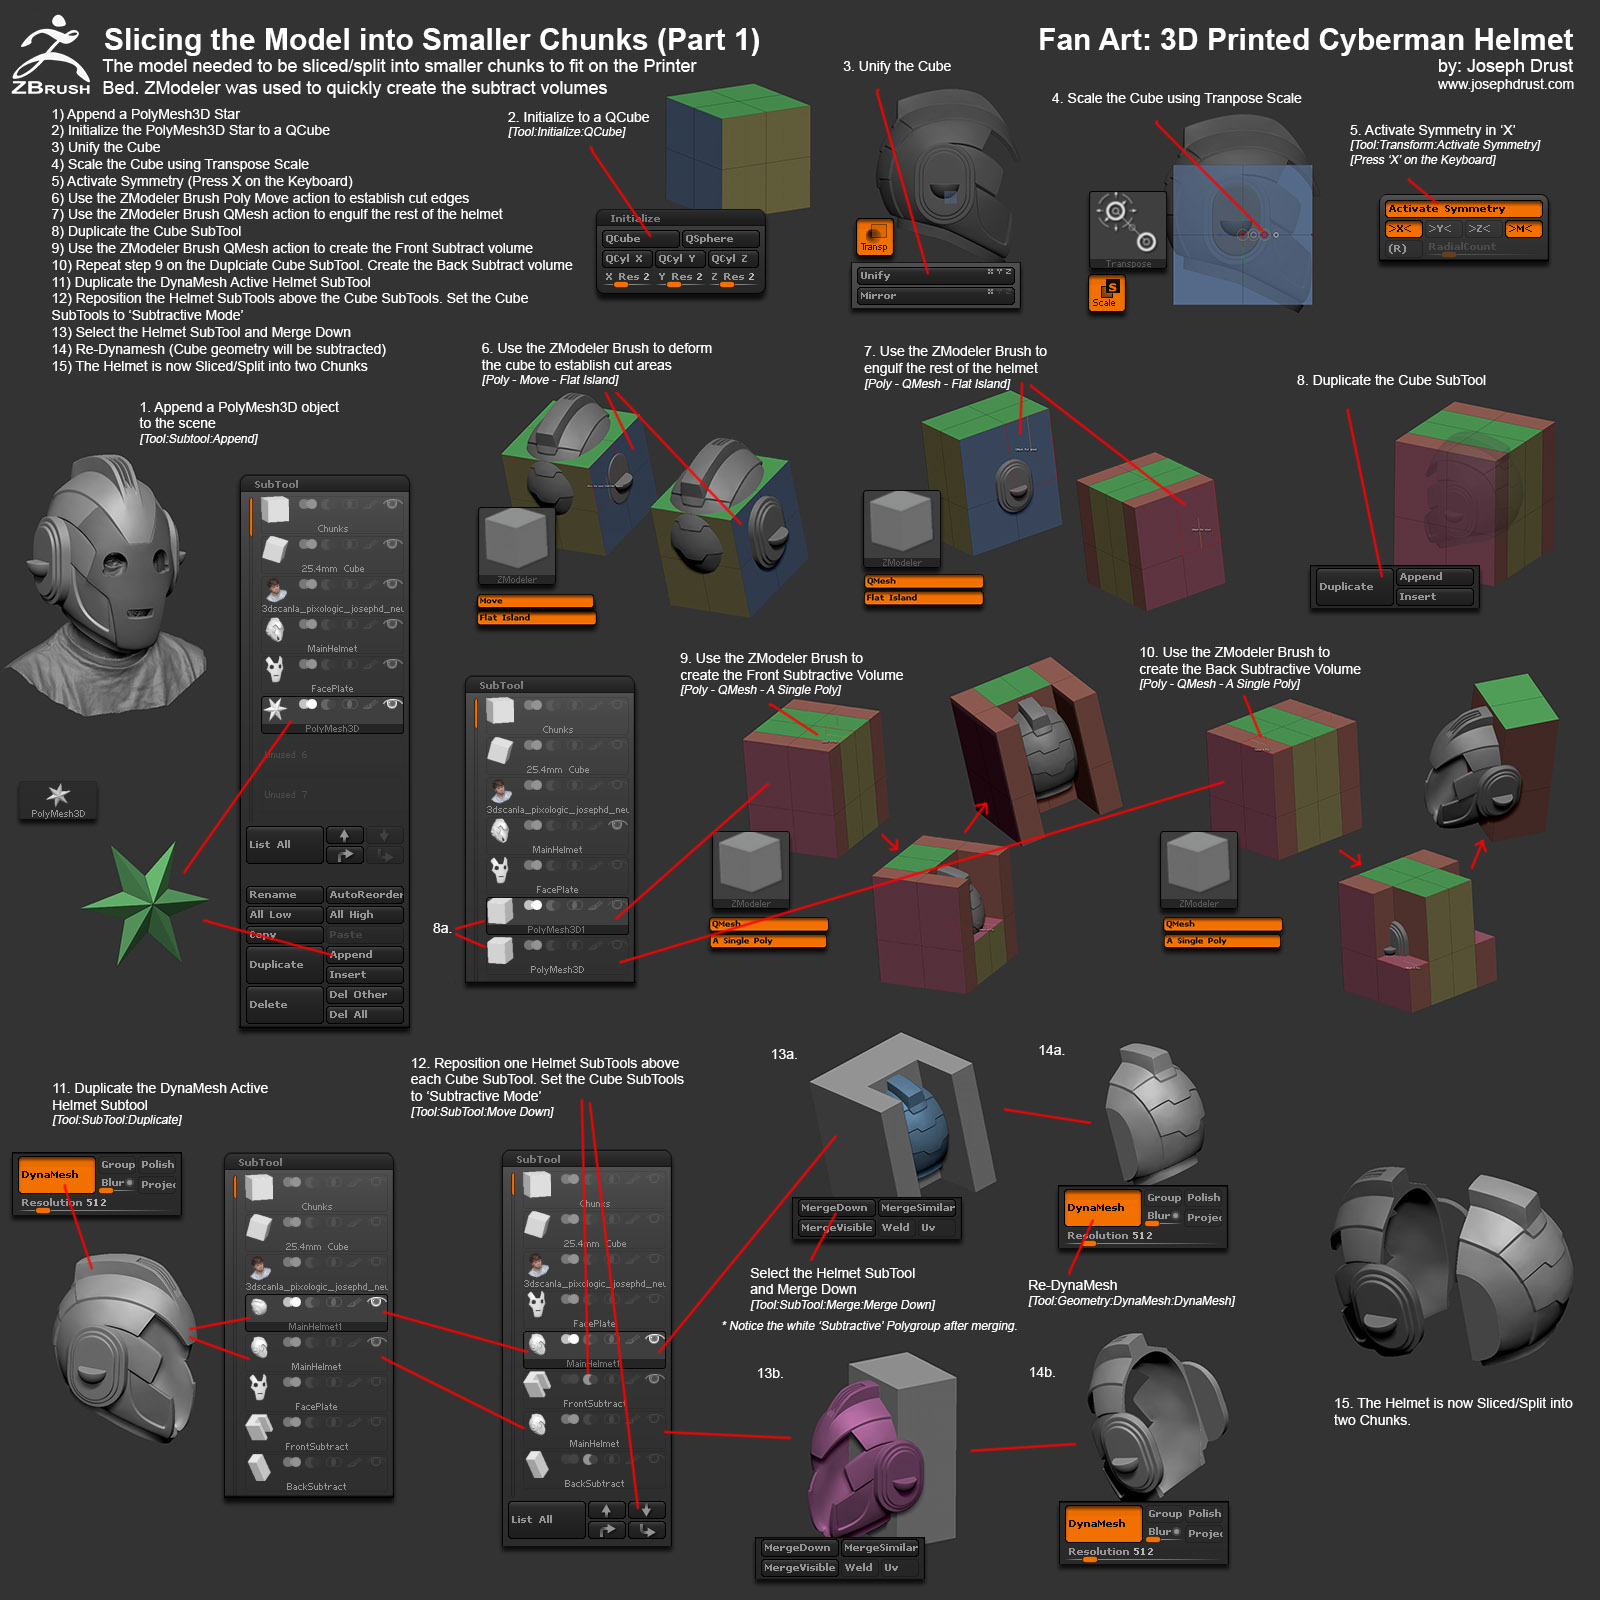
Here is another set of tutorial images. I try to model as much as possible with the ZModeler brush until I run into something that would be faster to create using the DynaMesh Subtraction process. At this point I convert the ZModeler geometries to DynaMesh and perform the DynaMesh Boolean Operations.
The processes show in these images is really fast to complete inside of ZBrush it just looks huge when broken out to small images steps.
Continuing onward with these image tutorials 
-Joseph
Attachments
2 Likes
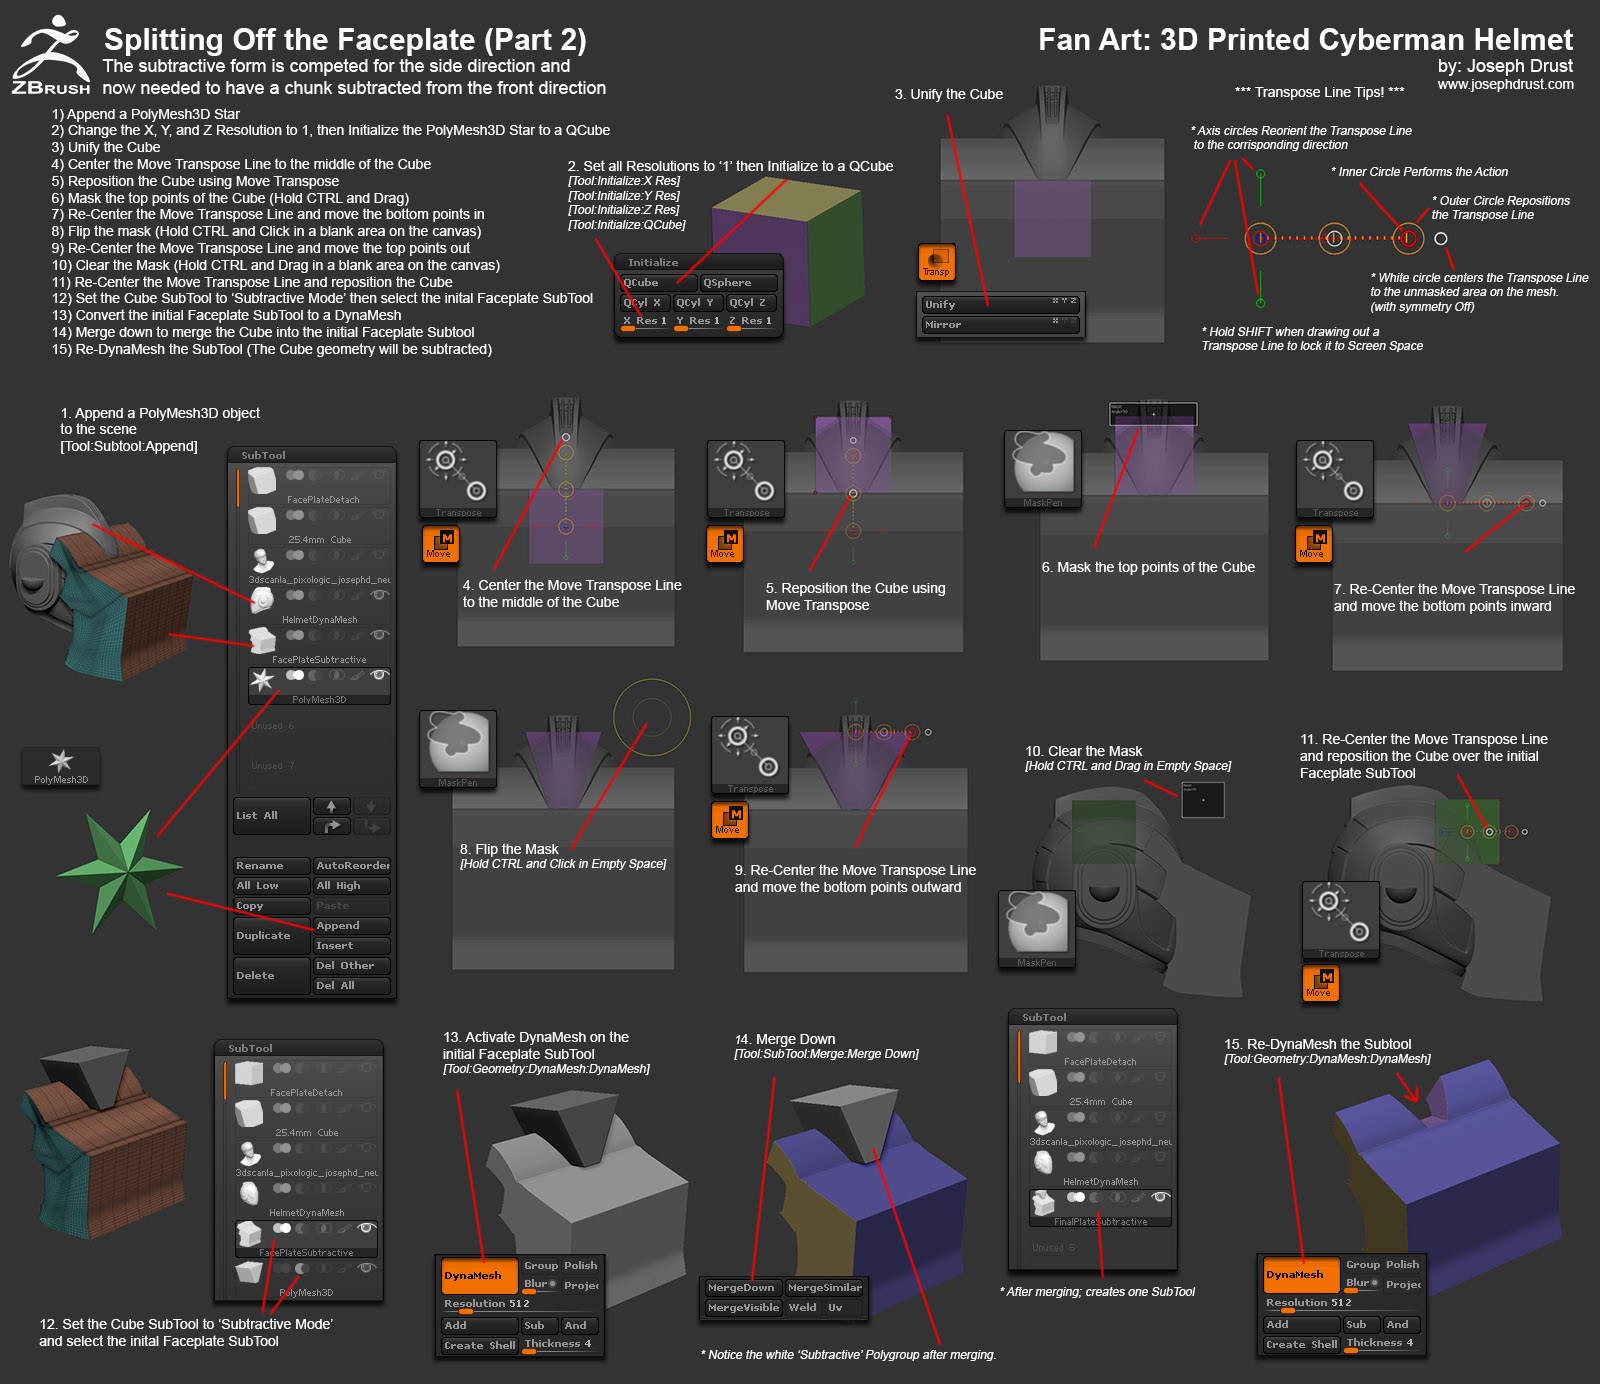
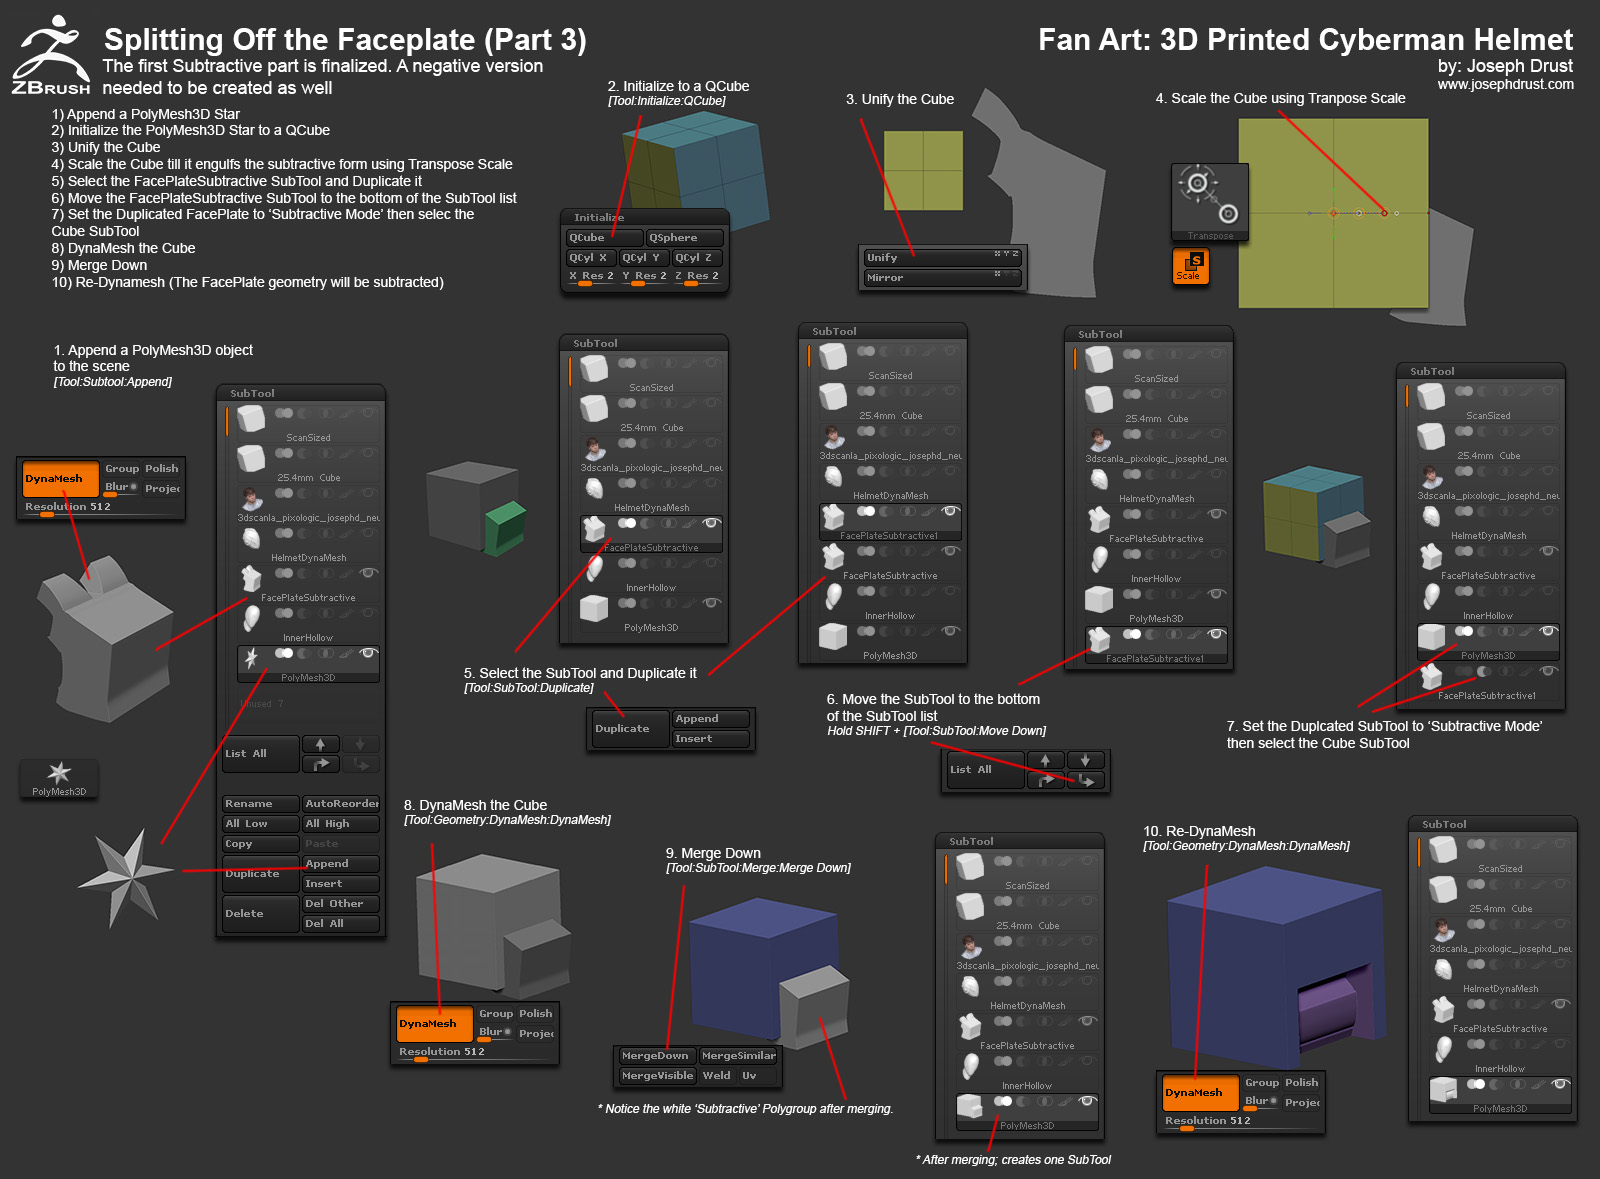
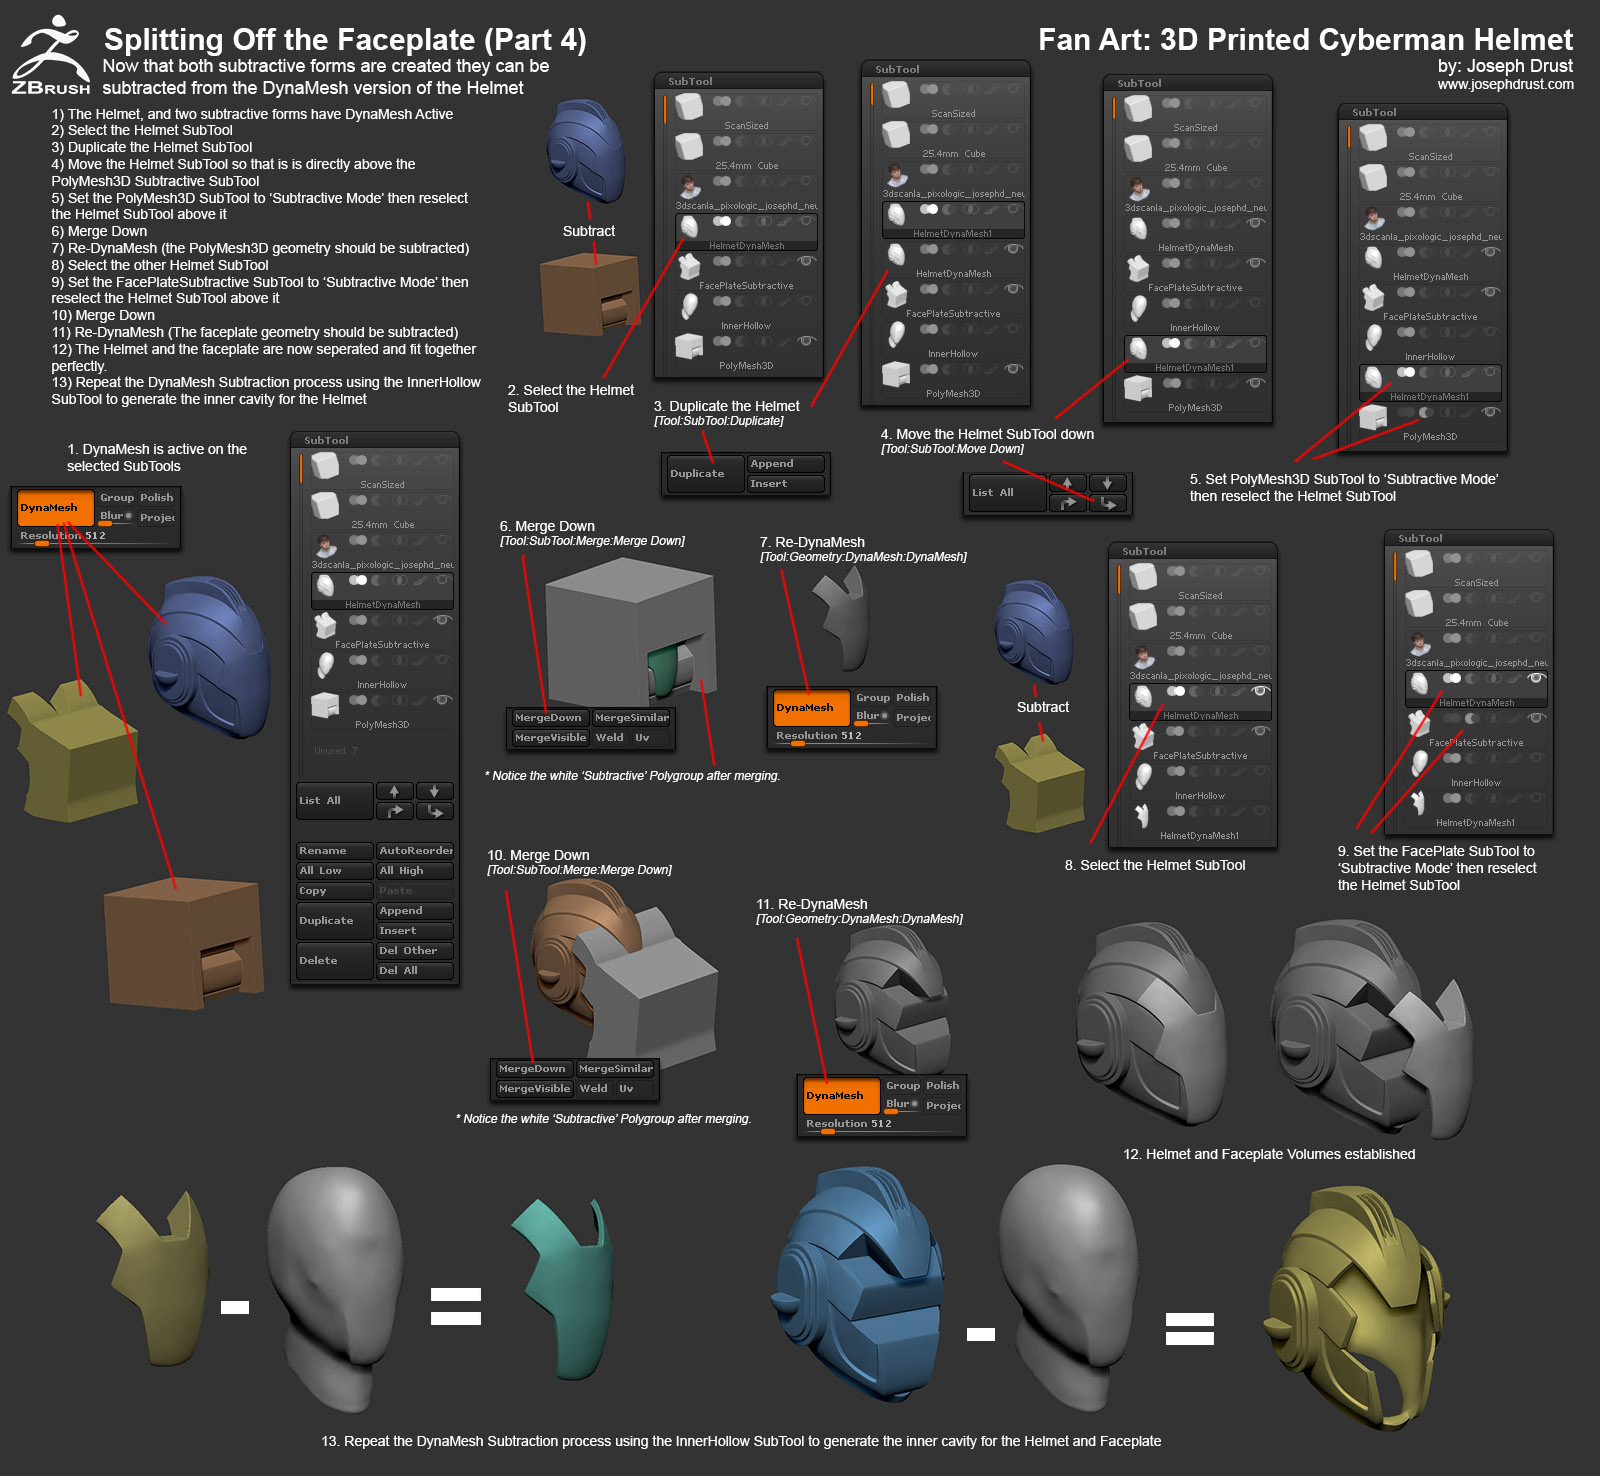
Here are two more Tutorials on slicing the model up. Lots of ZModeler and DynaMesh Subtraction usage. Basic premise is to build a volume, duplicate it, and then modify the volumes to create a positive and negative subtraction object. This allows for each part to be subtracted creating a clean break.
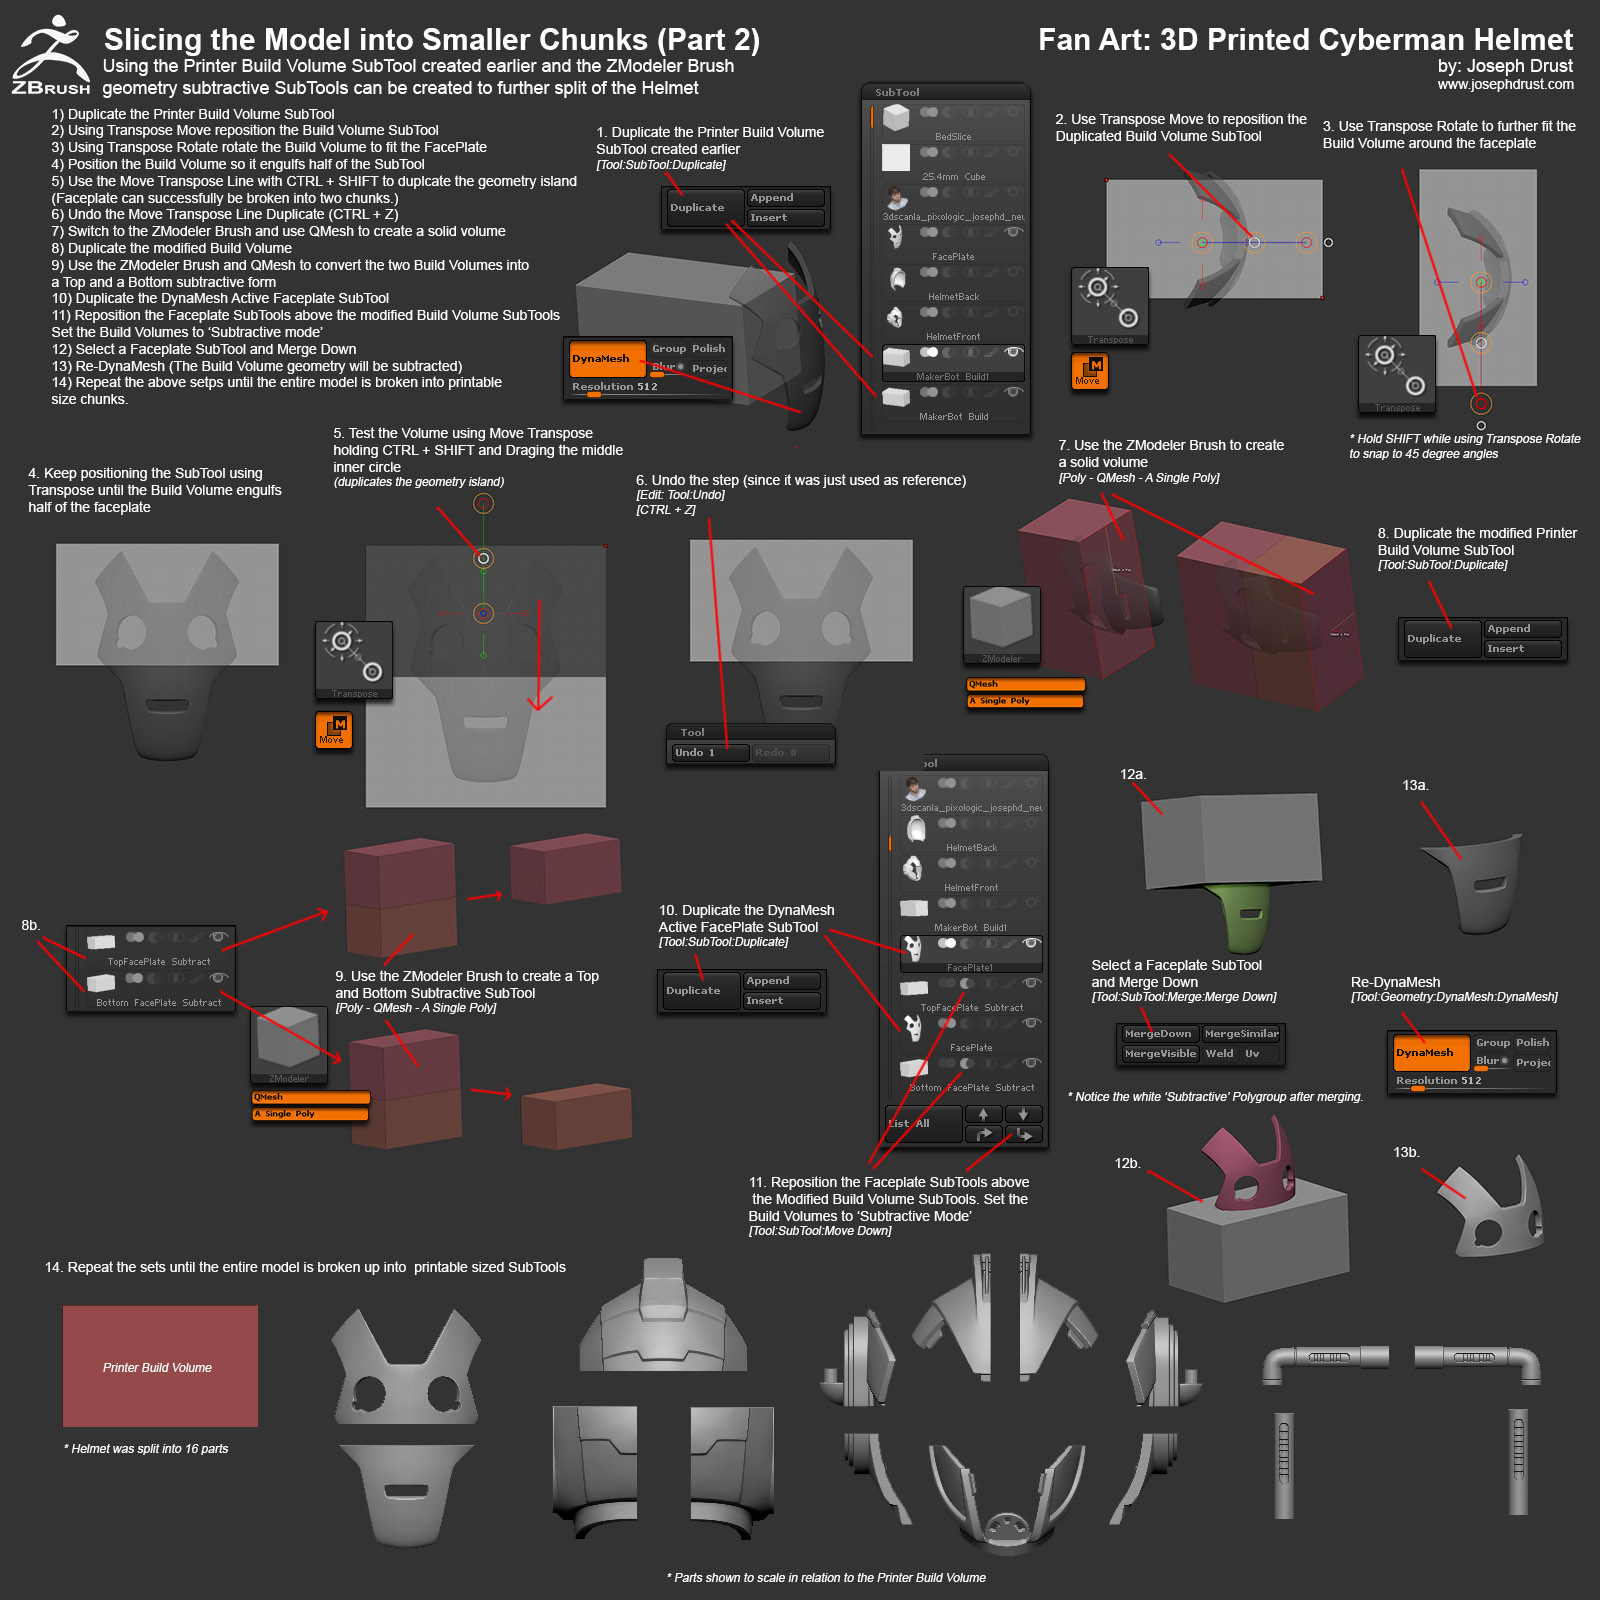
-Joseph
Attachments
2 Likes
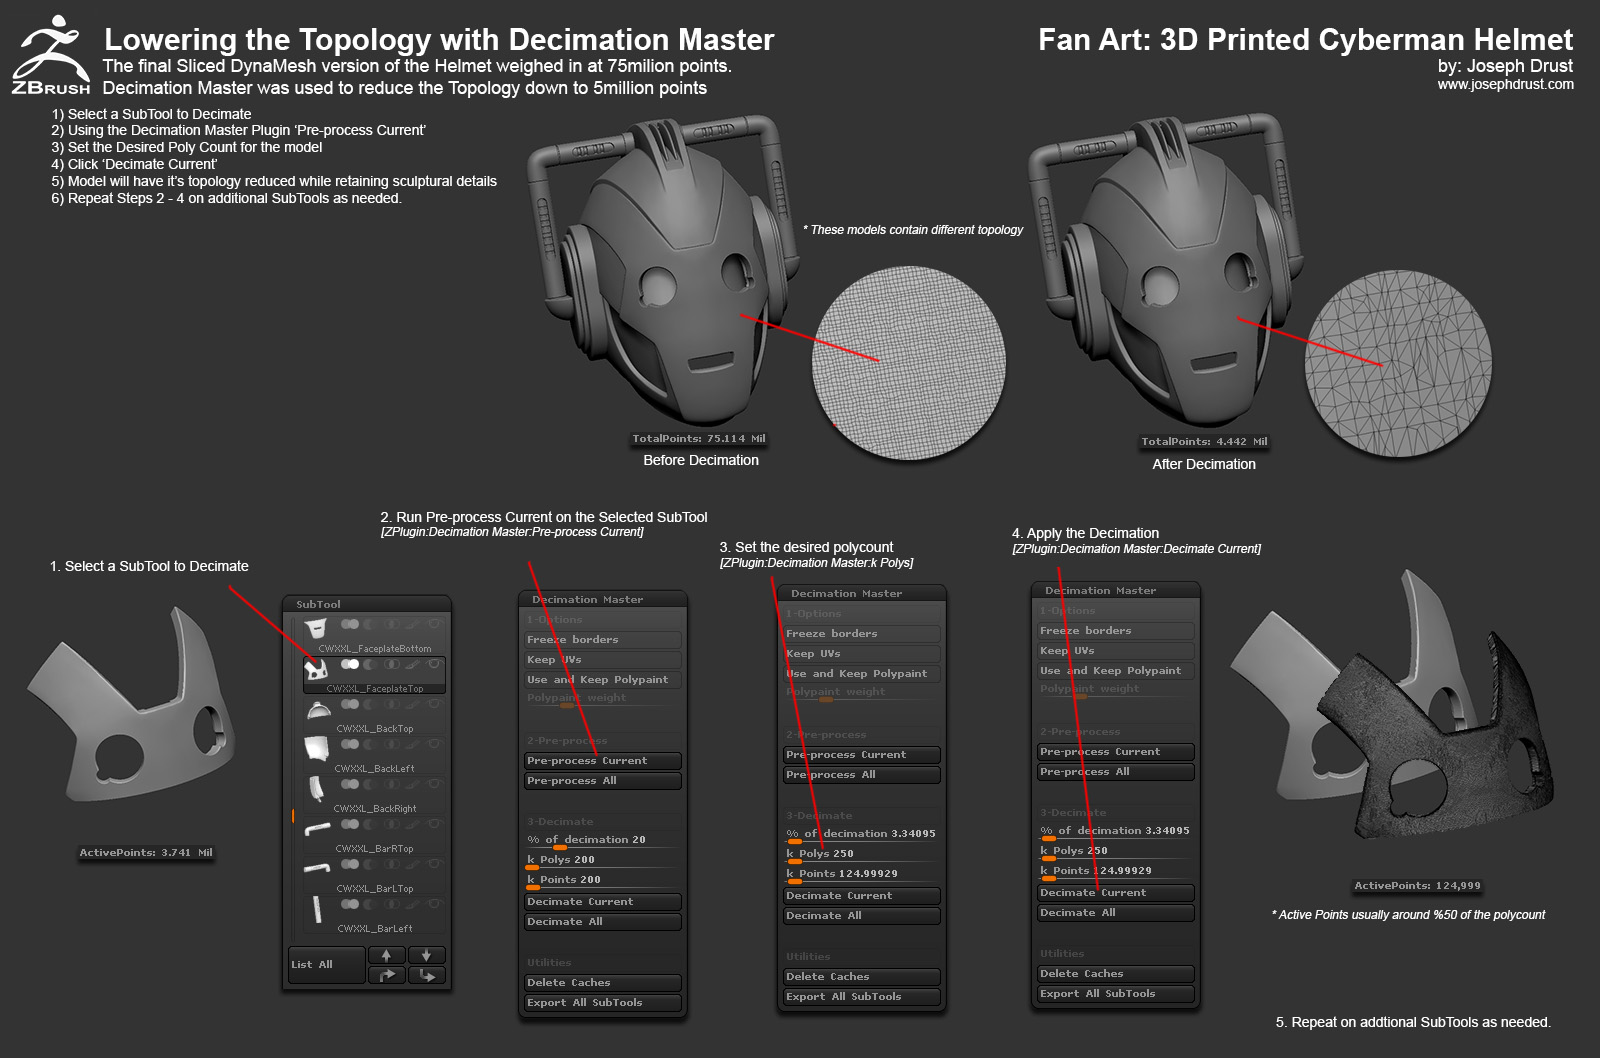
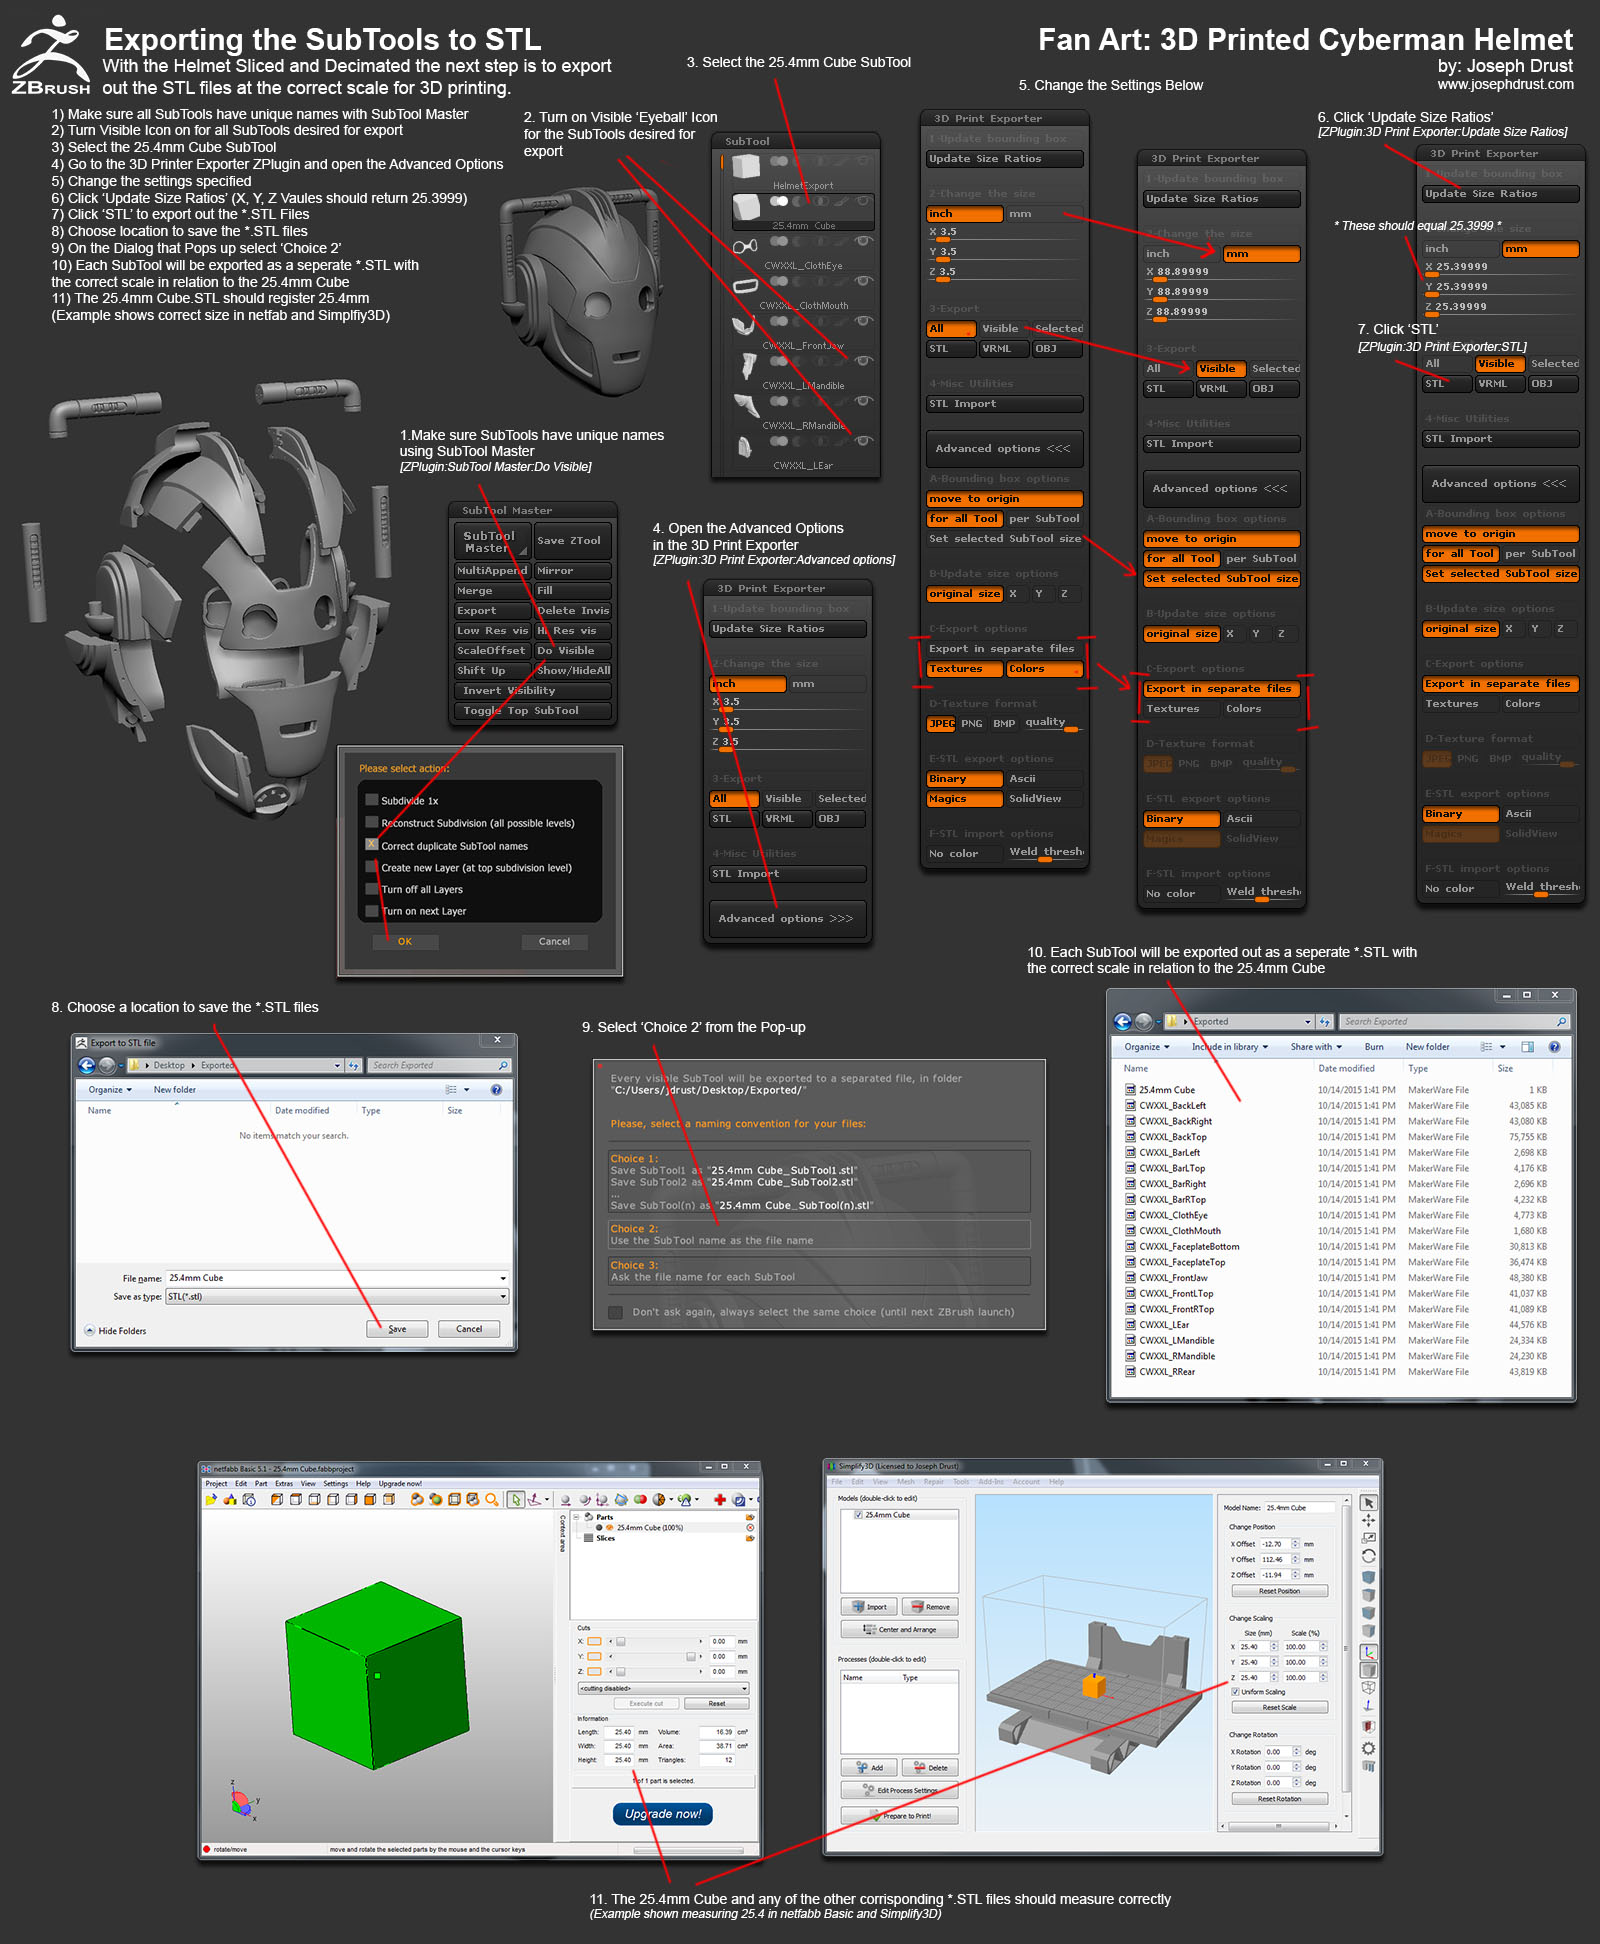
Here are two more image tutorials. One on using Decimation Master to reduce the polycount of the model for printing (I hope everyone already knows how to do this  ) The second covering using the 3D Print Exporter to export out the SubTools as separate *.STL files that are all scaled correctly
Hope these help!
-Joseph
Attachments
1 Like
what kind of paint did you use to get the metallic effect?
thank you for all the awesome tutorial images too!
Cool stuff! 
This is awesome Joseph!! Thanks for sharing your pipeline to 3D print in Zbrush. Already learned some tips! 
Greetings from Spain
I liked your technique. Excellent job.
Well deserved TOP TOW!small_orange_diamondsmall_orange_diamondsmall_orange_diamondsmall_orange_diamondsmall_orange_diamond
Thanks for sharing all this tips and workflows!
Once again, good job with that man! Makes me wanna buy a 3d printer for sure… and have a kid! Hahahaha
@marcus_civis, enishi, TonimaAkter, ][-][4Z4R][)): Thanks!
@Marco Splash: Hah! You need to start 3D printing for sure! (and I recommend the kid aspect as well; it’s a blast.)
@spaceboy412: Here is an image of the items I used for finishing (I will be creating tutorial images covering the process.)
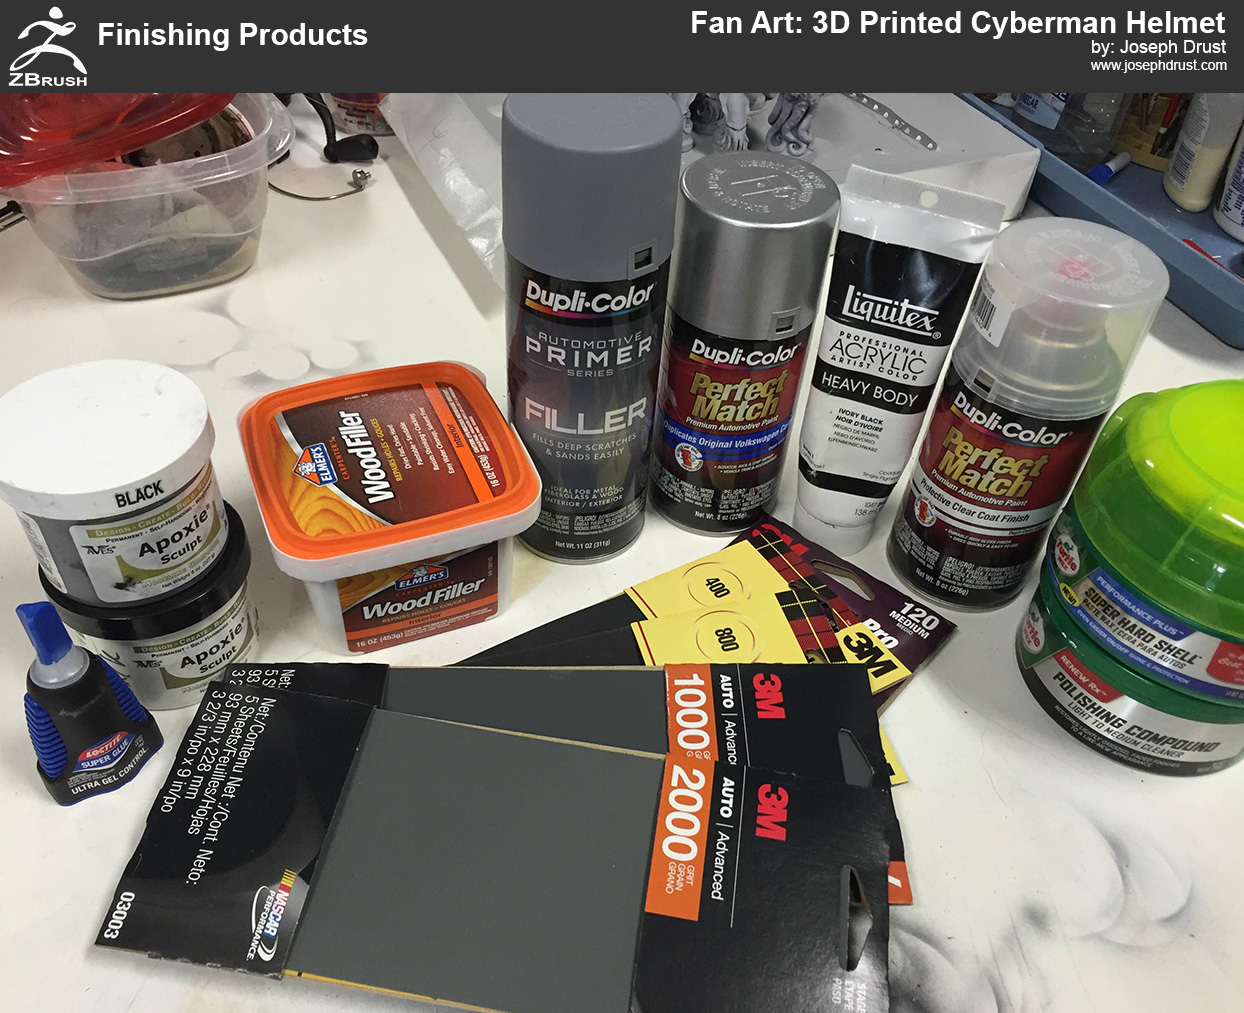
-Joseph
Attachments
a video of you making that helmet after being printed would have been great nice piece
Thanks Piggyson for the materials list. I’ve been using Mr.Surfacer 1000, sanding to 12k and then using Alclad and Future over Shapeways WSF so its always nice to see alternatives to that.
Amazing work!
What setting did you use to get the ZModeler crease tool to give you those nice bevels? Whenever I use it, it just tends to force my edges into the sharpest possible 90 degree angles.
Joseph, are you using the paste wax for final polish on the metallic paint?
never tried in my workflow, just curious if it is something i should try. thx
Very well done!
All of them. Helmet, print & kid for sure 
Thanks for presenting this detailed workflow.
Btw. If you wanna go crazy in sanding, look for “micro mesh” (no joke :D) pads. These are between polishing wax and sanding going up to 12000! Awesome. Use it here for even polishing clear parts.
…Tutorial!
Jim Carrey wants one!
This is great! only tried small 3D prints but this has inspired me to try something bigger would love to do a helmet thanks for the tutorial