excellent
illusionist: Thanks man!
Chimz: Thanks! I have attached a sneakpeak at one of the arms fresh out of the printer 
Jhon_Erick: Thanks 
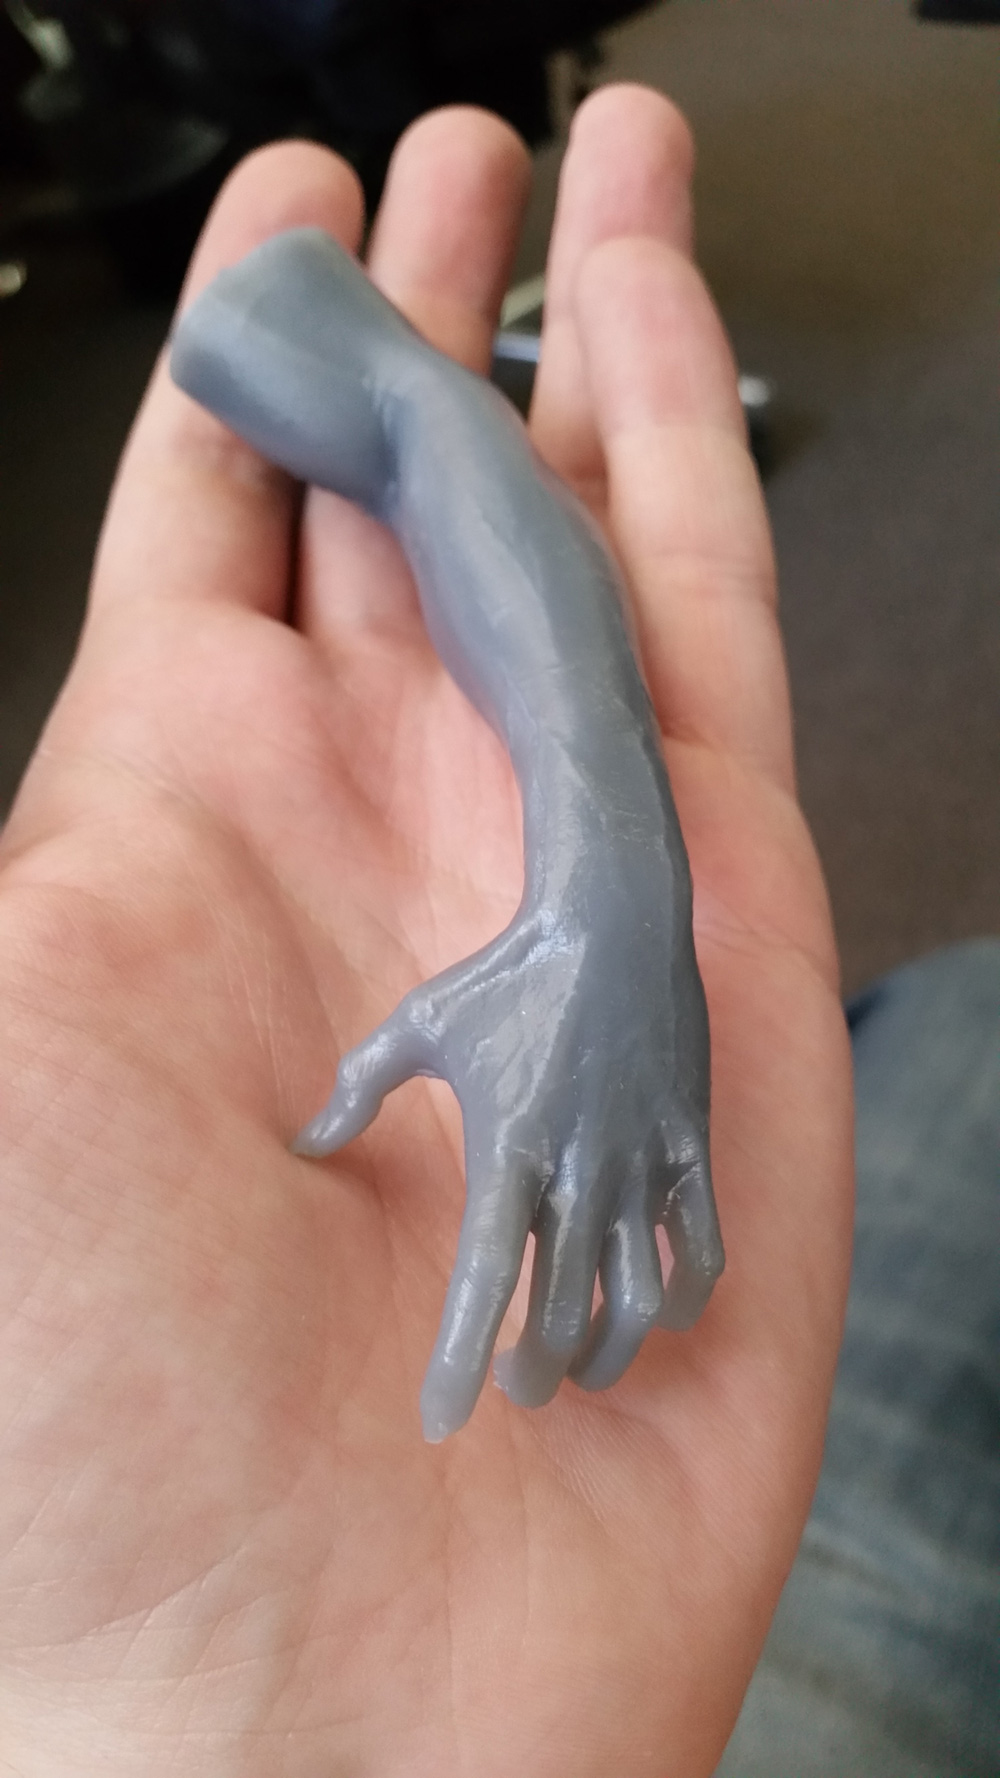
Attachments
Dang, if 3D printing is just kicking off and things look this good now, can’t wait to see what the next 5 to 10 years will bring. Good work. Oh, like the movie too, pretty cool (left me wondering why the ‘vamp’ let the guy leave? Have my own ideas, but wondering why?).
Saw this on facebook recently, really sweet work Jonas small_orange_diamond
Hey guys!
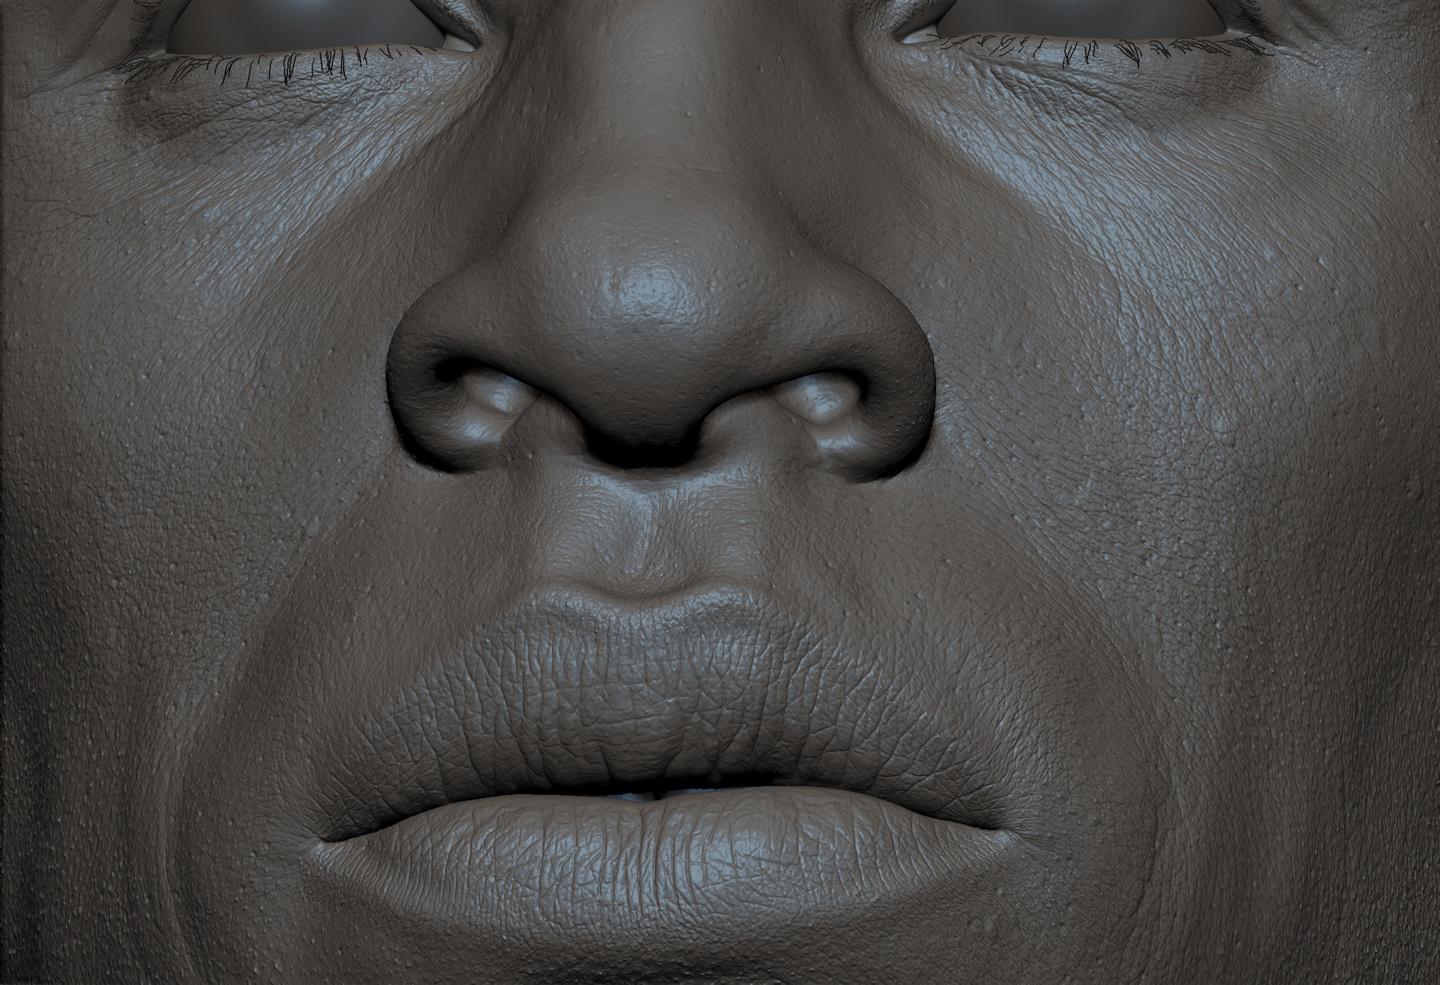
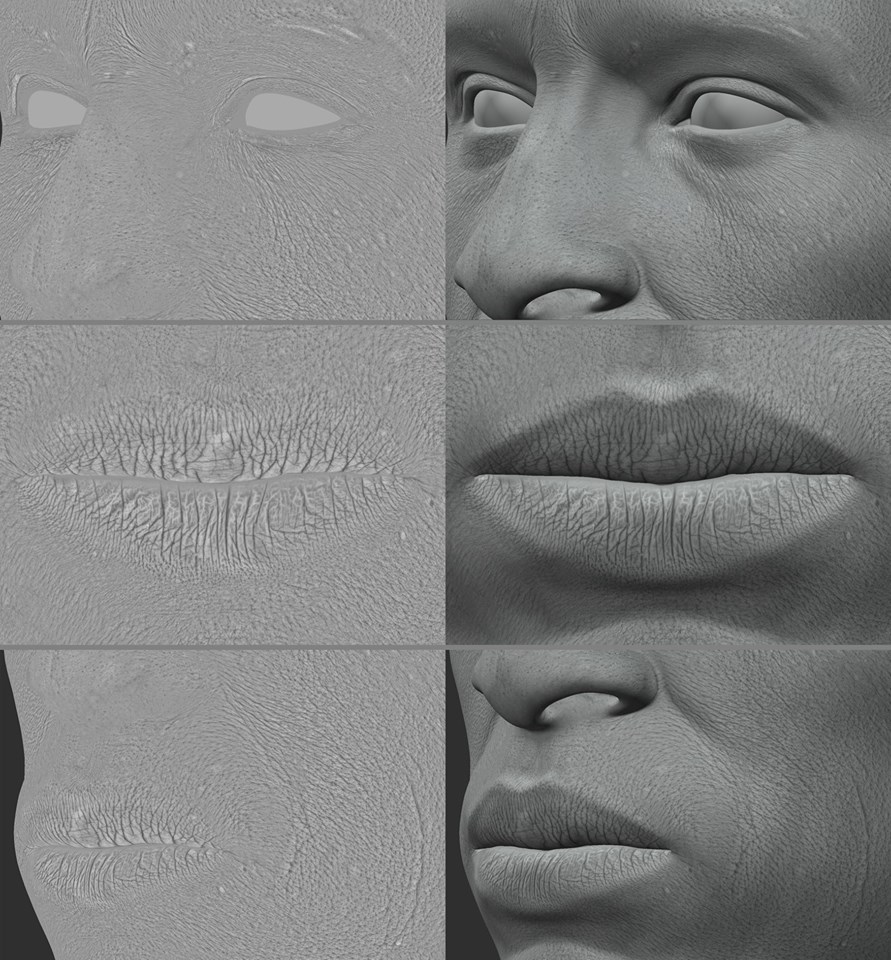
Just wanted to share some stuff I made for this new webstore called Texturing.xyz.
https://www.facebook.com/texturingxyz/?fref=ts
They are specializing in super highres displacement scans, micromaps and crosspolatized albedos!
I made this head to be used with their disp maps, painting them on in Mari and then taking it into zbrush to create all the tertiary details.
Hope you like the result
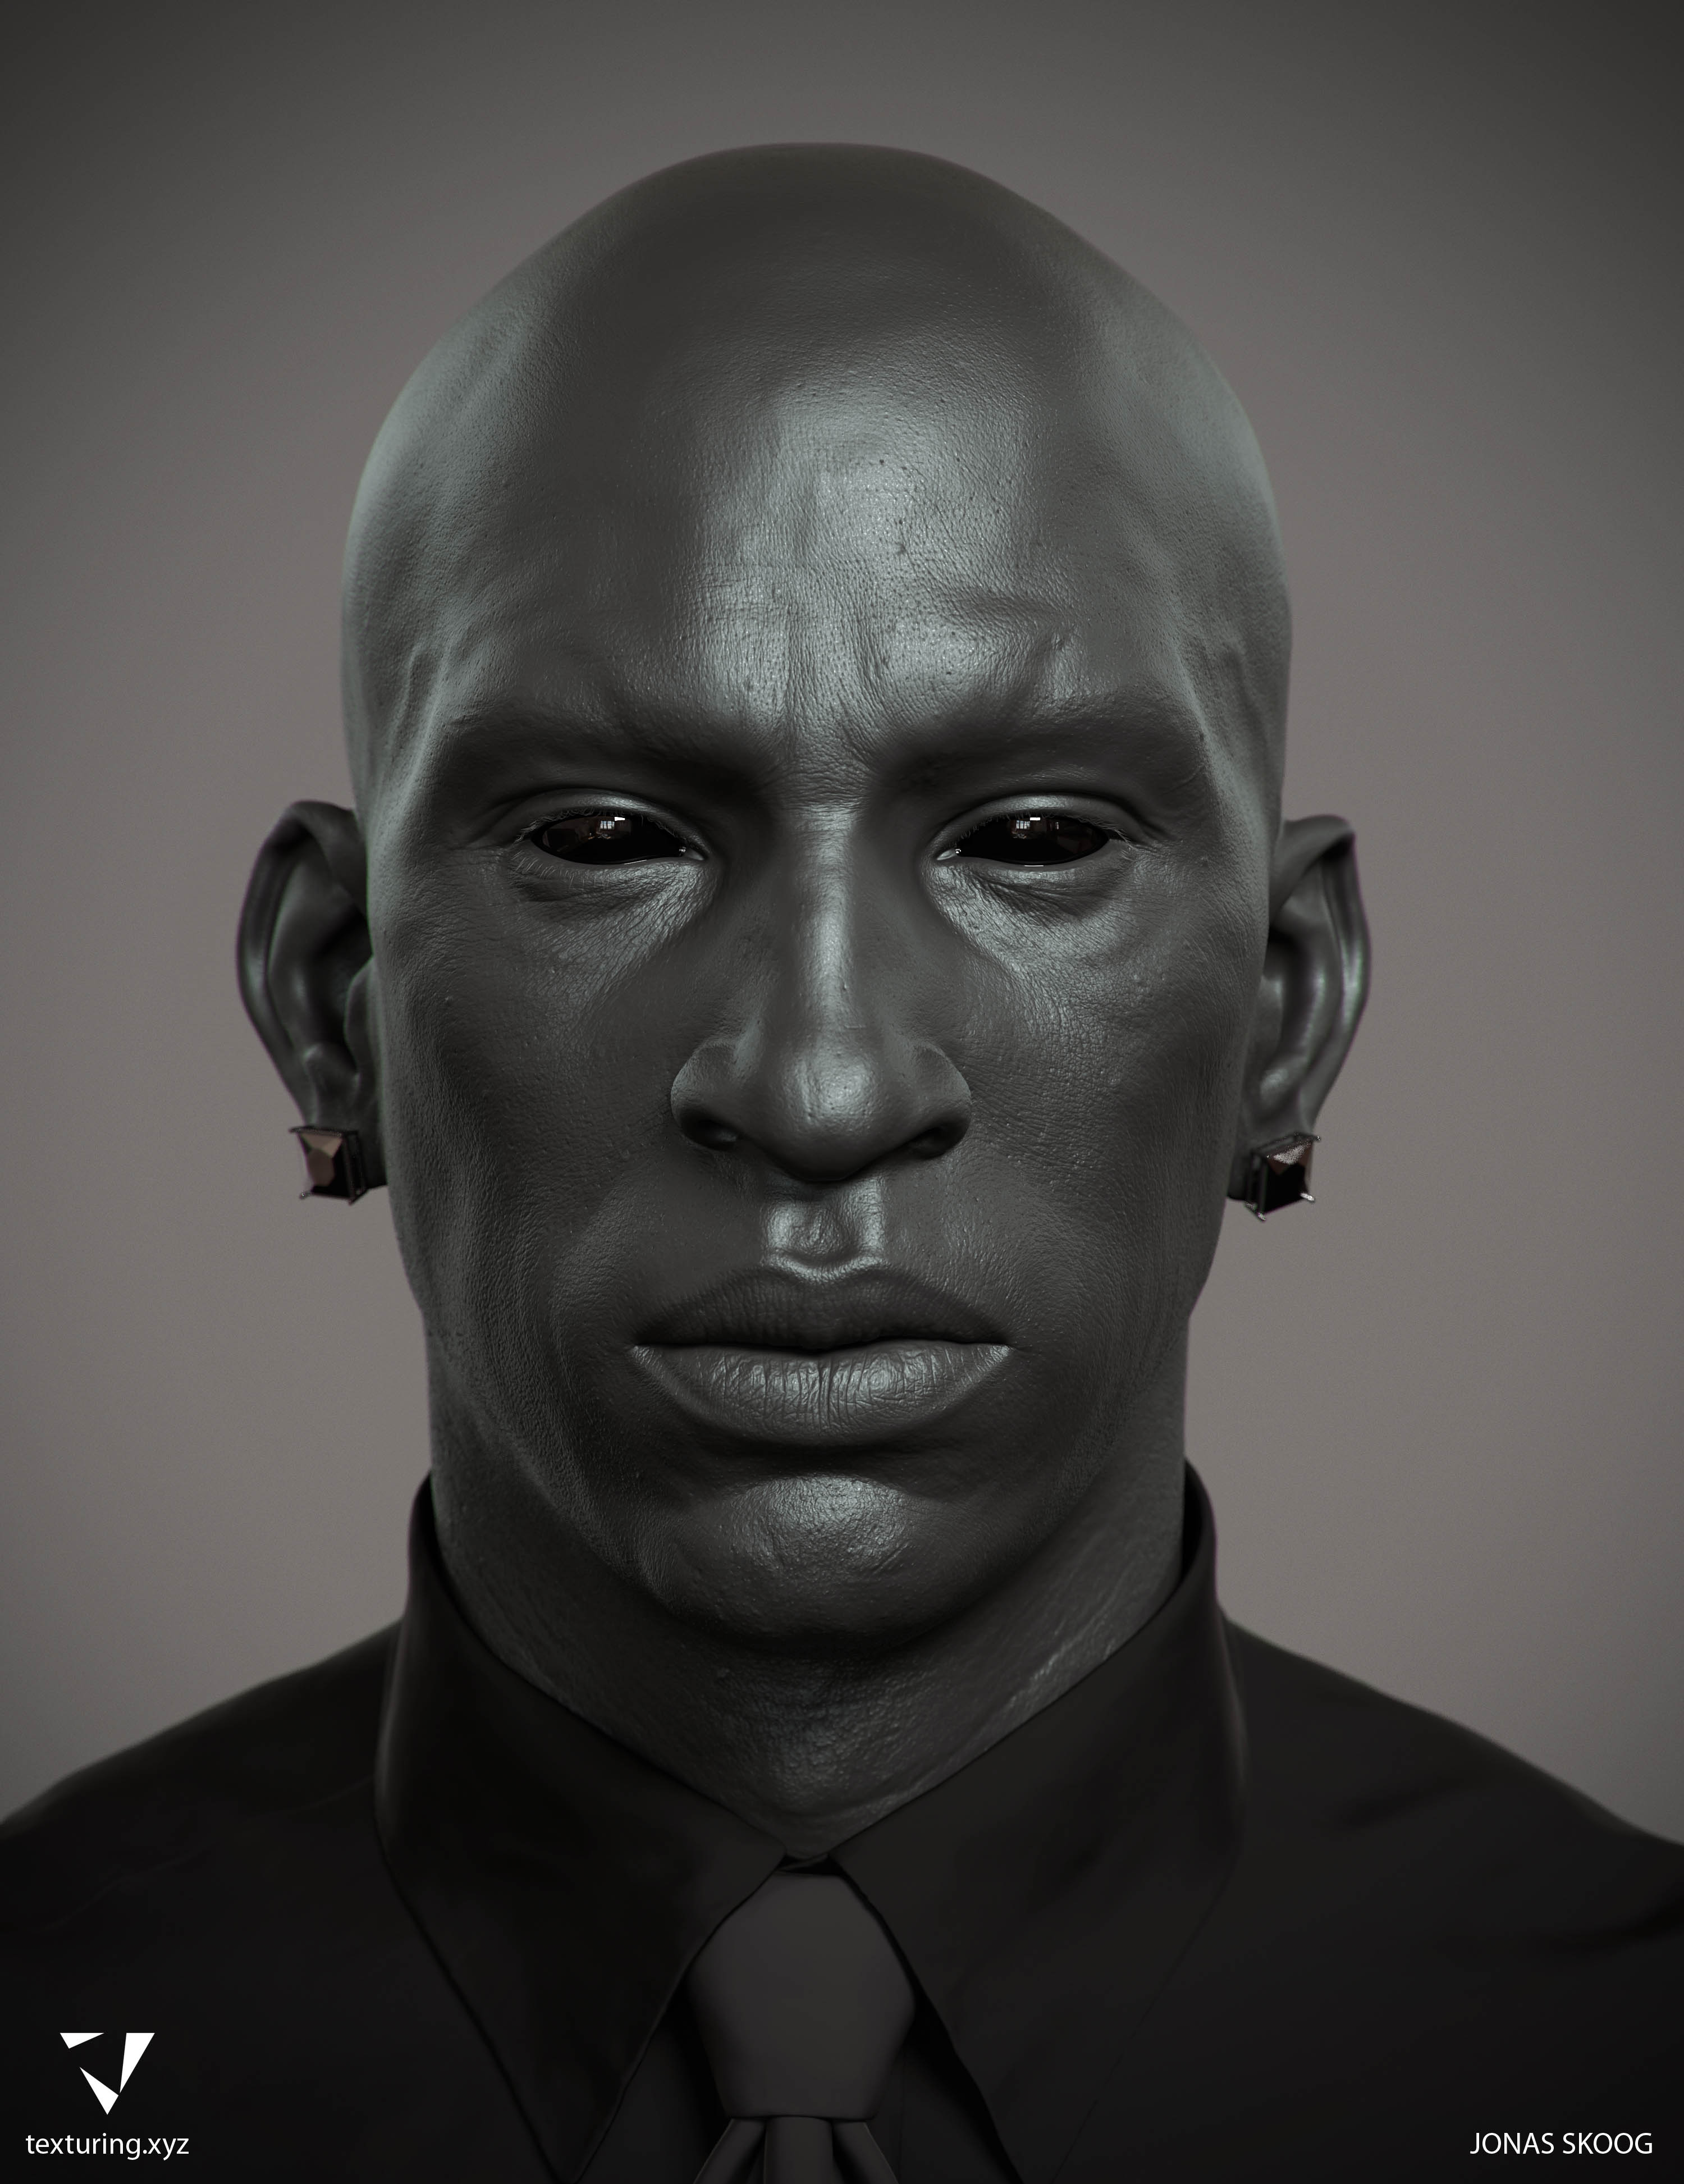
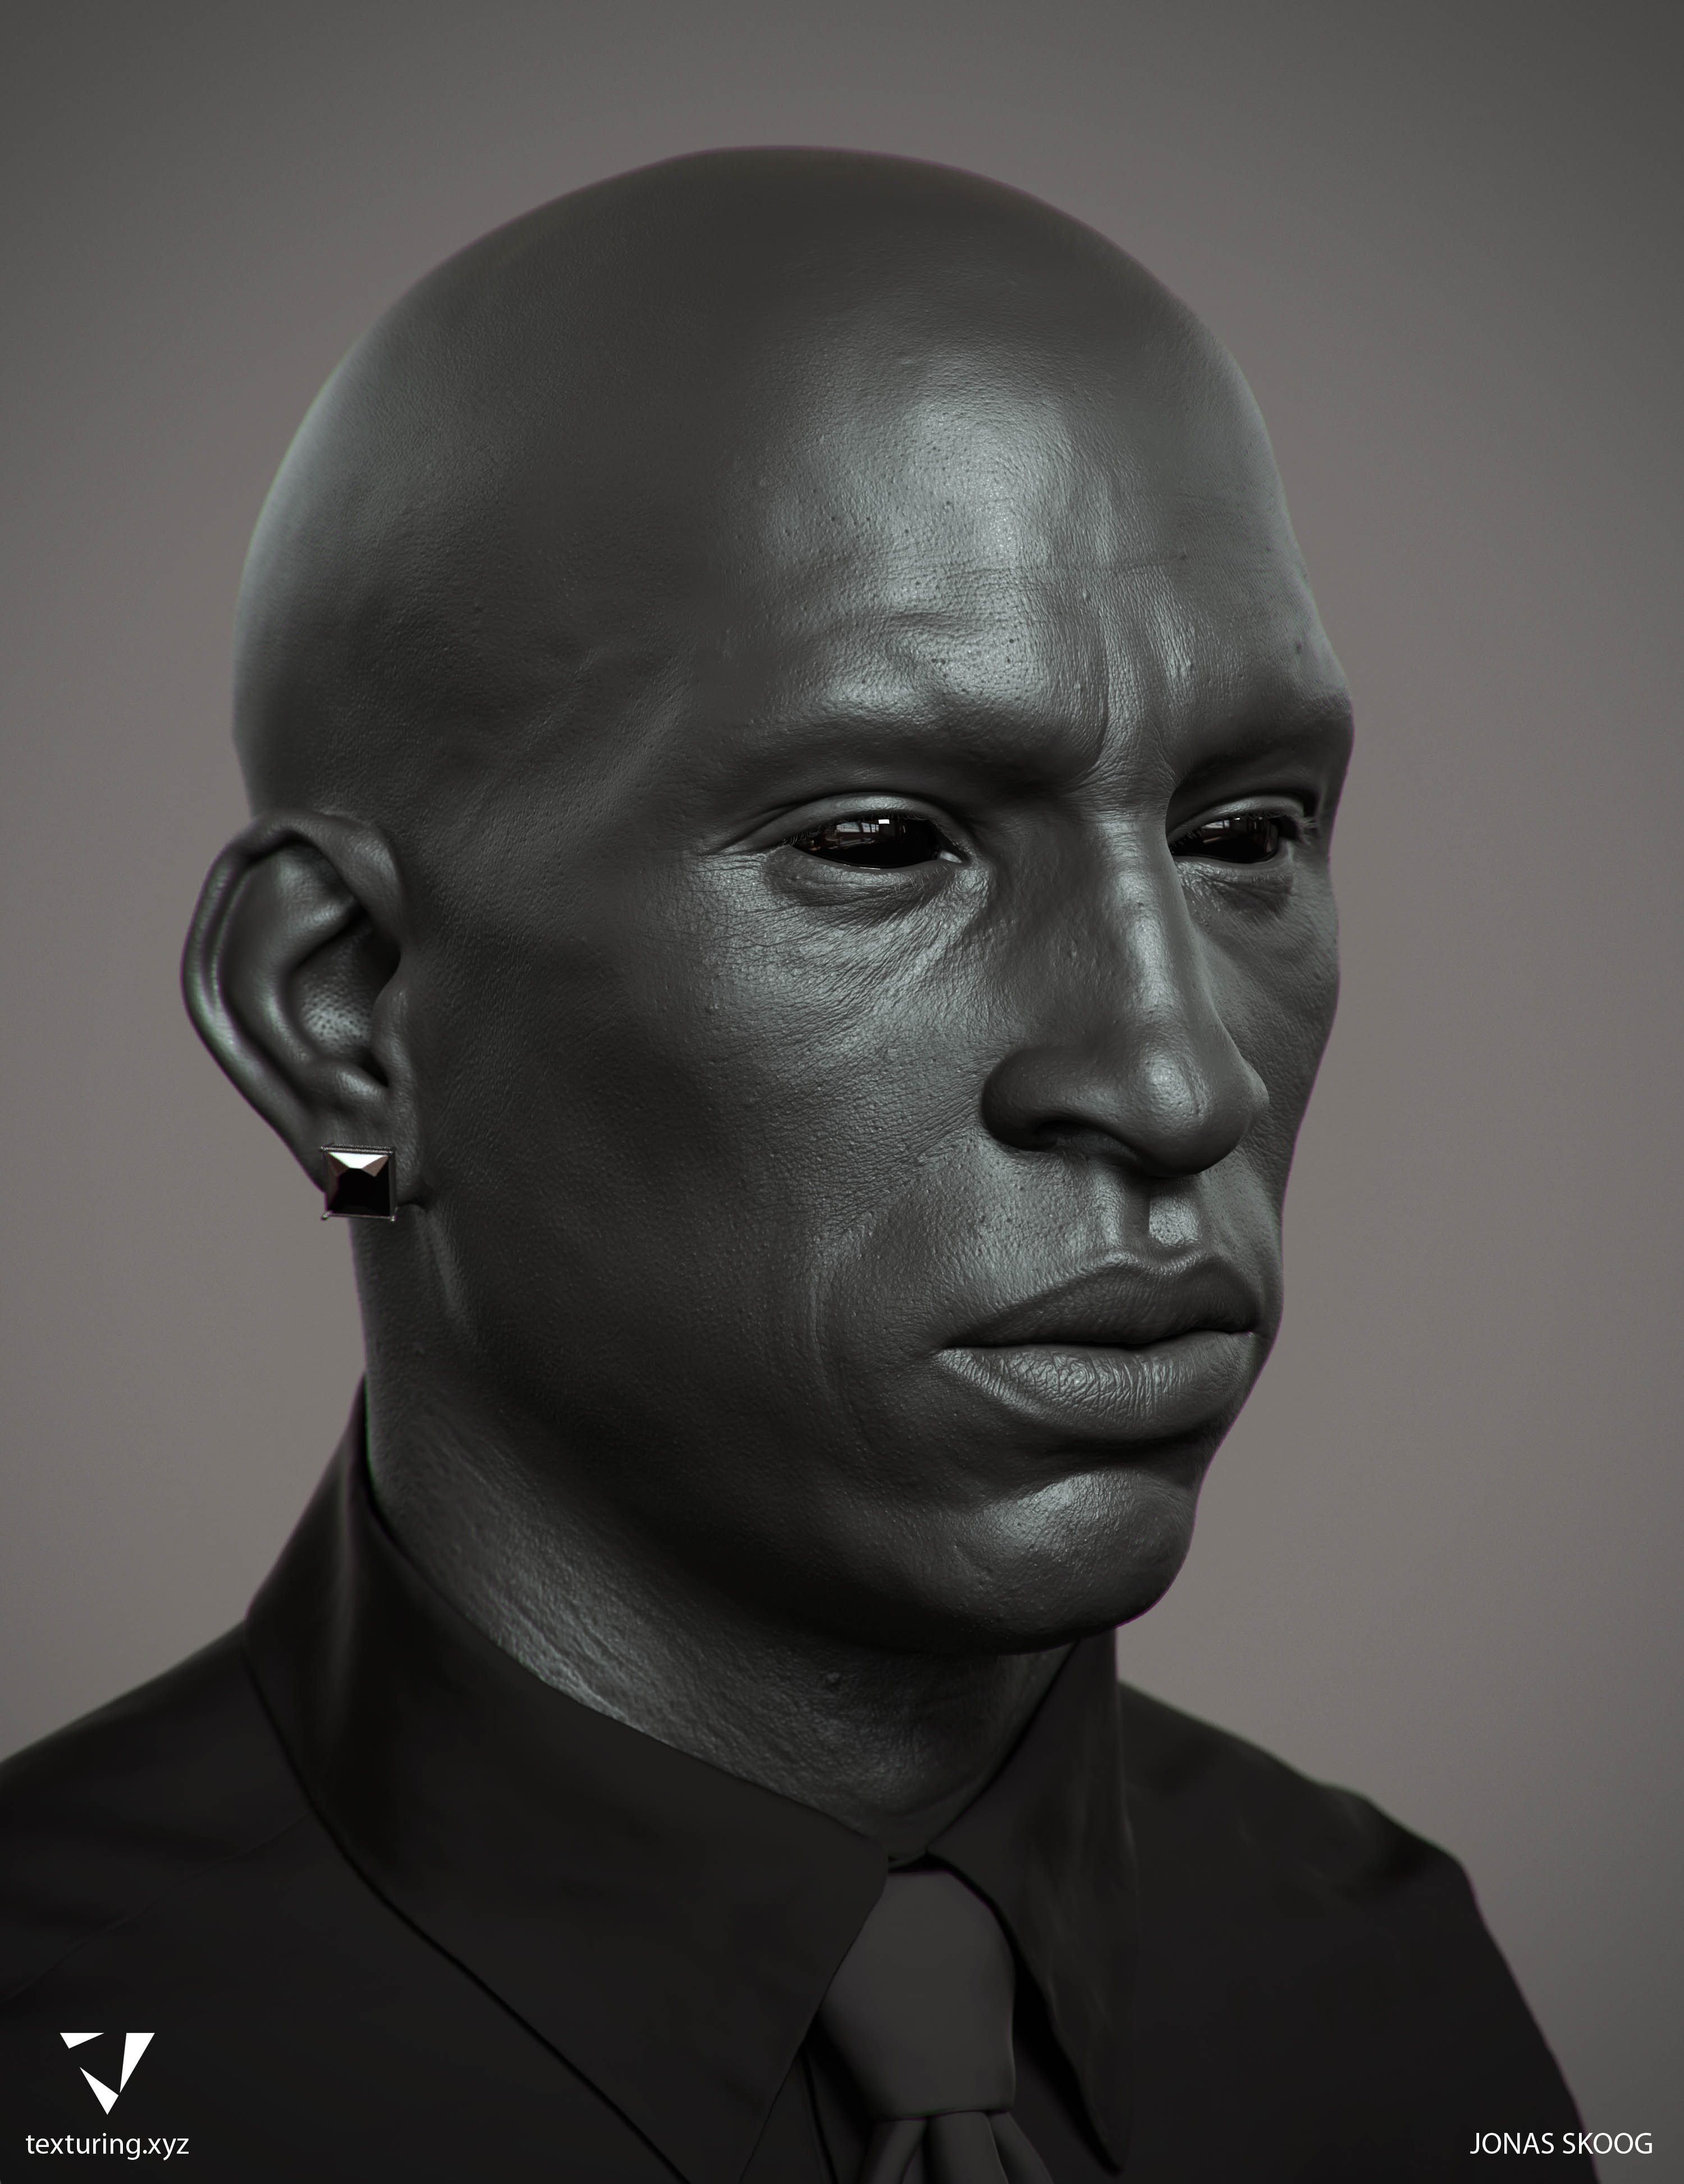
Attachments
really amazing …put some of the process
Very, very nice work Skoog.
Hey Jonas,
it’s been a while since I last checked here. Great work all across.
Cheers!
Hey, beautiful details. Any possibility of talks about the process?
Very impressive Sketchbook!
I am yet another person who would love to see your process for this last piece. It looks spectacular.
I really like the Surface Mimic products, and TexturingXYZ looks like it will provide some really great resources. Painting these kinds of details in Mari is great, but I’d love to learn how to bring my displacement maps from Mari back into ZBrush in order to refine them via sculpting. However, I haven’t found any method for bringing in multiple UDIM textures and applying them to a mesh in ZBrush. The closest workflow I’ve found was posted by Javier Blanco here - http://www.zbrushcentral.com/showthread.php?188940-Creature-Work-in-progress&p=1105118&viewfull=1#post1105118 - but it isn’t ideal.
Any information you could provide would be great. Cheers!
Jhon_Erick: Thanks man! I will put up as much as I can from the process
brettSinclair: Thanks Brett! Right back at ya, you talanted bastard 
Highlander_72: Hey  Yeah it´s been awhile hope all is well! Thanks!
Isunoj: Thanks man! Yes I will try to explain my process the best I can
SammehSAMURAI: Thanks!
cdizzle: Thanks! Glad you like it I´ll try to explain For my head which had two UDIMs I actually made an extra UV layout for the entire head within 0-1.
I then transfered the texture to this in mari and used it to project out the seams from my UDIMs. Hope that makes sense.
I will put together a breakdown to show the entire process from painting in Mari to how I extracted the details in Zbrush and continued sculpting ontop to push it further.
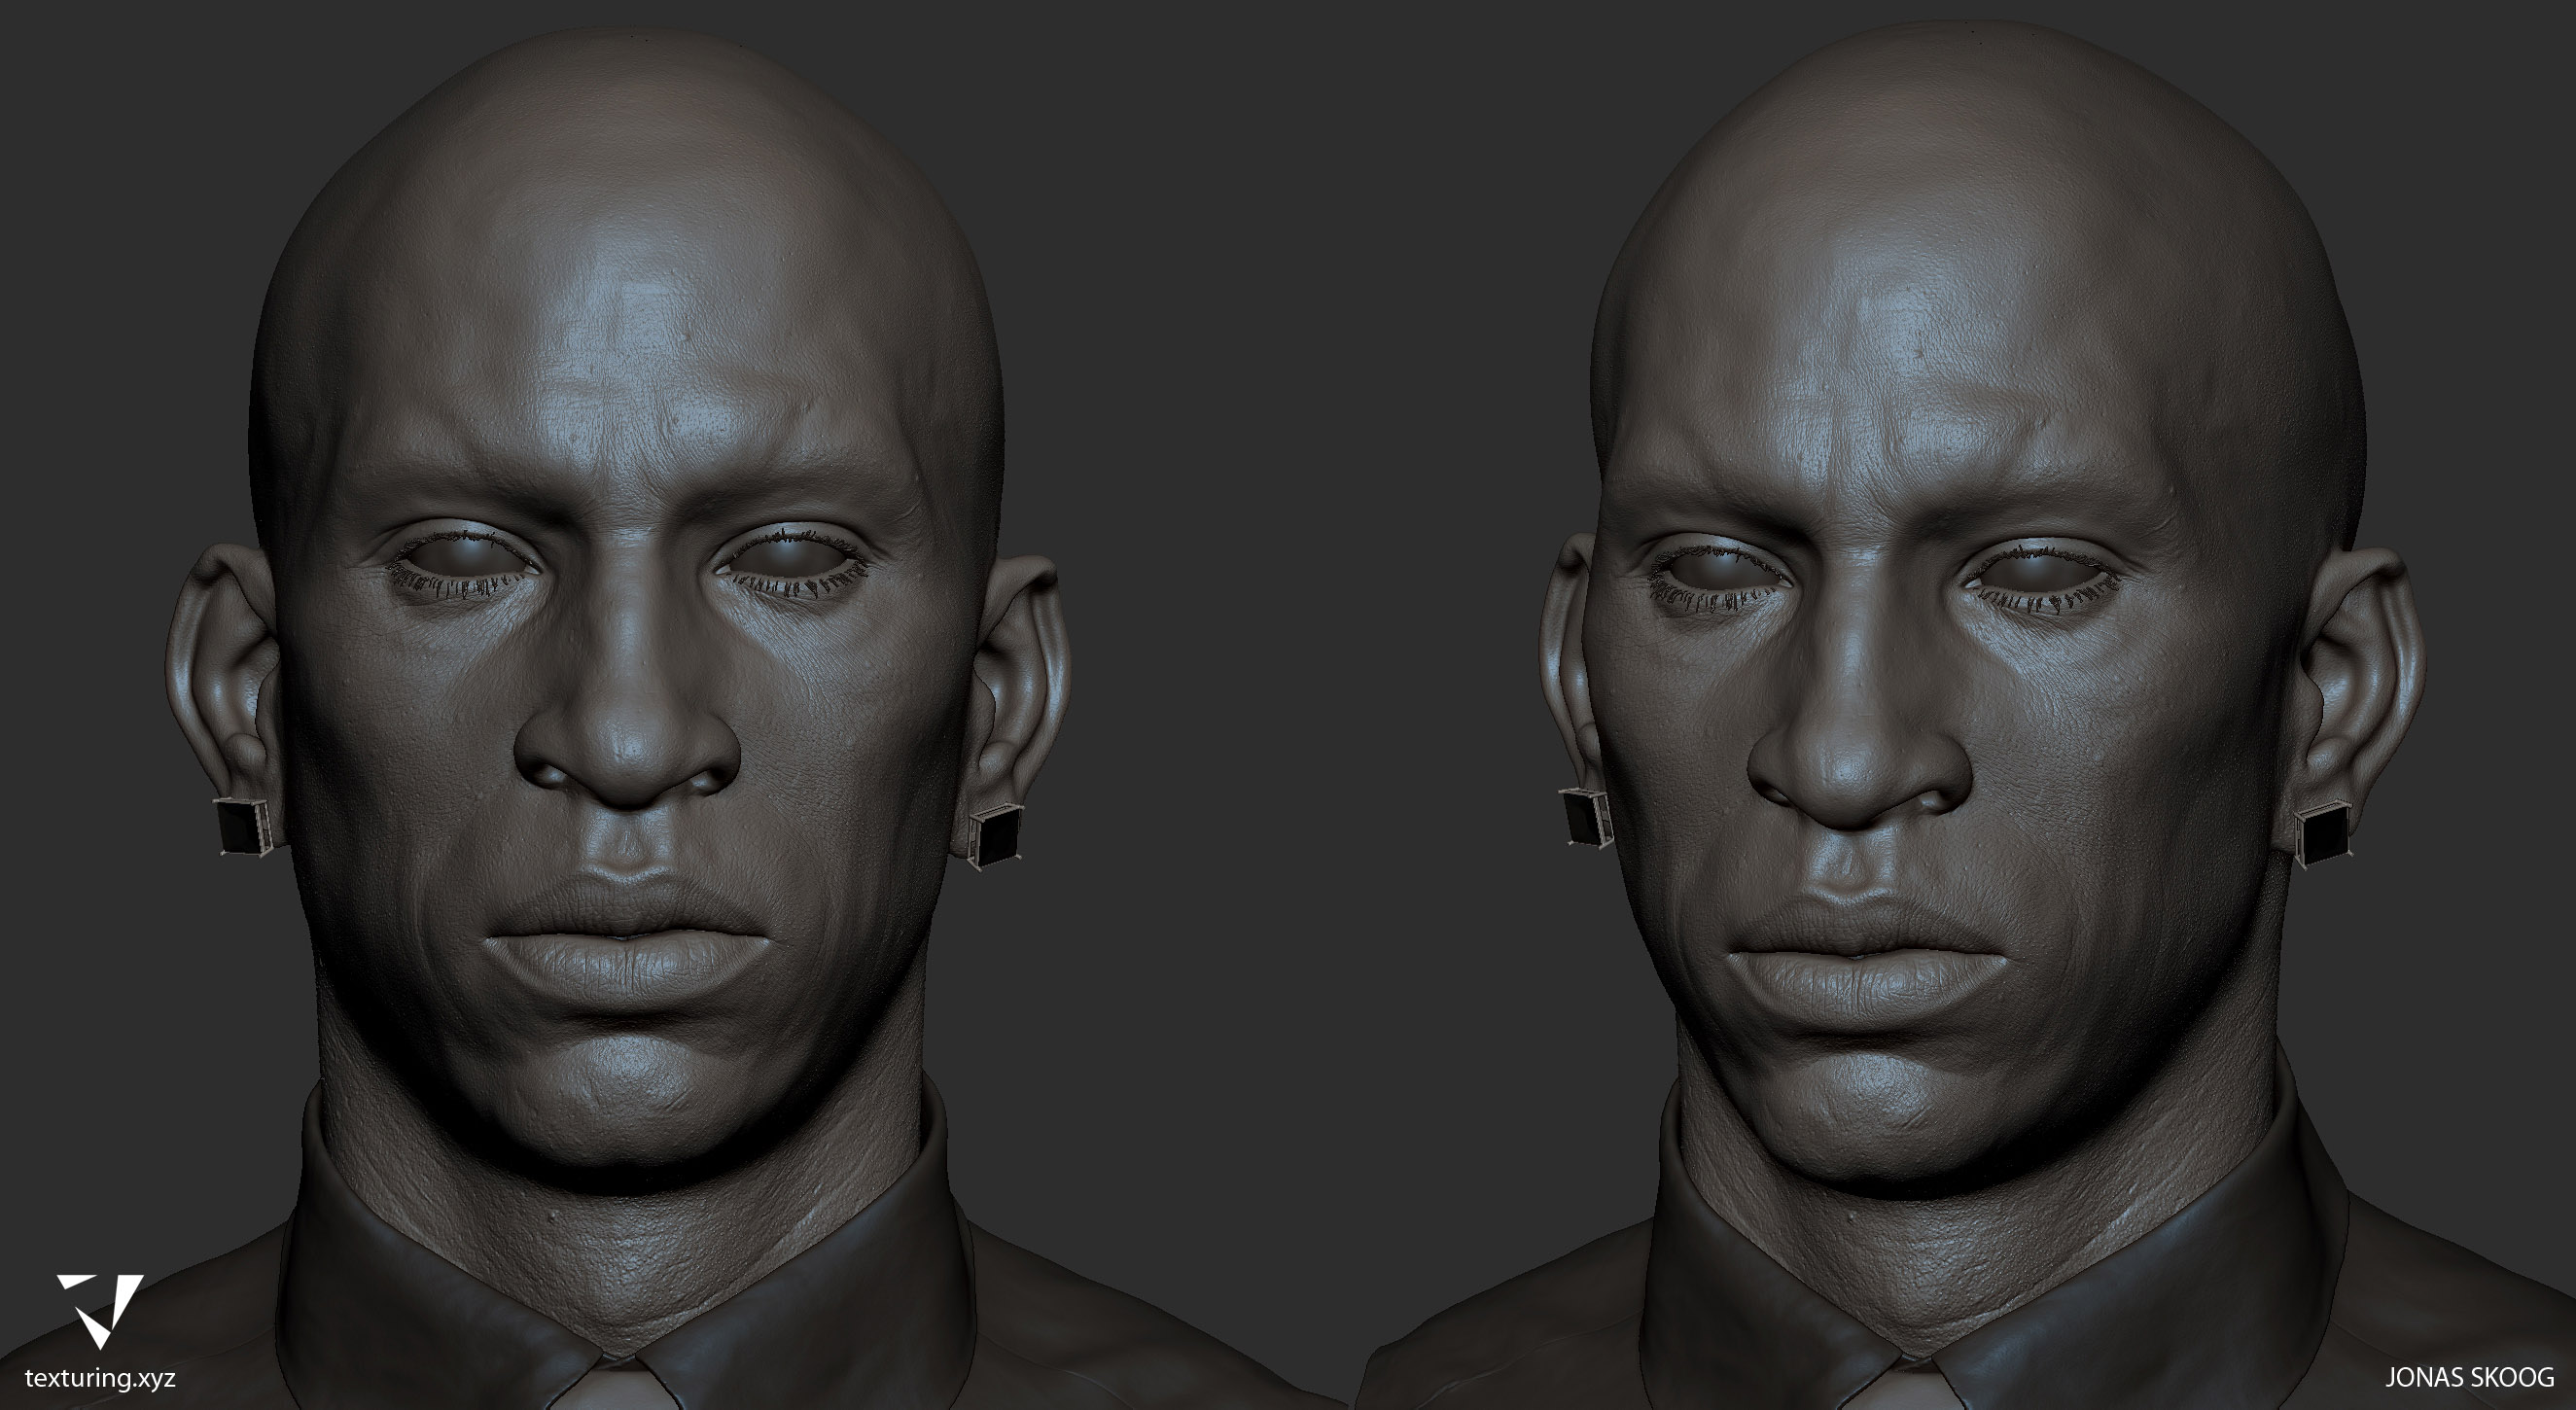
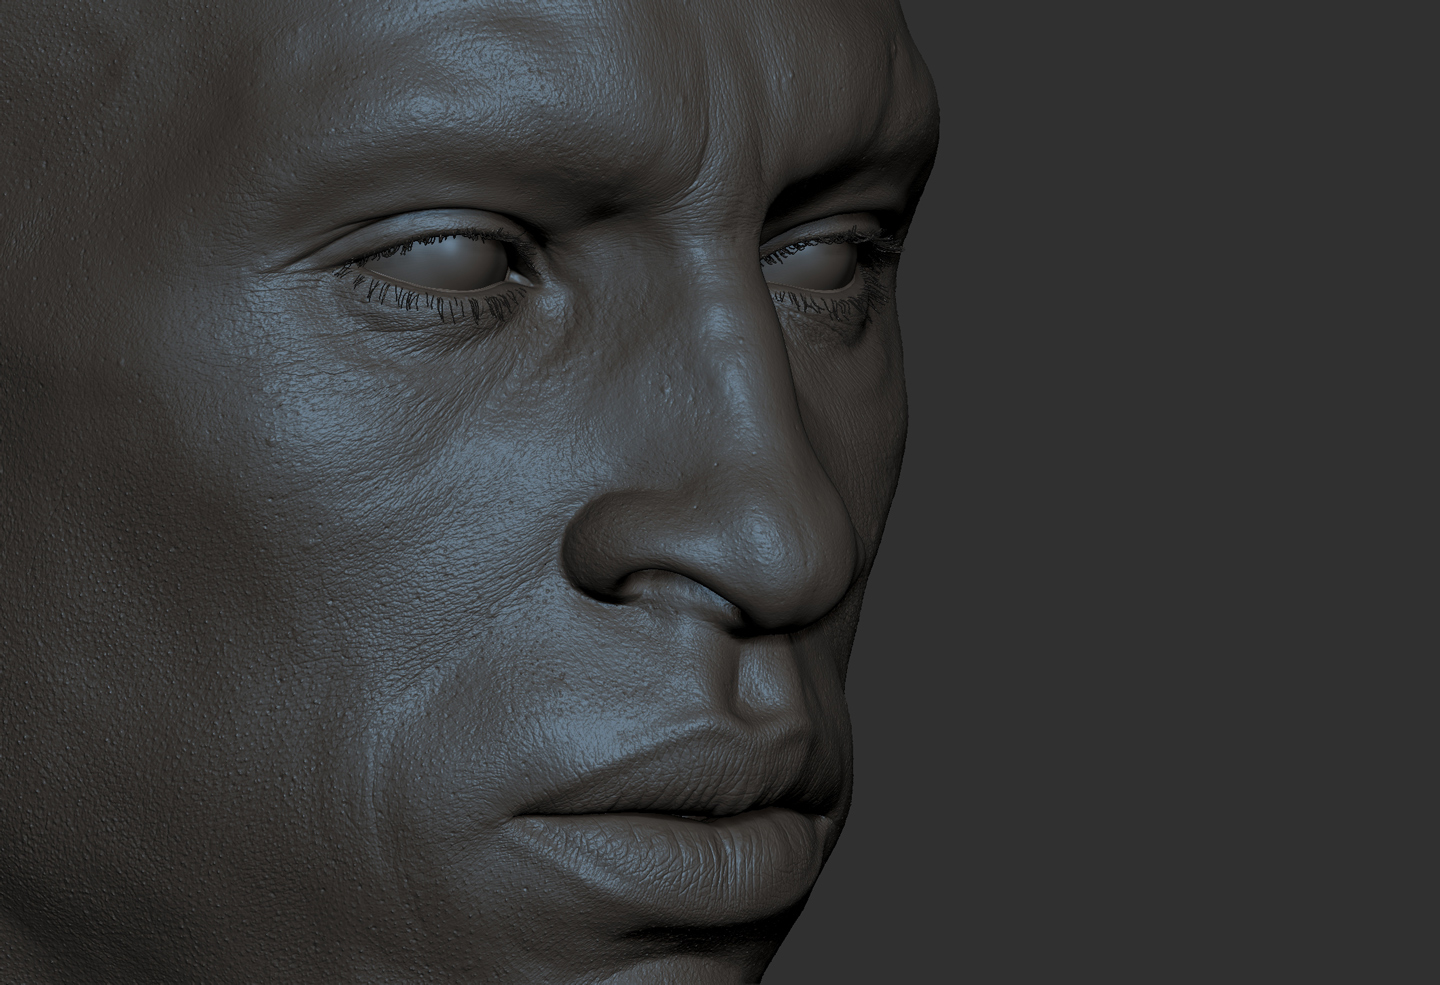
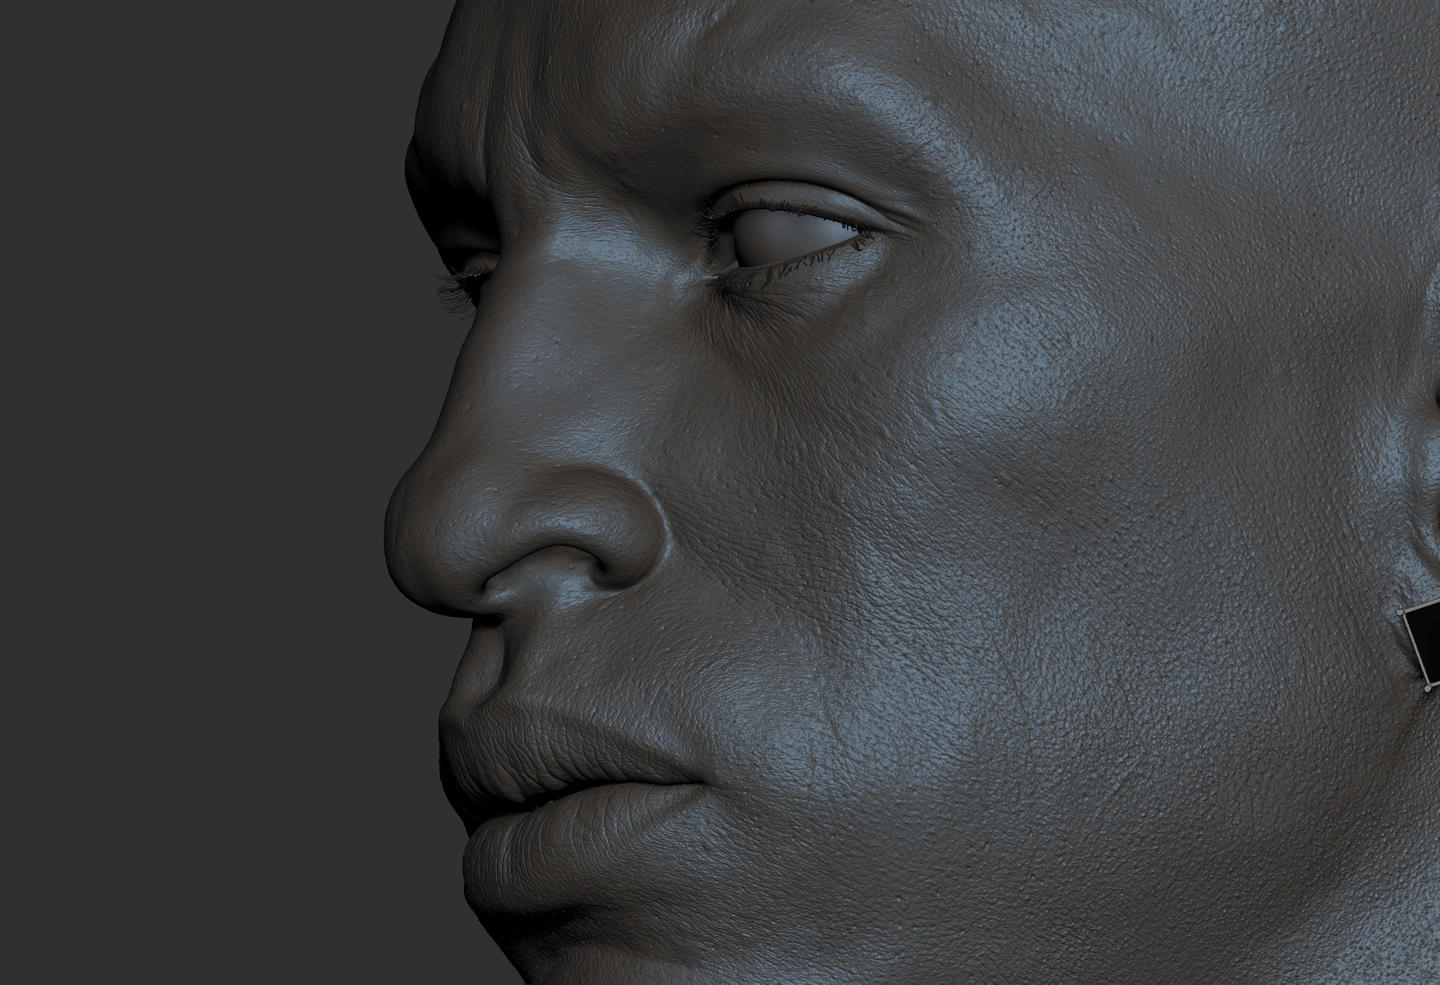
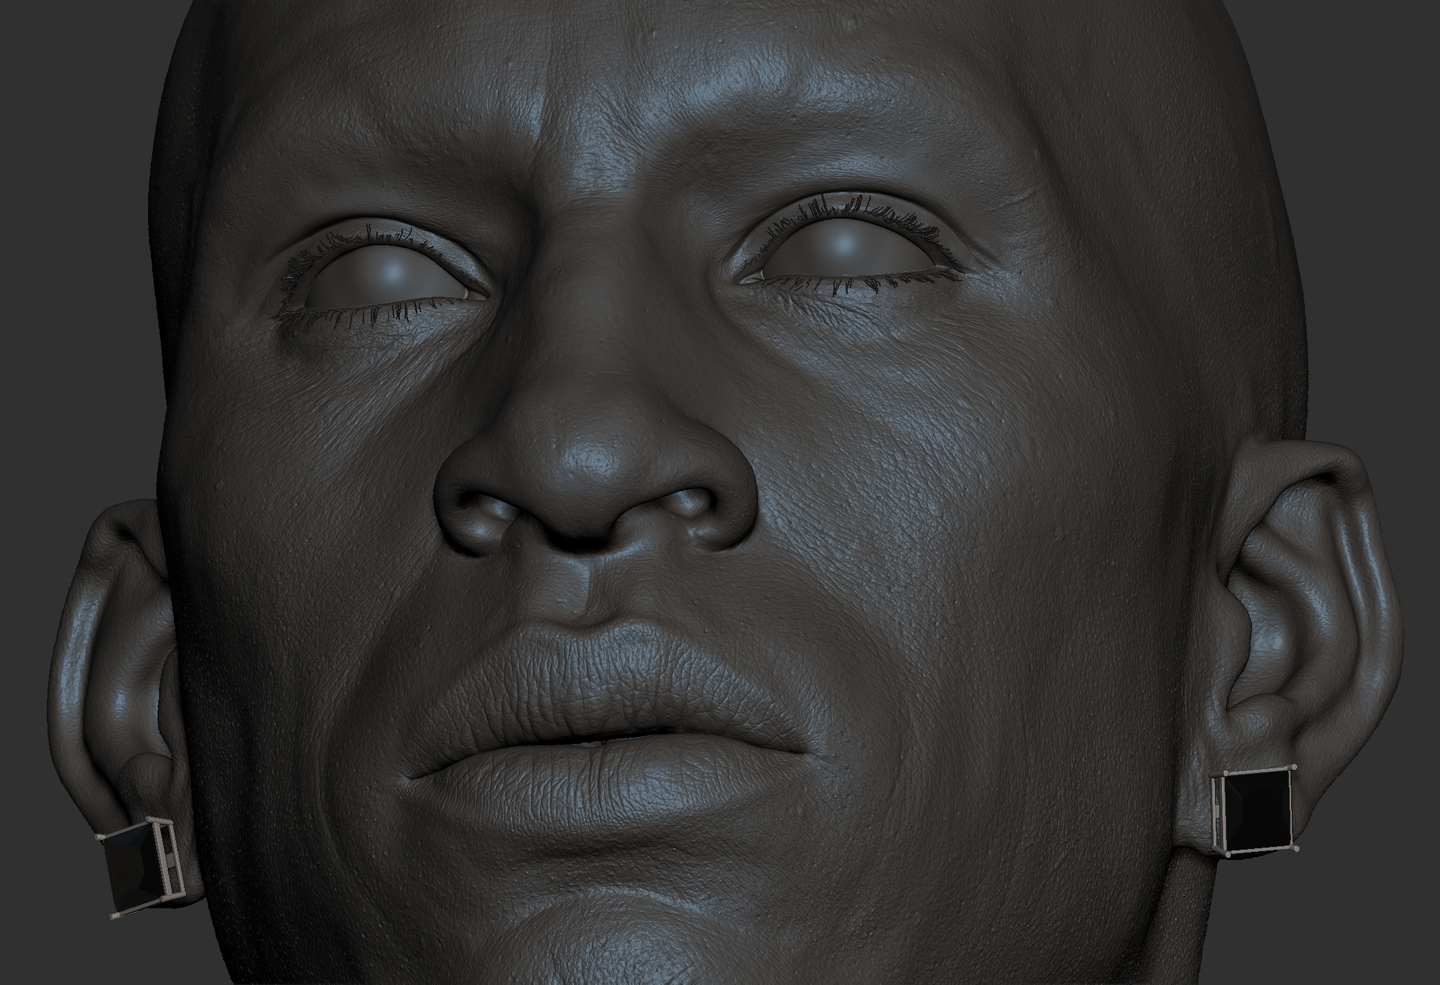
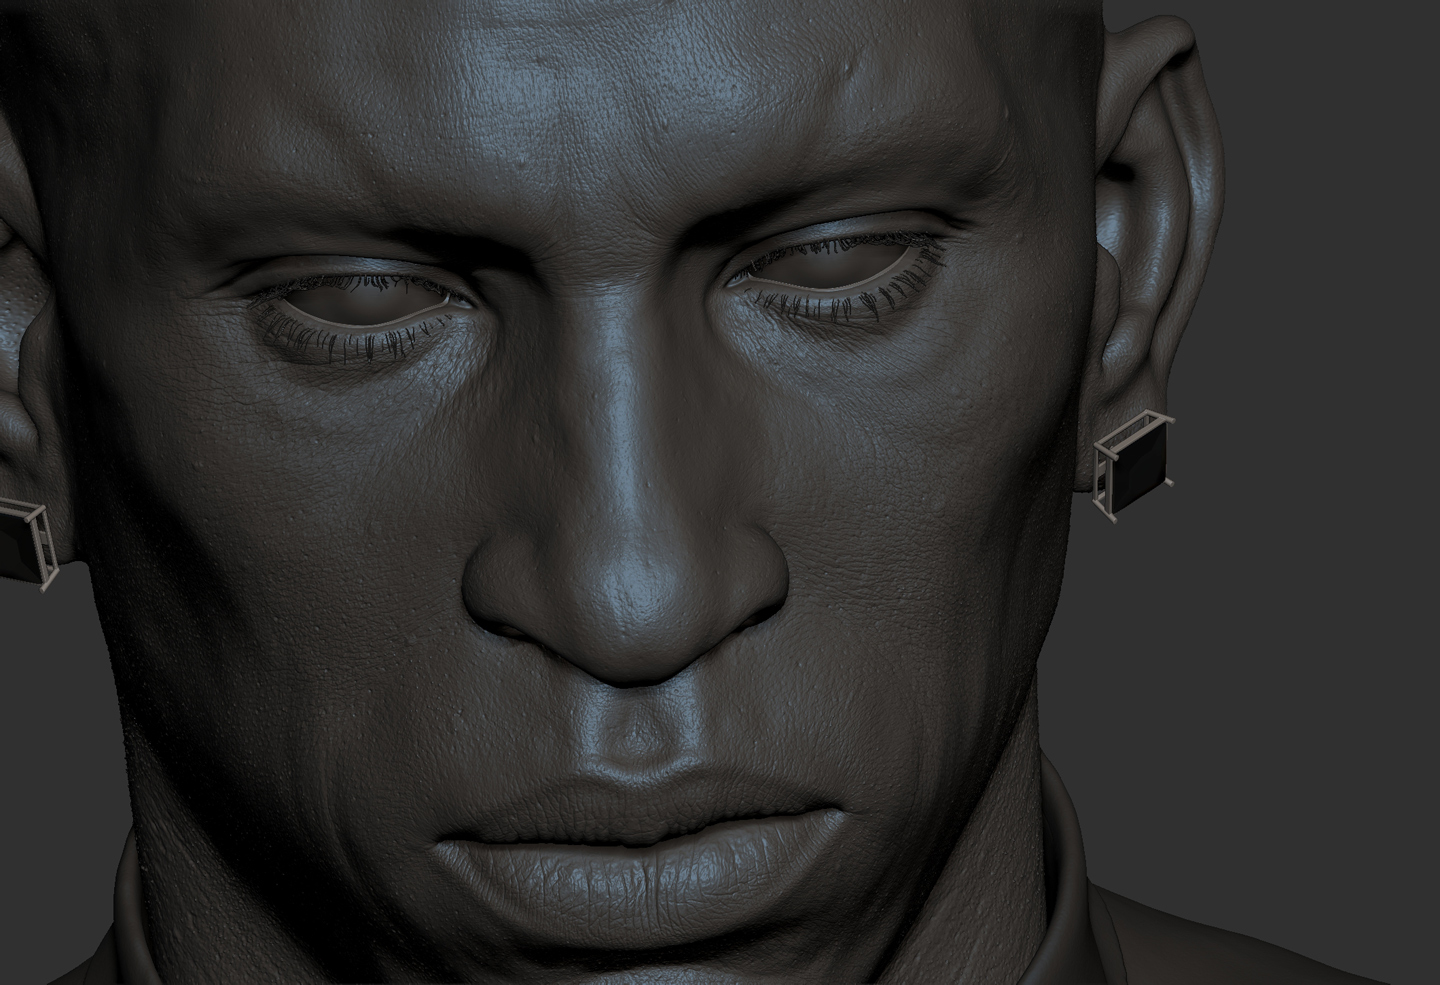
Here are some more Zbrush screens and closeups to begin with
Attachments
I’m very impressed Jonas. Snyggt jobbat. 
Awesome work.
looks very good indeed, look forward to trying out those maps once they’re available for sure…
wow~~
Thank you for the reply.
I don’t fully understand your explanation, and am therefore really looking forward to your breakdown. I appreciate you taking the time to present your workflow.
Thanks, again!
Awesome work Jonas! I love how clean the details are. Really well deserved top row
Amazing!! Do you recommend painting high frequency displacement in MARI as oppose to hand sculpting them in ZBrush? It seems you get much cleaner results this way.
amazing detail!
ty for share.