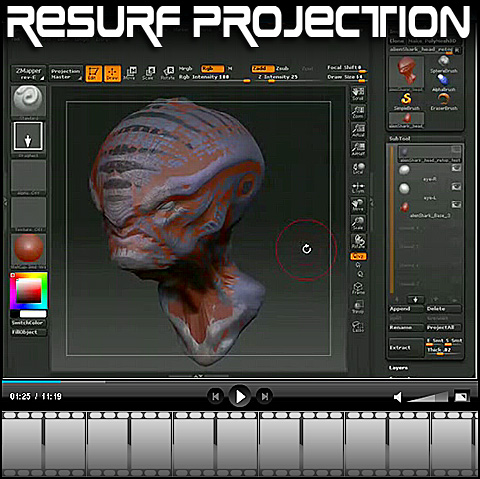
ZBrushCentral

Easy Retopologising models preserving the fine-detail levels (by Rastaman)

Hi, nice thread, but im haveing a very dificult time understanding exactly what to do when it comes to projecting the detail back onto another mesh.

What i want to do is, take a hi-res fine detailed head, extract the sub-d lvl 2 or so, and add a body in maya. then import that new mesh back into ZB3.1 and project the hi res detail onto the new mesh witht the body, and of course match up the sub-d lvl of both heads so they match in res.

I tried the projection brush and its not as accurate and i did not like the results.

it would be awsome if u can make a video, or link me to one that shows this.

Thanks very much in advance. - Jay :smiley:

Hi Jay,

please download and read my full tutorial from page 1 and take also a look at the short tutorial posted on page 2 of this thread.
All the basic steps you need are detailed descriped and you can try to adapt them to your needs.:wink:
If something special does not work after you followed my advices from the tutorials, feel free to ask.

Greetings,

Ralf

NickZ
How did you post a pick of your models with half the lines?
Did you just combine it in a photoshop program?

Control Freak -Yes sir, I used Photoshop. Took a screen grab with poly frame on and one with poly frame off and then blended them together in Photoshop.

Have fun,

NickZ.

Hey jojomondag,

I had the same problem.  Mine was due to the fact that when I brought my model in ZB3 for some reason it was scaled down by about a factor of 10.  With the model being so small the distance to do the calculations is to small this will also cause the effect of what happened with your model.  So make sure you model scale is correct.  I didn't know that it was scaled down until I brought it into XSI and the model was tiny compared to the model I started with.  Thats something to watch out for and it could be your problem also.  Hope this helps.

Cheers,
Nate Nesler

Thank you created this tutorial for our.:wink:

I have had a few people request a video on how to project detail and color from a hi res mesh onto a resurfaced mesh.

I had some time today to put together a video on this.

resurfProjectionMovie.jpg

You can take a look at the video by following this link:

CLICK HERE TO WATCH THE TUTORIAL

Hope this helps some people out.

Peace,

NickZ.

Hi Nick,

thanks alot for the tutorial - I had the frustrating scale problem and that solved it. Very nicely done.

seb

In fact I ran into a problem now :((( Im getting holes while creating the adaptive skin. I posted more detailed here:

http://www.zbrushcentral.com/zbc/showthread.php?p=397540#post397540

Thanks for any help,

seb

Sheb,

I have learned an even easier way to do things.

  1. Have a Hi Res mesh.

  2. Import your resurfaced mesh.

  3. Append your resurfaced mesh to your Hi Res mesh as a sub tool.

  4. Take your resurfaced mesh and subdivide it to your desired subdivision level.

  5. Store a morph target for the highest sub division level of your resurface mesh.

  6. Make sure you have your resurfaced mesh selected in the SubTool palette.

  7. Use the “ProjectAll” button in the SubTool section in the Tool palette. (This will do the same thing as the project option in the rigging section, but with different option for the project.)

  8. After the projection is complete, take a look at the model for some bad projections, if there are any then you can use the morph brush to paint out the undesired areas.

This method works really well on fingers, it is also good for making a one piece continuous mesh out of multi-piece models. I used this method to create a singe bust with arms out of a Hi Res bust model and a Hi Res Arm. I made tow projections and used the morph brush to paint a nice transition between the two projections.

Hope this helps!

NickZ. :slight_smile:

This is working great! Thanks again :smiley:

seb

Yes Nickz,

thanks a lot for your very good video, especially for the solution of the scale problem which also made me some serious headaches.:wink:

One note to your video:

I prefer to store a morph-target on my high-res mesh in the highest subd-level before I then use it in the detail-transfer-setup as a rigg for the zsphere.
When you have made your adaptive skin, you will see that the morph-target with the stored details of the original high-res version is now also within the newly created adaptive skin and can be used to restore bad projected areas.

Thanks Rastaman and NickZ, this is exactly what I was looking for. I have a model with many subtools and what I wish to do is combine them all together into one tool, export it and create a resurfaced version with uvs that I can project all the surface detail on to and project a normal map from. I’ll post some results later tonight when I test it out.

Thanks again!

UPDATE:
I followed the directions to a tee:

I created a low res poly of the combined upper body and head, using insert mesh (at subdiv level 1).

I created a combined high res upper body and head (at subdiv level 8), using insert mesh again.

I export both of them as separte ztl files then load them into a new scene.

I select the high res combined mesh in the rigging pallette then select the low res combined mesh in the topology pallette.

When I click edit topology, the original high res mesh shows up dark, as if it’s masked, but there’s no visible topology from the selected low res mesh. There’s only a single ZSphere (the original) sitting there.

If I begin using the SHIFT paint method to paint on topology, ZBrush eventually just crashes. I’ve tried using lower res versions of the high res combined mesh to paint but ZBrush inevitably crashes.

I tried the CTRL+SHIFT+LMB to unhide the existing topology but I still don’t see it. Is it not possible to get the existing topology in the retopo tool if you use the insert mesh feature? I did actually follow the steps and selected the low res poly under the topology section and the high res poly in the rigging section.

I don’t want to have to SHIFT+LEFT CLICK DRAG to generate all of the existing topology all over again … TONS of detail.

I thingk I must be the thousand one to reply, but I just want to say Thank you so much to give this so cool tutorial to me, Thank you

Lolonoa: You’re welcome.:lol:

Kosher: Check my reply to your problems in the topo-lab-thread.:wink:

Although the retopo-way I described is suitable in most situations, it often lacks when a model has open holes like the eyes and mouth etc…
Then the normal retopo-projection-way for closing the holes or changing the geometry and project the old details leads to wired results because ZBrush seems to loose the connection at the hole-borders and calculates trash.

So here is a possible solution for that problem by John Strieder:

http://www.zbrushcentral.com/zbc/showthread.php?p=451586#post451586

:smiley: good job man and thx

Hi ! facing the same problems like Kosher. No retopologised mesh visible after pressing topology > select topology. Rastaman,I can’t find where you address this issue in the topo and flow lab thread. Kosher ,any answers yet?

http://www.zbrushcentral.com/zbc/showpost.php?p=451578&postcount=672