ZBrushCentral

Dragon Promise Kept

OK. So I promised my best friend I’d draw a dragon picture for his son… 4 years ago. As soon as I was about to start on my next personal project, my friend decides to cash in on that promise. :lol: So I gotta come up with some type of cool scene for a dragon. Any suggestions? I got a couple ideas, but open for others.

In the meantime, here’s the initial ZSphere setup with the mesh. I just started sculpting the hands. I may end up doing the head seperately and placing over the body for final rendering.

ZD2.jpg

Attachments

ZD1.jpg

Looking good so far! :wink:

Here’s an update on the image. I like the overall direction, but there’s still some issues with the neck and lower legs. My poly count for this guy is just under 100k at level 6. When I try to add another resolution level my computer froze so In the end I’ll either split the model up to sculpt seperately or just add finer details in 2.5D (probably a little bit of both).

I’m thinking of still doing the head seperately so I can get some nicer detail in it. I roughed out a pose for him close to what I want. Still need to work on the problem of a few ZSpheres making the mesh crazy after posing. I want to creat an indoor scene with him just appearing out of the shadows from behind some rubble in a tomb. Any ideas are welcome!

D1.jpg

Attachments

D2.jpg

That is looking really good! love the pose! The wings look a bit neglected, but I imagine you are getting to those. Look forward to updates. :slight_smile:

Looking really good as you develop this creature. The posing issue is answered in the zsphere thread in my signature. Basically you are moving some zspheres in more than a single axis at once you get this problem as the structure gets confused. And you probably don’t have support zspheres in the right place. Not to take away from your thread but if you look for my dragon thread, you will see some tips as well. :wink:

Keep 'em coming…

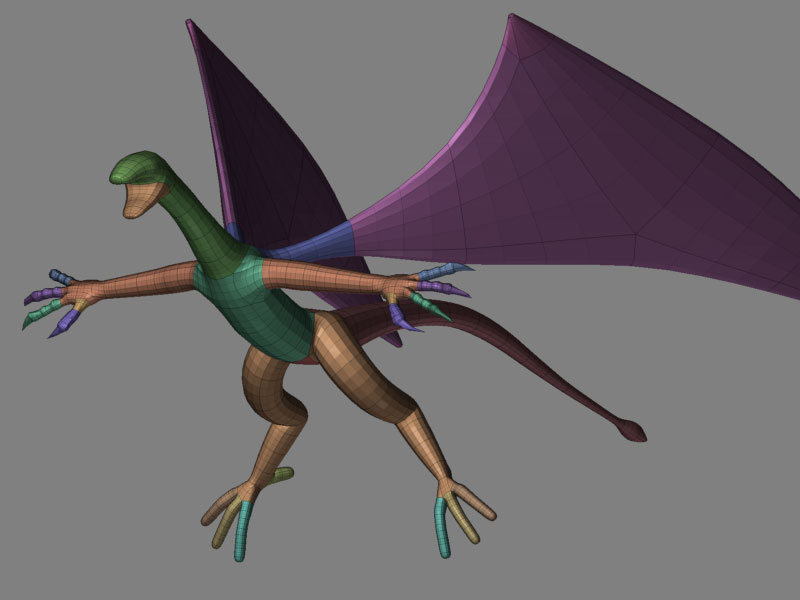
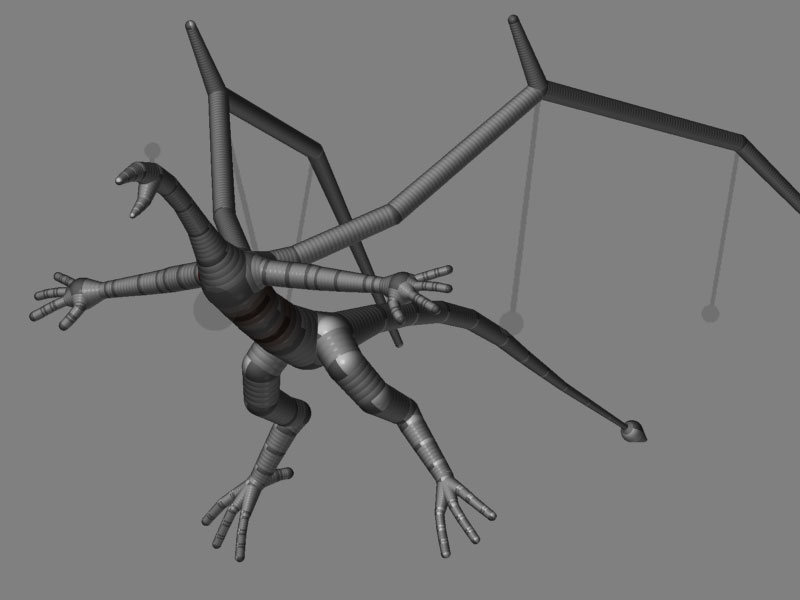
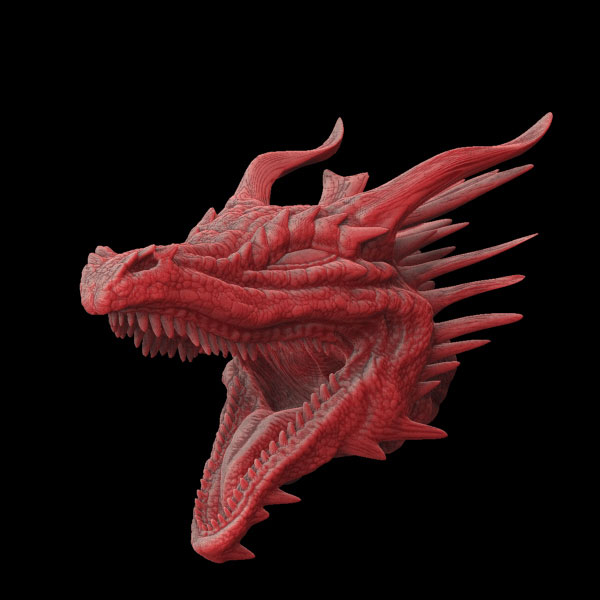
Thanks Jason. I looked through your ZSphere thread before creating this guy and got some really good tips from it and I thought I had created a decent setup. Before sculpting, I saved my morph target and then tried to pose it several ways and it seemed to work very well.

I tested it over and over as I was sculpting it to see if any issues arose. There were some minor ones, but nothing I couldn’t fix with a little bit of smoothing. Probably a few ZSpheres a little too close together. I also realized the distortion of the hands in the posed image I found out I was rotating the wrong ZSphere.

Then I sculpted the wings and posed them. All of a sudden that “finger” on the top of the wing exploded. And it does this by just rotating one ZSphere at any point on the wing. So I think I’m SOL there. But I figure, I can just resculpt that area after posing. And it’s mainly just that spot that’s giving me headaches.

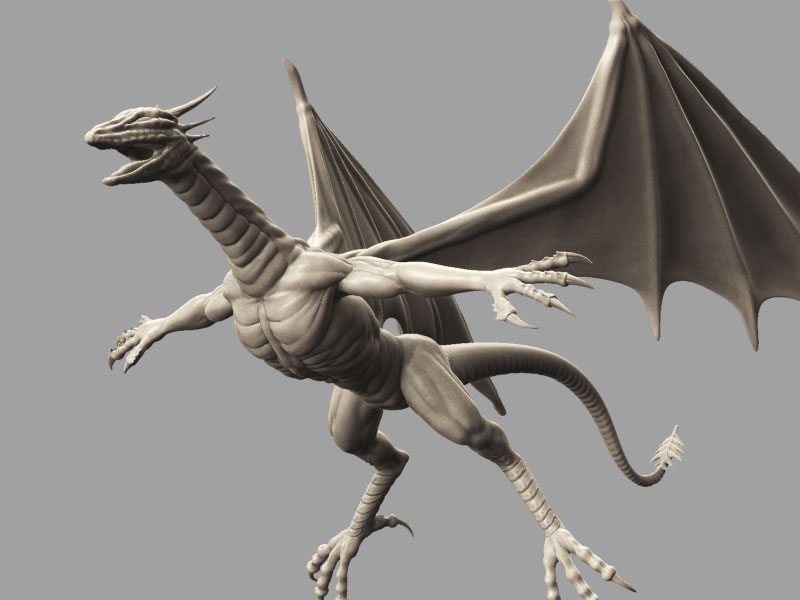
Thanks Harmonic. Yeah unfortunately the wings don’t have enough polys to ad much more detail. That’s why I’ll either have to detach them to increase the polys or just add the detail in 2.5D.

DragonTest.jpg

Another small update as I explore my lighting options. I kinda wanted to keep this all in ZBrush so I could add as much detail as I need without problems. And also to push the software to see if I can get the results I really want. So this is an initial lighting test to see if I really do want to end up rendering this in ZBrush. Still working on the pose and composition too.

The yellow light is supposed to be the hint of flame creeping up his throat, but not sure about that yet. And I’d like to show more of the wings, but I’m trying to get a similar look and feel of the environment as I got with my Dragonlance image (shown here). The fog will have to be painted in, but I think with a Zdepth grab, I can do something with that. I need more reflected light, so I may need to add some more soft lights for better ambience. This may require more than one lighting pass to do it. I’ll be doing some GI experiments as well. Still lots more to do!

That is looking really good, like the way the lights and materials are interacting

Materials applied to specific areas in Zbrush will give you the effects you want. To make the most use of the lights. More specularity, the more the materail applied areas catch light or not. You can use this technique to bring out more light in certain areas without actually using complicated light setups. :wink:

Oh yeah, as for the wing problem. yes, it has no support zsphere in that area, so it does the ‘gimble-lock’ or ‘mad normanl’ thing. :wink:

Testing lighting…

Well, I’ve been working on a lighting scheme for the dragon image and decided to go a different route with it instead of the dark tomb. This will now be more lit than what I initially intended.

I took a gnome model I created recently (I might add him into the dragon image or do something else with him) and threw my frog image as a background in there just to have something back there to work with. I was working with the GDI setting and maps along with some fog and it seems to be working out. I’m getting somewhat of the lighting I was after but with more ambience.

The only thing done to the image was lightening it a bit in Photoshop after rendering in ZBrush. The texture was Jantim’s rusty iron texture just slightly altered and lightened up to work with the lighting.

At some point I’ll try to work up a small tut about the lighting settings.

Gnome.jpg

Finally finished the dragon head last night. I may go back to the body for a few more small adjustments before moving on to the scene. I’m not sold on the pose though. I need to do a few different pose studies to see if that’s really what I’m after.

This isn’t the final material, just something to show the sculpting a bit better.

DragonRender6.jpg

Attachments

DragonRender5.jpg

DragonRender4.jpg

KrakenCMT,

Wow!
This looks very cool!
Thumbs up!! :+1: :+1:

~BW

Cool dragonhead! Your friends son should be satisfied i guess .

:wink: :+1: :+1: :+1:

Superb! That is a fantastic dragon sculpture my friend.

Your dragon head is amazing Kraken.
Is there a chance you’ll explain how you did it? Perhaps the next time you continue to model it you’ll make a Zscript out of it? I’d really like to see how you work.
Thanks.

Sweeeett! A little girlie lookin, but still tough enough to knock a small 3 legged-dog around… kidding.

Really nice detail work, flows, well, I do think the head is a bit effeminate, but it may be a girl! :wink:

Thanks guys!

Girlie? Effeminate? Awww! :lol: Well, Maybe a little bit.

I was just looking for a thinner, sleeker looking design. Hopefully it won’t come across that way in the final rendering.

Cheshire, I’m just about done sculpting the dragon. Just a bit of fine detail to add. But I don’t do anything special anyway. Everything I do is pretty much learned from the community tutorials or the Pixologic educational movies. But maybe I’ll try to do another quick version of the dragon head and make a ZScript from that. It won’t be anything revolutionary though. :slight_smile:

I’m kind of new to Zbrush, and mostly I bought it to do textures with.
Maybe it’s a common type, but what material is that you’ve used in your WIP pics most recently?

Thanks. :slight_smile:

ABC

Kraken, can you please recommand on some video tut that you learned from then? :slight_smile:

I learned from every single movie in the ZClassroom on the Pixologic website. Here’s the link to that. These gave me the most knowledge about the basics of ZBrush.

http://www.pixologic.com/zbrush/education/zclassroom/class.php

Then there was the forum tutorials. There’s no one tutorial that I learned it all from. If I wanted to learn more about color texturing a model, I would search the tutorials for anything to do with that and then watch them all. I really learned everything I know about ZBRush from Pixologic and the community.

One of these days I’ll give something back to the community. I’m working on some nice skin materials (One I used for my Santa image). I’ll be uploading those pretty soon.