ZBrushCentral

dino project WIP-body Update

Hi all:
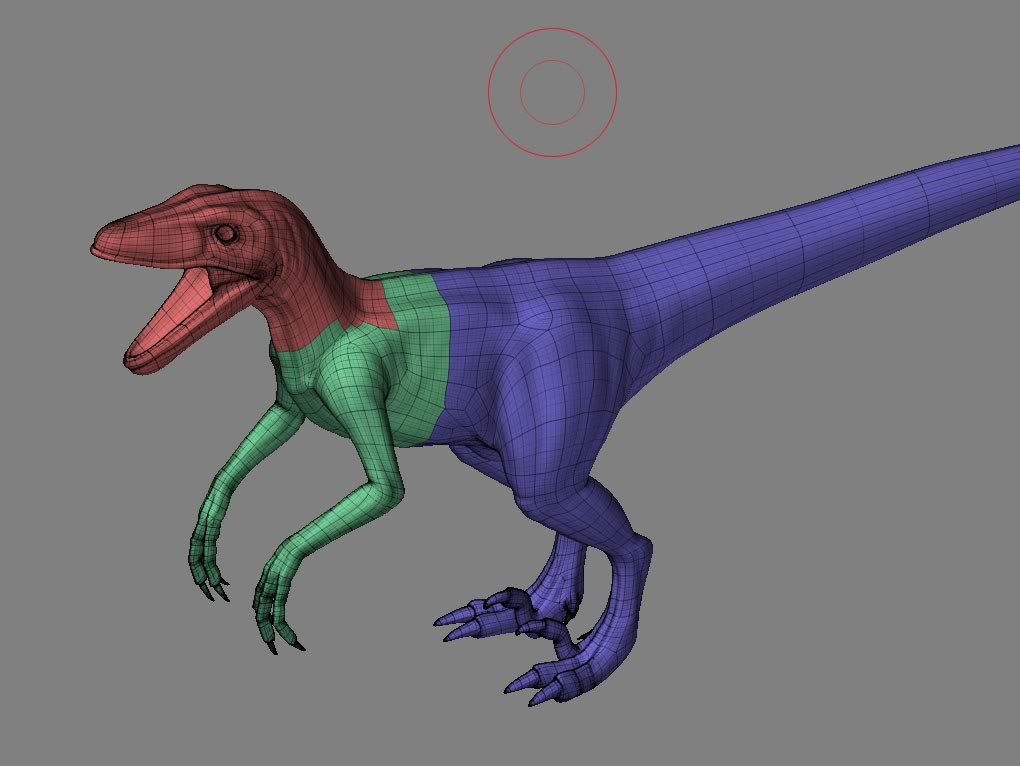
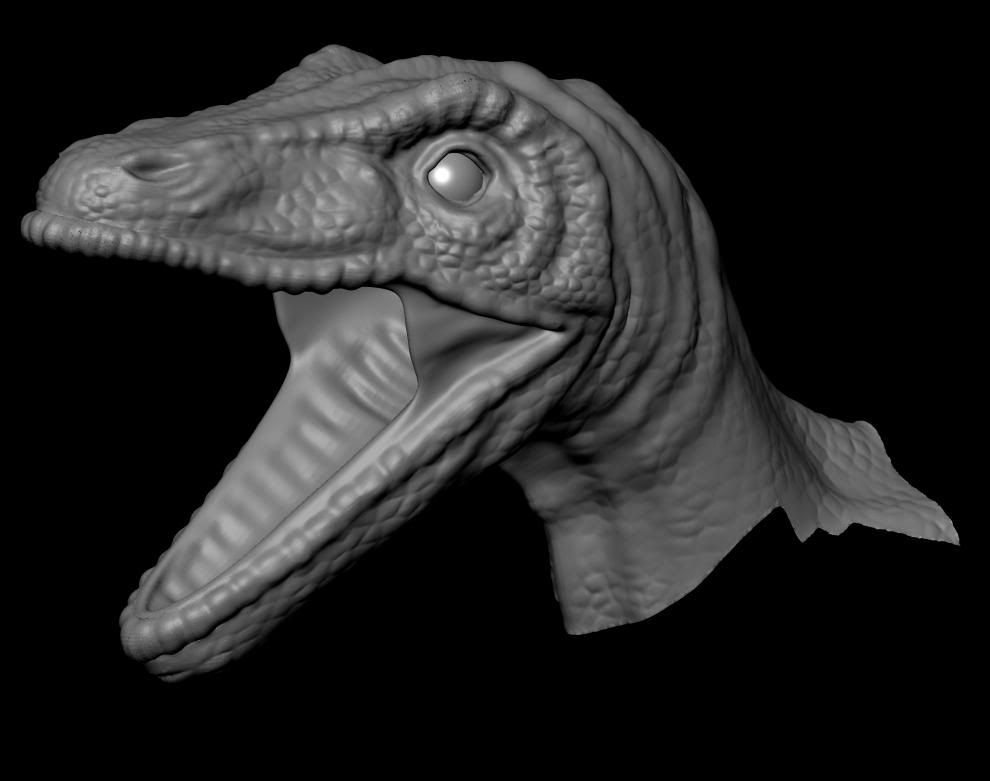
I start a new dino model and this is how it looks for now.
C&C welcome as always
BUT…I encounter some serious problem …now I AM CALLIN FOR HELP!!! any1 could give me a pointer might be a great help.

i start the dino model in xsi as 1 piece of Geometry and layout the uv.
import into ZB and start sculpting for overall shape and muscle structure etc.
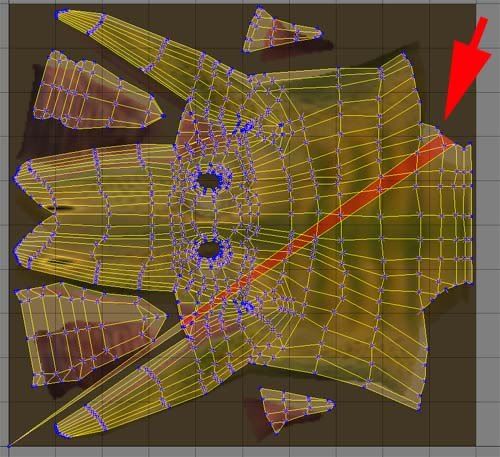
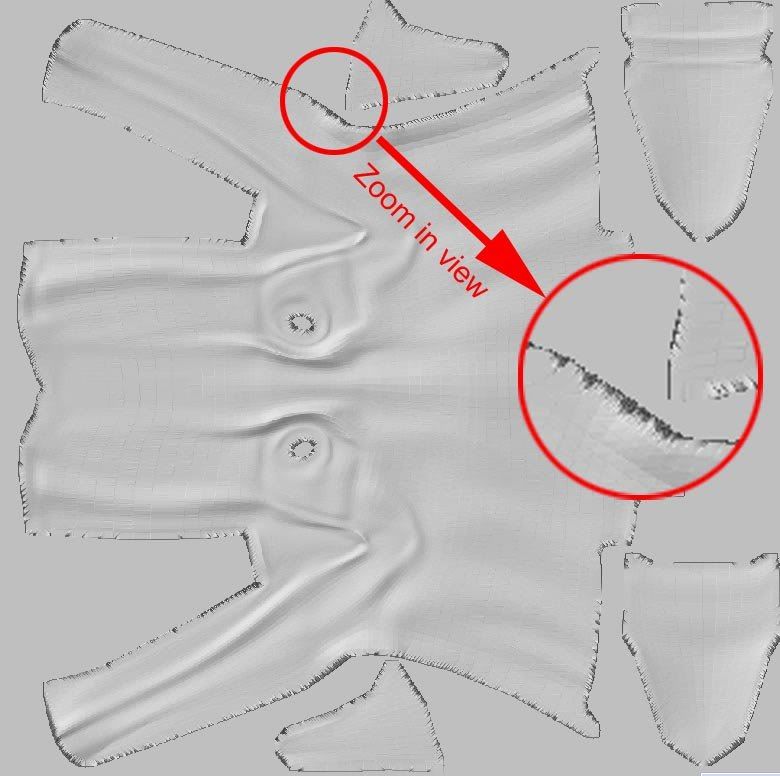
then i delete all the poly except the head uvGroup and start detailing and painting…the problem comes when i create the displacement map… i found ZB screw the uv layout…1 uvpoint jump to cord(0,0) …:evil: :evil: (show in folowing picture mark in red arrow)

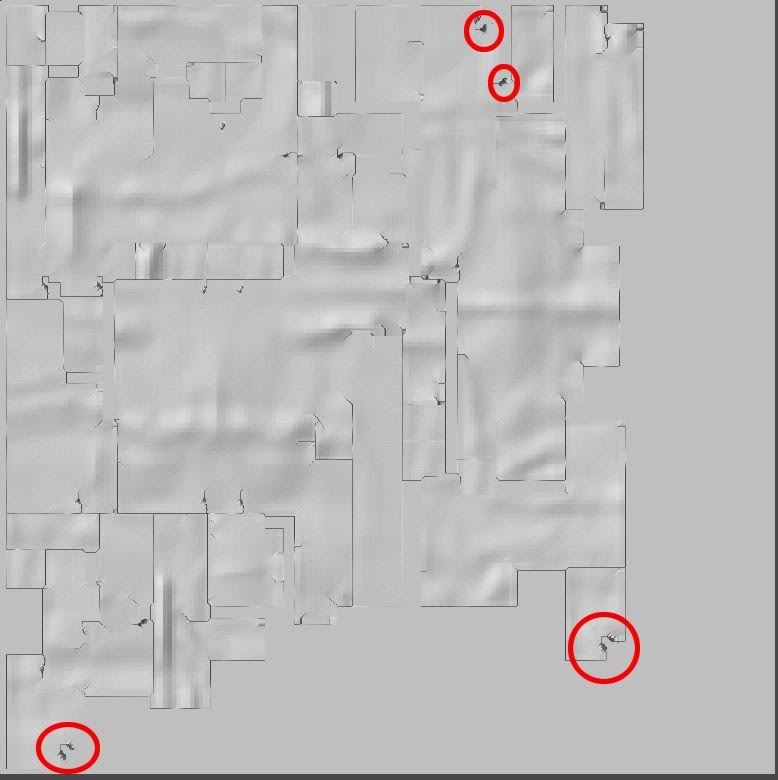
i try to fix it in xsi that was easy only 1 uv point screwed. But the problem is in xsi the model is 1 piece (whole body) i have to delete the rest of the body.
then export it . ZB doesnt read that!!! guess what a explosion mesh :frowning:

any suggestion or comment of the work would be great. thx

textureWIP_Phase2.jpg

the uv group

the screw up uv

well i wish next version ZB can have ability to adjust uv layout within the software. make that as my wish list.:wink:

can’t offer you any help. the model looks nice at this stage though. can’t wait to see more progress on it.

thank for the quick reply abxy.
i will keep workin on it.

thats an awesome model,my 4 year old got a kick of it, recognised the Raptor right the way

glad u like it volk23.:wink:

no help only praise here…Your dino modeling is extremely well done…thnx for sharing and I hope someone is able to help you get your troubles straightened out. Good luck.
Ron

thx Ron:)
actually i found out some of the tools i save still have the good uv layout.
and i will use them to create the dispacment. now what a relief. keep on workin his body and legs.hope can get it update soon.
but if u know why this happen please still tell me the solution or suggestion.
donno how i screwed the uv in zb.:confused:

hi xsiflasher

I find that sometimes when using select hide you don’t always hide what needs to be hid. If you grouped the mesh before importing to zb or after a good rule of thumb is to…

when select hiding make Sure to turn double sided on and rotate the model religiously…zoom out if you have to to make sure you only have visible that which you want visible. Once in a while…specially at higher subdivisions you might miss one and that’s all it takes. You think you are moving only the groups you wish to move but are actually moving a missed one as well.

I know its not a solution, sometimes you can isolate and drag that point back though, but something to do for future work.

hope that helps some.

Did you used smart resym? I often have this uvs problem after using smart resym…

Evretime you plan tu use it, save your tool before, apply smart resym, then generate a normalmap to check if you uvs are still correct.
If not, reload you tool…

thx for helping me here.
aminuts:
i will try the trick that u teach me thx again.

Sebcesoir:

i did try smart resym b4 but didnt work for me. its always create a seam when i use smart resym… so anytime i sculpt the “X symetry” is on unless i use some alpha or pm to deform surface .
maybe its me that dont know how to use smart resym:o
anyway i will keep workin on the dino.

thx for ur input Sebcesoir

i will put some update when i get progress on the model

1 problem goes … the other comes … :ex:
i create the displacement in zb but it give me some weired map.(circle in red )
just doesnt looks right to me… actually if map it in xsi will create the something like the polygon is broken (or a big seam)…i did the guvTiles displacement test its better but still got some(show in second pics circle in red):confused:

this is not the 1st model i did in zb. some model 's displacement work just fine.
some model will create some ugly displacement likt this… drive me crazy:cry:

wat did i do wrong…please help me .

the displacment is print screen version of crop and fill in zb .

hi xsi,

I haven’t really had time to play with the displacements so don’t have an answer for you however …check out the trouble shooting forum…there have been several similar questions on seams and such in displacements and think you will find your answer there quicker than waiting for a reply here.

thx for the suggestion aminuts, i already search the forum there b4 i post this.
anyway i find myself a quick solution.

to be honest after creating tons of corrupted displacement maps, i almost give up. BUT… finally i found the cure for this nightmare… i have to addmit this is not the best solution…not satisfy with the solution but i can live with it.
here is what i did:
b4 i create the displacement maps i roll back to the lvl2 subdiv and delete the lower lvl subduv and create the displacement map from this lvl 2 model.why lvl 2 model? coz lvl 1 model doesnt work…:evil:
the original uv layout still not working so i use the GUVTile native mapping mothod.( i still cant figure it out why this happen, but here is the acceptable result. u still can c a little jagged on the edge but i gonna bulit some other stuff to hide it.) with the new GUVTile mapping … i have to re paint the model…but its better then giving up…
here is the render from xsi… glad that this version finally working for me.
now its time to do the rest of its body.

if any1 know the answer to my question please share with me thx in advanced.

I have a question for my own curiousity,

were there tri’s in the level 1 subd that you were trying
to create the displacement from?

hi aminuts
actually yes there r 2 triangle in the model… but i think thats not the problem (maybe i am wrong)…coz i redo the project from start …yes re model everything and get rip of those 2 triangles still the same… i mean the displacement still corrupted…thx for the concern.:slight_smile:

hi thanks for answering…

i have another question for my curiosity…

Did you use the old uvmap when you redid the tri’s model or is that when you already switched to guvtiles?

sorry for the questions, but I am trying to prevent or learn what to keep an eye out for when I finally have time to deal with displacements.