ZBrushCentral

Did You Know That (ZBrush 3.5)

Hi, Gabo.

Thanks for responding to my post (#138 ). My inquiry was about creating, positioning and lighting character eyes in 3.1. There are a few sources of information on this for earlier versions of ZBrush but none that fully address the changes in 3.1.

So, I thought it would be great if there was a tutorial on this specific issue. I have attached a picture MonsterMaker posted a few years ago that is a typical composition of a character bust against a background where he created a great transparent eye effect. If you look at the eyeball image you can see reflective and refractive elements that differ between the eyeball and the sclera and you can see distinctive reflections along the edge of the corneal bulge. These are all subtle details but are all very important to the final effect. Do you agree?

http://www.zbrushcentral.com/zbc/showthread.php?t=23473

I don’t think we need this tutorial to show how to make a character bust, but it would be nice to see a workflow for making an illustration that takes an already existing character bust, composited on layers with a background and eyes that have transparent sclera. Maybe a few tricks using the radial brush and alphas to paint the iris. How ‘Markers’ work. It would also be nice to see how to light the composition to get the most out of the eye reflections. What do you think?

I think the point of the tutorial should be how to create a great transparent, reflective eye effect for an illustration.

How much of MonsterMakers’ reflective, specular highlights are real, ‘ZBrush 3D’ and how much is ‘Paint’ in Photoshop?

Anyway, your tutorials are great and thanks for sharing.

~S.~

Hello ZBrush Community

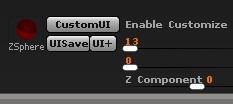
I know it has been a while and I am sorry for that. Here is a video on creating your own custom menu in ZBrush. This is a great asset for you to create a really quick workflow for yourself. This video will also show you how this menu can be used as your own right click menu. Enjoy. :slight_smile:

Custom Menu

[veoh]v183632393pYF56sw[/veoh]

Here is the YouTube video

//youtu.be/-oTAllGY8DY

This is where you can download a HighRes of the video.

http://www.mediafire.com/file/i13myzv1ww2/Custom_Menu_HighRes.mov

Enjoy and as always feel free to ask any questions.

Paul

[DidYouKnowThat.jpg]

Thanks a lot for your time. Thanks for all your help!

I wouldn’t recommend anyone train themselves to use the pop-up menus until Pixologic fixes the annoying “interface jams on pop-up menu” bug that strikes so many. Maybe its fixed on the recent mac updates, I wouldn’t know.

I made it a point to train myself in using spacebar menu, only to end up retraining myself NOT to use it once i saw how many times it's ruined hours of work total.

Despite that, very nice tip, for when that’s fixed.

edit : Mac not Max :stuck_out_tongue:

Hello

Just wanted to let everyone know that Art-Machine is speaking of the Quick Menu crash. This is fixed in the new MAC and remember you do not have to assign the right click to your menu. Any shortcut will work, but on another note i have not gotten a crash with assigning the right click to my custom menu. Thank you for the heads up Art-Machine. Hope all learned something. Talk to you all later.

Paul

i have to just say i’ve been using a custom popup along with the normal popup for almost 2 yrs now, opening them a few hundred times a session and never once did i get this crash/jam, ever.

Gabo,
Your tut on custom menus was great. I’ve always wondered why more people don’t create and use their own custom menus… though there are some issues that make it a little tricky.

At one point I was experimenting a lot with creating special purpose menus - made one for retopologizing, another for general ZSphere sessions which integrated the TVEyes utility. I also found it useful to include custom buttons scripted to expand functionality or combine specific operations.

To make the development process a little less painful, I created a custom button set that works just like my QuickSave buttons (see attachment) that allowed me to save incrementally numbered interfaces as my custom menus progressed. Custom button groupings (integrating buttons from multiple other menus) and new, original custom submenu sets were the goal.

Custom popup menus are a new idea for me, something I really want to start using - thanks for that info and for this wonderful tutorial.

[attach=139046]customizing menus.jpg[/attach]

Attachments

customizing menus.jpg

Very, very helpful thread. Finally. Thank you Thank you!

This is a great thread, just found it.
Thanks Paul

:+1:

Great

how we solve the problem of seams in normal maps…???:cry:small_orange_diamond:cry:small_orange_diamond:cry:

I read somewhere a suggestion to blur them in photoshop with smudge tool.

@ronybuster

check out xnormal , even I had issues with zbrush sometimes with the normal map seems. Xnormal doesn’t give any issues
http://www.xnormal.net/1.aspx

Seams are tough to take care of. There are set configurations in ZMapper that will help. Yes XNormal is a great application and can be a great tool for artists to have on their palette. Normals maps are different for every application. what are you using for rendering.

Paul

Hi Gabo 1991,
Enjoyed your narration on the Decimation video…
tutorial request, one on materials … kind of intermediate to advanced…
using/making multiple shaders in one shader. preferrably a skin shader of sorts. using sliders etc. maybe tie this in with using multiple layers…
Thanks

I’m very new to zbrush and its probally something really simple but when your doing eyes i see that many of the people have two eyes already in one subtool layer when i try it it alwas comes out as two one for the left and one for the right eye. i was wondering how u got two eyes in the same subtool. another thing is how to take those eyes and bring them into your body sub tool. so say u got a head but no eyes. and you have the eyes in the other subtool how would u bring the eyes into the head subtool. THANKS - Cheers-

Hey JesusFreak3122

Ok this is a very simple process. If you have already made your own eye subtool you can just append that to your head. If you dont have an eye just select a sphere 3d and make it active in the canvas. Next make that sphere a polymesh 3d. Then load your head into zbrush if you havent already. With the head zubtool selected in the subtool palet click append and click on either your eye or the sphere 3d. This will make the head and eye appeare in the same canvas. Your eye probably isint in the right spot where an eye should be so transpose it into position. Now to get both of your eyes as one subtool. You will need the subtool master plugin if you dont have it already. Have the eye selected, and at the top of the screen click on zplugins and click on subtool master. Then another palet should appere, click on mirror. then check merge into one subtool and it should be on the x axis. Then click ok, and that should make your eyes one subtool and your head a subtool in the same canvas. Hope this helped, just ask if any more questions.

hockey14 aka (akacg)

Thank you very much for the great tutorials Paul! You have saved me a lot of time and grief! Hopefully one day I can contribute to the community in the same way. What software(screen capture) do you use for creating your tutorial videos?

thanks for the tutes dude!

Hey, if you “Reproject Higher Subdiv” will that loose any UV map info?
-Matt