Not sure if there’s an easier way, nut I’d use the slice brush (whatever it’s called), make shure close groups is ticked in DynaMesh bit, the remesh and your mesh will be two bits. Duplicate the subtool. The in one, make one part visible, the ‘delete hidden’ in the duplicate tool make the other part visible, and ‘delete hidden’. Done.
Thanks Gordon, works like a charm. Also “split groups” makes the subtool creation from the groups even faster.
Hey Jake
You can use the SliceBrush to cut the mesh up. Turn on the Group button in the DynaMesh section. Then re-DynaMesh. This will create two pieces with two polygroups. Now all you have to do is click GroupSplit in the SubTool sub-palette.
Paul
Thank you Paul for your help,
Brings me a great step further!
Since I get such good help here, I dare to ask another newbie question:
Bevel:
I imported an obj put it to subd level 6 and made groupsplit and now want to start sculpt and polypaint it.
First I would like to create a bevel like on the longside also for the short side.
What`s the best method to bevel these edges as smoothly as the others?
Im stumped with how to move the fibermesh after you hit accept…its always locked to the root and you cant move it. Does anyone know how to fix this? :S
If you are trying to move the whole thing it is a subtool, so you would go into the subtool pallet and select your new object, then use the transpose tools or the deformation pallet to to move them around.
If you are only trying to move bits of it you would use the Groom Brushes, but it sounds to me like you want to move the whole thing, right?
Cheers!
Mealea
I mean after i hit accept and select it in sub pallet…its like its masked at the root and I can only strech it I cant actualy move it anywhere its locked
THAT is weird, I just tried it and have the result you have with the transpose tools but Offset in the deformation pallet worked fine (and did not crash so far).
So it looks like the transpose tool is doing things differently, or in this case wrong(?)
Ok (a moment later)
I see what its doing, use the deformation pallet to move the whole thing.
Use the transpose tools for some fairly serious grooming.
Try using the rotate and scale transpose tools as well and you will see what I mean, its neat you can make big curls and stuff.
EDIT: Using the transpose tools like this it seems good to use lots of segments, otherwise things seem to break sort of.
This is Move and Rotate:
And with all three; Move, Scale and Rotate:
Attachments
Hmmmm but offset wont helpv in say posing a character with hair…it would be impossible to get it exact Ithere should be a way to unlock it i cant believe this isnt in the tutorial…anyway thanks for the help 
The root is automasked so that the fibers stay in position when grooming them. If you want to move them away from the root you need to turn off the auto masking feature in Brush>Auto Masking>Auto Mask Fibers. I would recommend keep this on unless you want to completely move the fibers away.
Paul
Awesome thank you so much!
I agree! Thanks!
I had hit Clear in the mask pallet thinking that would do the obvious, clear the mask if there was one, I had no idea it would just recreate it self with out asking.
This is great to know!
Is there a Part 4 video on rigging with ZSpheres yet to come, or have I just somehow overlooked it in this thread? I would really look forward to seeing it if it exists, as this has proven to be a very helpful and informative series for me.
Thanks.
Hey ZBrushCentral Community:D
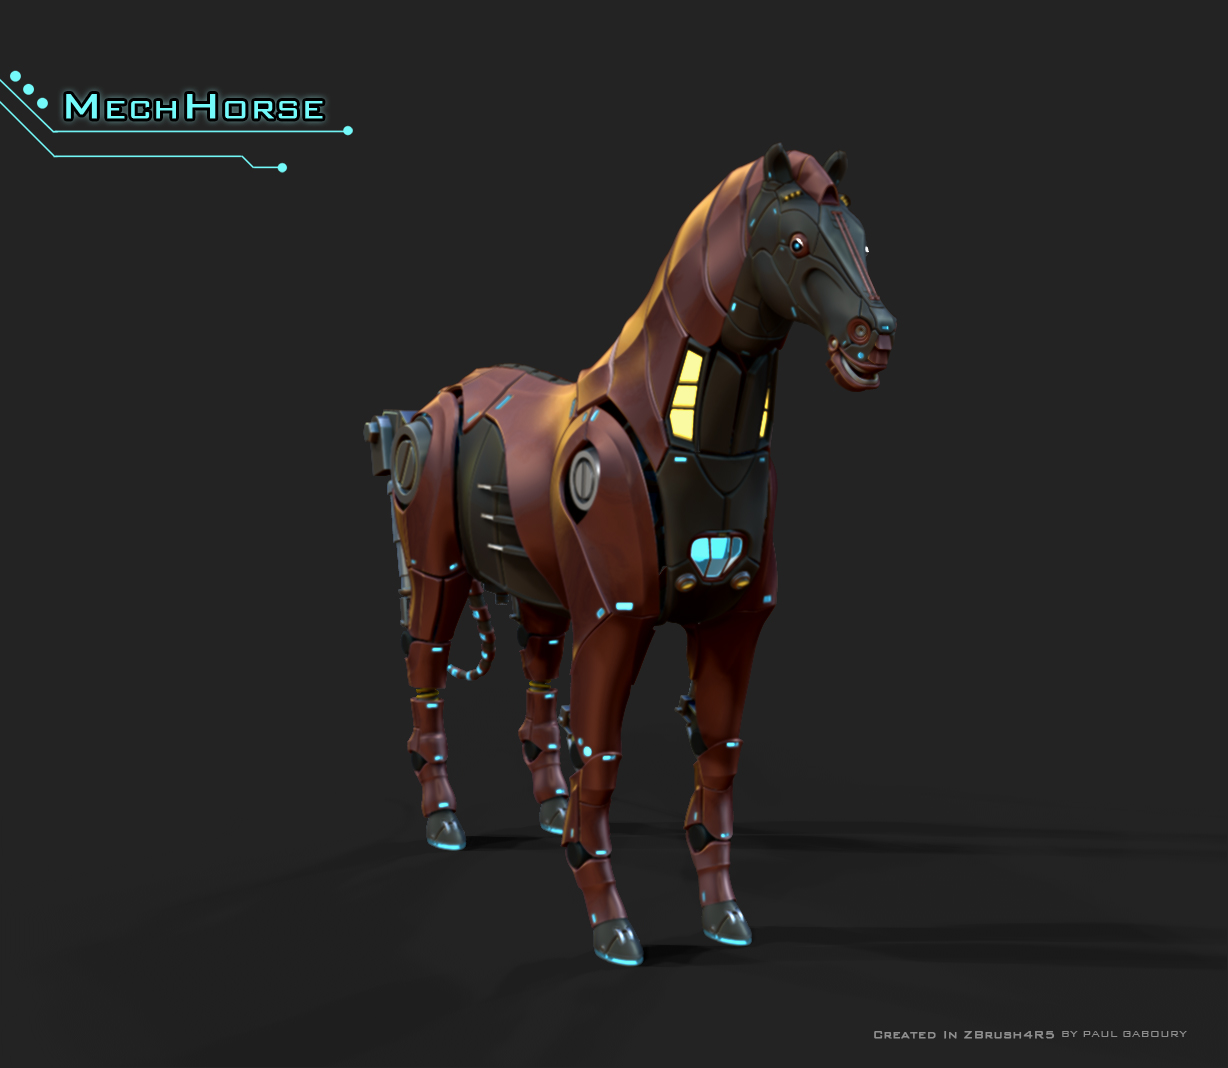
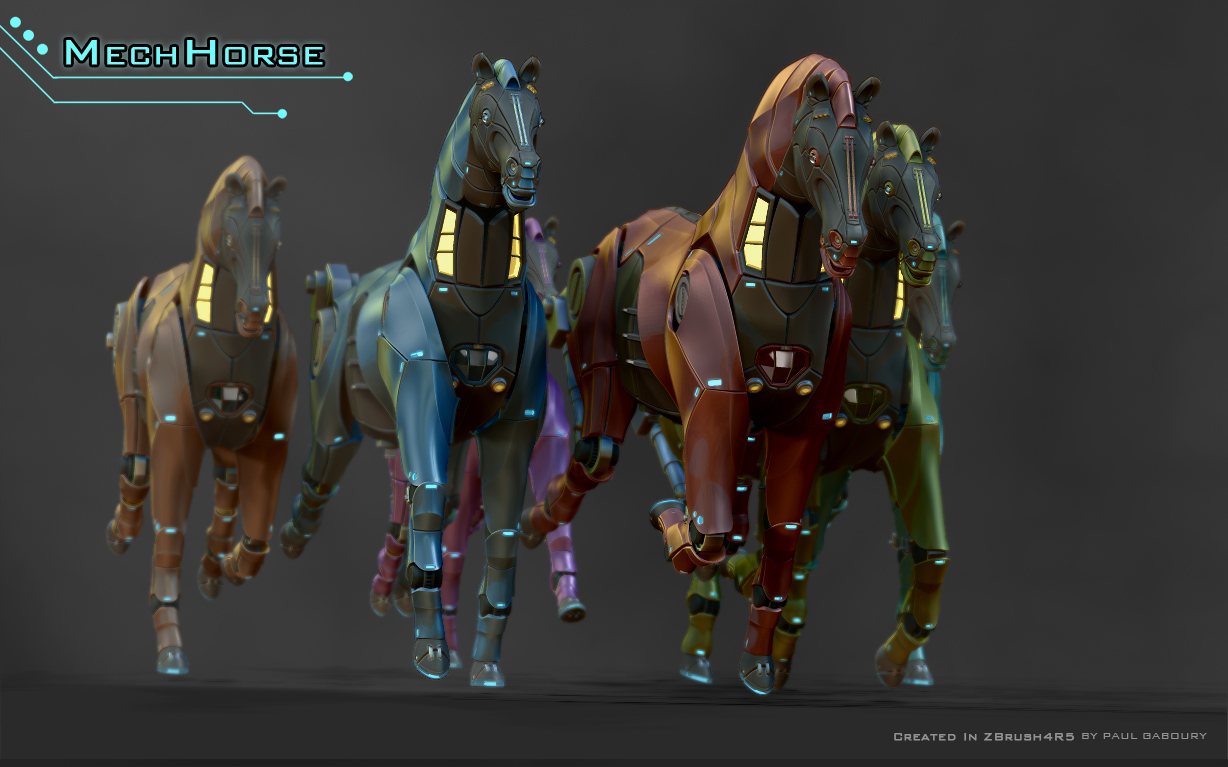
Here is something I created in ZBrush4R5 using Panel Loops and Polish by Feature. This image was inspired by Syd Mead’s Running of the Six DRGXX for the Tokyo International Sports Fair. It was a lot of fun to put together!
Enjoy, Paul Gaboury
Attachments
Very cool work …love to see more!
Best, David
Excellent sculpt. 
Cool robot horse . Vampire hunters ride . Did you do the glowing lights by hand in a 2D program? If so what one and how did you do it so well?
Nice Paul! Are you going to give a break down of your workflow? I’m still playing around with the panel loops tool but still having some trouble hitting all the shapes from Pixolator’s hovercraft video. Thanks! 
Paul, I guess I should be more specific with my question. This looks like the workflow for the panel loops from Pixolator’s video, let me know where I am going wrong.
-
Rough out shape with dynamesh.
-
Create polygroups that will define your panels (create a mask shape and hit CTRL + W)
-
Run the panel loops tool with a smaller edge.
-
Select the larger poly group panels that were generated with the last panel loops pass and then do a new panel loops operations, this time with larger thickness on the panels.
-
Use the Polish by feature tool along the way to reduce any wobble in your panel surfaces.
Not sure if that is right or not, thanks for any insight!
Also, he has a really nice look on his larger panels where the corners are highly rounded, that is the part I am really unsure on how he is achieving that look and still maintaining his hard edges.
Thanks again for all your help!