Ahh!!! Yes! That could do the trick!! Thanks again Paul!
Hey Community
Thanks for all the interest in the mech horse. I put together an image tutorial on the process used to create the horse. Hopefully this will give you some inspiration to Panel Loop your own mech animal. 
Step 1: Load Reference Images
Load any image onto the Floor Grid for reference.
( Inspirational reference images by Hermann Dittrich)

Step 2: Crop Reference Images
Use the Adjust feature to crop the images.
Note: you can also put images on the back of the Floor Grid.

Step 3: Block Out with ZSpheres
Blocked out a horse with ZSpheres using the reference images as a guide. Notice the simplicity at this stage.

Step 4: Refine the Sculpt
Added just enough detail to get an idea of where some of the anatomy of the horse falls. Will use this later for panels.

Step 5: Separate Head from Body
Used SliceCurve brush to separate head from body. This made it easier to focus on the body.

Step 6: PolyGroup out the Design
Mask portions of the model where panels need to be created. Use Ctrl + W to create instant PolyGroups as masking is completed.
Don’t worry about being prefect at this stage, Panel Loops will clean everything.
NOTE: Turn on Mask by Polygroup in the Brush>Auto Masking sub-palette to help not masking over already created PolyGroups.

Step 7: Panel Loops
Clicking Panel Loops will instantly give you metal plates. Some adjustments were made to the default settings.
Panel Loop Settings
Note: Try different options at this point. This is key to give you the look you are striving for.
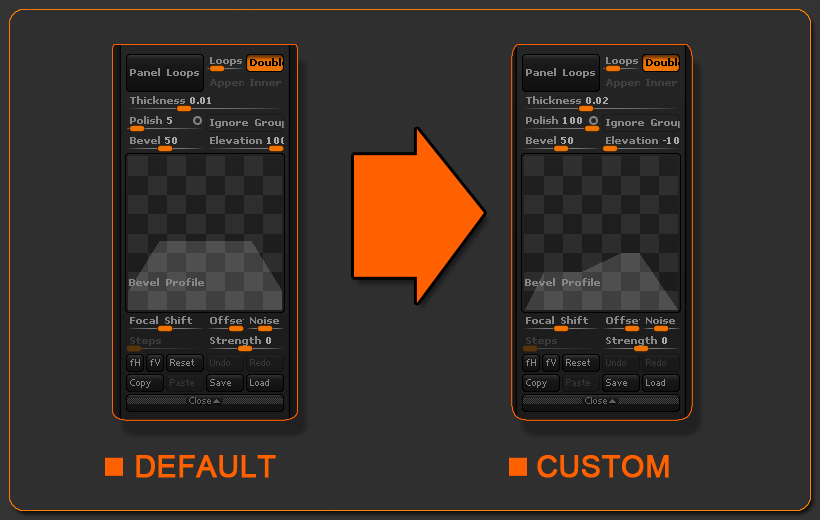
Thickness:
This will control how thick the individual panels will be created and also help create a larger gap between each panel.
The higher you put this the thicker and larger gap you will have.
Polish:
With an open circle ZBrush will polish with some shrinkage to the panels. However, with an open circle where every 3 PolyGroups intersect, ZBrush will keep a sharp transition. With a closed circle the panels will have more of a rounded edge.
Note : The Polish by Features algorithm is being used for this slider.
Elevation:
To make sure that the panels were created into the existing mesh, the Elevation was set at -100.
Note: Setting this to 100 will keep the panels on top of the surface, and putting this at 0 will put half the panel below the surface and other half above the surface.
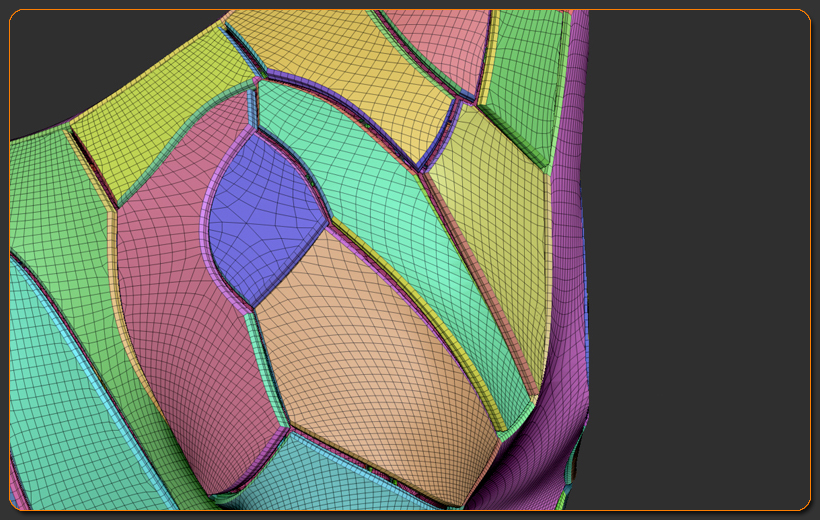
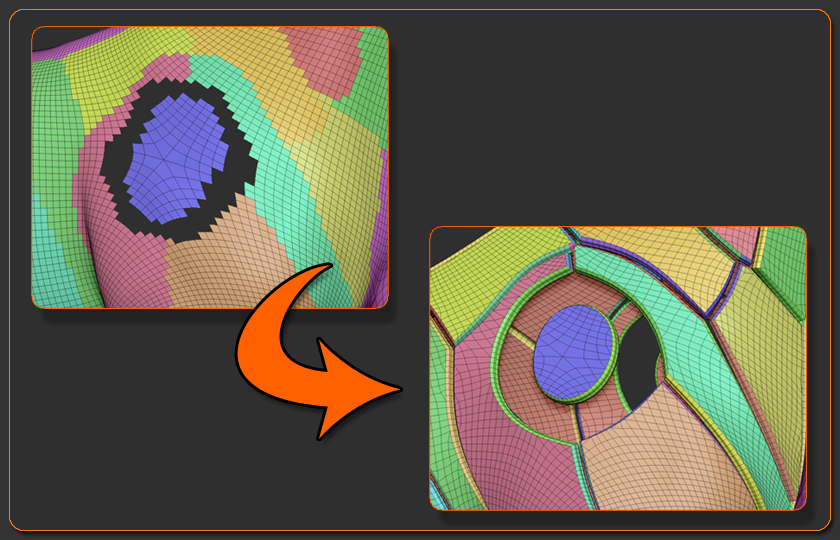
Step 8: Refining the Panel Loops
Knowing that where 3 PolyGroups that meet, ZBrush will keep a sharp angle.
Note: Playing around with the PolyGroups can give you very different results. By deleting several rows of geometry around key PolyGroups, a rounded piece can be created.
The image below shows an extreme case of this technique.
With this technique in mind it’s quite easy to adjust the PolyGroups to create harsh and round panels. Once adjustments have been made, use the Polish by Features (Tool>Deformation sub-palette) to achieve the rounded or harsh panels.
Note: Even after a panel has been moved significantly, Polish by Feature can then be used to gain back the original shape of the panel. Turning on Topological in the Brush>Auto Masking for the Move brush will allow individual panels to be moved around even though they are all the same SubTool.
Thank you. Have fun “panel looping” your creations:)!
Paul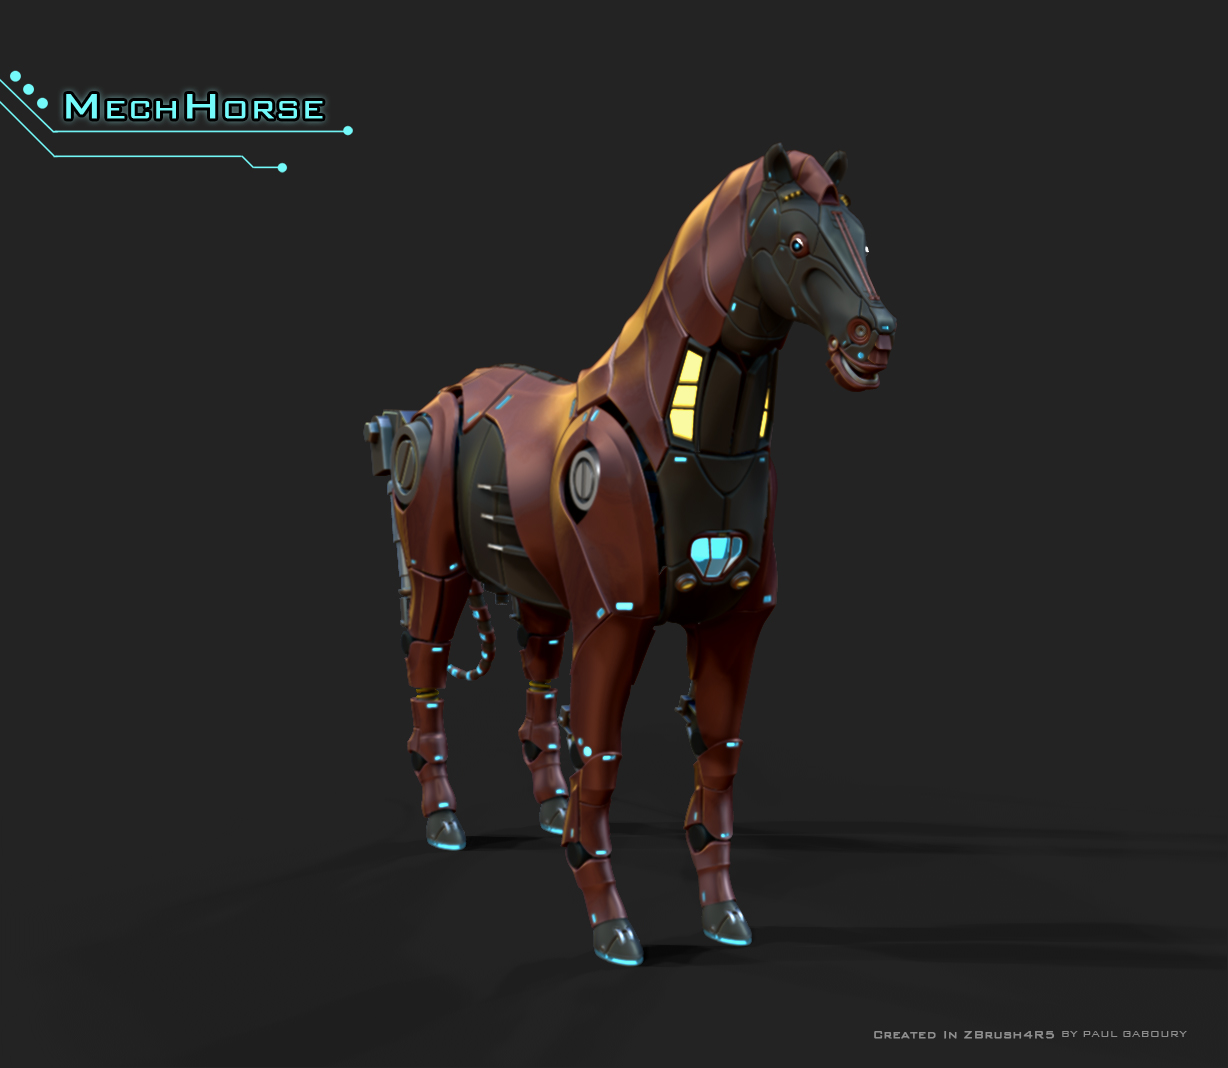
Attachments
Excellent use of panel loops
cool mech horse and thanks for the tutorial. small_orange_diamondsmall_orange_diamond
Very nice, sir. Thanks very much for the tut!
Well done Mech Horse… thanks for making the tutorial… Deke
Very cool Paul!
Nice post! thanks for sharring!!
Yes, very cool, thanks!
Thank you for the write up Paul! Very cool of you!!
Curves on mesh that can cut topology,
see picture:
Oops wrong thread
Hello Ronald
You could use the topology brush to create pieces that look like panels. However you could also use the EdgeLoop Mask Border in the Geometry>Edge Loop menu.
Are you looking to just turn those polygroups into their own geometry? The curves you drew out only have one vertex because you drew them as one continuous line.
Can you share more exactly what you would like to do?
Paul
I was thinking more of a way to use those curves, to cut low poly meshes.
Just throwing out idea’s http://www.zbrushcentral.com/showthread.php?172671-Some-new-idea-s
Hello Ronald
You can do what you are looking for with the EdgeLoop Mask Border. All you have to do is mask what you want to cut and then click that button. ZBrush will slice around the mask, as if you were using the Slice brush.
Let me know if that helps.
Paul
… there REALLY are some treasures to find here!
Thank you, Paul, for taking that much of your time to answer questions here.
Got one myself (looked around for possible solutions before posting here):
OK, during modeling I like to have anything that means color off. No RGB, MRGB.
But, every now and then (mostly when I turn from building to smoothing) all of a sudden RGB is turned on without my doing.
Sometimes I notice, but sometimes I do not. If the color picker is set to anything just a bit lighter/darker then the color of the model, I will have to go back several steps or fill the object.
This also happens when I change brushes - so: is there a way to disable that? I just want to bother with modeling, coloring is something I do much later in the process.
Thank you…
Great interface and nice to look it. Need more for beginner…
Very useful and informative post. I am the beginner of ZBrush learner. This will help me more. Thanks.
Little thing which I recently discovered. Not R4 related but most useful for me.
To check your mask switch to flat color material. You’ll see missed parts much, much better.
Most of you probably know that - a search just turned out a link to a zbrush book - so I thought it can’t harm to post. 
Cheers,
Knacki
It’s really interesting and i think people will like it
so great!
study