[ ]
]
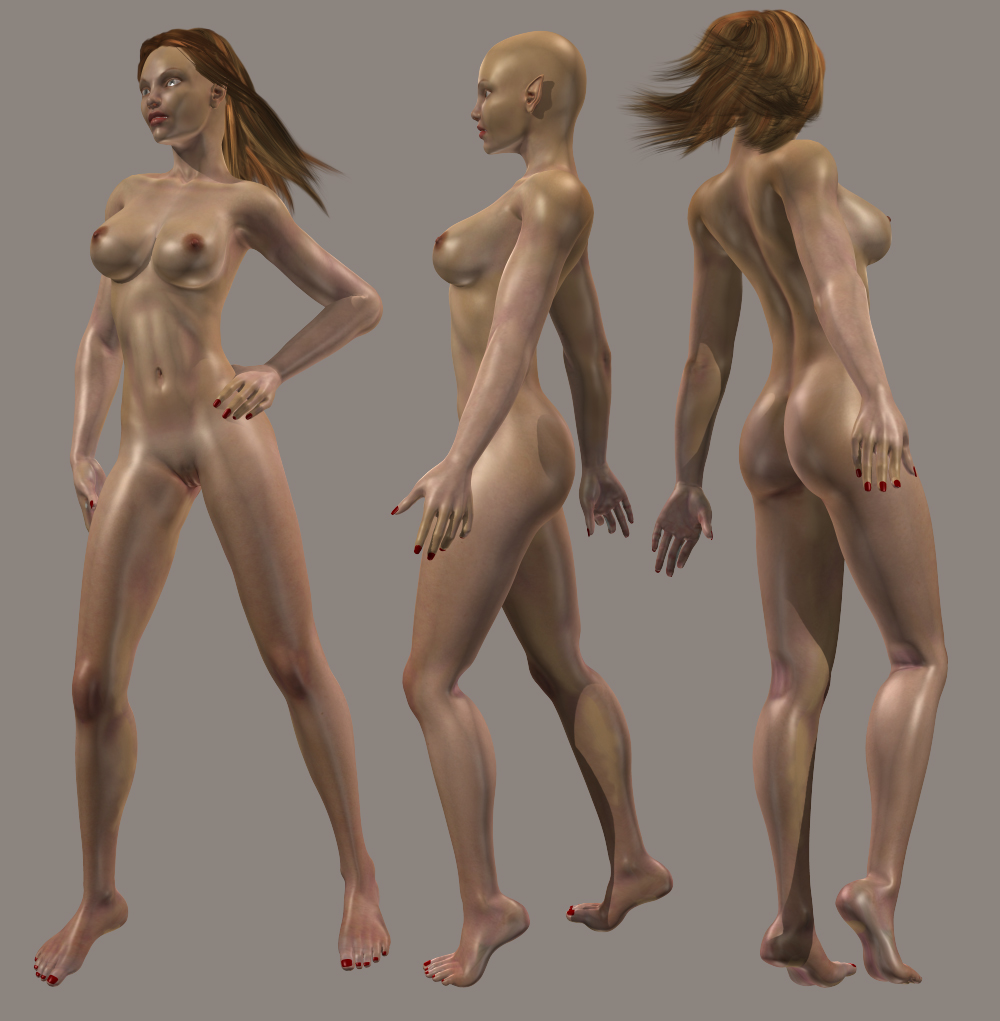
Here’s a first look at the poser figure I made from the base mesh still a ways to go, the rigs turned out pretty good and I’ve started texturing her so she’s a bit patchy I need to do the eyes teeth and tongue are in and the face may need some work to. I don’t think V4 has too much to worry about. Thanks again for letting me use her.
Hey i Love it, did you use different materials for different parts of the body
Clubber: you’re welcome again, looks pretty good  did you manage to get body shape morphs working? I’d work a little more on the backs of the knees and ankles to avoid the gap when they’re bent, for instance, I like how the inside of the elbow is working. A couple other small issues include: overly round shoulders and elbows, and bicep looks a bit too big for a girl’s arm. The skin might be a little too shiny, and I’m sure you’re aware that some eyelashes (and possibly darker eyebrows) could be nice.
mcool: If you’re referring to Clubber’s poser ‘port’ he just posted, then you’ll have to ask him (looks pretty single-mat to me). My body model (posted a couple weeks ago) is one material, some of the subtools use more than one material.
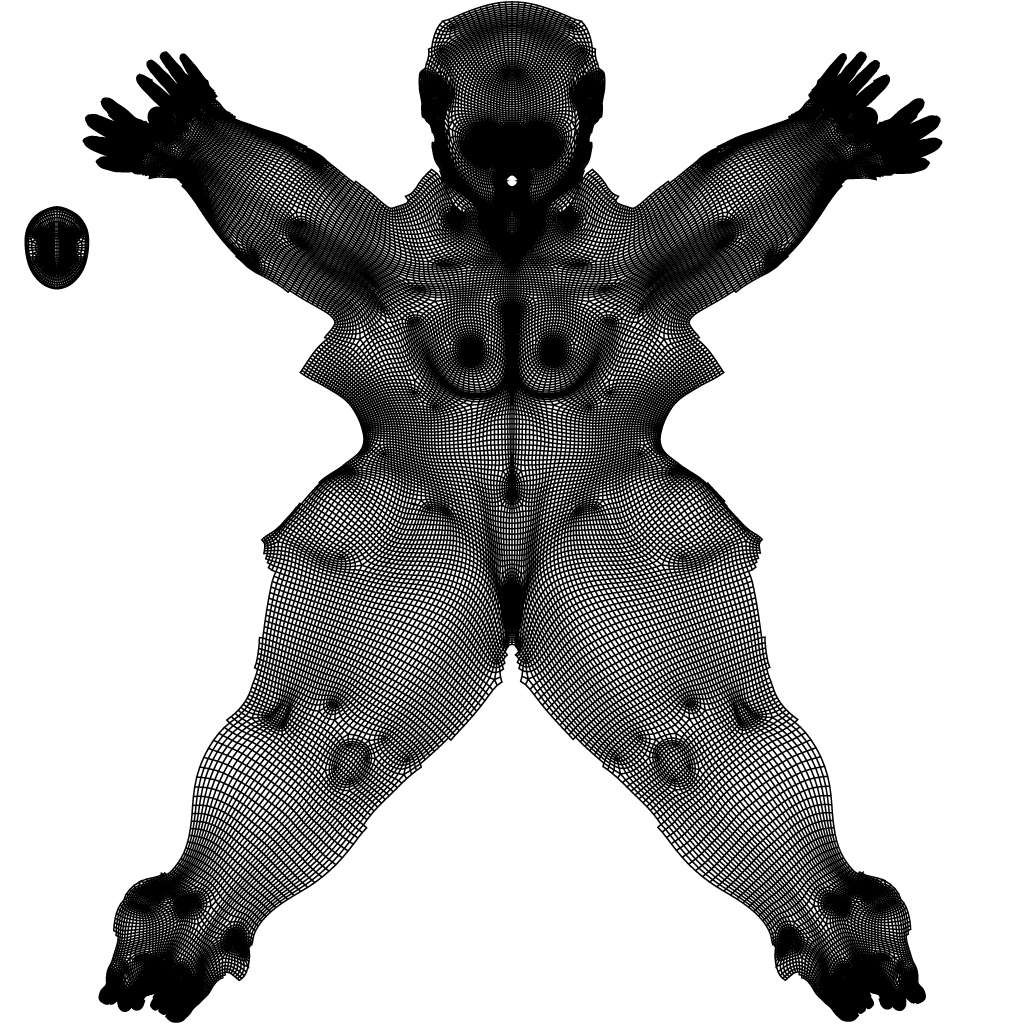
Yes it’s early days yet the skin is one material and texture, here’s a shot of the UVs I ran it through UV Master. Thanks I forgot about the eye lashes I won’t put them on till the face is set. Was very easy to rig I will have to do a few more edge loops around the finger joints I’m getting some blocky bends. I may have meshed up the length and size of the arms to, but I can move the elbow and shrink the biecept without distroying the rig. So lots of work to do. Thanks for the feed back.
Cheers
Attachments
I’ve tried to send you a private message via your profile, but it appears I didn’t have the privilage to do so. 
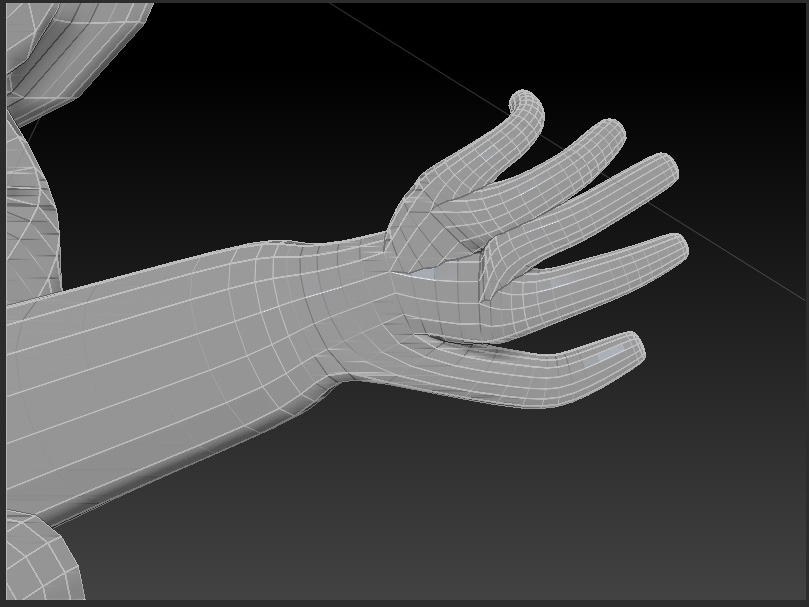
but anyways, I hope you don’t mind me posting here, as I’m having difficulties trying to get the hand zspheres to look right via polymesh conversion.
however, if you’re willing to help do some tweeks to the zsphere model, you’re more than welcome to do so.
I’ve posted some shots and whatnot here.
I hope you don’t mind. ^^; help would be much appreciated, you’ll be credited for help.
Attachments
Looks great. I like it.
Clubber: by bicep size I was referring to the volume of it, it looks flexed even when it isn’t. Minor thing. Arm size looks okay, but I’m also very bad at judging arm size Keep up at it, looking forward to seeing more!
mok: Thanks !
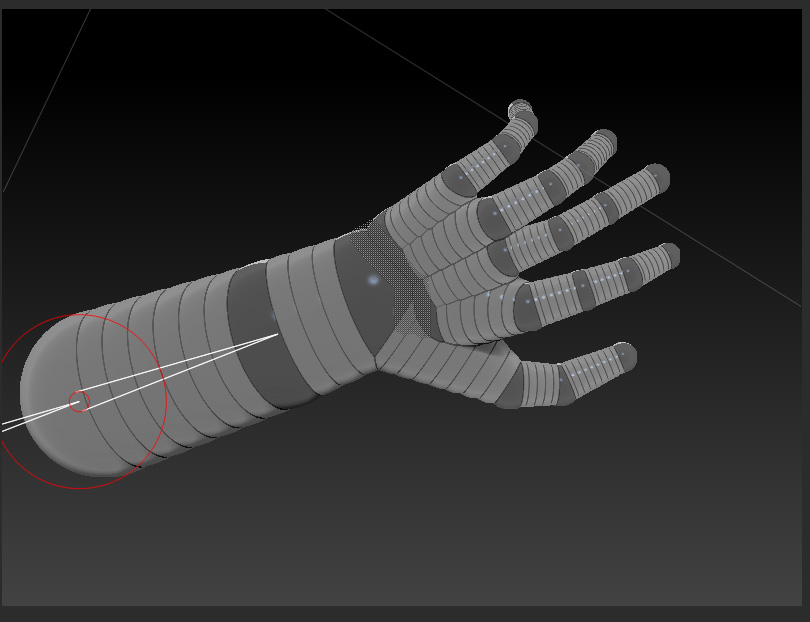
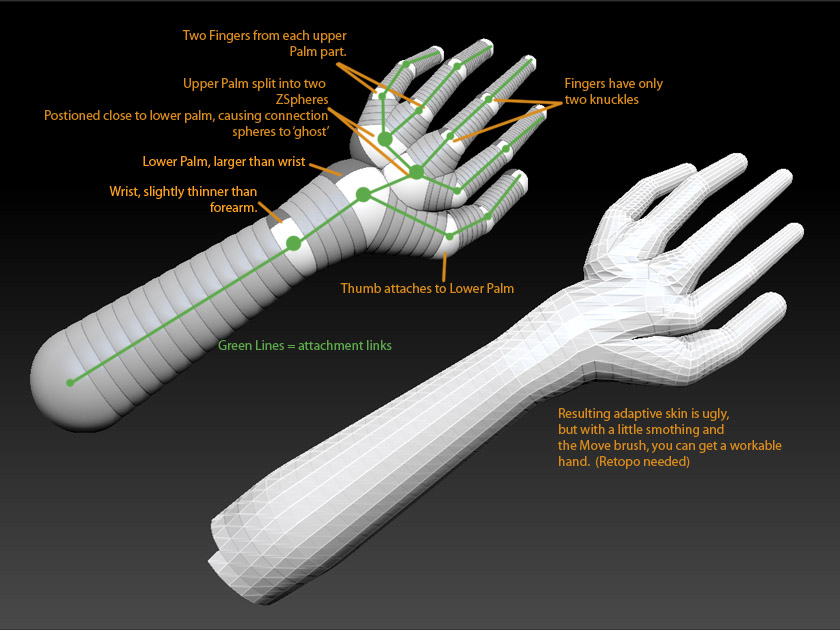
Solidfire: I have no idea why you couldn’t PM me, hopefully something’s not messed up with my account. looks fine to me. Anyway, it is hard to really describe a good way to do hands with zspheres. Getting them to work out is easier now than it was with ZSpheres 1, but it’s still very much a trial and error thing. I’m reposting a shot of my version of the zsphere hand with a few notes in case it helps. Be aware that the active skin I got wasn’t perfect and required a little smooth/move to get it to be workable.
[ ]
]
this should help alot, if you have any more photo references, please pm them to me or post them here, very helpful, I should be able to work from here, as for the feets? do you have a closeup version of that one as well?
from there I’ll be happy. however creating a proper adaptive mesh is questionable. 
PS, is it possible to copy and paste parts of the zspheres such as the hands to another model? if not, thats fine, its only a question I had in mind. ^-^
last question is, how did you create the belly button ball as an “inverted” mesh? creating a ditch on the belly.
thanks a bunch ;D as soon as I get the zspheres perfected, I should be able to make it from there hopefully. however I don’t have any friends on ZBrushCentral yet, you’re welcome to add me.
hope to hear more from you soon.
-Solid
http://www.youtube.com/watch?v=RWBV7hipE5E
Here is a good tut for making a hand out of Zspheres. This is the most right way to make it because the topo is close to what it should be.
Anyway, you aways have to do retopo on that hand, so… hehe
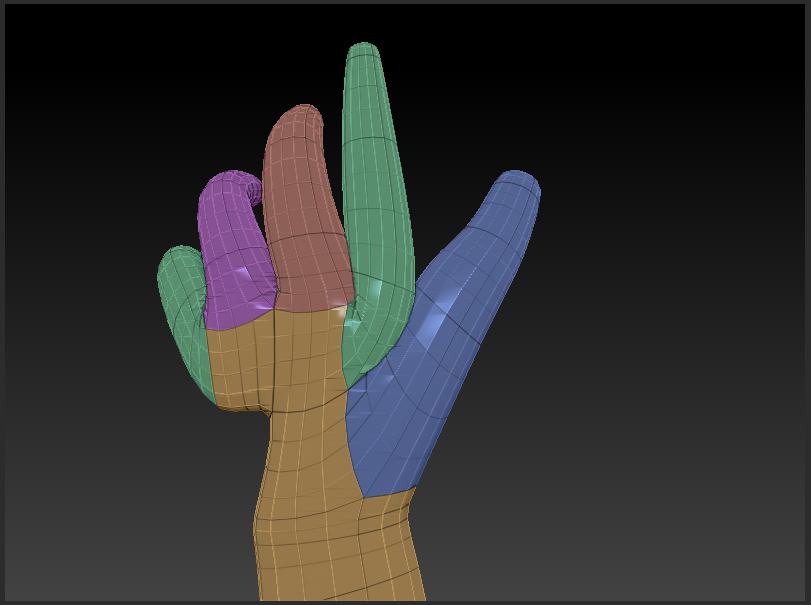
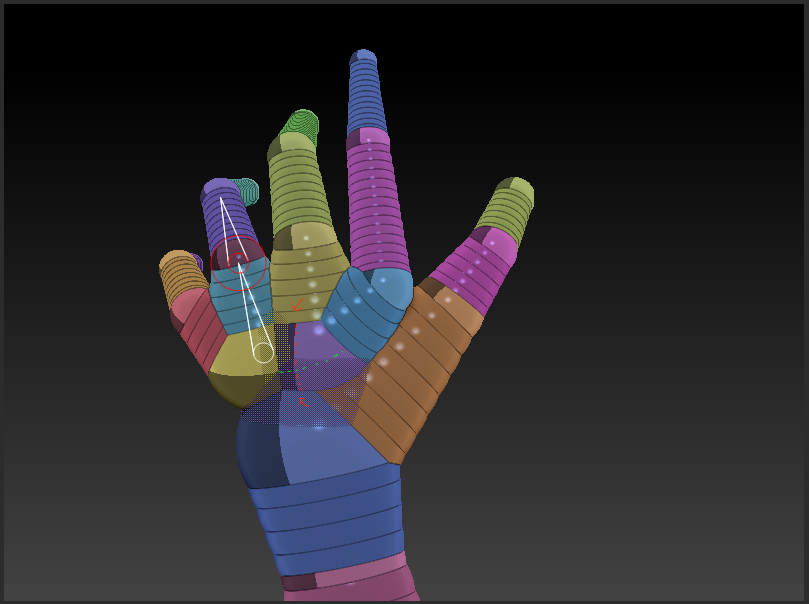
I’m having some slight issues with the way the zsphere’s directional line is pointing. as you can see with those 2 photos, its color mapped to make it a little easier for ya, it seems to be distorting the pointing finger.
I think you’ll see what I mean
third photo shows it pointing out the issue just in case.
Attachments

Thanks a lot, when I always use zspheres but my fingers always come out like webbed??? Any help?
hi,
dont know if its of interest but heres a link to page one of my thread and a hand ive tried from a sphere and retopo.
http://www.zbrushcentral.com/showthread.php?t=73480&page=1&pp=15&highlight=colins+curiosity+corner
Pime - thanks for the link, that way works fine too
Prosthetix – thanks! I think tends to be harder to use a separate hand mesh like that unless you’ve got some way to hide the seams, though (and the question was specifically about zsphere setups ) I enjoyed looking through your awesome thread again though… some great work there!
yeah zsphere hands are tricky, thats why i posted that, i model this way, then mirror for both sides, apply to my body mesh before i retopo, this way i avoid those crazy hand meshes (and no need to hide the seams! but a jacket isnt a bad way!)
wow, I apologize Solidfire and Michael, I swear your posts weren’t here when I visited yesterday. I’m sorry for ignoring your questions! Let me try and address them now.
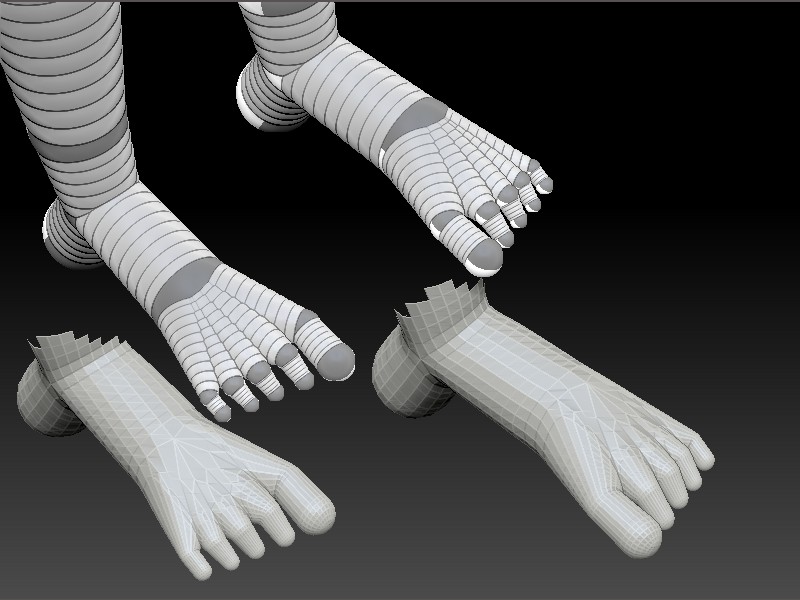
Solidfire – is there an additional view of the hand that you’d like specifically? Below, you’ll find a similar close up of the feet. I didn’t add any notes, since I think the construction is pretty self-explanatory. I don’t know of a way to copy portions of zsphere set ups between models, I doubt there is one.
The inverted belly button is a standard ZSphere technique of moving a zsphere beneath the surface of another one. People often use it for generating topology loops for eyes and ears – I might be the only one who does it for a belly button;)
As a general tip, try to avoid expecting your zsphere result to be perfect – you’re going to be sculpting on the mesh anyway, a few weird spots that are easy to fix are perfectly acceptable.
[ ]
]
Michael – hard to say what the problem is without more info. chances are your finger spheres are too big or close together in comparison to the hand sphere they’re attached to.
Prosthetix – Yep, if you’re going to go through a retopo phase, I believe it really doesn’t matter what you start with
Can someone please provide a new link to the basemesh files? It says the website/link is unavailable.
Looks like they’re still there for me, but I’ll mirror them on my webserver; the ‘rush’ is probably over bandwidth wise. That said, if others are going to download, please try using the mediafire links on the first page first – the links below will become invalid if my bandwidth cost gets too high
(right click and choose ‘save target as.’)
I’ve done some research and looked for ways to work around the model.
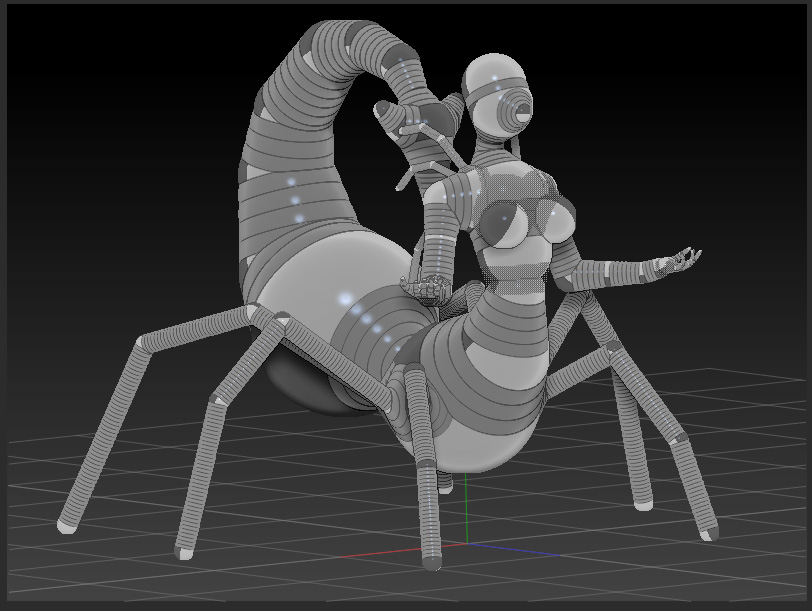
subject one (appears to be normal but the hands still looks funny, maybe a bit glitchy in your view, since our zsketch settings may be different?)
subject two (what do you do with these settings to make the model more forgiving?, for example, what intersection resolution, subject one is set at Ires 6, default, however there was one other Zartist, mentioning if I set it down to 3, it’ll remove some difficulties he mentioned)
subject 3 (setting it down to 3 distorts the object making everything more circular, so to think, this trick, isn’t for female models as it appears. X3, it made those more natual looking breasts into mellons. facepalms)
but while continuing research, I’ve decided to ask what settings do you use before you create the zsketch model?
I’ve learned how to individually click each mesh, that’ll help me move inbetween each fingers.
I think I’m at the brink of getting it through  maybe your zsketch or zbrush settings might be the key.
though i realize that my messages takes more than 24 hours to post, I wonder if it has something to do with my early membership privilege, though that would seem unfair, unless you’re verifying them, that would make alot more sense.
the Subject, are the photos below, send me a message if you’d a ZTL file of this spider queen for abit of some issue checking.
thanks for all the help 
PS, as for the hands, I think I’m getting it, and for the feets, I’ll save that as a reference, for working on my other model.
-Solid
PPS O: wow nice, my message was posted instantly after posting, I hope it stays that way.
Attachments


Solidfire:
I have no idea why your posts weren’t showing up right away – apparently they’re there, just not showing up, since they then appear in the correct time order . I see that I missed another one of yours regarding your hand zsphere images. That one first:
the orientation of that sphere is different on your hand because you have your hand, overall, in a different position than how mine was done. I don’t think it should be something to worry about.
It looks like you’ve chosen to use the ‘Classic Skinning’ model for this. I can’t really help you with settings for that, since I used the new ZSpheres II radial skinning method. The only thing non standard that I forgot to mention about my zsphere setup is that I had G Radial set to 11 (opposed to the normal 8)
I sent you a PM with my email in case you want to send the model for me to check out. Not sure if I’ll be able to help at all though.
Got it. Very nice mesh with UV mapped as well. Thanks a bunch and for sharing too.