ZBrushCentral

Dan's Sketchbook

hey yumme,

your work is really coming along well and your sculpt is looking better with each post. Some general things that I notice with your sculpt is with the shoulders. Or deltoids to be exact. I definitely feel like they’re to big for his build. And i also think that having a little bit of a smoother transition between the deltoids and biceps would also really help. I’m still very much in the learning process as well so take what I say with a grain of salt. I’m sure there are much better artist on here who could give you better advice. But keep at it and you can only go up from here.

@ Sketchkj Hey dude! Thanks for the reply and sorry for the slow reply but I worked like a mad lately both on my daily boring job and to the human figure… But… here it is… ready for critiques! Before I go ahead and post it I’ll reply to what you said… The deltoid was a bit to big… also there was quite a lot of sharpness between the muscles since the human figure till that point has close to no fat because I focused entirely on the muscle and how they form the body surface and the silhouette. But hopefully the whole thing is looking better in what I will post. (PS: I left a small opinion on your sketchbook :slight_smile: )

So… Here is the almost final figure. I say almost because I wait for your critiques and also I will probably tweak it a bit more after retopology… Yep, I will try to create an animation ready model for the first time in my life… Should be fun… Also, the entire model will be sculpted a bit further in the posing process… As fat as I saw in all the videos I watched, you do sculpt quite a little when you pose it in Zbrush. Actually I plan to take it even further than that, by creating a set of … armour or cloths… or something and adjust the features and the proportions a little and create a full composition… But that’s quite far still… So with no more mambo jambo from my part, here are the renders:

So, as usual, please let me know what you think and hopefully, tell me where I did something wrong!

Now… regarding this last stage of the figure… I would like to share a few things… First of all, if you ever sculpt something for 4 hours and you are so into it that you completely forget to save your project… and than… Zbrush pops up a tiny little message saying that you ran out of Virtual Memory and than it shuts down… Well, ofcourse you can go ahead and punch and scream, and throw your computer on the window but than, after you calm down… and pick up from around you, go ahead and sculpt whatever you sculpted again… and be happy that the error occurred… (Ofc, I’m saying this from a newbe perspective who is just learning the basics). I’m saying this because I managed to sculpt in 1.5 - 2 hours what I sculpted in 4 hours and I did it better and also understood the whole thing better. Now, I’m not saying to be masochist and do this often… but if it happens keep in mind that it has its bright side.

The other thing I wanted to share … was something that I realised recently… It might look like a little, unimportant or a very trivial thing but for me it was quite… a discovery and it helped me very much. I realised that in a way I was thinking a bit wrong about sculpting. Lately I thought that I understood quite good the concepts of digital sculpting and the principles thought by great artists and teachers such as Cesar Dacol Jr. or Scott Spencer. But a few mornings ago I realised that I had something that kept me back a little… I had a fear. The fear that I will get to X moment in my sculpting process and that the model should look in a certain way… and if it didn’t… well… I would struggle to do it but with fear of not screwing everything up… and than I would shy away from Zbrush for days… Now I realised that this was the dumbest attitude I could have… Because the important thing is to do mistakes… otherwise you won’t learn. Mostly because we talk about Zbrush, a software that allows you to make changes so easy, you should go ahead and experiment even when you think that everything looks right because you never know what you might find… That’s how I think now at least. And this kind of thinking helped me to finish this first model of mine… I know that is quite a boring model but it serves its purpose and i wanted nothing more for now… FOr me it was a big help to understand anatomy (at least at a basic level) and to tackle those basic principles of what makes a good sculpt.

Anyway, I’ll stop here and I hope to hear from you guys soon! I’ll get back here soon to post the topology layout. Meanwhile I’ll try to think about what I want to do with him further, and what character I will create from this guy!

Thanks for your time dudes! See you soon!

Long live the THUNDER! RAWWWRRRR

Peace!

Dan

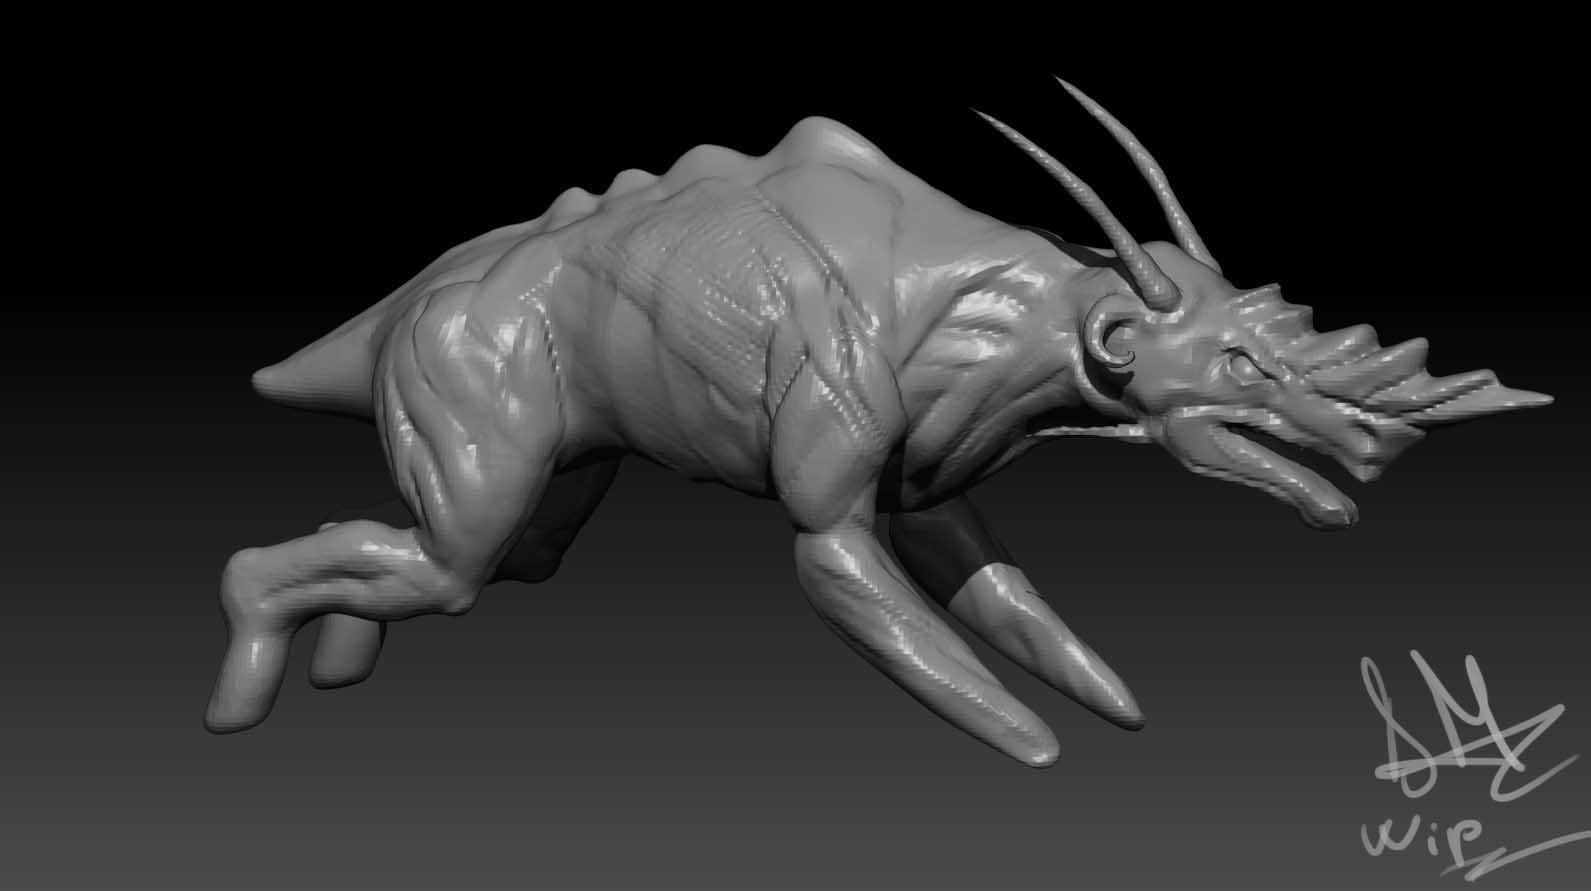
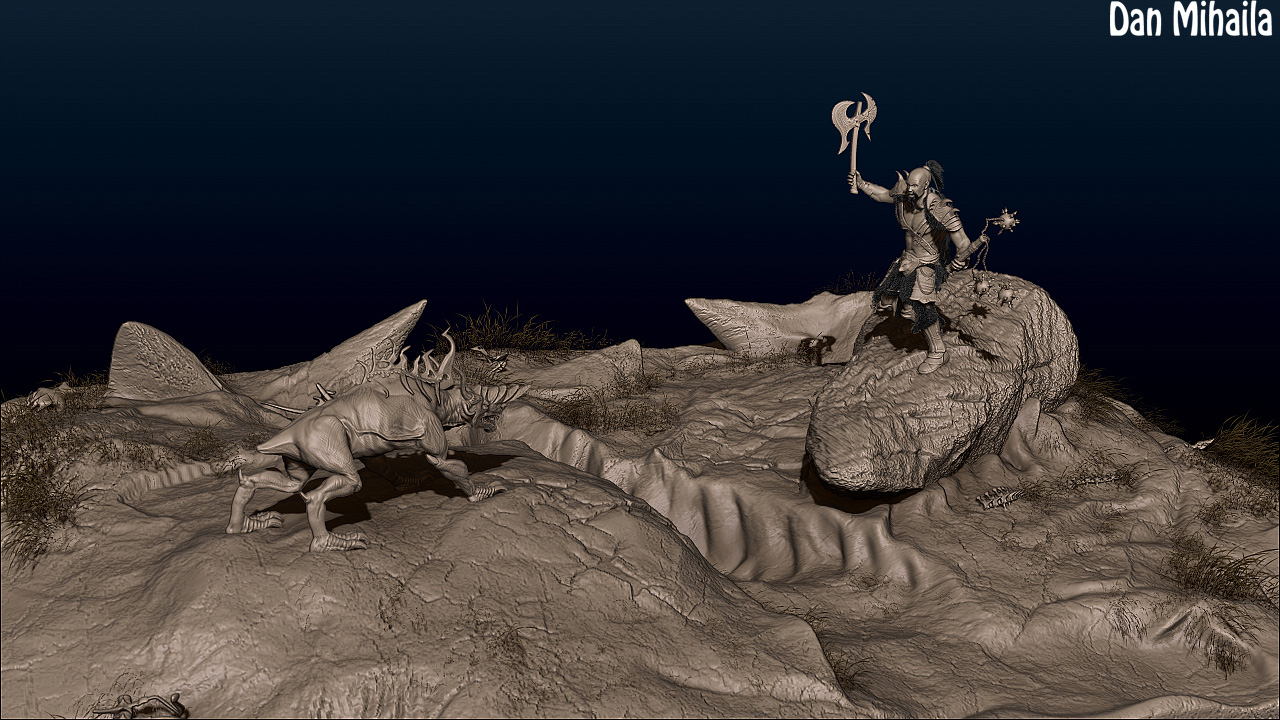
Hey guys! So, again is been a while since I posted here but I spent most of the time planing my future steps regarding this guy because I decided to take him and build a bunch of stuff around him and create my first composition. I prepare myself for a CG, modelling school and probably this will be my first peace for the portfolio I will apply with.

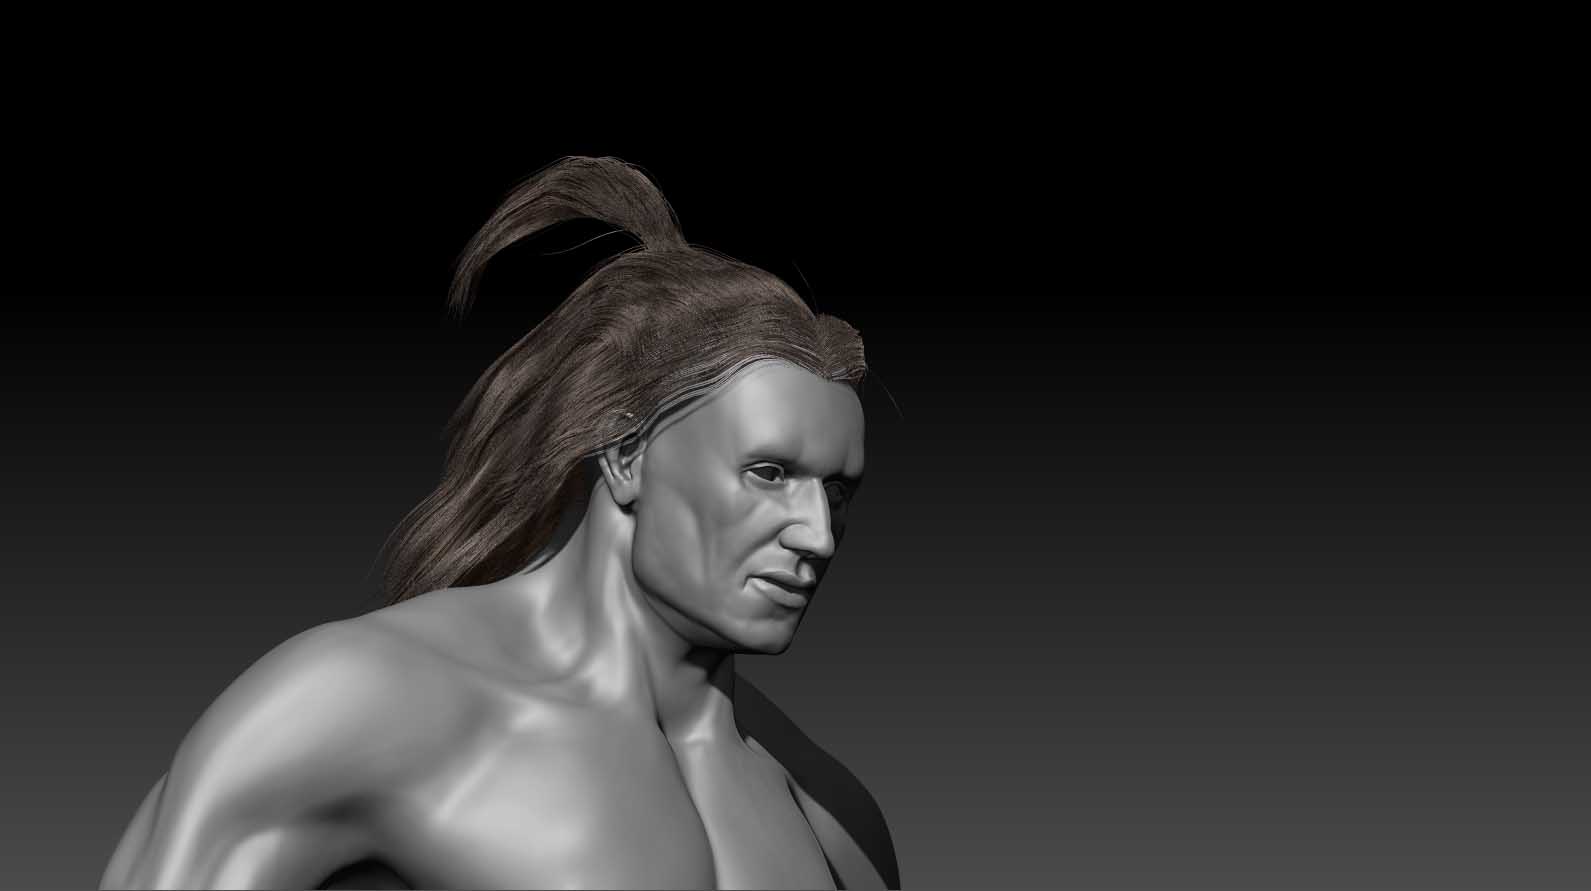
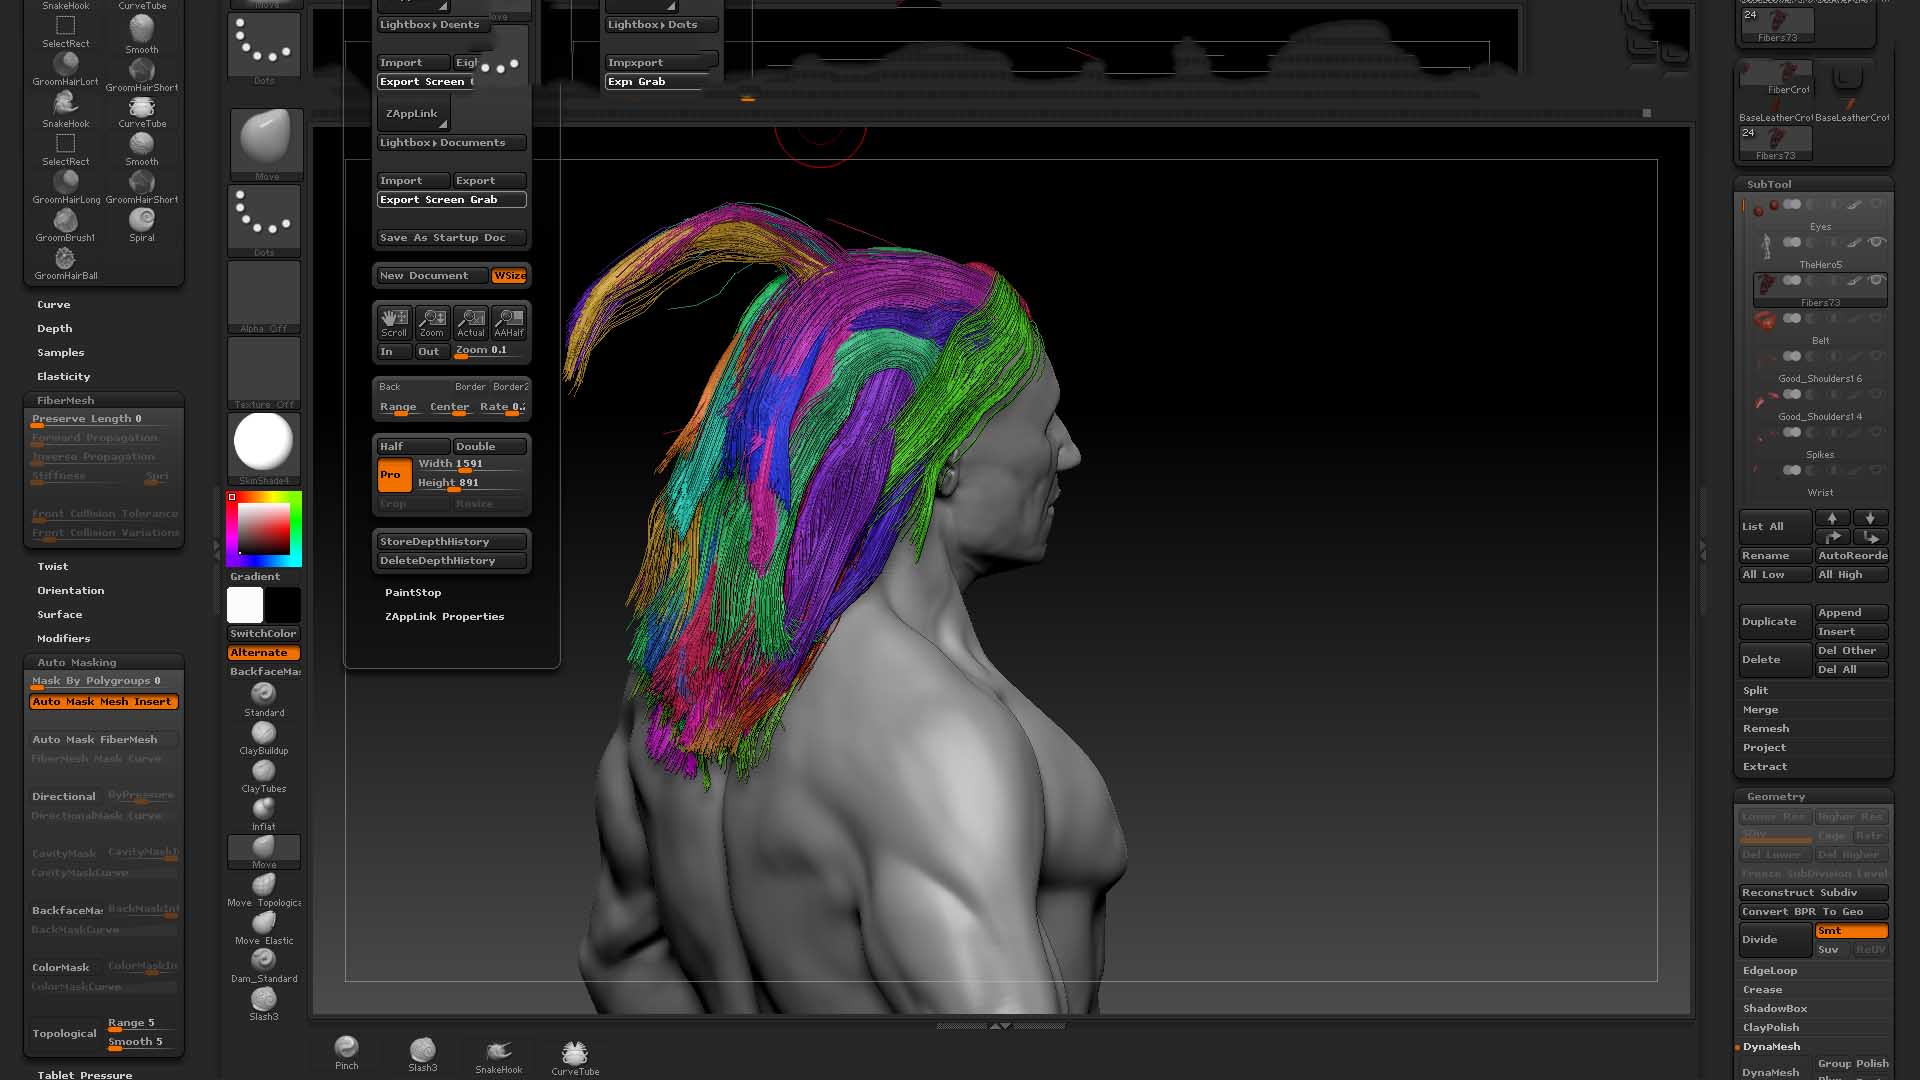
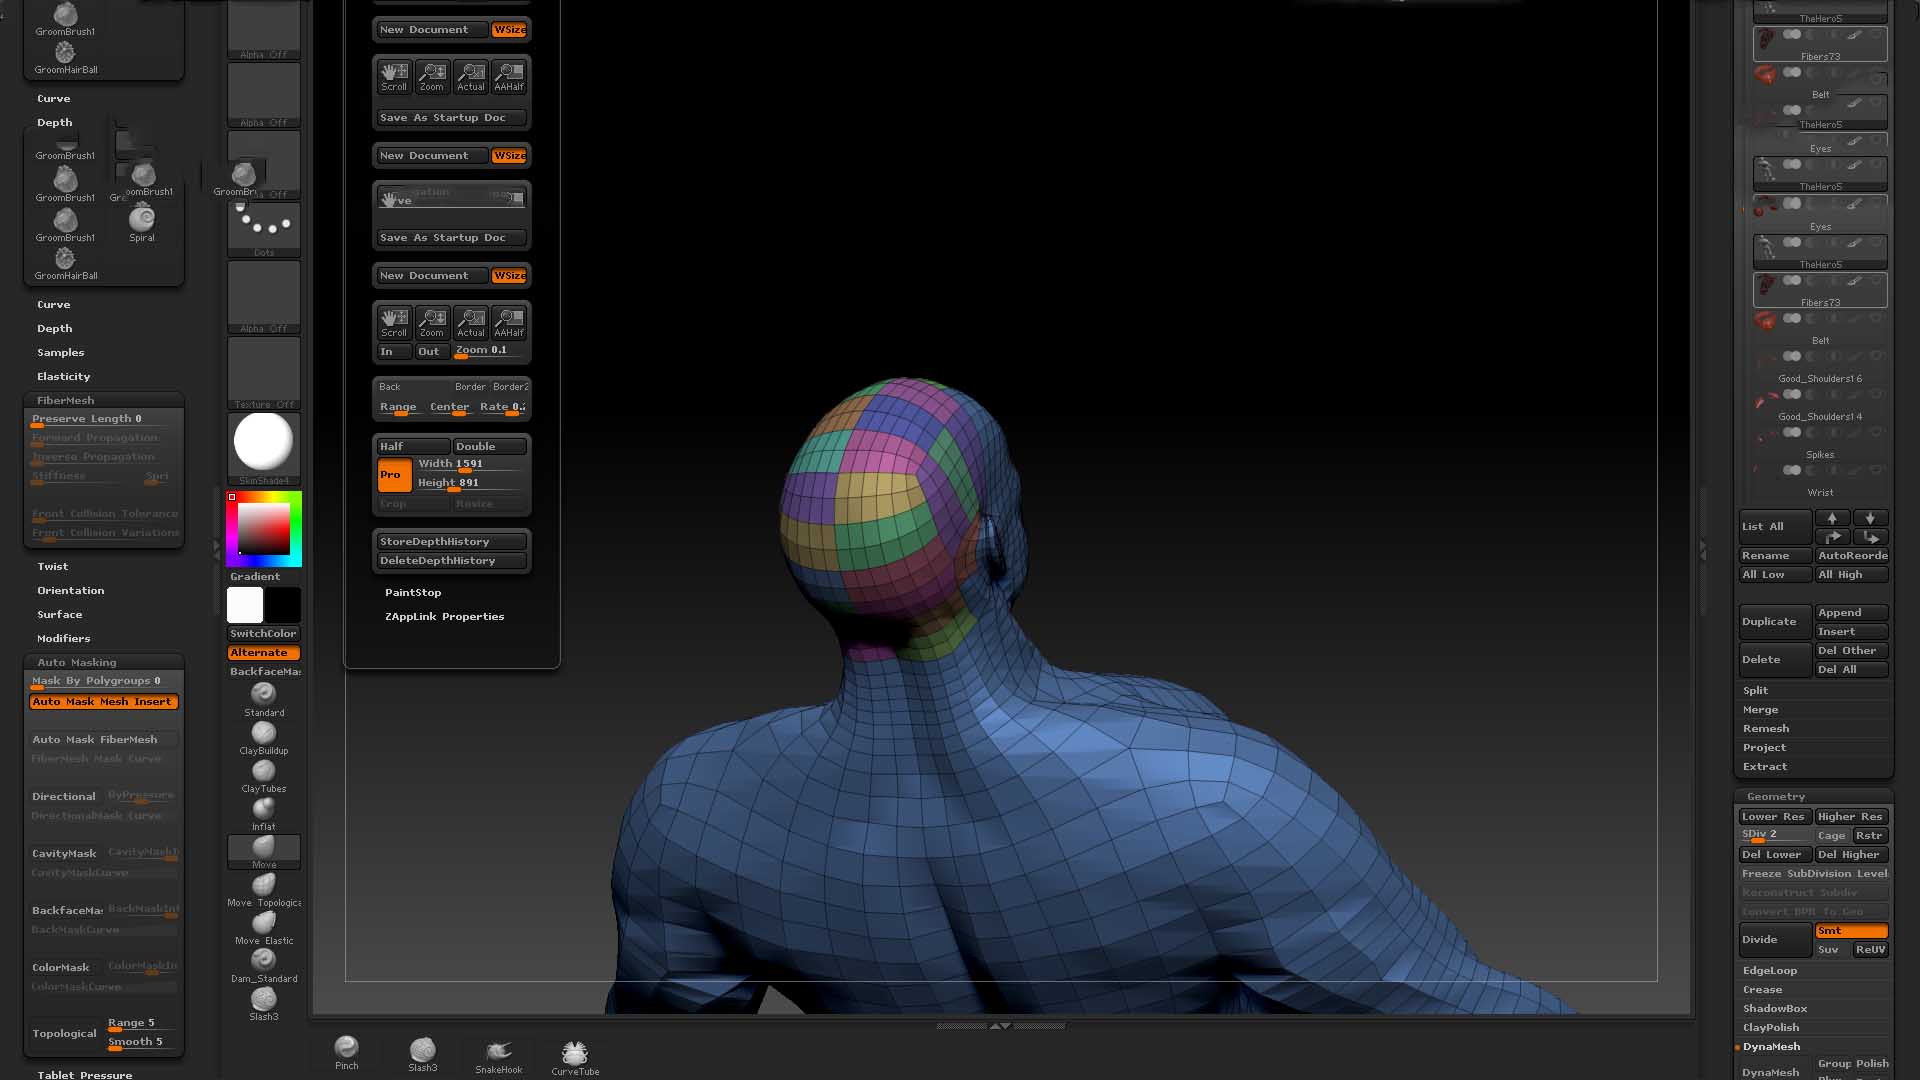
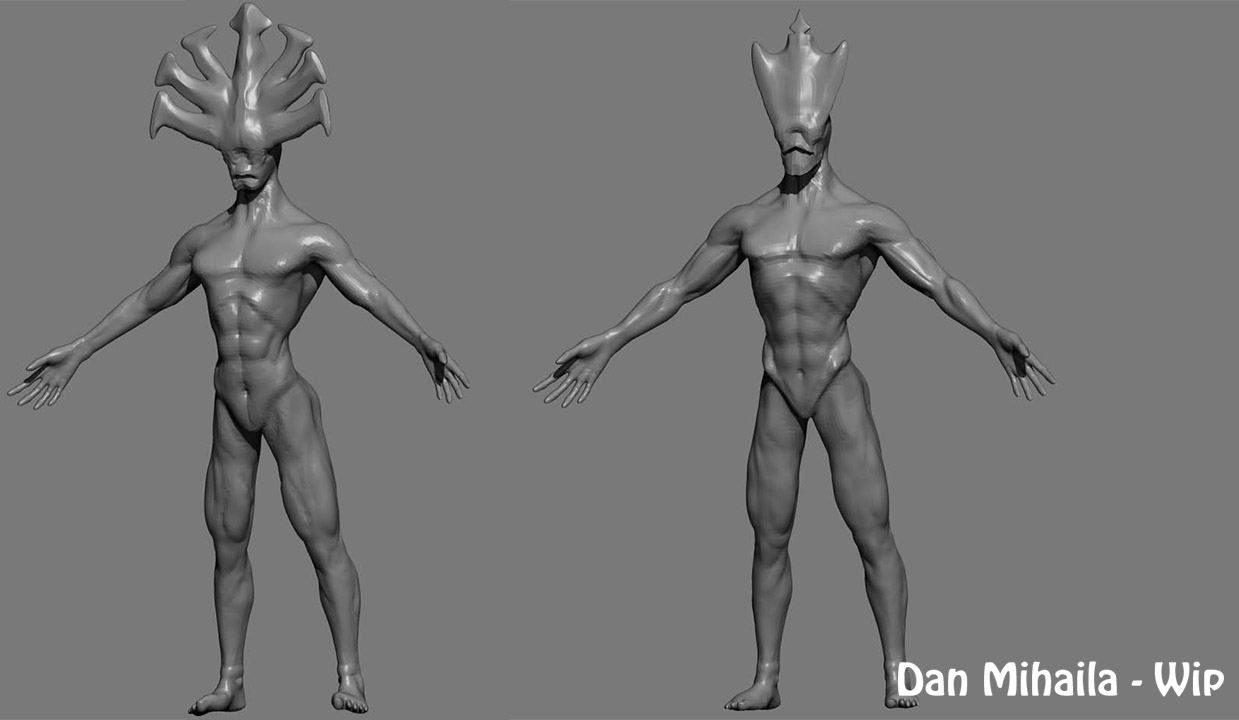
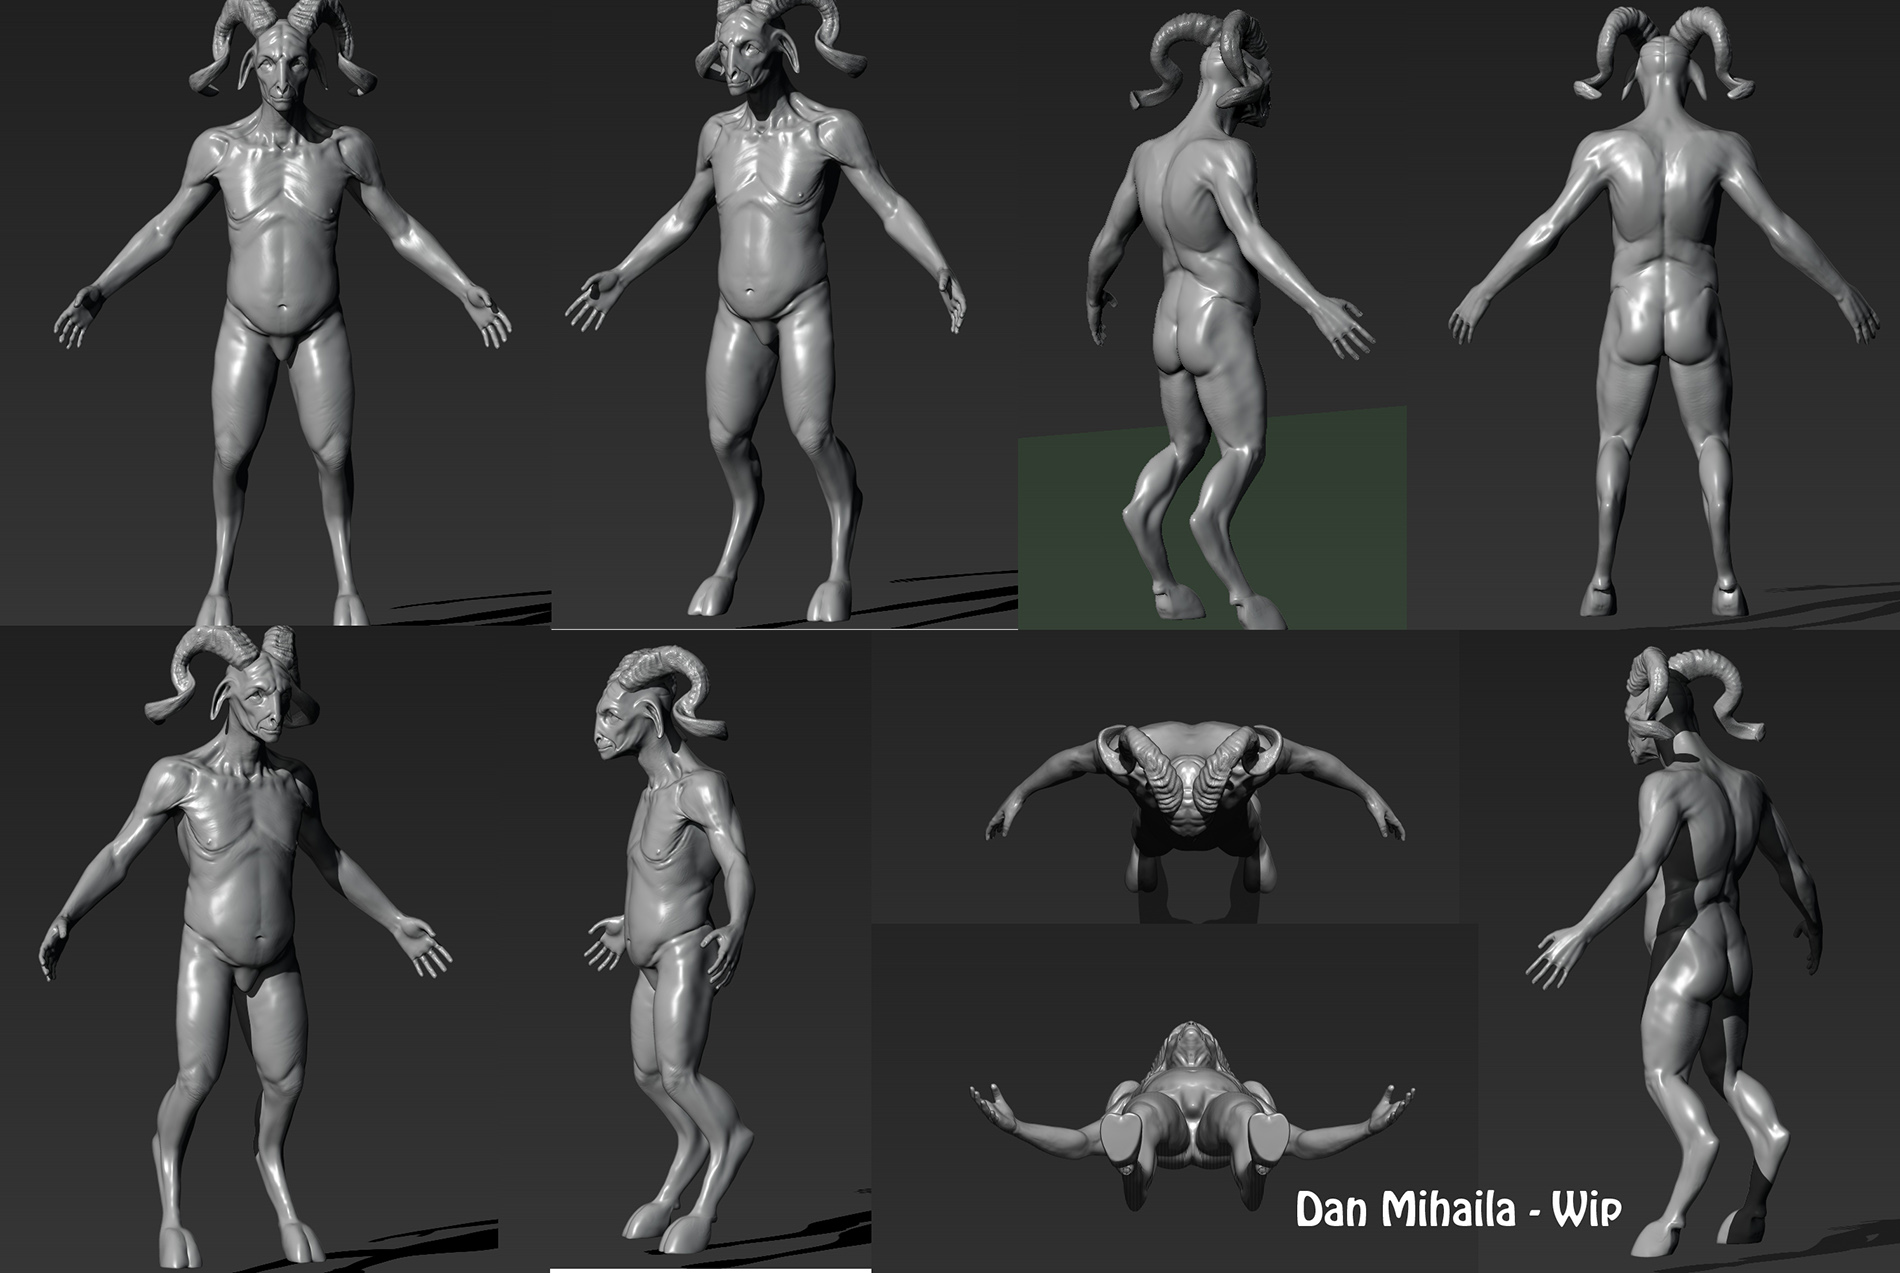
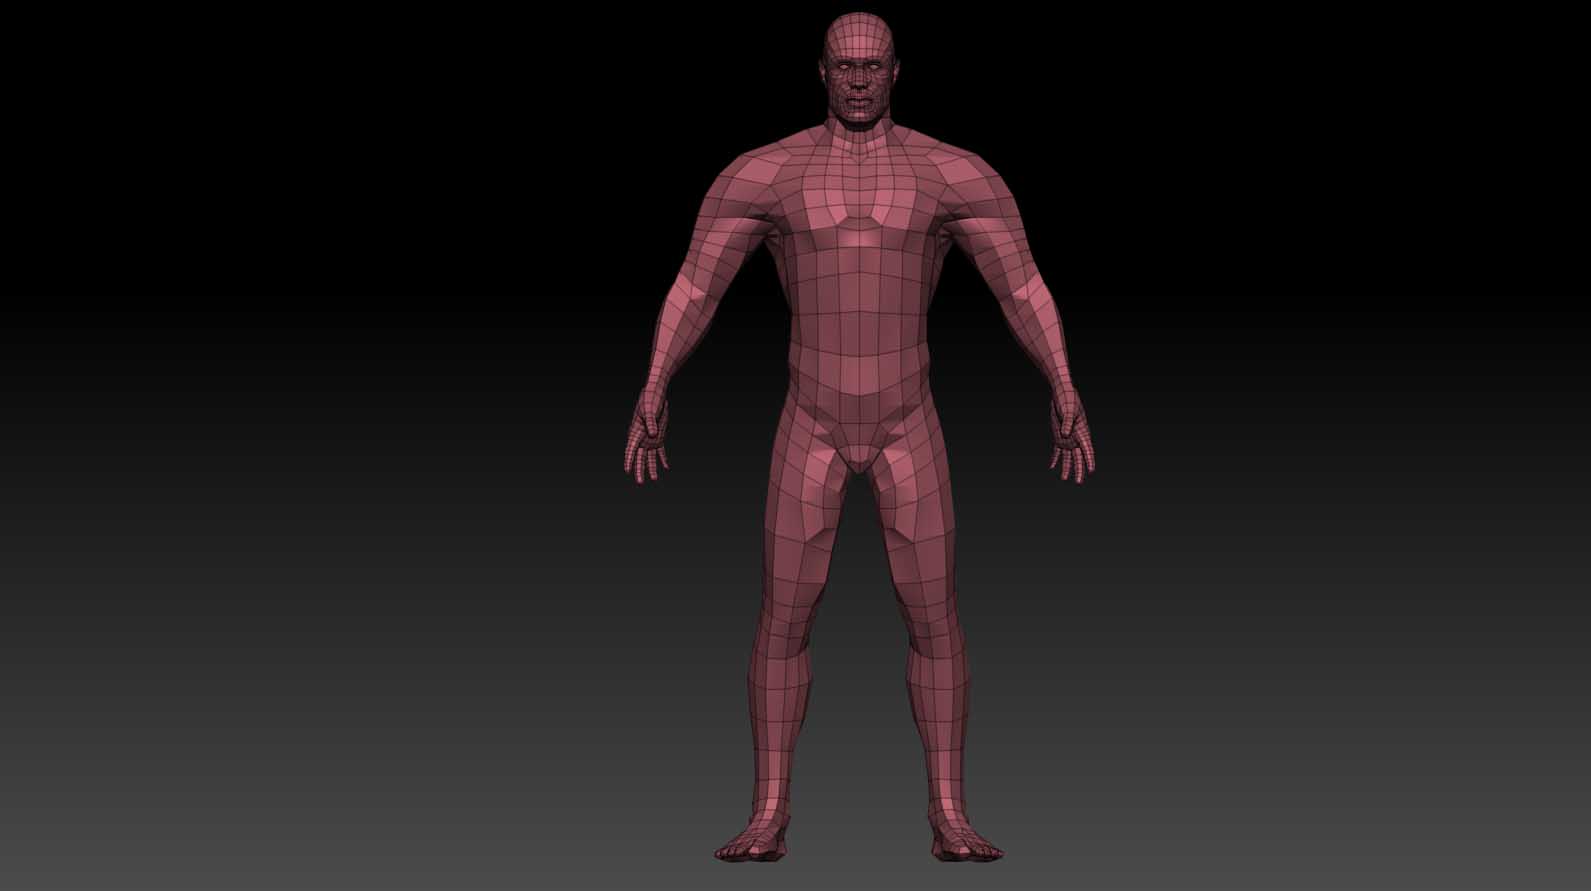
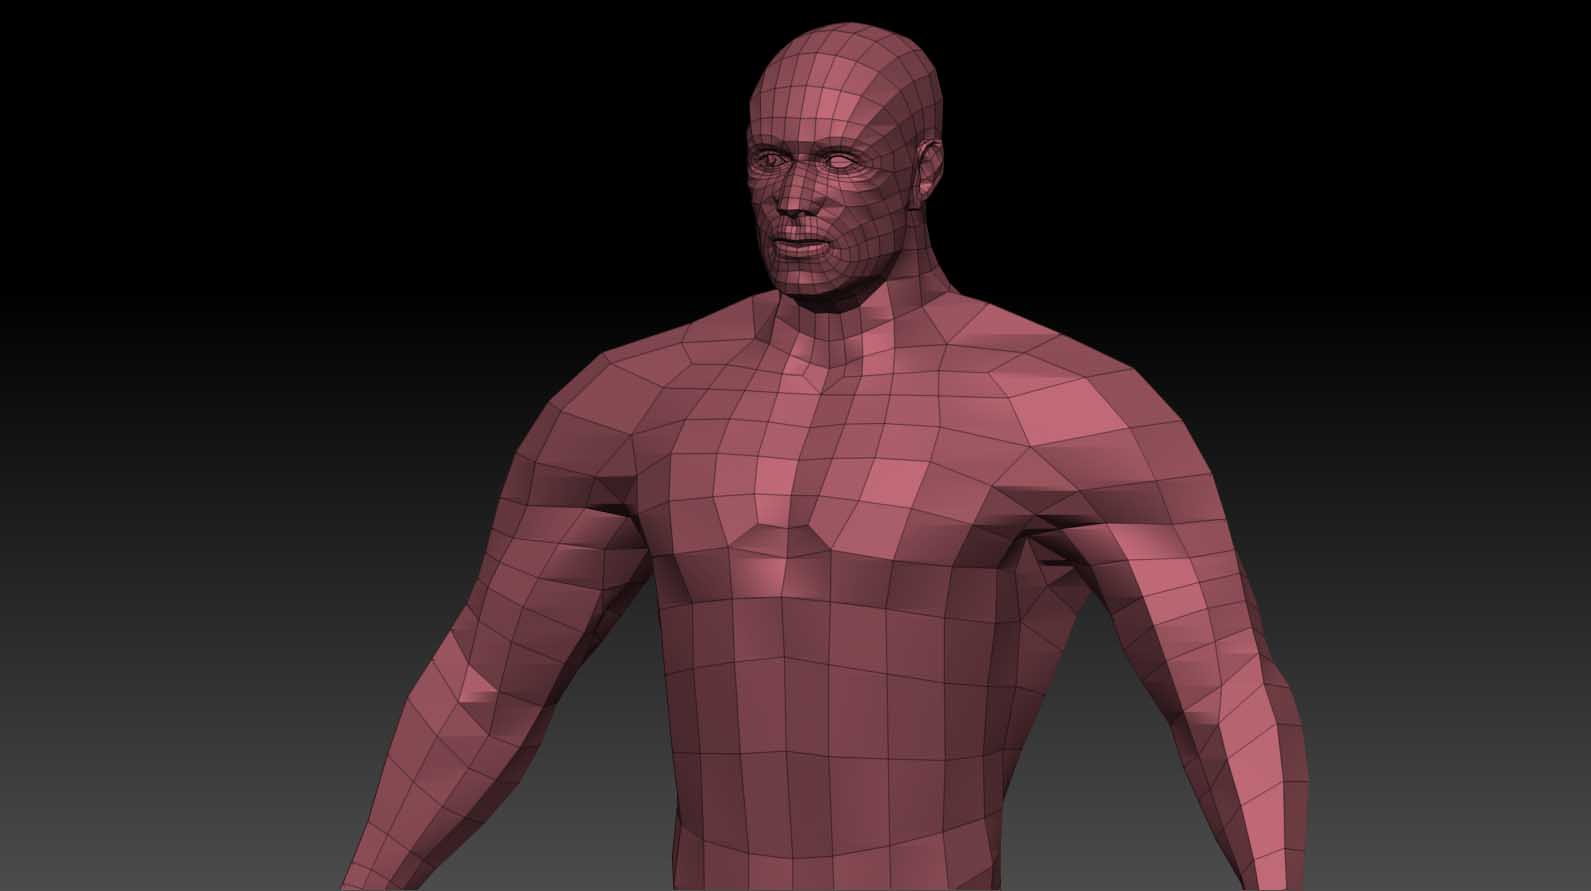
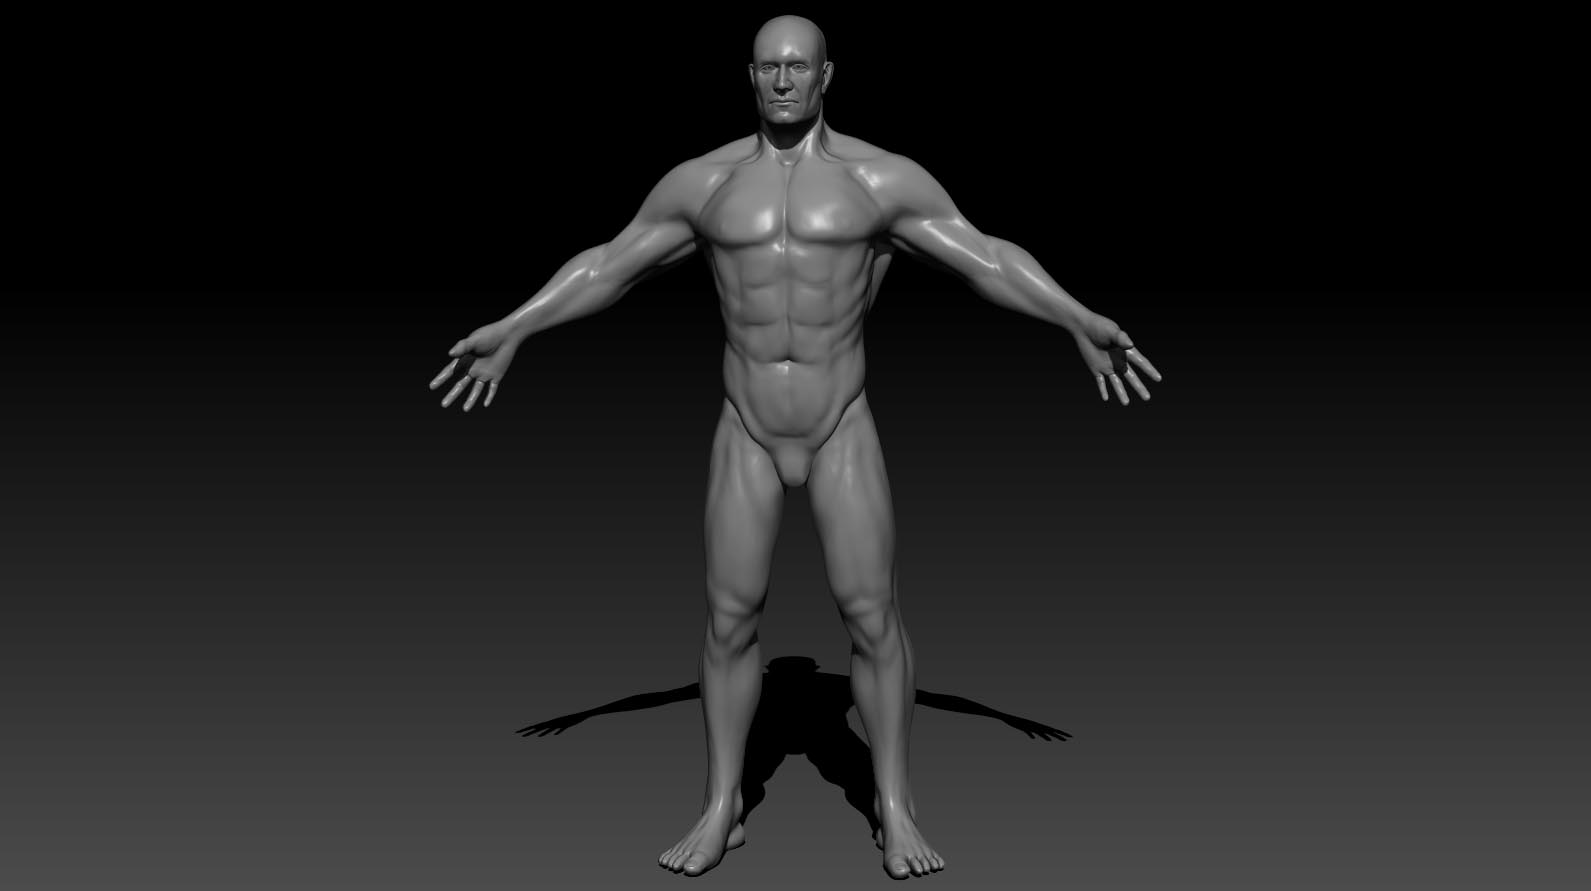
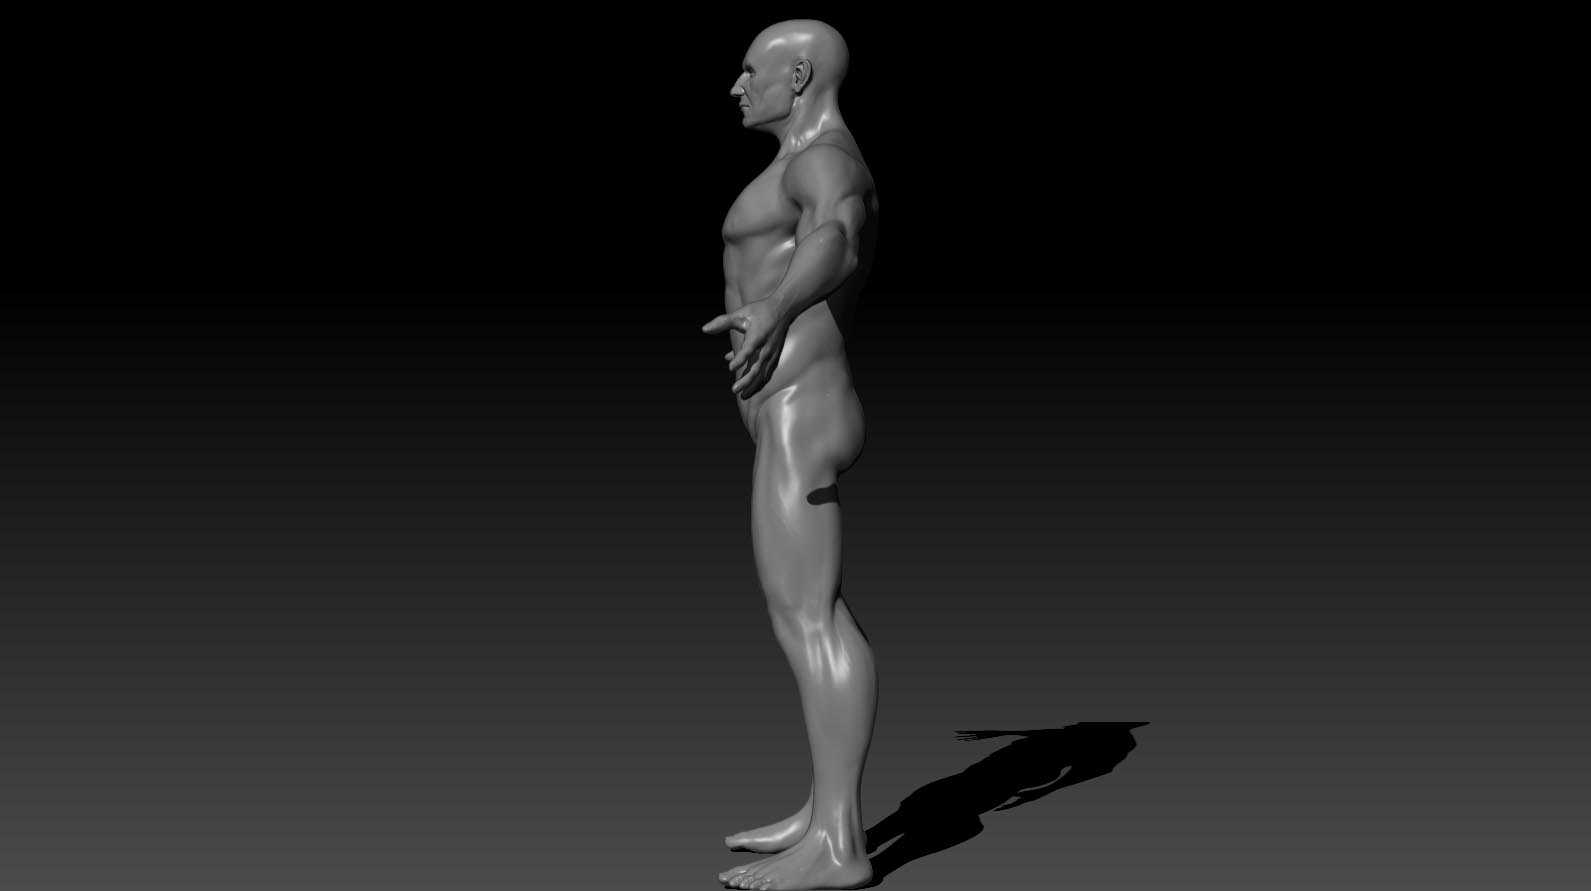
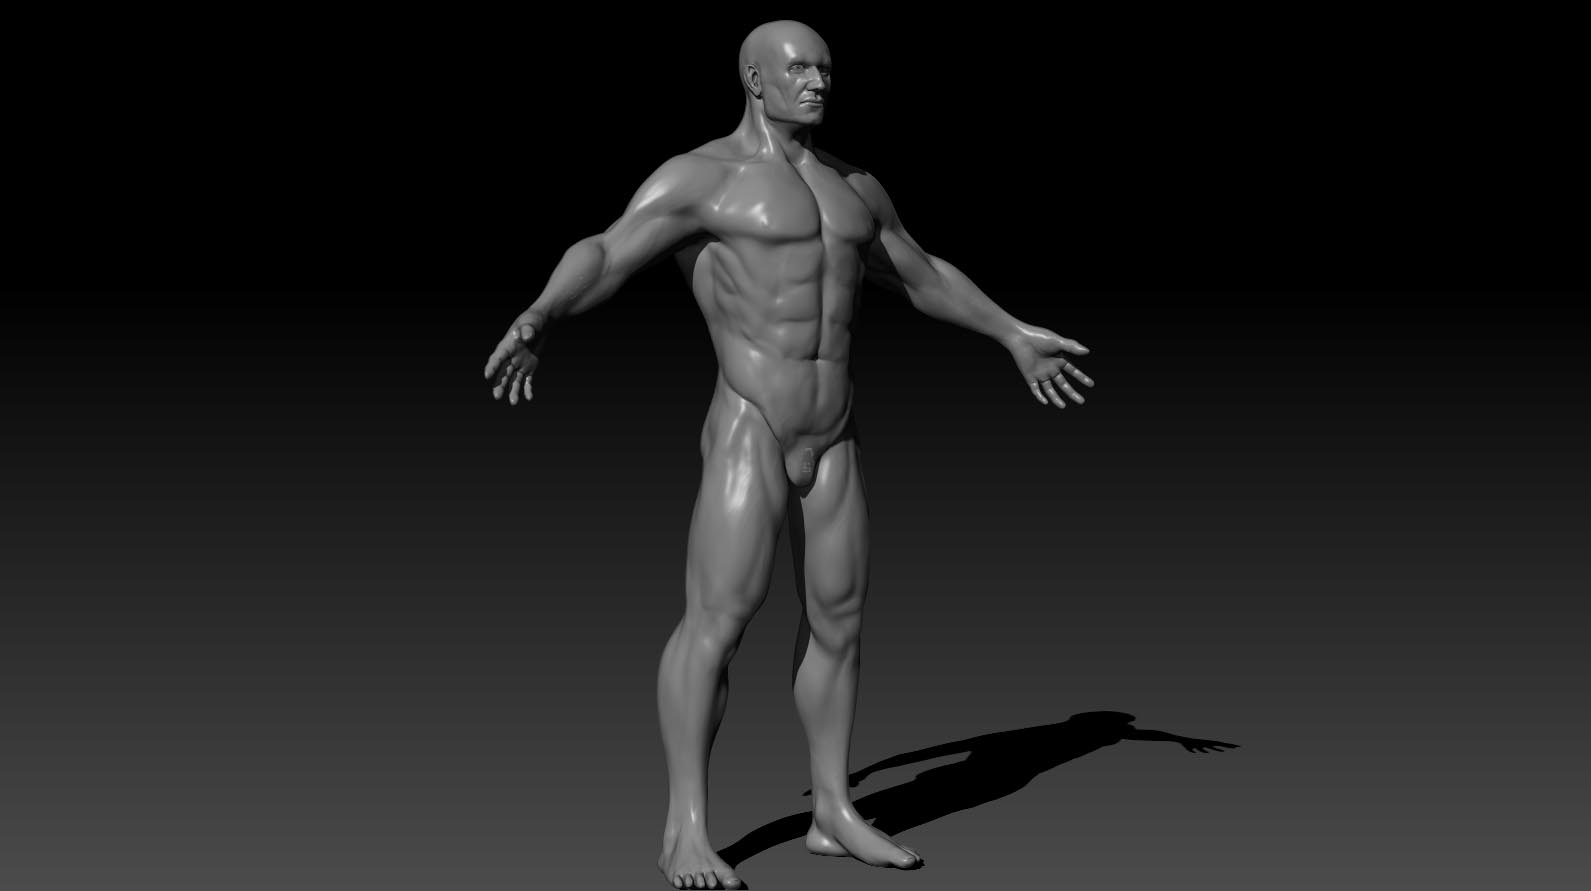
So anyway, even though you won’t see much, I went ahead and retopologised the whole model creating (what I hope to be) animation ready topology. I used the new retopo brush and boy, do I hate that brush?! … at least I did for a couple of days while I was working on retopology. I will share these problems at the end where I usually put my walls of text but, if you don’t want to go through that, I will say the short story here. Is an awesome tool to create new assets for a character (like armor) but when it comes to complete, character retopology is a pain in the ass after 50% in progress because a) it becomes slow (that means 7 to 10 seconds waiting time after a stroke) and b) after 80% it gives you errors (as in making random topology, out of the model, somewhere in the canvas, randomly choosing to put one poly in a random corner of the scene without you clicking it). But I managed to get it done by retopologyzing the arm, separate from the rest of the body; I generated the two new meshes and than got them in Maya and transformed everything into one mesh. The projection went just fine except one problem I had in the mouth… I wanted to create a mouth bag in Maya and than I changed my mind but I forgot a few polys floating around in his mouth so it caused some ugly artifacts when I tried to project. Everything went fine after I went inside his head, isolated to polys (ctrl shift alt until I had nothing left but those polygons) and than inverted the selection and than I deleted the hidden parts.

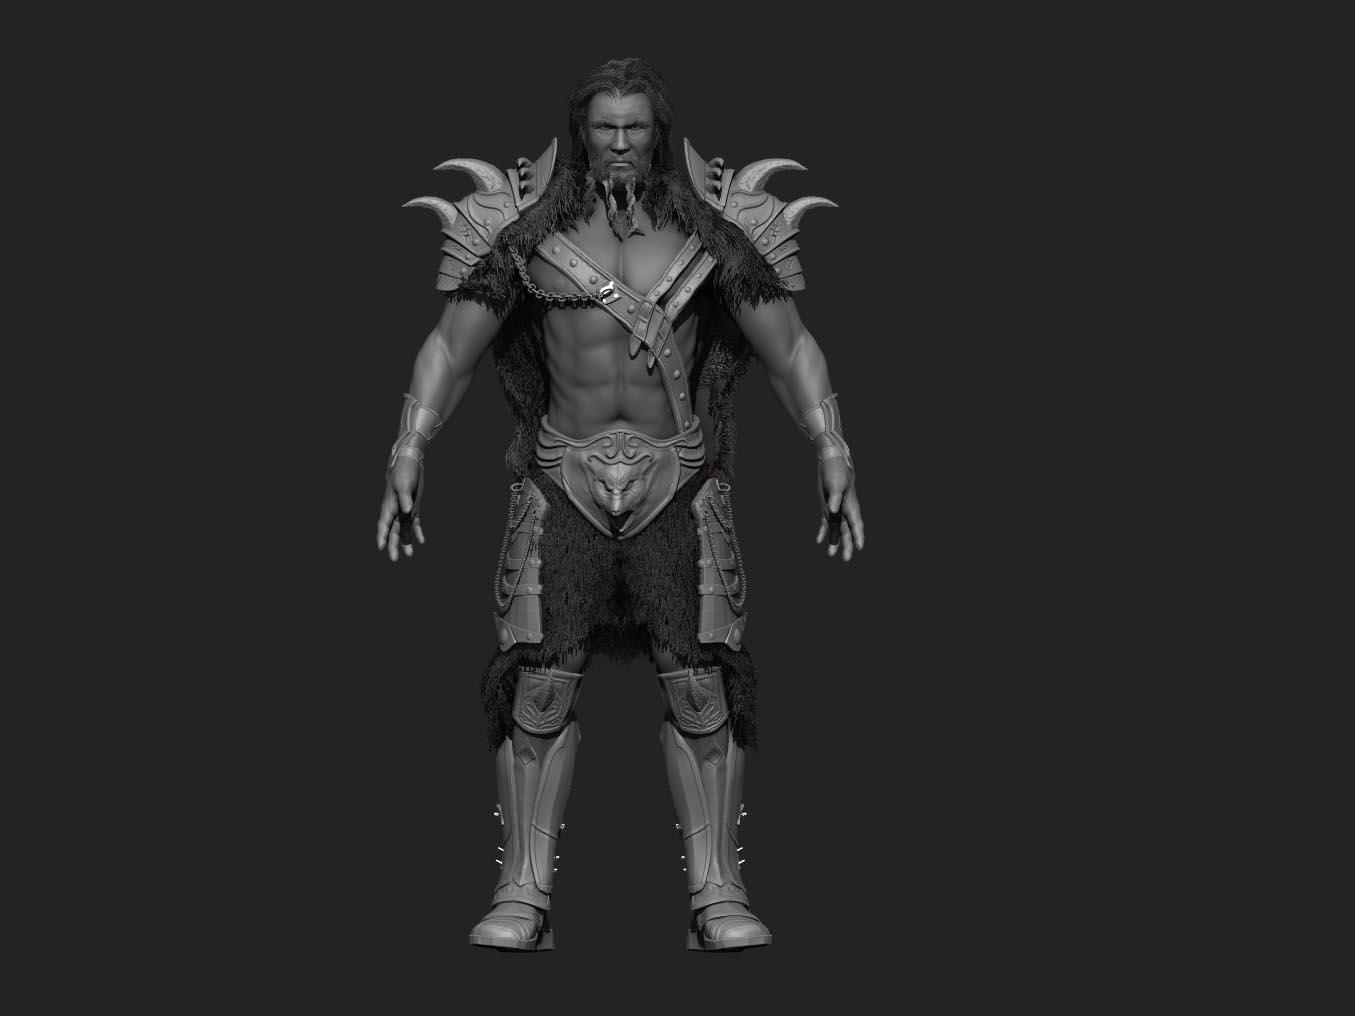
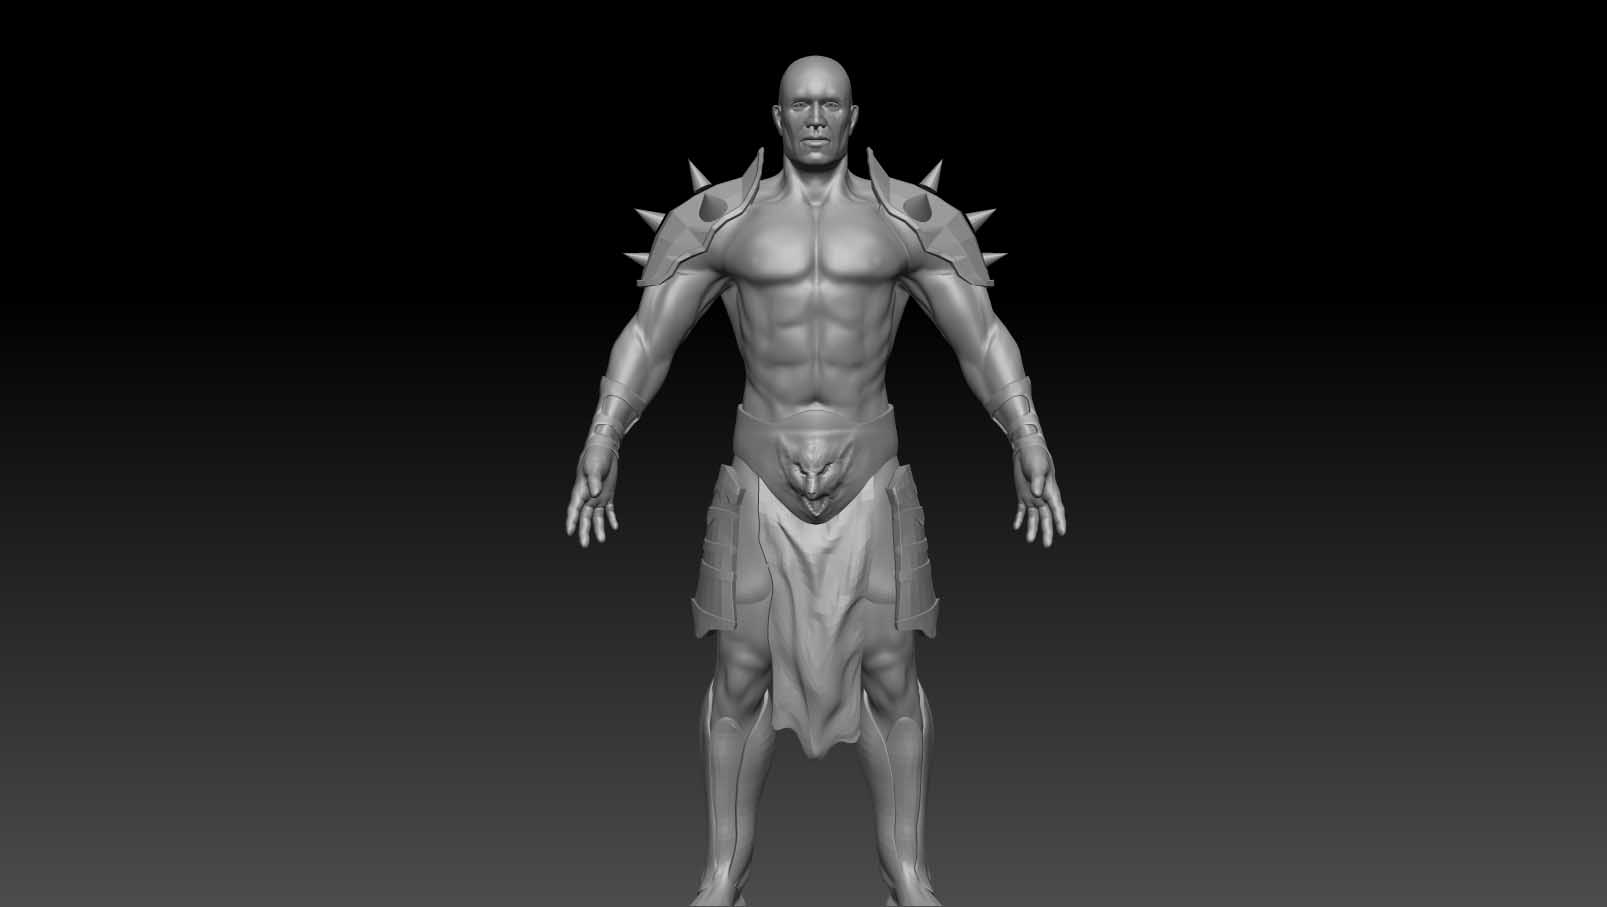
Now, I will show you some work with the armor want to create for him. Is supposed to be a barbarian like character and this is the rough, sketched armor. I found out that retopo brush is the ideal tool (at least for me) to generate this new assets for this character, mostly because they are hard surface modeling and since I don’t have any experience in hard surface modeling, retopo brush gives me a little help by creasing the edges and helping me to keep a clean look. I tried to generate them with extract option and… for me at least, is impossible to transform an extraction peace into a clean, neat looking peace… I always struggle with the edges, being to soft, I struggle with what is supposed to be secondary forms, which again, should look clean and resemble hard surface materials… With retopo brush I managed to get in there and a) get the forms I want from the beginging and b) do this while keeping the minimum topology needed and in the same time, the edge flow that I want (which means that I don’t have to retopologyze them).

So I will go ahead and post the pics and than I will finish this post by sharing some things I learned about this Retopo Brush.

BlockStage02.jpg
RetopoZZ01.jpgRetopoZZ03.jpg

The few things I wanted to say about the Retopo Brush were actually a couple of things that I struggled with and than found a way out… and these are thigns that I didn’t really find mentioned in the main tutorials out there, on the internet. First of all, as you probably know, to generate the new mesh, after you’re done with drawing the topology, you have to click on an empty part of the original model (aka, the model you drawn the new topology on). Now, sometimes you will see that instead of generating the new mesh, it goes into something called “Polishing”. For me at least, that was confusing because I kept clicking on the model and it kept polishing instead of generating the new mesh. The reason was the fact that the original mesh was partially hidden… So for example I isolated the crotch area to create the belt, and I had the above mentioned problem. Once I brought back the entire body, the click worked and I had the new mesh.

There is one more small thing I thought I might say, even though most of you probably know this… just thinking that maybe there are new people around (like me :slight_smile: ) who don’t know this. If for example, you have a character and you want to create a new peace of armor… like the belt. Once you generate the new mesh, it will be in the same subtool as the original mesh… which is not ideal… So to solve this issue, go to Subtool - Split - Split to parts. If your new mesh will have several parts (lets say that you did one part for the central part of the belt and another for the belt that holds it on the body) they will go away in their own tool… What you have to do is, after splitting them, to go to merge section and merge the tools you want together. Mind you, these commands will delete your history so, if you want to be sure, save the project before doing this.

Right… thanks for watching guys and, as usual, go ahead and post a comment or a critique! Thanks and I’ll see you guys soon!

P.s. / Edit: Ignore the attached pics… not really sure how to delete them…

Attachments

RetopoFull01.jpg

RetopoFull02.jpg

Great work man! I like the project you’re doing. But I do think there is something off in the upper arms in my opinion. The biggest concern is the Deltoid I think, compared to the other muscles it is a little big. Not so much in volume, but more in its length. Next to that your Trapezium seems to have a little indent, while normally they form an arch on top of the shoulders, especially wiith muscular humans like the one you are sculpting. I made a simple paint-over, I hope you can appreciate it, I am still a noob, but it just catched my eye. You’ll be able to fix this quite easily I guess. But, once again, great job overall man! I’m curious too see the final result.

paintOver.jpg

Thanks a lot man! Nice catch! I really see what you mean and I will definitely adjust that part when I will start shaping the final form of his body (I want to modify it a little according to the character I have in mind)! Thanks a lot and you paint over is very much appreciated!

What about the rest of the body? Do you think is allright? See the attachments of my last post… there you will find the body after retopo and all. Let me know if you can spot any other mistake! Thanks again for your time!

Glad I could help you out a bit. Well actually it all looks okay to me. There are a few minor issues from which some are an opinnion and some might be actual errors, nontheless they are all easy to fix (15 min in total). There isn’t that much to say about the rest of body if you ask me, the torso looks great, the front of the legs look great, the feet, the hands, and especially the head look very nice man. I made another paintover for you, fear not, it looks like a lot of critique but in fact it really is not. Most of the lines, especially the green ones, were helping lines for myself. The red ones are some lines that indicate you need a little more detail or whatever over there. The arms will take most of your time, but those correspond to the drawing I gave you earlier so that was just repettative work from me. The notch in the back of the upper leg, and the accents in the Calfs are a matter of taste, they dont need any adjustments if you don’t feel like it, as well as the indent at the side of the ass. Here’s the paintover, hope you can appriciate it once more (And just to be clear, I think your model looks great man, don’t think I am spraying on you, I am trying to give you a " fresh look"):

Hey! Sorry for the late reply! Thank you so much… Actually I was looking at the back but probably because I stared for so long, I couldn’t figure what looked wrong to me… Now I know thanks to you… Thanks a lot! Also, there are some forms that I noticed myself (the bottom of the abdomen for example) but I just went further on the project without correcting them… I will actually go in there and do all those changes and save the model as a separate project and call it done as a anatomy study… After this I will take him and adjust him according to what I have in mind for the character I was talking about earlier. Thank you once again for your effort and please, don’t worry… Is me who has to thank you for the feedback… I wish there would be more posts as yours! The bottome line is, when I post something I don’t post it because is perfect and just to show it of… I post it in order to learn more from people who know more than me. You are obviously one of those people (yea, I checked your thread :slight_smile: And there was something I wanted to note on your model and than I saw that you already posted an update with the exact same thing corrected :)) )and I thank you for sharing these observations with me.

I’ll try to post as soon as I have some progress on the scene.

There would be one more thing… If you or anyone else know a tutorial or a place where I can find some guidance for creating realistic hair with FiberMesh please let me know… I’m struggling with the settings for this guy’s hair and I can’t manage to get something that looks half decent… I keep getting a painting like effect on the hair… I will take a nap now and after I wake up I will try again with a fresh head… If I get the same issues I will post some renders and I will show you what is the problem… The thing is, everywhere I look I see people showing what is FiberMesh and what are the GroomBrushes… but I can’t find a tutorial on the insides of this tool… like how to achieve a certain type of hair/fur and so on… Again, I will try to play with the settings some more and I will come back later and tell you the outcome.

Thanks for your time!

Dan

Hey there again!

Right… so yesterday was a total mess… a miserable failure to generate any decent peace of hair… Today, I came back from work and decided to make it shorter and I changed some things arround and came up with what I can say that is the most decent peace of hair I’ve came up with until now… I thought I could post this and hope from some advice from you guys on how I might improove it… I thought that posting all my failures would be pointless… what I was getting was a coloured mass of something on top of his head… In best case scenario it was looking like a sketched/painted hair… So here is the image and here are the settings… let me know what you think please! And if you know any source where I might get more information about FibeMesh let me know please! It doesn’t matter if is a sub scription website, DVD, book… whatever you might know because I am quite desperate… I don’t want to go into Maya Hair… I want to produce my entire scene in Zbrush and render it here… I just feel like focusing on this single software for now. This was in case any one of you guys wonder why I don’t go in there to make it… I would if I could bring it back in Zbrush and render it there but I doubt that works…

P.s: Never mind the grooming and the general shape… I just tried to see how it looks and groomed just enough to get it into position and avoid overlapping.

Edit: Please let me know if you know more about Hair with Fibermesh and how it can be improved with the Hair materials… or any other materials… Or how you can improve the look from the BPR settings.

Since I think is important and you can’t see it, the “RADIUS” is at 0.6

Edit2: I’ve added the “Hair” Material and enabled some render settings and lowered the Radius to .35 and I came out with this look

I’m still not sure how to fix that odd spacing the roots have… Hope I’ll find something :S

Hey… Sorry for spaming the thread today but I think I’m getting somewhere… While the actual final hair style for this char is not near complete, I went ahead today and did a long hair and imagined a certain hair style that I than tried to recreate. The major thing I wanted to see if I can groom a semi complex long hair in order to create something that resembles real life hair. While I think that no one will be fulled by this hair, at least I managed to get read of that painted like effect.

I thought it might be nice to show the polygroups and how I organised the flow. Please let me know if you see anything wrong with this.

Thanks and sorry again for the spaming but since I got to work on this and since it is something I’m very confused about, I thought I might try to find another opinion on my struggles :slight_smile:

Cheers!

Dan

Once again: Glad I could help you out by giving some feedback man! And Its good to hear you appreciate it. I thinks most of the Zbrush Centrals’ users are posting here to get some feedback. At least I am, since I am far from being professional haha, those two sculpts on my page are my first 2 sculpts ever, so I have no experience at all. Therefore I need to disappoint you by telling you I won’t be able to help you out on the fiber meshes. You should however look around a bit on the forum for people who you think are good at fibermesh and just ask them if they want to help you out. You’ll never know what kind of help you will get. Good luck anyways! I think the hair is coming along already.

Hello again! So I managed to kinda overcome my problem with Fibermesh. I managed to get a hair in place and a couple od fur peaces arround on the model. I also brought the armor peaces to almost a finish stage from a modeling perspective (there is still more to do with their texturing and what not). I’m sure that I will go one more time through the whole model and do minor tweaks and repair some small mistakes that I found yesterday night when I was looking at these renders that I’m going to post now.
The process as a whole was very enjoyable once I got a certain method… I never did hard surface modeling in my entire life so this was a first for me… I had a learning source planed for this kind of modeling but one day I started to work on the armor and something magic stroke me in the head or something because in that day, in a few hours I manage to udnerstand the power (I mean the REAL power) of the Topo brush when it comes to character assets (aka subtools of the main … tool) and also understand the power of the new edge loop/crease control option combined with transpose modeling… Is like discovering a new modeling application in a modeling application… Is really fantastic how these work… Let me show you what I did:

The Fur peace on the back still needs some adjustments and I will probably change the coulour a little but at this point that won’t be a major thing to do since I allready know the Fibermesh settings that I need.

IMM brushes really come in handy and I didn’t explore them that much… all the belts and borders are done either with Topology Brush or, when I had small borders like the one on top of the Waist peace or the one around the pauldrons I used the tecnique based on edge loops and polygroups/ transpose modeling. When you basicaly take an edge loop, crease it and make a separate polygroup from it and than mask - inverse mask and inflate for a value of 1 or 2. I guess that all these techniques are fairly common and known but for some reason I didn’t find a lot of stuff about them… Or at least I didn’t before I manged to figure them out. However I do recomand you to go and check the Michael Pavlovich’s videos on Zbrush Classroom… Thanks a lot Michael and Zbrush for making those videos…

Now, what I also need to do is go in and review the proportions of the character a little bit since I feel like he can get a little bit bigger. I’m talking about the torso area and maybe I will try to define a few more muscles in the forearm. Also, the biggest problem this char has at the moment, in my opinion, are the eyes and his expresion in general… Is quite blank… So I want to go again over the face and adjust some key features. I want to do this before posing him because I want to get something from his look in this neutral pose because that will mean that once posed, the character will really comunicate with the viewers… At least that’s what I hope :slight_smile:

Allright… thanks for stoping by and please let me know what you think… Tell me if there is anything wrong or if you like something in particular. Let me know what you think about the armor as an overall peace and what you think about the character. Also, do not hesitate to make suggestions and please please please, go ahead and point out at everything that you see wrong!

Oh…almost forgot…Very important: The armor and how this character will look is havily inspired by Blizzard Entertainment Art style. I took a great deal of inspiration from Barbarian Artwork (the Diablo 3 class) and also from some WoW artwork. There were a few artists on Zbrush Central who really gave me ideas… even though there might be no clue when you look at this guy, there were some peaces here that really opened new roads for me to explore so I think they deserve the appropriate credit. Once I will get this project closer to an end I will make a file in which I will post all the artwork that I used. Thanks in advance and I will post these artworks soon. ( I’m thinking to start a blog so if I do it, than I will post all the images in there… think would be nicer than to do a simple list of names).

Thanks! Cheers!

how did you paint on the musculature to the base model? it looks amazing!

Hey guys!

So as I said, I intend to do a narrative scene with this guy and everything will be called “The Quest”… Is a very simple idea about a fantasy world where a hero does his hero things and hunts down beasts (is actually more complicated than that in my head but those are details no one would be interested in… they are there just to help me create things :slight_smile: ). This being said, I managed to get the beast done more or less this weekend. I will post a couple of wips and than the almost final render. I say almost because it still needs some work but my eyes are bleeding at the moment so I will stop here for now.

As usual, please let me know what you think! I really would appreciate your feedback on this creature since this is my first model that I do without any guidance (save the fact that the concept is not mine).

I started with three boxes and went on with Dymesh. Than added the extremities (paws) and the other small parts such as tongue, teeth and eyes. I tried to really get a decent structure on him so I went and took some horse anatomy pics and tried to bring some of that into my sculpt. The detailing was a mixture of alpha as a starting point and than, since I didn’t like how repetitive it was, I went down and for a couple of hours I stood and adjusted the details across the body.

The model is imagined after an idea originally modeled by a guy called Justi Romero. At the bottom of the page you will find a link to his demo reel on youtube and from there you can get on his website. I am sure many of you know him since he has one of the best models I’ve ever seen in my 8 months of CG world :).

Wip001.jpgWip01 copy.jpgDragonWip01.jpgDragonDetail01.jpg

The boney parts from the top of his head (yea they are supposed to be made from a bone like material) are still to be detailed… that would be the most obvious part left untouched… But go ahead and shoot whatever you can see and let me know what you think. Mostly if you think is ****, please let me know what you think! Please :slight_smile:

Justi Romero link: http://www.youtube.com/watch?v=CJ8-gkt8yi0
A timelapse I did with the Undo History and posted it on Youtube: http://www.youtube.com/watch?v=2TWdGN0KGxY part 2: http://www.youtube.com/watch?v=t2arB3MMY5w and the detailing part will come soon. The thing is I am not happy with how it looks so I might just start recording with Fraps or smth because the camera moving is very tiresome and you can’t see what I’m doing at times…

@Abraham Margosian : Hey there mate! Ahm, I am not sure what you mean… Like, how I sculpted the anatomy of the character? If this is it than you can find a bunch of details about the process on the first page of this thread. Hope I answered your question :slight_smile: If I didn’t let me know. If you’re new to Zbrush and would like to learn more check the Zbrush Classroom in order to get an idea about the program. If you want to push it further let me know and I can recommend you a few teaching resources.

Edit (31st of October): I just found out from Justi Romero that the original Dragon model was designed by Kosta Atanasov… I can’t load his website but I will update this as soon as I manage to get a contact with him!

Great to see someone this ambitious and articulate about his/her work! :slight_smile:
The final result on that human character is great! Keep studying and struggling! :+1:

Lycka till :wink:

Hey Santis! Thanks a lot for your comment!

Yea, is really awesome to receive a comment from some one whose work you appreciate so much as I do yours :slight_smile: Tack så mycket!

Looking foreword to see what I can come up with when I get down and start sculpting the environment and color the whole thing :slight_smile:

See you soon!

Hey guys!
So I have commited this sin again: I stoped posting in my sketchbook on Zbrush Central. I feel ashamed but I am here to repair the damage.

That was the bad news. Now the good news is that I stoped posting but I didn’t stop working. As a matter of fact in the past 6 months I’ve been working like a lunatic to get my portfolio done for university addmission. And I’ve done it. Is done. :smiley: :smiley: :smiley:

Now… if you want to skip the whole thing and go and see my portfolio, scroll down to the bottom of this post and you will find it there. I won’t put it here because I want to post some still images and a little about each of them… since this is a sketchbook/diary makes sense to do that, right? :slight_smile:

So, not much after I made the last post here, I began an amazing course called “Character Design”. This course had Danny Williams (the one and only also known as Pointpusher) as instructor and it took place on the interwebz hosted by Visualarium. Now, I plan to do a post on my new made Blog/Website (yes, I have one of those as well now) about what I have learned and how amazing this course was. Here I will only show you what I came up with from the course. The short story is that because of this course I had the chance to learn amazing things in a short period of time, and the practical achievment is that the backbone of my portfolio was done here, at this course.

So let’s get the chars roolling:
The course was divided in three: Character for Games, Char. for Animation and Char. for VFX (live action).

So for my first assignment, the game character, I came up with this guy who is supposed to be a boss in a RPG kind of game. I started from thinking at WoW but as style I migrated more towards Diablo grimmness (is that a word?).

WIP images:


Final images:
Final01.jpg

It seems I have to do another post in order to upload the other chars since there is a limit of images/post.

So I will end this here and be back with the other characters.

If you want to go straight to the portfolio (which is a 3.50 minutes video), you can find it here: http://www.danmihaila.net/portfolio/

Cheers and see you in a bit! :slight_smile:

The second was the Cartoon Character… which was quite a bit of challenge and that’s because it was totally different from what I was used to sculpt (realistic, fantasy, bad ass… etc).
So I created this guy, who’s name is Frank. I’ll let the images speak for themselves :stuck_out_tongue: :slight_smile:


Great environment work! I would love to see a breakdown of how you did it. Nice scene :+1:

And the last one was the VFX Character.

This was done by going back to my old master, Scott Spencer. I took one of his concepts and developed it in a slightly different direction…

Here is what I came up with: :slight_smile:


And last but not least, I finished the scene with which I began this thread… The Warrior/Dragon thing.

Credit for the Dragon concept goes to Kosta Atanasov. He developed the 2d concept which later I saw at Justi Romero (the place from where I took it to recreate it)

Won’t post any wips since you kinda have them in the first posts. Here are a few screens from what I present in my portfolio.


So this is it in a nutshell. Here is the link again for the portfolio in case you want to watch the whole thing http://www.danmihaila.net/portfolio/

That’s all for now. This time I’ll try to be quick and return with some fresh models soon! :slight_smile:

Thanks for dropping by!

Cheers!

Dan