ZBrushCentral

Creative Ergonomics Lab

Hey Antonis.

I was waiting for this wip tutorial from you and look at my luck i cant practice it or take part in it, due to my injury as I have no zbrush at my brothers place…

I just dont know what to say, without practicing it I cannot learn.

Anyhow I will keep attending this post and if I have any questions will shoot at you.

Keep trying more, especialy these cartoon characters.:wink:

great thread
i really like that last character !!!
he is fantastic

Mytholon,

As Matthew said, this is a real “breakout” thread and I must add my thanks to those that have already been expressed.

I’ve used ZBrush in a rather similar fashion for a long time now but your illustrated examples here have exploded my thinking. I’m especially inspired by the most recent workflow - Sensi Yatanaki - mixing ZSpheres with inserted local meshes - poseability with modeled detail - a fantastic prototyping strategy for enhancing my hand-drawn end-product! Woo!

Sven

[edit ]An example (from six months back) of my sketch-style, drawn over VERY basic ZSphere-posed figures, using Bauhaus Mirage’s 2D Animation Software…

[attach=49613]gang002a.jpg[/attach]

Attachments

gang002a.jpg

Oh man! A character inspired by a picture of Morihei Ueshiba, the developer of Aikido! How cool is that. :+1:

Wow! Love how fast you did that. Also I like the drawing directly in Zbrush instead of in Photoshop. I have to take a closer look at this whole thread. Thanks for posting.

Wow you connected the head in ZBrush? I just did this with my Cupitron character but in Maya. Gotta learn this.

Mytholon,

Good to see some more of your excellent work and thanks for sharing your techniques. It is always interesting to see how others work and your methods are adventurous and illuminating. All very much appreciated. :+1:

Cheers,

Thanks for the great thread, Mytholon. You’ve given me some great ideas on how I can use ZBrush further for my own work.

This is great. Yet, I am not familiar with the local mesh combination. I gave it a try and it put my mesh inside the Zsphere. How do you properly connect it?

Wow, another great Mytholon thread. I keep all these as part of my Zbrush reference materials.

Thank you very much for sharing this with us. Hopefully more newbies will realize that Zbrush is a full-blown and unique paint program and not just a mesh-head sculpting tool.

Great contribution! :+1: :+1: :+1: :+1: up!

(No, I don’t have four thumbs, the other two are my big-toes). :wink:

Mytholon,

I’ve been inspired by all of your posts but this has got to be my favorite. Thank you for all that you’re doing to show how useful ZBrush can be for 2D artists. Your examples have completely changed the way I think about ZBrush. I recently picked up some freelance work doing book cover illustrations. I was going to create the images in LightWave, but because of your examples, I’m convinced that it would be better to do them in ZBrush. Thanks again for the tremendous inspiration!

Cheers!

Steve

Thanks for the answer :slight_smile:
I got one more question though…how did you make the last render pass in the row? (the 4th from the left in the 1st image, 3rd from the left in the 2nd) What material, etc was used?
And, here’s to show i’m a real rendering noob, what is that pass even called? :o

It’s the ‘Depth’ pass. You can do that using the tool ‘MRGBZ Grabber’. When you select that tool you can draw a rectangle on the canvas and all the depth information in that rectangle is converted into gray scale values and is stored as alpha in the list of alpha images.

All rendering systems I had my hands on can generate this path. It’s always useful if you want to create an effect which is distance/depth related. Like fog, haze, depth of field, light intensity, a gradient. OR if you do a composite out of two pictures you can use this information to mask away parts from one picture/render which would be obstructed by elements from the other picture/render.

This map does not require the application of a special material. It’s a byproduct of the render process.

Hope that helps and I hope that’s the map you meant.
Lemo

PS:Black value = as far away as possible , white = as close as it get’s.
[attach=49630]ballstack.jpg[/attach]

Attachments

ballstack.jpg

mytholon…great thread as always…one question…

do you keep ps open while doing your various pass experiments and tweak via zb or no…just render whatever ya think might work and deal with it later?

was wondering cuz sometimes i can save time by keeping a seperate file open in ps in which i copy layers over to for quick checking if i am heading where i want to go or not before returning to the zb file and returning to zb with either way too many new options haha or realizing that was definitely not the material etc way to go etc etc…

love all your threads…as always…very informative, opens new eyes for sure, and if nothing else…a pure joy to watch someone who loves zb (who actually has talent…i mean as opposed to me not any one else in zb land) …push it…and find there is still more one can do.

Thanks for sharing!!!

omg omg omg OMG!

Mytholon,

Just want to tell that you’ve really impressed me by your workflow. I really admire your skills in post-production using Photoshop. The passes you’ve used have a great possitive influence in the results. Great!

Mick

Thanks a lot lemonnado! That’s exactly what I wanted to know about. I even tried it out myself in Zbrush…it’s really easy to do :slight_smile:

You’re welcome. Also check out the mostly unnoticed Draw -> Channels -> Z-Tolerance slider. Together with the ability to lock the brush into a Z-Plane with the right Picker setting (Once Z, or Z depth slider there), you can do amazing things like paint earth layers in a canyon according to depth etc…
Cheers
Lemo

Sample: Every color is on it’s on depth layer using the picker on Z-Once and a Z-Tollerance of 0.3. The brush is a single layer brush, single stroke, and flat alpha. Variations are plentiful and yield very interesting results. I am sure it’s a cool weapon for manual fog with lower color intensity settings.

[attach=49704]umbrellas.jpg[/attach]

Another great use is to lock the depth to paint a grout into a tile floor and then the tile colors on top without ruining the grout…

Quick and dirty depth limited texturing sample (2 minutes total):

[attach=49713]quickie.jpg[/attach]

Attachments

umbrellas.jpg

quickie.jpg

Mytholon,

You Sir do some outstanding work and I really whole heartily appreciate your contributions to this forum!! Great innovative ways to work in concise and time efficient manners while maintaining amazing quality. :+1: Continue to look forward to more!!

Thank you all for your taking a moment to write a coment. I am glad this thread is helping people with their workflow.

Lemmo: Thank you for your answers. Very usefull info.
Aminuts: My PS process is preaty much streamlined, and the render passes I do are standardized (to achieve higher speed). However, I do keep both programs open, because I often do a pass on the fly. I do this when I get the feeling that my image is becoming stale, to look for happy accidents and keep things fresh.

Recently I have been inspired by the ergonomic procesess of Thierry Doizon, Sparth and the rest of the Steambot team. Hey, they are my heros!
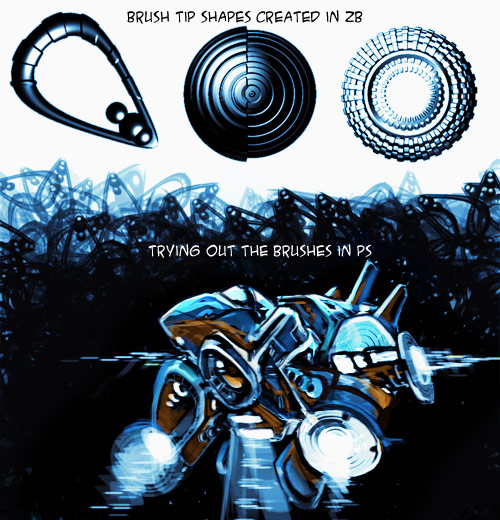
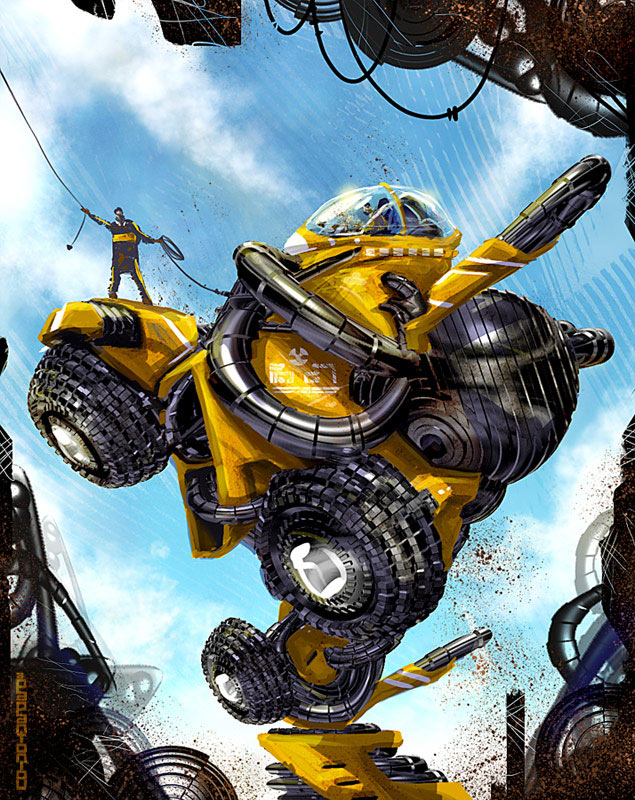
So I decided to try their brush utilization techniques in combination with the magical capabilities of ZB in creating particle forms (base forms from which larger and complicated constracts are composed).
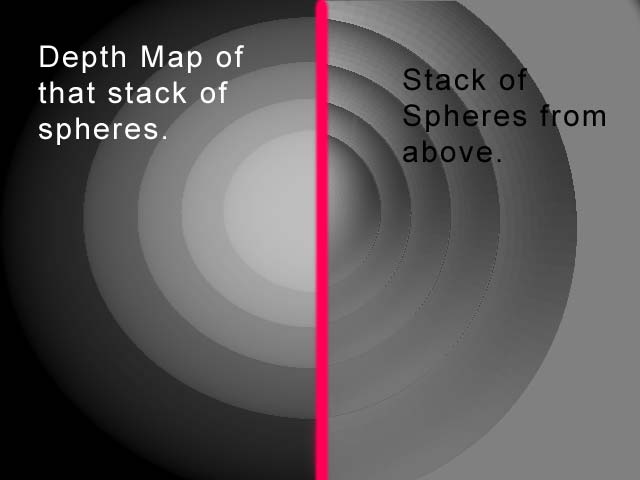
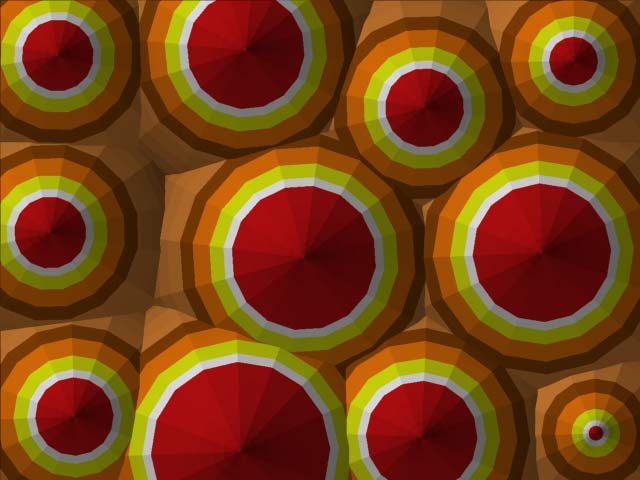
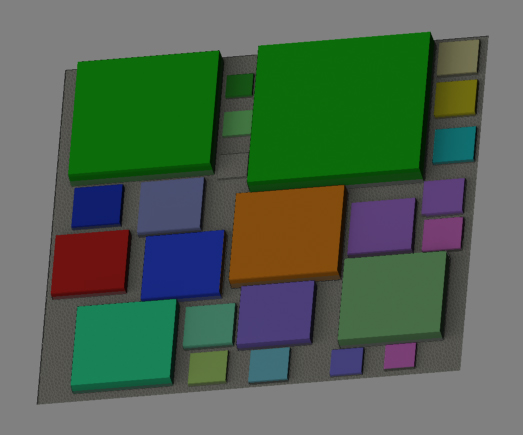
I created a couple of those base particles using masked primitives. I then randomly sprayed them on the canvas, creating chaos, until I shaw a form emerging in my mind’s eye. I painted over that form to bring it out.

This is a super ergonomic way of working concepts. It is fast, fresh, and sponteneously creative. It is a true way of exploring concepts and designs, because the only thing that you begin with is a focused intend in finding the forms you need.
Once the form was out, I took the image to photoshop. I created brushes from the ZB particles, and I finished the painting there.
I simply can’t think of another more ergonomic way than this, to do mechanical concept art.
Total time: about an hour.

[Machine.jpg]3X3.jpg

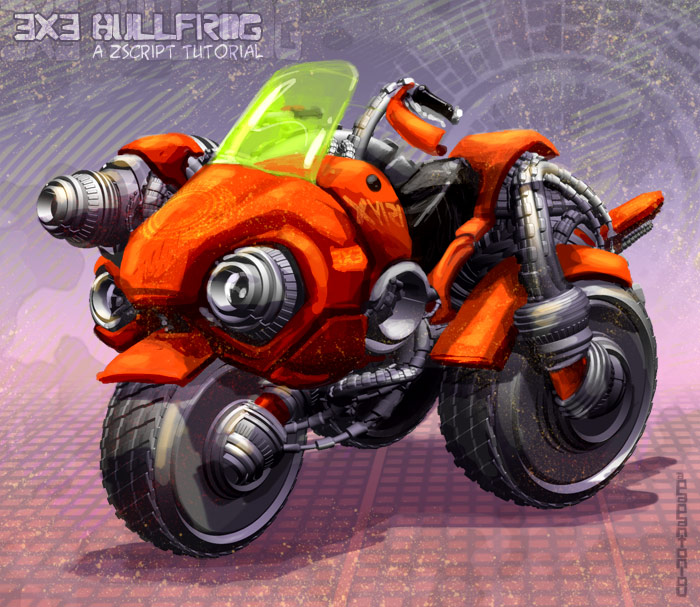
You can download the Zscript showing the creation of this image at:
http://www.giotavorgia.com/tutorials/bullfrog.zip

As always there was a slight mistake on the recording of the script and my paint layer has been moved a few pixels to the right, but you can get the idea.
Total Time for this: 1:30 (I concluded that it takes a bit longer to work with this technique if you have a clear theme to accomplish, but it is still very fast)

Attachments

Brushes.jpg

Perfect!