AWESOME results Derek… simply awesome.
Thank you, Peter. I think I am hooked!
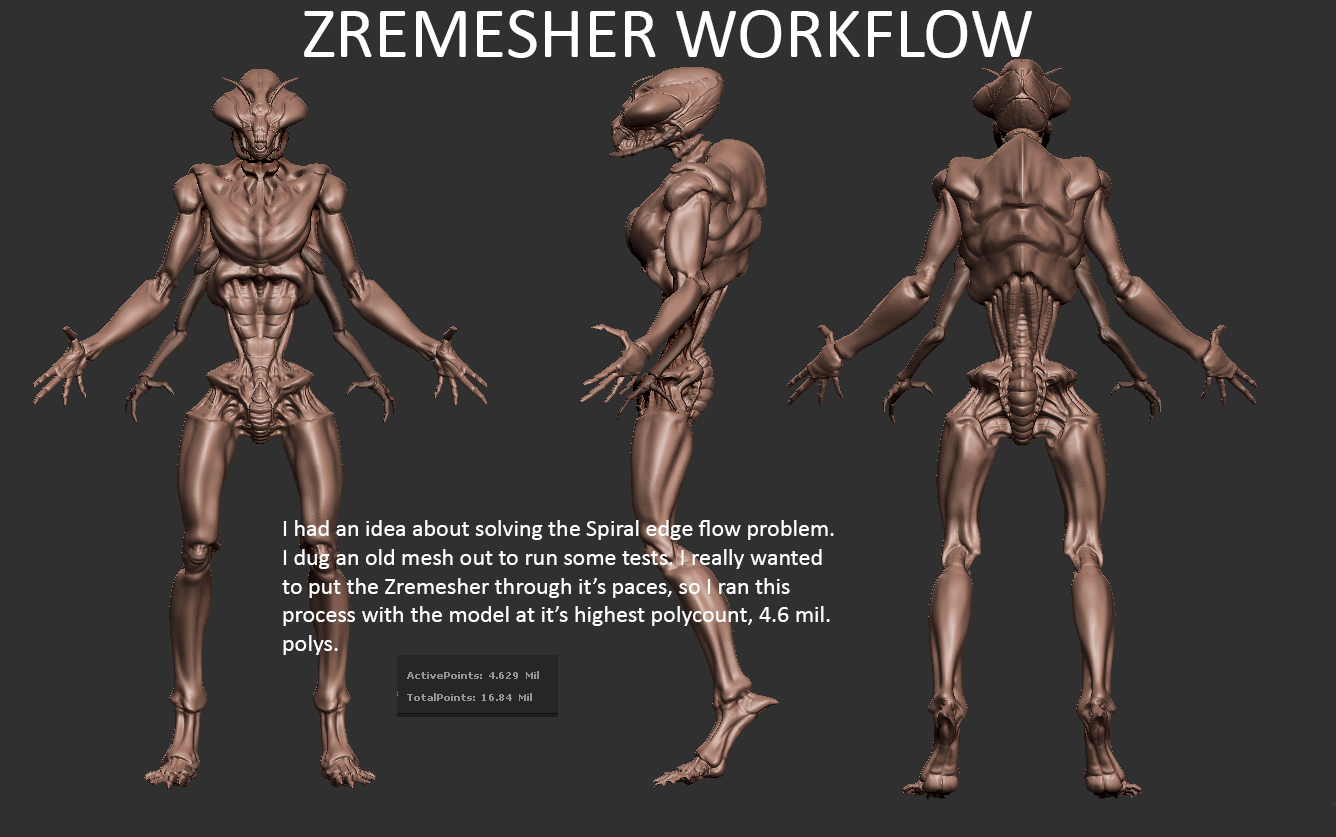
Hey all…After getting the new, amazing, update, I was reading some comments in the Z4R6 update thread, and notice quite a few people bemoaning the fact that the new Zremesher still produced spiral edge flow.
I don’t often rely on perfect edge loop formation for most of the work I do, but acknowledge that most probably do. I decided to run some experiments. The workflow I came up with is not 100% perfect edge loops
at all times, but darned close. I put together a mini tutorial to share my results. I hope that many of you will take this as a jumping off point, and fine tune it. I would love you to share your results.
As I said, this is just a jumping off point. I hope it helps.
Carver
Attachments
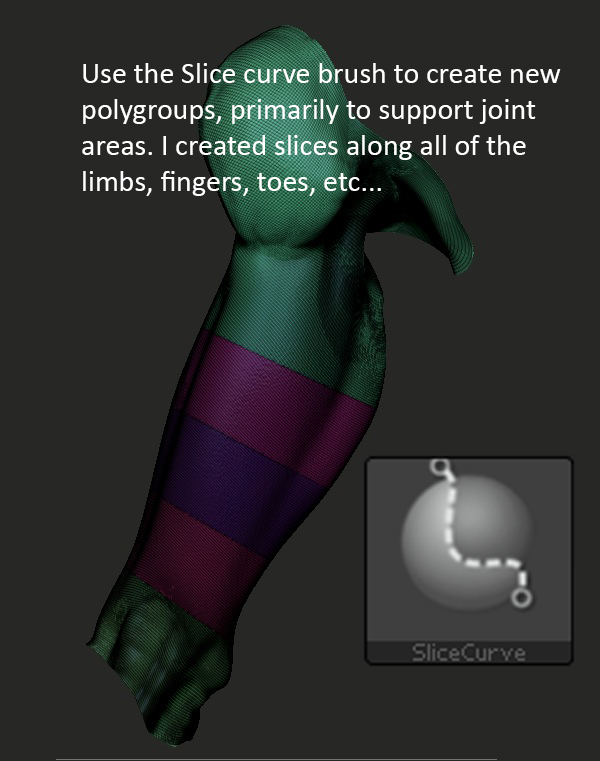
I forgot to include an important step. Slice up the right side of the model, then use Mirror and Weld to mirror the new polygroups to the other side. I knew I was missing something. Carry on…
Great idea! Thanks for sharing. 
Great stuff. I love it when these kind of ideas just come to you. Thanks for sharing.
Great idea using the slice brush and frame mesh to set up ZRemesh guides!
Thanks guys. I am always inspired by the many combinations of tools that Zbrush provides, and how the community is constantly thinking outside the box and finding new ways to use them in tandem. Zbrush is like a swiss army knife for digital creation. So much freedom in one package.
Thanks Carver! Just saw this after Pixologic linked your thread on Facebook.
Quick and smart I like it!
I wanted to add that I’ve had a pretty good success rate with duplicating the model, and actually carving loops where I want them with something like the MAH_Cut brushes or Orb_Cracks brush.
Its amazing how well zremesher will read those lines, and it works with symmetry on while carving.
But I think I will just be using your technique from now on as the loops come quicker this way!  small_orange_diamond
Thanks again!
Great idea! tnx a lot for taking the time to make the tutorial!
Thanks for the tutorial it is very usefull
Gabriel
jBogh - Thanks. I am a big fan of your work. I keep forgetting about Facebook. I withdrew from there a while back. I had no idea the tutorial was posted there. Thanks for the heads up.
milivoj_popovic - Thank you, I hope everyone can build on the idea.
Gabriel Herrera - You are very welcome.
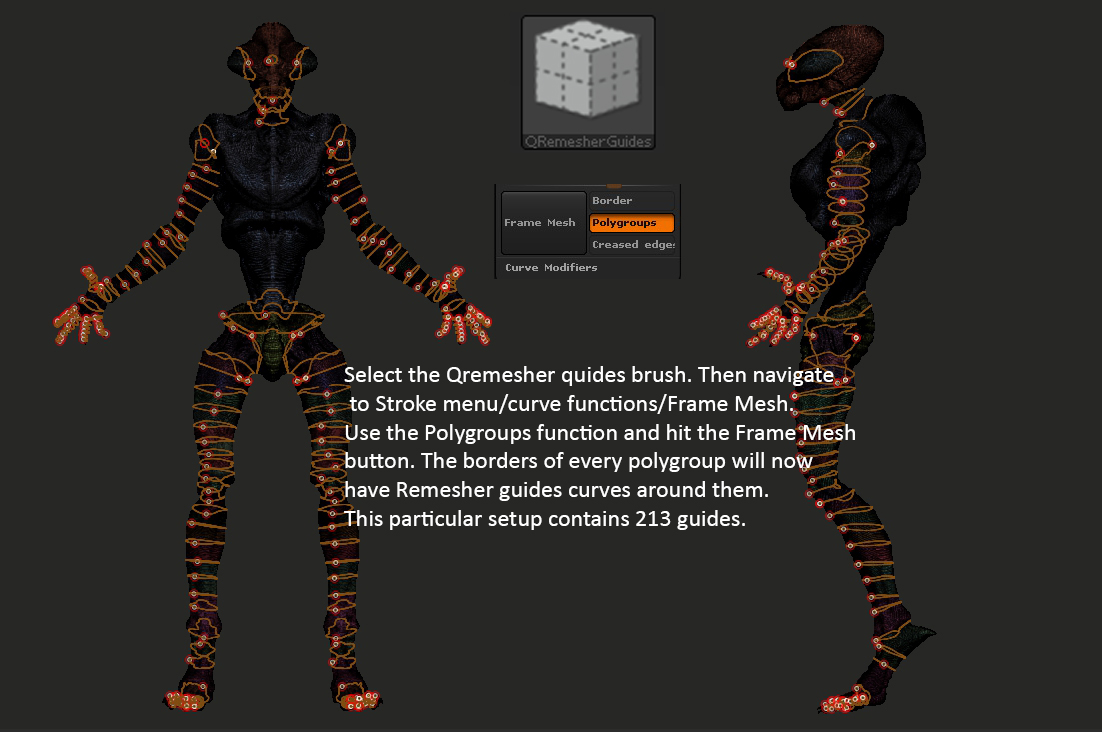
I scanned some of the replies on FB, and want to respond to the use of the guides brush comments. There are times when the guides brush alone will produce non spiraling topology, but I have found that it is very rare. This approach is for those of you who require a bit more precise topology with closed loops. I myself really don’t need that in my day to day work, but there are many that do. I am just presenting an alternative process that results in closed loops with more certainty. I am not dinging the guides brush, as it is needed to produce the frame polygroups. And it is necessary to produce a lot of clean slices to insure closed loops between joint areas. At least based on my own personal experience.
Awesome works, And thank you for all the workflow stuff you post. The ball was most helpful.
Thank you.
I still get spirals though. In some cases.
Michalis,
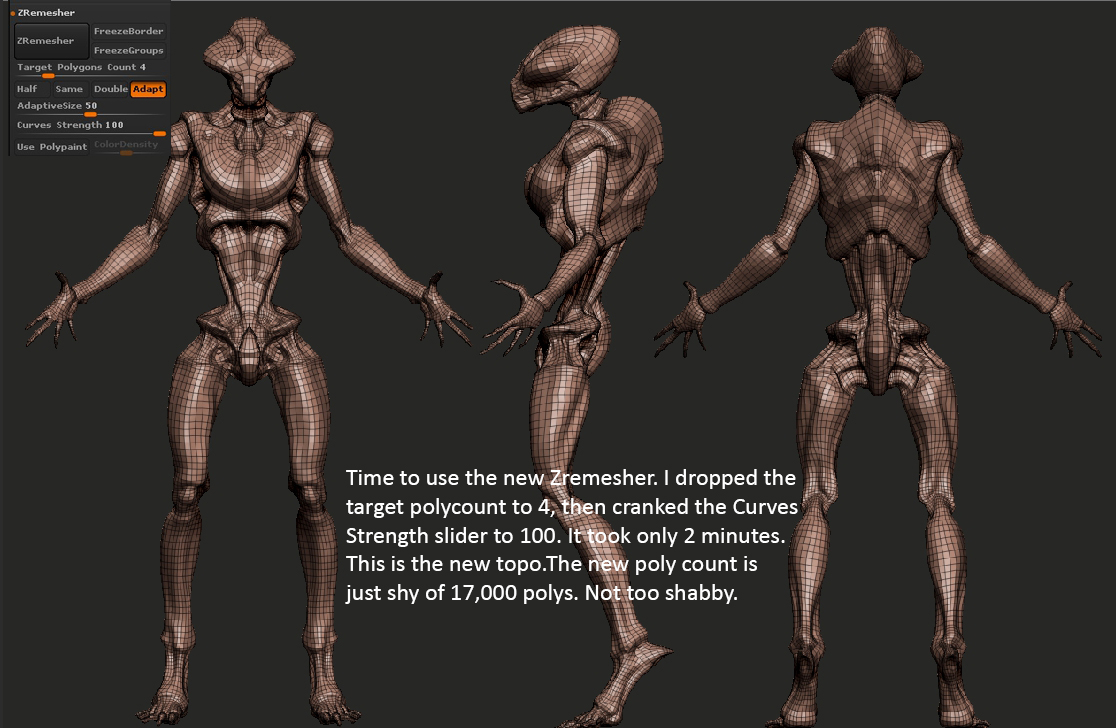
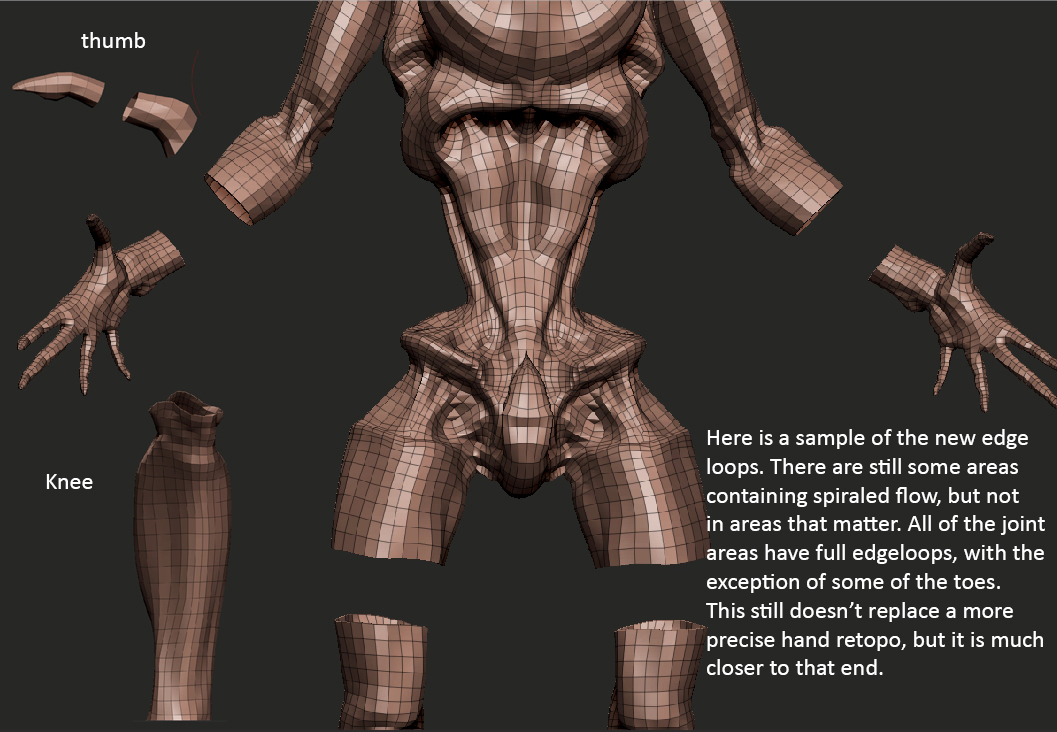
Yeah, there are still spirals. They are tough little buggers to get rid of completely. My goal was to rid the most important areas, namely the joint areas. Some people are using the Dam Standard brush, but with Z add on instead of Z sub. They are “drawing” the edgeloops on so the surface is deformed. After running the Zremesher, they reproject back to the original. My results have been ok, so maybe a combination of both? I think Pixo will solve the problem on then next update. Thanks for your feed back:)
Dam standard? How I missed it? Thanks, it might work. Nice tip.
I’ll try them all. we must not forget that such auto methods have to auto and fast. If we have to spend a lot of time, manual retopo is still in hand.
Great workflow! Going to try this out.
Thanks for the workflow.Will test it now.
 thanks SO much for this easy to follow tutorial, exactly what ive been looking for. quick question, how do you avoid the black fuzzy edges. and how come it looks worse once on BPR mode? is there a step i have missed?
Thank you, glad to help. That fuzzy edge is easily removed by turning on both the Transparent and Antialiased buttons in the Texture map menu, right under the texture preview window.