
Nice work odhinn this last one looks very promising.
GO on

Mr Micro26,
thanx alot bro.
Here is a texture test rendered in Mentalray and textured with Bodypaint 3d.
This is starting to look very good.
Real good drama and lighting.
Best luck for this project.
S
really like the coloured version
some nice stuff here man ! the character modelling is fantastic the anatomy looks dead on ! that said what i dont understand is why you have took such time to model the characters body to such a high standard and the keep insisting on using such low poly and low detailed props ? i noticed first a few pages back ,i was suprised to see the guy with the sword which again had an incredible body mesh and then a sword in his hand which looked as though it was made out of primitives again with the boots ,nice boot design but why so low poly ? the mechanical legs was another the legs looked fantastic and the texturing too but then you added really low poly sharp edged pistons and such are you planning on replacing these later and just using them as place holders or something ?

For you Maya users out there,
Mentalray is very fast once you invest alittle time to adjust the settings. The displacement render was about 15 sec.
[attach=16255]redemption_DISPLACEtest.jpg[/attach]
Suzana:
Thanks alot, your a great artist.
Pinkarman:
Thanks bro, colour is something I’m working very hard on developing.
gaz t:
Thanks for the support. My thread is all about experimentation and not details. For example I have spent the last 4 weeks on just MENTALRAY rendering in Maya. finishing a piece is not really in the works right now and as a result details suffer. I am still trying to refine the way Zbrush and Maya work in a pipeline. Exporting models from Maya to Zbrush can be quite complicated. Especially if you are creating armour from scratch using CV curves. The way in which your normals face on the model and a ton of other small settings must be done before exporting to Zbrush. Displacement maps are really impressive when you have your model ready for export in Z. I have included the above pic to show how well these two platforms get along.
Thanx to everyone for breaking the 15,000 views on this thread:D
Attachments

Working on the textures…
Hey Ohdinn your ultimate guy it´s sooooooo great, i like a lot friend, keep posting in this cool (and long) thread
IlusionDigital:
Thank you my friend for the kind words.

Here is again another displacement test.
Used Projection Master and the Directional brush with some alphas to create the concrete displace map.
I find it to be more accurate then a bump map.
The textures on the spheres are HDR maps with quite alot of tweaking done in Maya hypershade.
One light used in conjunction with Global Illumination and Caustics.
The use of Caustics contributed to this being a 3 hour render… Ouch.
But it gives a subtle bleed of reflections onto the floor of the concrete. Spent the week working on these tests.
I had to save this pic at a low setting to post. As a result I lost some rez… It was a huge file:mad:
I just spent the last half an hour working my way through this entire amazing thread… very good work.
also, just wanted to say thanks for inspiring me to think in new directions about alphas… I just got into quick and easy terrain generation, it seems that not even the sky is the limit of this amazing software.
keep inspiring, and I’ll keep watching.
ty
Behemoth:
Thanks for the nice comments, it means something to me./Odhinn

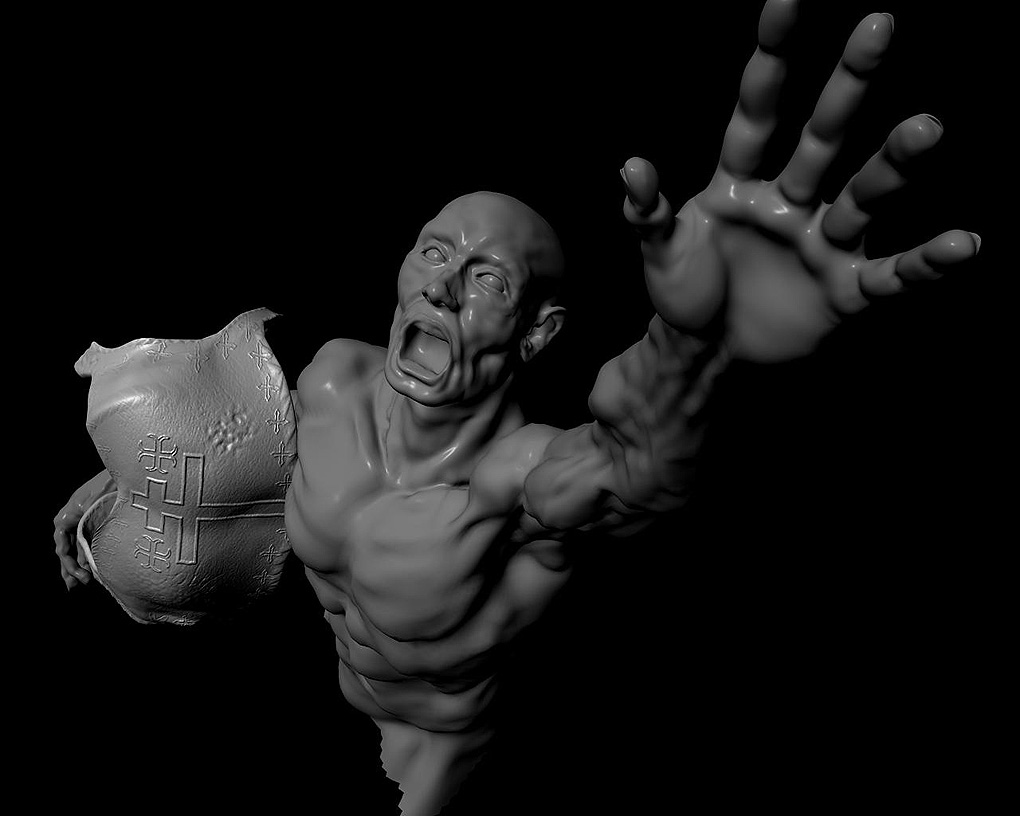
I don’t use the bind pose in Maya very often. Zspheres are amazing at roughing out the pose and since I don’t animate my figures, this process can be done quickly.
I started the above model after work and spent about 1.5 hours on it.
I know it lacks details but it’s in the very early stages, around 6200 polys.
Posted this for my fellow Maya users to show how great the two programs compliment one another.
Looka goos, but why do you rig it when you are not going to animate it :qu:
Pixelsoul:
Thanks bro, I find it easier to tweak the pose with a rig then without. This took 5 minutes to pose with the skeleton.
The shoulder angles and how the hand meets the ground is easier to pull off this way. Once the higher rez details are done in Z I will again add the skeleton in Maya and tweak it. I always keep a low rez copy seperate so when I layout the uv’s in bodypaint and render the displac-map in maya, it is a quick render.
I’m not saying it’s the best way, it’s just how I do it.
Killer stuff, odhinn. While I think someof the anatomy details are a bit deep, it seems to be your style, and it doesn’t detract from the overall emotion of the scenes/models. The armor stuff looks great, as do the poses.
I also rig a character for posing, rather than move the points. I tried moving the points a while ago, and it took forever, messed up the mesh, and just looked awful. I think it’s much easier/better to rig them up
Thumbs up from me, great stuff.
Replica:
Thanks alot bro…
Looking good! Is all this great stuff going into one picture?
I use a similar technique to your Spiderman, though I can’t afford Maya. Instead, I just use the tools I’ve got: low poly model with X symmetry in ZB > mapped with material zones and body part names assigned in UV Mapper > joint rotations and hierarchy set in PHI Builder > rigged (if you can call it that) and posed in Poser4 > back into ZB for sub-d and detail. Not very efficient as a workflow but hey … it keeps me off the streets.