
Not sure if this is something new or that it might be of interest to you ZBrushers, but I discovered a different way to deform a mesh using alphas without entering Projection Master. I was following this thread,"
http://www.zbrushcentral.com/zbc/showthread.php?t=9776&page=7&pp=15 " and observed that the tutorial was suggesting dragging the alpha from outside the document window, which does work, but I noticed that if I used the “edit Move” instead of edit draw,while in edit mode, I could draw the alpha directly on the object by using control click and drag. For more precise placement of the alpha,I think you would have to use PM, unless anyone does know of a way to move the alpha after it being placed? I have this small zscript to explain it better.
Thanks Digital! I learned aigain 
Agree with BMazur Thank you, DD 
Abyssis__
Nice addition to my technique. This one is even more precise and practical.
Thanks DigitalDreamer.
When I tried this, the alpha did not show any depth on the object…so I wa a bit dissappointed.
But…then I found that I could use “inflate” in draw mode, and paint over the areas precisely where I wanted the depth to come up…plaus it gave me control of how much depth I wanted in which area…very very cool
thank you for sharing
Rawn
I tried it the first time and it went the way it was explained. 
After a while I tried it again, control-click… 
I only dragged out the palets. On the pict you can see a part of the script (the inflated cube with the alpha)
Control-click on a palet (without dragging), the palet disapears and ZB has to be restarted to have them back.

Hi Bas,
Control+drag on any control tears the control loose so you can relocate it to another part of your interface. Some people work by clustering combinations of controls over the canvas area.
Tandem groups can be created by docking several controls together. Clicking on the color bar above the tandem group lets you move all the controls as a cluster.
To put the controls back, just click the “custom” button in the title bar… you don’t have to restart Zbrush.
On using the Edit-move mode to locate alphas: You should only press Control when you are placing and expanding the alpha on your object. If you begin by pressing Control+Alt, you can position the negative of your alpha on your object, (works best if you first apply mask to the whole object.)
Note also that you can control the strength of the mask by setting the rgb slider before entering Edit-move mode.
One caution: Any alphas placed on a model using the Edit-move method will “print through”, i.e. the alpha also appears on the reverse side of the model. If you don’t want that, select brush 01 (the white rectangle) and rotate the object so you can box the alpha on the back using Control+Alt.
Sven
It should work if you dont click and drag the actual menu…just click on your image (hold the control) and drag across there.
It should work (or at least that is what I did)
Rawn
opps…cross posted 
I believe that is not this Move 
It’s the Key “W” !
Pilou
Glad I could be of help guys, and a big thank you to Svengali as I didn’t realise the technique painted through to the other side. Your solution to mask off the rear of the box with the 01 alpha was very helpful. Also your control+Alt to place a negative also helpful. Rawnrr, I did my deformations by using the Tool menu\Deformations\ inflate, your method of using the draw inflate also useful for precise depth at any part of the alpha. Thank you to all, we learn from each other.
I tried all your suggestions but it does not work. Only tearing off the palette is the result. The script is doing the job ok, strange! After interupting the script and try to do the same it does not work. Only one time (the first time) I could do this trick, after this… nothing. When I control-click on a palette is disapears. Does anyone has the same problem?
For Baz, While in edit mode, You press W on your keyboard that gets you the “Move pointer”,then you control click on the object that you want to draw your alpha on. Hope that helps.
Hi Bas, i made a zscript with the topic in comment¡
Andreseloy
:evil: :evil: :evil:
No W :mad:
I made a script to show what I was doing, but recording it, it does not show the ‘tearing-off palettes’
You don’t actually click and drag until you have your mouse or stylus cursor hovering over the cube. You enter edit mode, press w on your keyboard for Move, . If you was going to draw on your object you would press Q. But you don’t want to draw (or add depth),we want to place a alpha on the cube. So after you are in edit mode (T) you press (W) not click and drag! then you hover your cursor over the cube, and only then click and drag out the alpha. I hope this does help you.
sweet! thanks a lot for the tip. last night i was thinking how nise it would be if the edit\draw tool could use the different alphas for deformations rather than going into PM. this isnt the same but still very useful. good job!
:mad:
Attachments
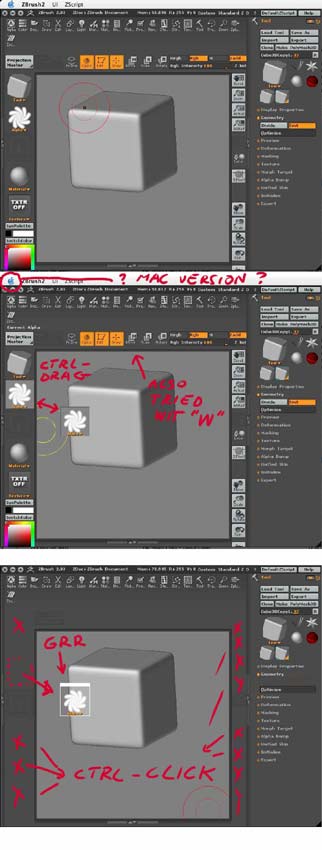
Bas, I just looked at your pics. The second pic shows you click and draging your alpha out. That is not what you do! You click once on your chosen alpha, not click and drag, otherwise yes, you will drag it out onto the canvas. This will only work with edit (T) and move (W), and only when you just click on an alpha to select it, (not click and drag)! So…you have an alpha selected, DONT DRAG IT OUT !, But place your cursor over your object and then, and only then click and drag over the surface of your object! You now should have an alpha mask placed over your object… Keep trying Buddy, you’ll get there.
then you hover your cursor over the cube, and only then click and drag out the alpha…
THANKS ALL!
Attachments
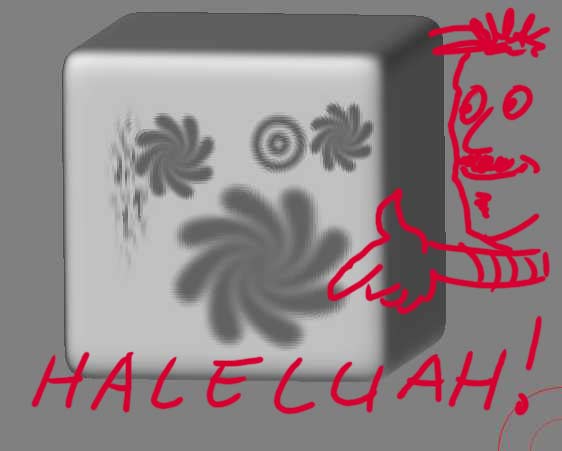
Yes!!! Bravo! he he. It’s ok, we all get “Brain Freeze” every now and again. Glad I could help.