if you model in max, then sculpt in zbrush something like an eyetooth, then you can´t export a nice displacement map to work in max. I say that cause i´ve tried everything.
I´d like to know if anybody could tell me i´m wrong…
Hope zbrush 2.5 can solve this problem with max
Don’t you think a lot more people than you would be complaining if this is the case? 
I use max and zbrush all the time and it works just fine. btw what is an eyetooth?
what if you model a sphere in max an then try to make a big horn in zbrush; your displacement map won´t do it. Listen -E-, i´ve tried everything and it only work if you don´t modify to much your original model, i´m talking about scupting only cause i don´t move any vertex. Or if you model directly from zbrush
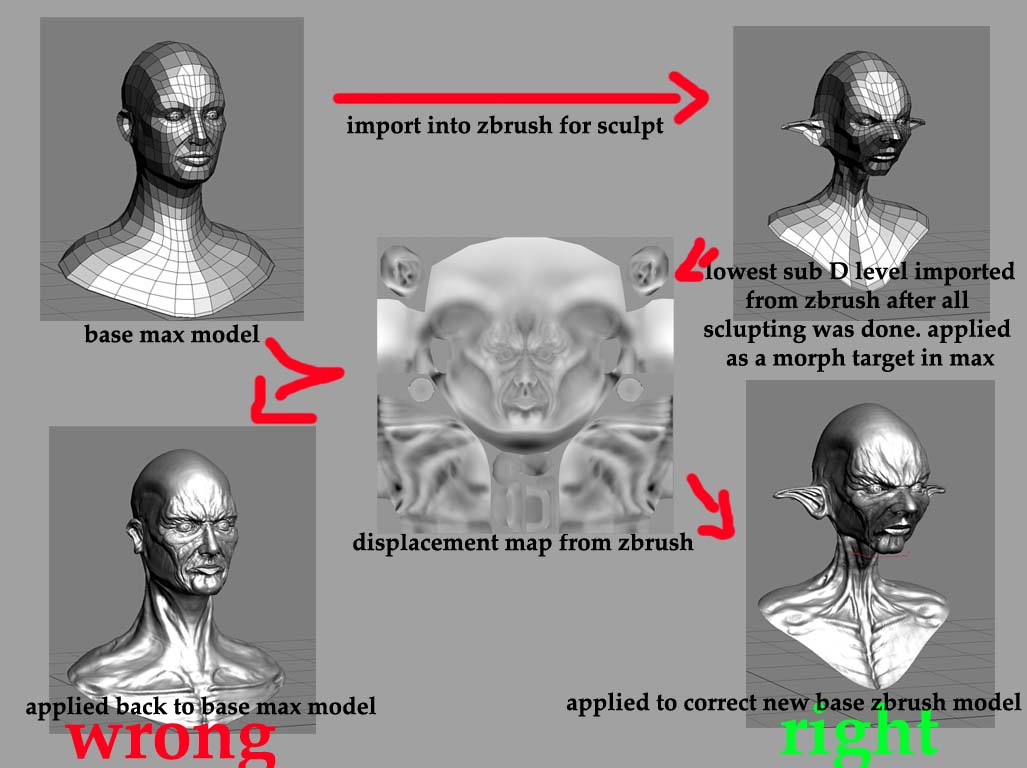
If you change your geometries shape whatsoever (by this I mean move a single vertex away from the model), which is impossible to not do if you are sculpting then you are changing your meshes base shape and are going to have to export that new shape as an obj to max to apply your displacement map to. Displacement can only go straight out, and can’t bend and change shape. Which is why a lot of people use the save morph target function in zbrush to save their models initial shape so it doesn’t get destroyed in sclupintg.
The problem lies not in the software but rather your understanding of what these maps do.
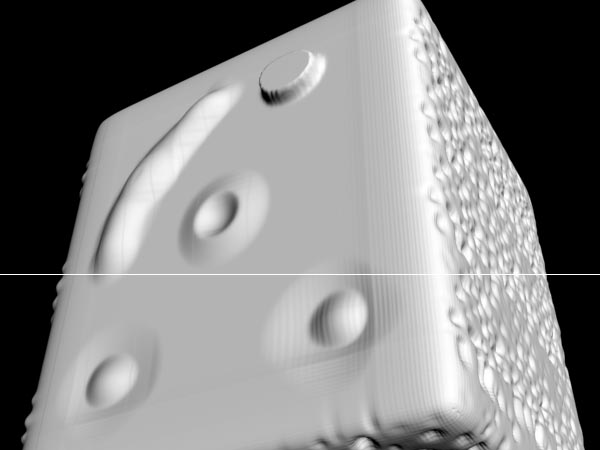
Displacement maps can ONLY move pixels or points in a single direction: along the surface normal. They CANNOT create overhangs or curved projections. So you could use a displacement map to create a nub-like horn that juts straight out from the forehead, but not to create a horn that curves outward.
You will always get the best results with displacement maps if your base mesh topology is very similar to the displaced shape. The more radically you try to change the shape of the mesh with displacement maps, the more likely it is that you’ll run into the limitations of this technology.
Thanks -E- and Audrick.
i’ve tried to do the same model in max and then in z, when i model with zspheres, everything goes ok. But when a model in max and then export an obj to z and store a morph target, then it doesn’t work. Tha’s why i say they are not compatible, it’s a test with the same kind of displacement, so i don’t think it’s about the displacement map.
I nedd to do that cause have to model for rigging.
Finally i just would like anyone show me it can be done
Could you describe your workflow in more detail?
As I have stated before I go from max to zbrush back and forth and use displacement maps all the time and get very good results.
Here is a link to my latest work, base model in max, then to zbrush to sculpt and create a displacement map and then I had to export the base model back out of zbrush to max. I then used that new model as a morph target in max on top of my base model that was already skinned and rigged.
http://www.ericblondin.com/images/3d-4_1.jpg
Below I made a quick doc that illustrates our point.
Attachments
Thanks again -E-. I think i’ve done everything you said
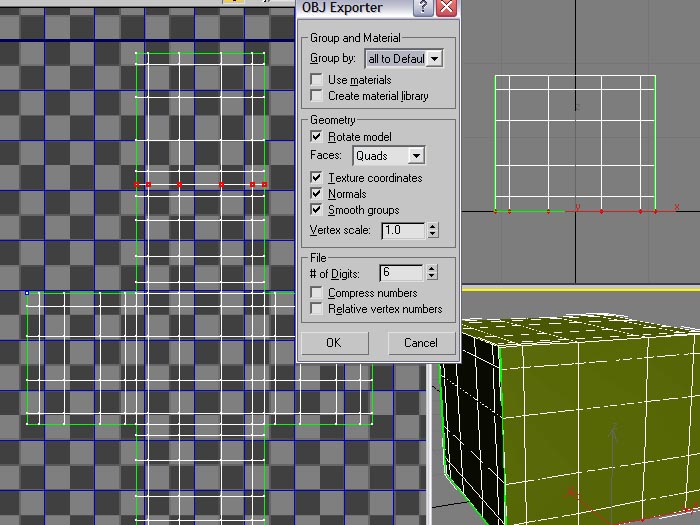
ok, this is a test to explain why i say what i say:
this is what i did in max, model - unwrap - export obj
after watching your work i realize you’ve solved my problem, so i’d like you to tell me what is that i’m doing wrong
Attachments
I can’t speak for final render.
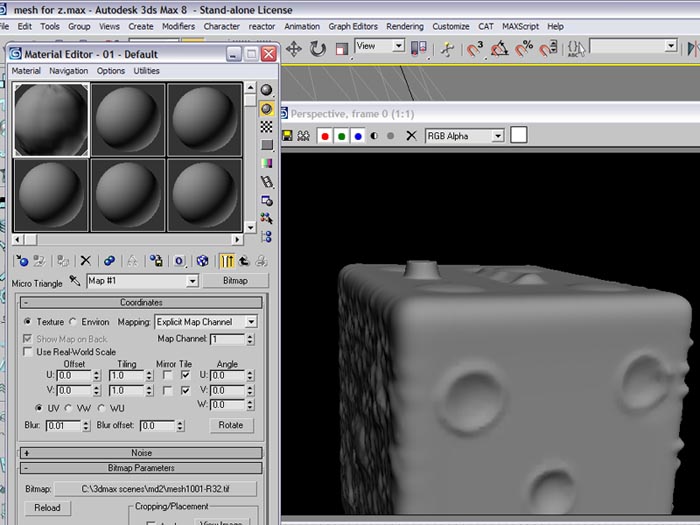
And I also don’t load my displacement as a material.
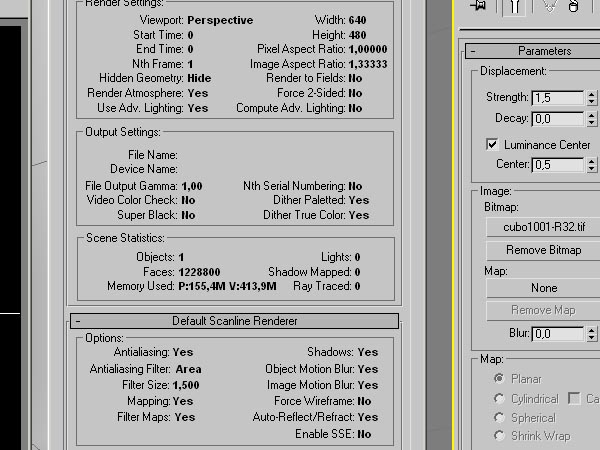
I load it as a modifier; here are my settings
www.ericblondin.com/zbrush/forum/displace_setting.jpg
(obviously you don’t need the skin or the morpher, just turbosmooth below the displace modifier)
I think if you would have done some searching through this forum you would have found this.
I don’t use Max, but your render looks like a clipping plane issue in most renderers. It looks like you have gone outside the expected radious of the object and the app has clipped it.
Now Aurick’s statement about normals is almost correct. This doesn’t help you, but so it is clear, you can bend normals and the displacement to follow, it just takes a lot more understanding, done this for years under any Renderman compliant API. And no Max can’t handle that directly, at least not from anything I’ve ever seen. 
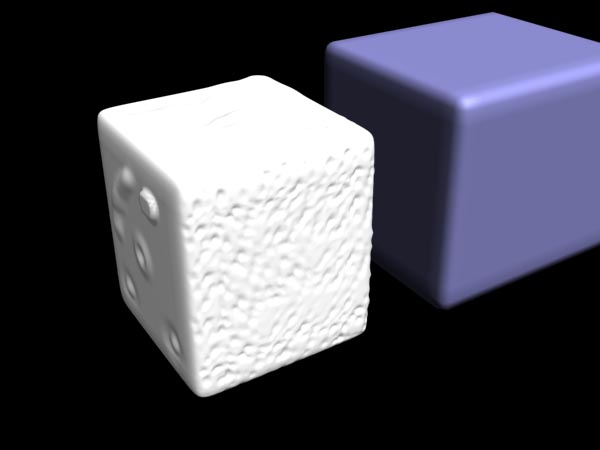
this is what i get using scanline, no material and your settings

so, i still would like to know what render engine you use
i think maybe my problen is about the morph target. i understand you use that to store your original mesh, but how could that help you if you are not going to use that original max mesh again, cause you said, you export your new sub d level to max
thanks again, it’s just that i don’t wanna stop till i find what is wrong here
finally i’d like you to know that i’ve tried with mental ray, vray, finalrender, scanline, with disp mod, disp material, vray disp mod and many guides i’ve found.
I use mental ray and scaline. Both get same results if you are using the displace modifier.
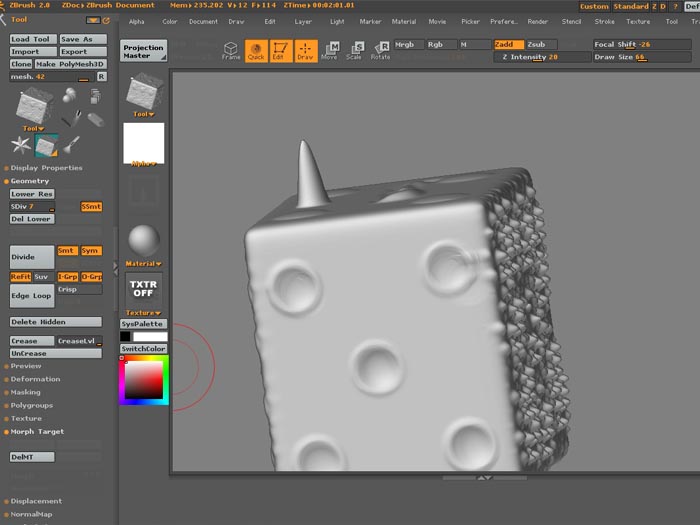
Please post a picture of your lowest sub d level in zbrush, and a picture of the mesh that you are applying the displacement map to in max before turbo smooth.
ok here´s all the information you need:
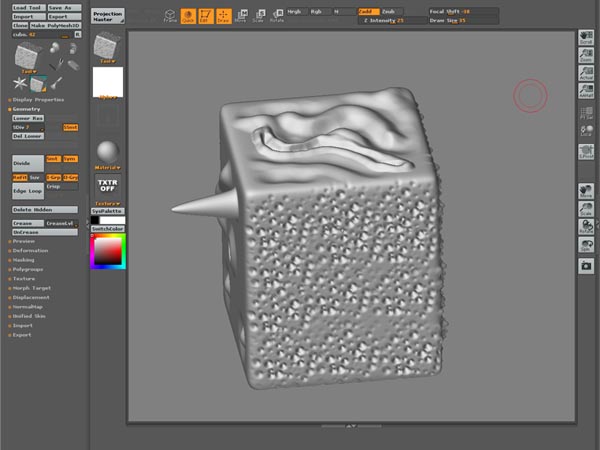
this is the model made in z
thanks -E- for helping me solve this problem
Attachments

can you post a shot of your lowest sub d level in zbrush and also how many polys is the highest level in zbrush and what is the final polygon count in max when you hit render?
this is the lowest sub d level in z

I think you generate your displacement map in a different way, you install the md2 plugin but you don´t use it
I wanna know if my exportation is ok, it works ver well with the z spheres
thanks for supporting -E-
Attachments


Okay so right off the bat I see that your polygon count in Max is WAAAAAAAAAAAY too low, You polygon counts in max HAVE to match your polygon count in zbrush otherwise there is no way to reach the same complexity of displacement.
Your quad count in zbrush is 600,000 polys which is really 1.2 million tris (if you count in tris like MAX does)
your rendered polygon count in max is only 300,000 tris, it needs to read 1,200,000 million
so try upping the render iterations on your object a few more times and see what happens.
you may need to play with your strength on your displace modifier as well. I generally stay between 1 and 1.5 but that doesnt work for everyone.
is this what we need
What do you think about the method i use to generate the displacement map?
Attachments
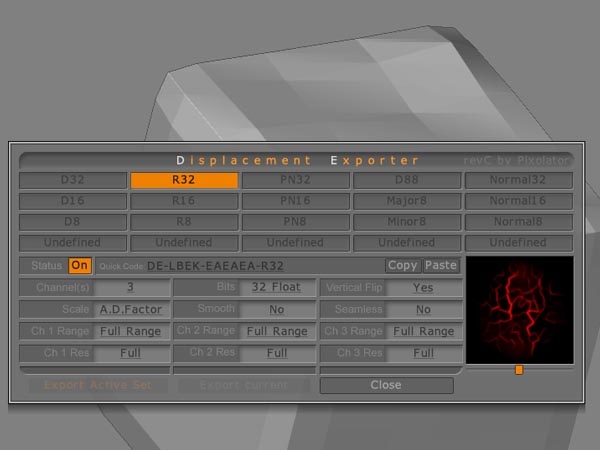
- To create and export a displacement map In zbrush [list]
- Create/import a mesh that has multiple sub d levels sclupt as much as you want.
- Go to the lowest sub d level
- Under tool – displacement set the map rez to 4096
- Turn on adaptive
- turn on smooth uv
- Hit Create DispMap
- After it is done creating the map it will throw it into the alpha slot, but it wont select it
- select your new alpha
- Under alpha, DE Options, D16 button Quick Code enter DE-FDEK-EACADA-D16
- You want to create a 1 channel, 16 bit, vertical flip yes, scale- auto+ADF, smooth –no, seamless –no, ch 1 range – full range ch1 res – full
- Then export active set as a .tif to wherever you want on your computer
[/list]
again the same

i really don´t know what is going on, cause i´ve been following every single step and nothing; at least you can understand why i said they weren´t compatible
Anyway, thanks for sharing your secrets.
Got to continue trying cause there has to be a way to do it
send me your .ztl file please no textures or alphas just the .ztl
you can email it to [email protected]