ZBrushCentral

A little challenge...

Well actually it’s always conversion for me - if I can’t move it back and forth between platforms, not much point in sharing it. On the Mac we get the best results with odd numbers rather than even numbers, so again this causes serious problems when sharing. :wink:

Still working on that aspect, I have just been happy to find that it is possible to setup a ‘templant’ that can be shared and I have a few that work, different styled characters.

However thank you for confirming my findings, it means I still have some sanity left. :wink:

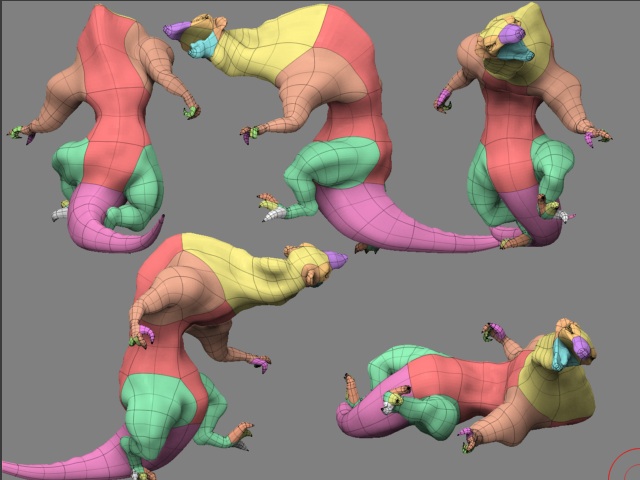
If I’m not mistaken this fellow is cross-platform as well afetr some thorough testing by Atwooki, myself and I had at least 2 others open the file. :wink:

Did a real quick rough up of this base, perhaps someone else can (Windows) and post it so I can run tests on it as well. Thanks. :wink:

Untitled-1.jpg

huhu

[![fitt.jpg|800x600](upload://xJ0WsnvZFY6Xr7naLM3cDDt663f.jpeg)]

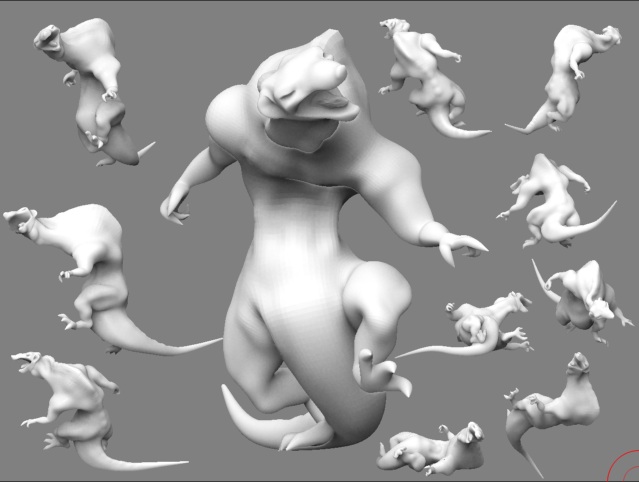
a little tricky around the parent sphere, it seams, but thats all :slight_smile: I went to lvl 5 not thinking about size and upload limitation :confused: both, the posed and the unposed versions are 1,36mb zippen each. leave me a pm with your email, if you want and I´ll send you the files tomorrow.
gn8 froyd

That’s just awesome looking! Sent you PM with email. Appreciate the help. :wink:

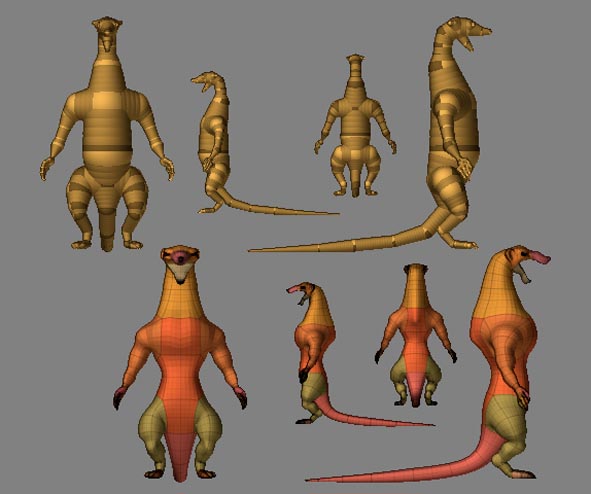
Ok… I’m still not sure of what I’m doing, but just wanted to give it a try without making a fool out of my z-pose abilities. Something very simple and basic… and even that was hard for me!

Z ferret.jpg

Although I did seem to find some funny mesh displacement, nothing very big, but some kind of crossed poligons by the ears and some other parts in low SDiv

Just in case, here’s the tool -not recommended as an exemplary model though-

Attachments

Pose Ferret.jpg

Pose Ferret 1.jpg

Considering that you are pretty new at htis elarcano, it sure looks like a great attempt. Love the character, reminds me of ‘Secret of Nimh’. :wink:

I’ll check it out…

OK, I just grabbed yours, reposed adn roughed up some more modeling and did a quick test to help you with ideas. Unfortunately this makes it rather large. Hahaha. I can email it to you, just send me your email address at [email protected] - and anyone else as well. I’ll have to set up a webdav in the next week or two for everyone to swap files on for this to really work.

However it is starting.

Another note for all the traditional sculptors, as I mentioned I just posed this then sculpted with no symmetry, a lot more traditional in approach. :wink:

Picture 3.jpg

Attachments

Picture 4.jpg

ffroyd, got yours as well. Nice work, easily posed and the mass seems to flow well. The issues you mention are from where the main zsphere is, I have a btter version that I will dig up. However this a great test piece. The ability to work back and forth opens up so many posibilities. :wink:

Back to the little humanoid Ithink to see where we can go. With examples from people covering male and female, I think we can quickly evolve to several great ‘templants’ for everyone to work from with ease. :wink:

Picture 5.jpg

keep me posted

Uhhhhh Jason?

Just opened the model and this is what happened when I went to preview

Ferret.jpg

When I go to lower SDiv the “pulled mesh” disappears and went to higher SDiv but it makes the program to close.
The problem doesn’t come from one direction, because when you move the figure around the mess moves around like changing places from where it goes out.
I tried to repose to see if that resolved the problem, but didn’t
And the “pulled mesh” cannot be pushed… it’s like it doesn’t exist for the pointer

Just informing… worder if anyone else has the same problem with same model

It’s exactly the same that I downloaded, but something coul of happened in the way

If anyone wants to check it out, send me your email because its doesn’t fit here Fidel

Cool. I’ll check that out next, probably not until tomorrow though.

Thanks for the feedback. :wink:

He Jason, I was playing around with that funny model on the mac. Only had some trouble between its legs and the neck became a bit flat after bending. I only used the rotate tool to move the object. Wow, this is the longest thread I’ve ever seen. Hmm, may be ‘The road to’ of pixologic will be longer :confused:
Keep going Jason! :+1:

screenshot_01.jpg

Hey Bas, maybe we’ll condense it all when done! Nah, no fun! Thanks for helping out, great poses.

Did you rotate the first zlink between the main body and leg? If yes this is the reason for the messy geometry. It seems that Zbrush uses the first zsphere to guide and the next to anchor and create a relation - especially problematic where this joint leads to a long chain like an arm or leg. This is just observational stuff based on where people do and do not have mesh issues. It’s easy to overcome though. Wish I could colour code the zspheres to move!

If this is not what you did, let me know. Preferably what you did exactly, so I can update the instructional info I’m trying to put together to make this fast and easy for people. :wink:

Phoo, it’s hard to say what parts I rotated. Mostly I try not to rotate the spheres but the zlinks. It can be I took the first after the base sphere. I will try a next one when I find some time and do more tests.
It should be a great option to color the spheres.

Here a ‘neckbendingtest’. Bending the first joint after the schoulders is making a flat neck. I placed a sphere just above the shoulders to fix that problem. After making a tree some time ago I found the same problems where 4 joints came together.

screenshot_02.jpg

Here is the same problem. Also solved by adding a sphere.

screenshot_05.jpg

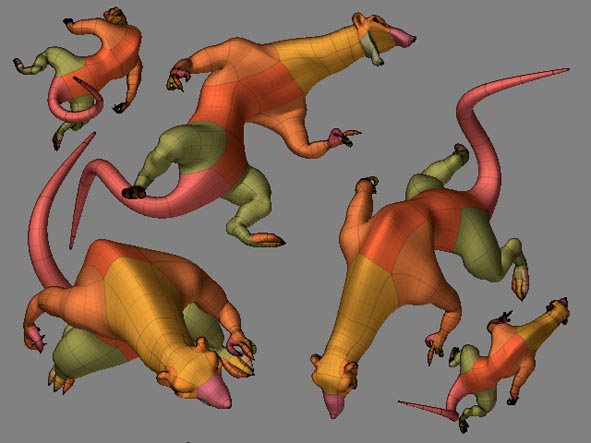
Many thanks to everybody in this thread who convinced me to give zspheres/adaptive skin another try.

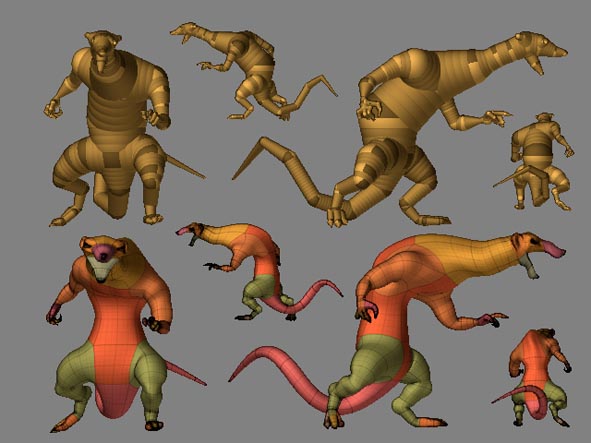
Hardly as sophisticated as what everybody had been working on, but good enough for my purposes for this little guy. Just a low detail, rat that will show up once in awhile. He’ll be pretty small so hopefully the low detail (and imperfections due to my inexperience with posing) won’t matter.

BTW, when going to a new pose, is it better to start back from the zero-pose zspheres? I found that with him, but I don’t know if it’s because of the sort of half a**ed job I did, or if it just works better that way.

Anyway, thanks again. You may now avert your eyes if you don’t like looking at crap.

rats.jpg

Always recall that the spheres are actually cubes at birth. All the smoothing later makes that thought vanish. But the moment you twist them you see the creases resulting from that origin. If you place more ‘spheres’ together the better the smoothing/aproximation works. To have great success with sphere’s means that you think ahead with the ‘cube model’ which has a skin stretched over it later.
Lemo

Nice work billrobertson42, If you take a look at the joints int eh ferret/lemur character posted above, you will see zspheres before and after a joint, these hold the joint. I might also suggest a zsphere after and close to the shoulders heading towards the stomacha nd the same as you approach the hips.

lemonnado of course is right.

However I was never a box modeler, and I use the zspheres much the way concept designers do. They are a base structure I lay thin wire over and attach at certain points. Then skin. This is for me is as close to the NURBS approach I’ve enjoyed so much success with inn the past. Many production techniques also follow this process. But that’s just me.

I’m working on stuff and will get back to everyone soonest. :wink: