Have you guys seen this post about retaining textures with insert meshes?
If I’m not mistaken, couldn’t things like rusty chains be produced with this as a resource?
Have you guys seen this post about retaining textures with insert meshes?
If I’m not mistaken, couldn’t things like rusty chains be produced with this as a resource?
So I’ve been fuddling around with the IMBrushes, trying to make plane-strips for lowpoly ingame hair. However, I seem to be unable to use the Brush > Modifiers > Weld Points when using only planes. Any idea what might be wrong?
Whakka, are you using a tri-part model (3 polygroups) or one model (one polygroup) with with curve mode enabled? If it’s a tri-part, make sure the planes intersect each other enough. Maybe also sub-divide the planes once or twice.
Either method, I would also turn on Stretch along with Weld Points and up your curve Resolution to about 10.
Thanks for fast reply, your advice makes a far better result, however it still does not weld the planes.
I am using a Tri-Part since I want the stripes to have a beginning, mid and end-section. The planes do intersect/overlap eachother a little bit. Tried to do the opposite by leaving a little gap between the three planes. This leaves an even better result since the verts snap to eachother (as you would think that they are welded), but after examining the strip in 3dsmax, they are not welded. The mystery continues 
Wakka, you are using a plane. To make that brush you need some thickness.
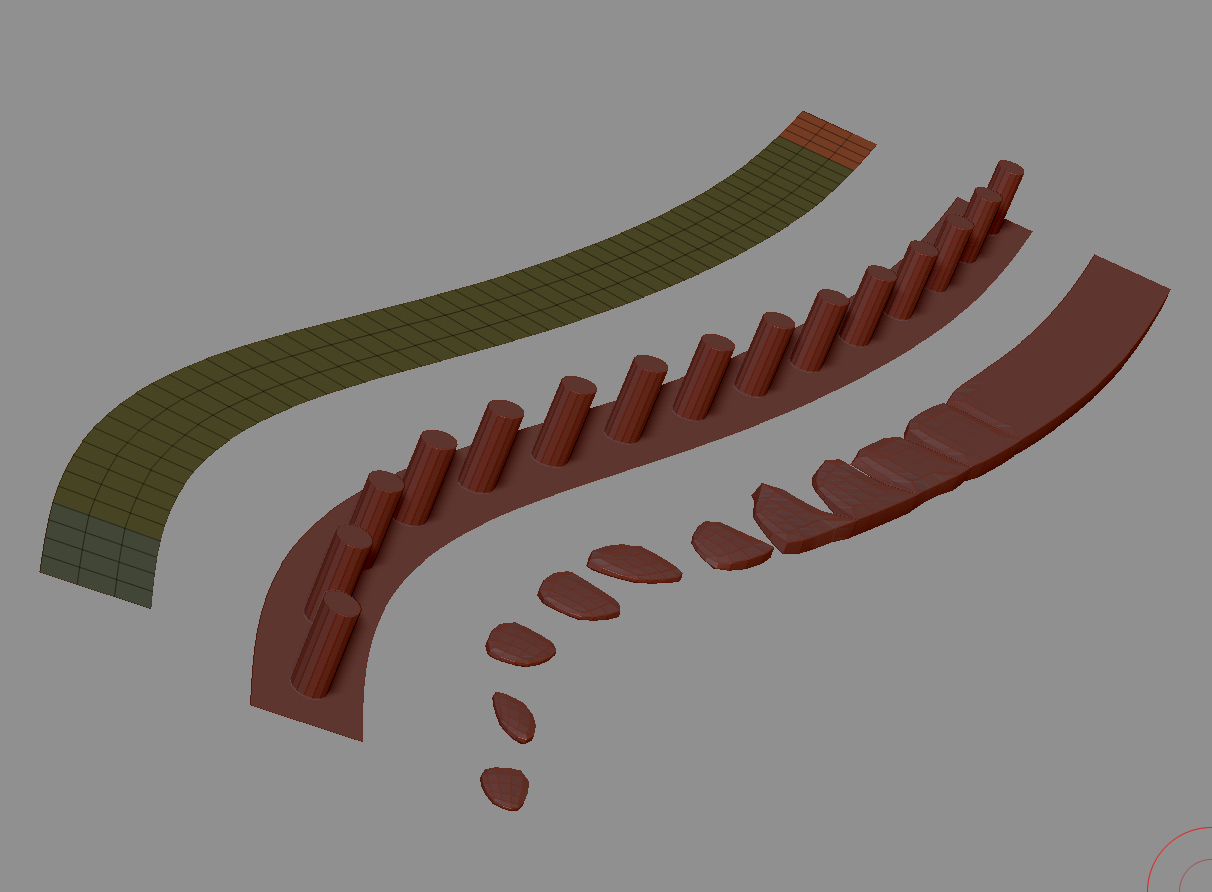
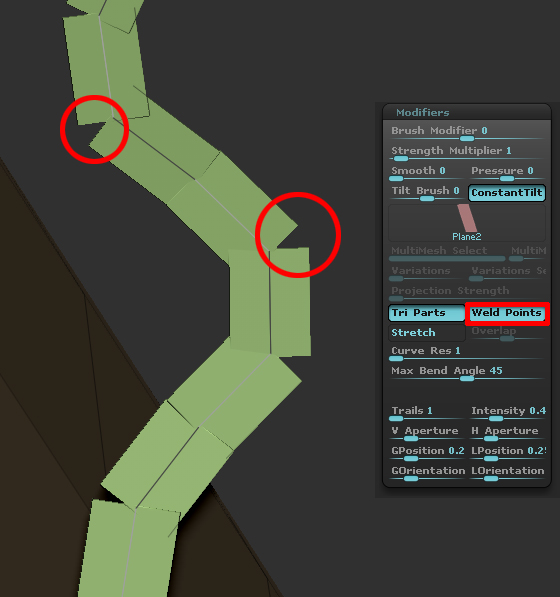
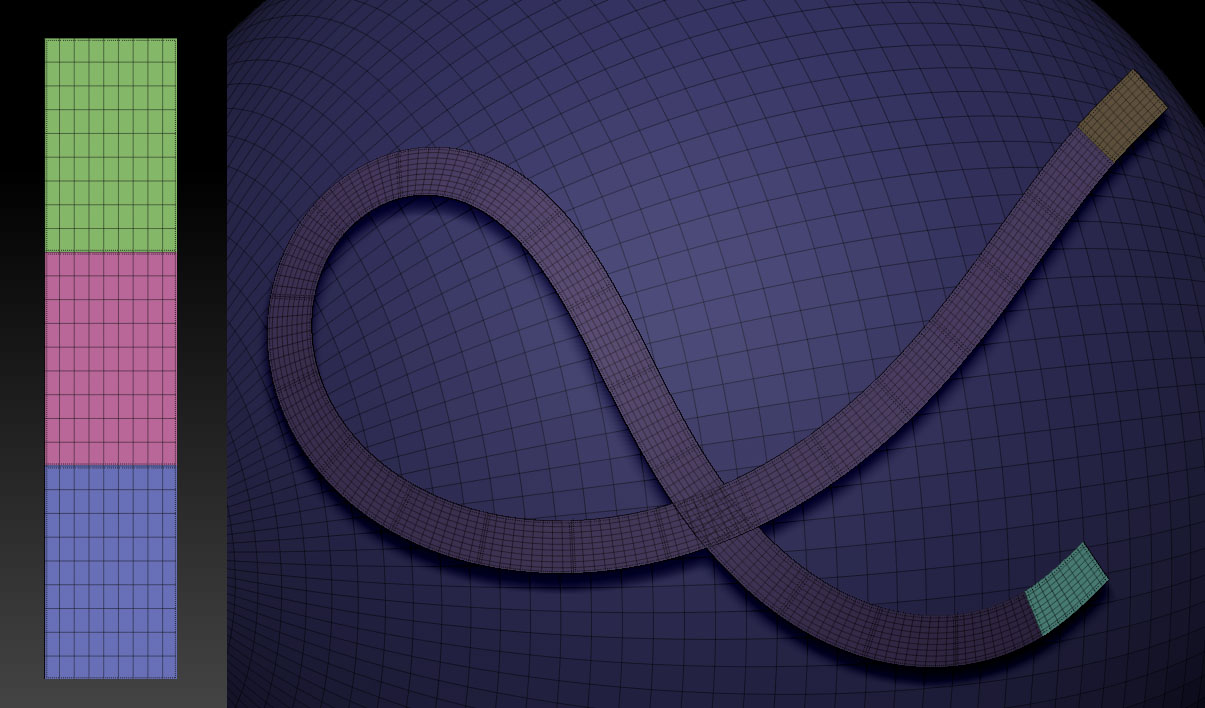
I’ve attached an image of settings to do what I think you’re wanting. This is just a simple flat plane with a initialized state of 10x10 (100 polys) converted to polymesh 3d. This is not a tri-part insert brush. As long as you turn on Curve mode in the stroke pallet, Weld points, Stretch, up the curve resolution to 10 in the Brush Modifiers, you should get the same results as below.

And here is a tri-part insert brush with the same settings as above.
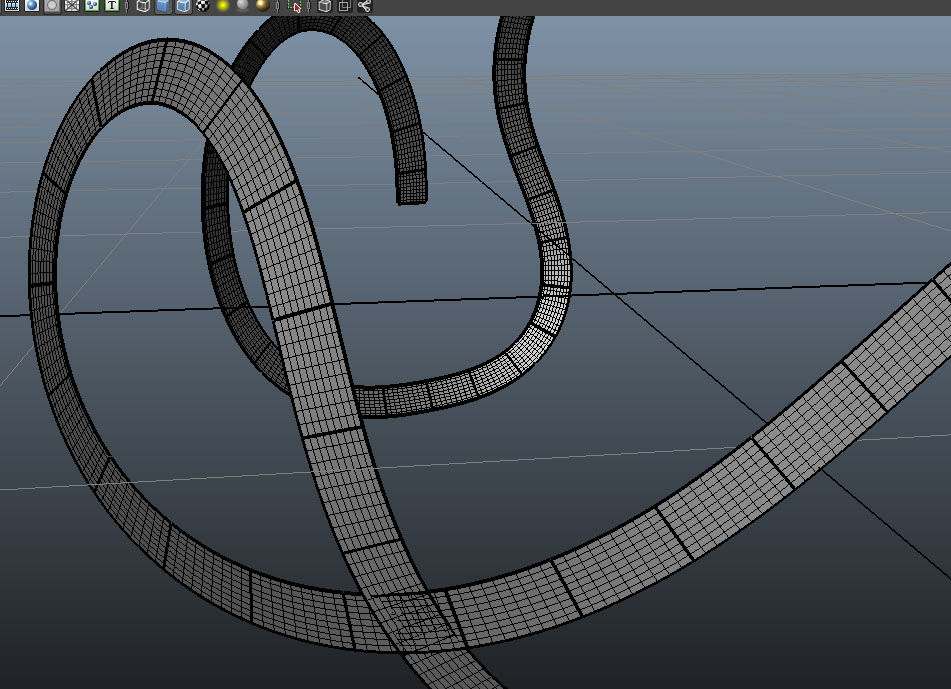
Here is how it looks in Maya (via GoZ)
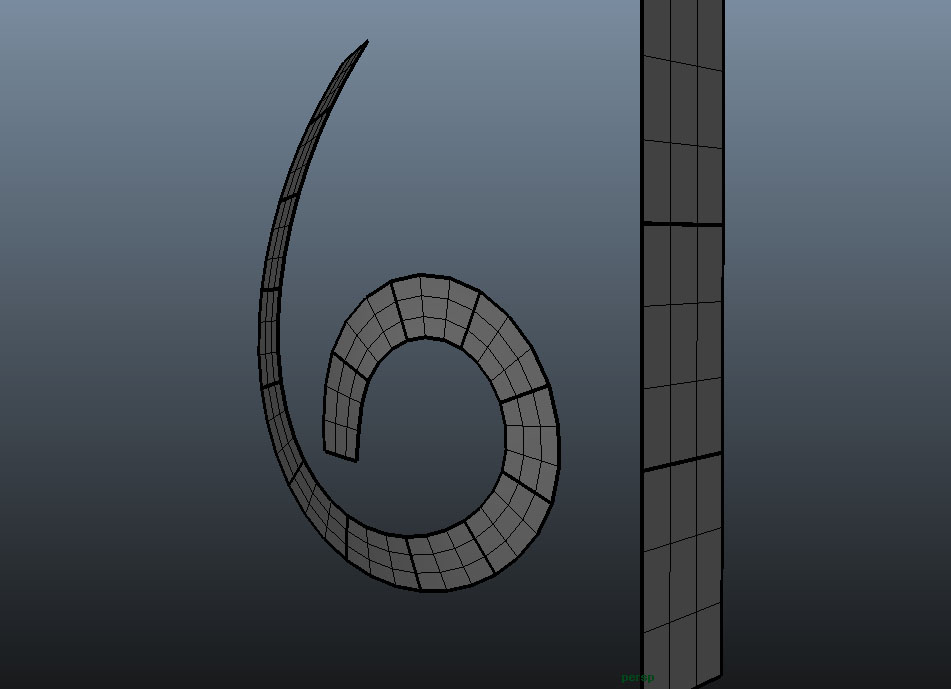
One more using a lower poly mesh. only 9 polygons per plane. In order to get it to stretch, and be somewhat smooth, you’ll have to have at least a 9 polygon plane. I don’t think any less will cut it.
SKDZines, thanks… I could not get this result with just planes. I will try it! 
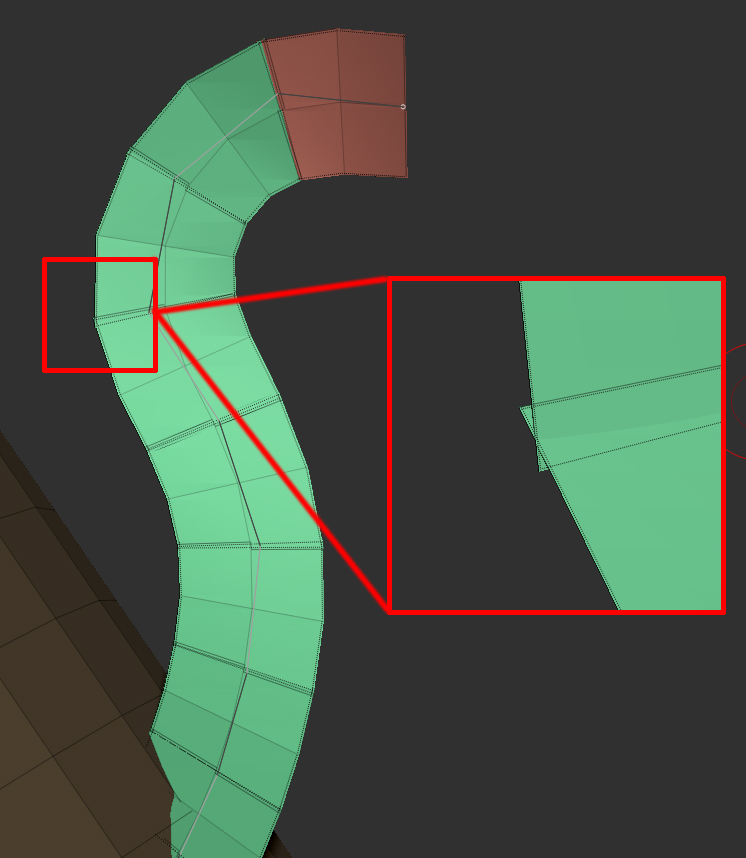
The only problem is welding those pionts. It looks ok but after extracting you can see what’s going wrong…
Agree with the above, it yields great results. However, it still does not actually weld the planes together. This would be great if it could be solved as it would literally make lowpoly-hair and alike really easy to create.
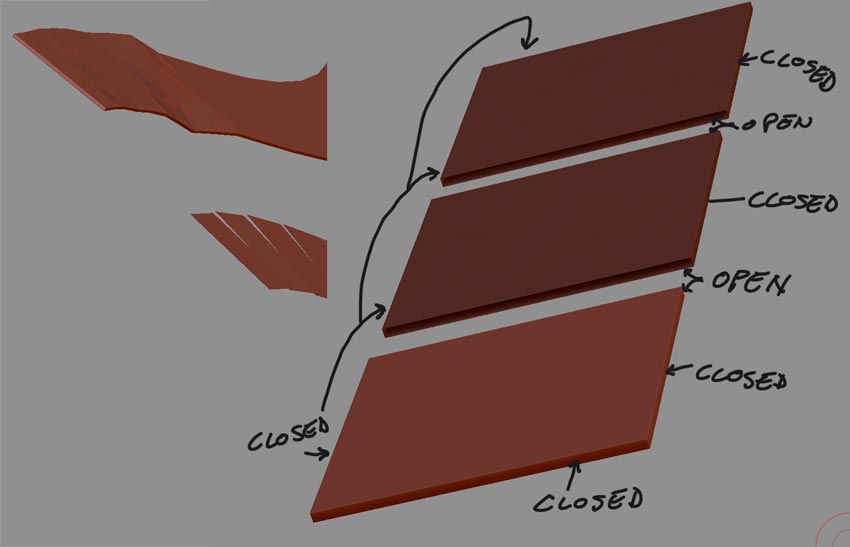
I thought the point was to create a low poly strip for hair. What is the need for extracting then? If you are strictly using zbrush for doing hair for a still render using this method, you could apply a texture based off of the uv’s that would stretch/repeat for the IMM and would get a smooth curving flow. No need to subdivide it at all to expose the points not properly welded.
If you are wanting to use for animation, while not ideal, I would for example in Maya, select all vertices of the entire hair strip and merge any vertices not currently welded. This can be done easily by setting a low tolerance value of the merge vertices tool. This way, the strands would flow/react to forces and deform without the points breaking apart. Apparently it just seems that the actual welding needs to happen outside of Zbrush for this method.
A quick note on hair:
I have been having a lot of fun with turning FiberMesh into curve brushes, you can make one heck of a feather boa in a few seconds and you can also do amazing things to your poly count at the same time, its great fun!
Can you give an example of your process?
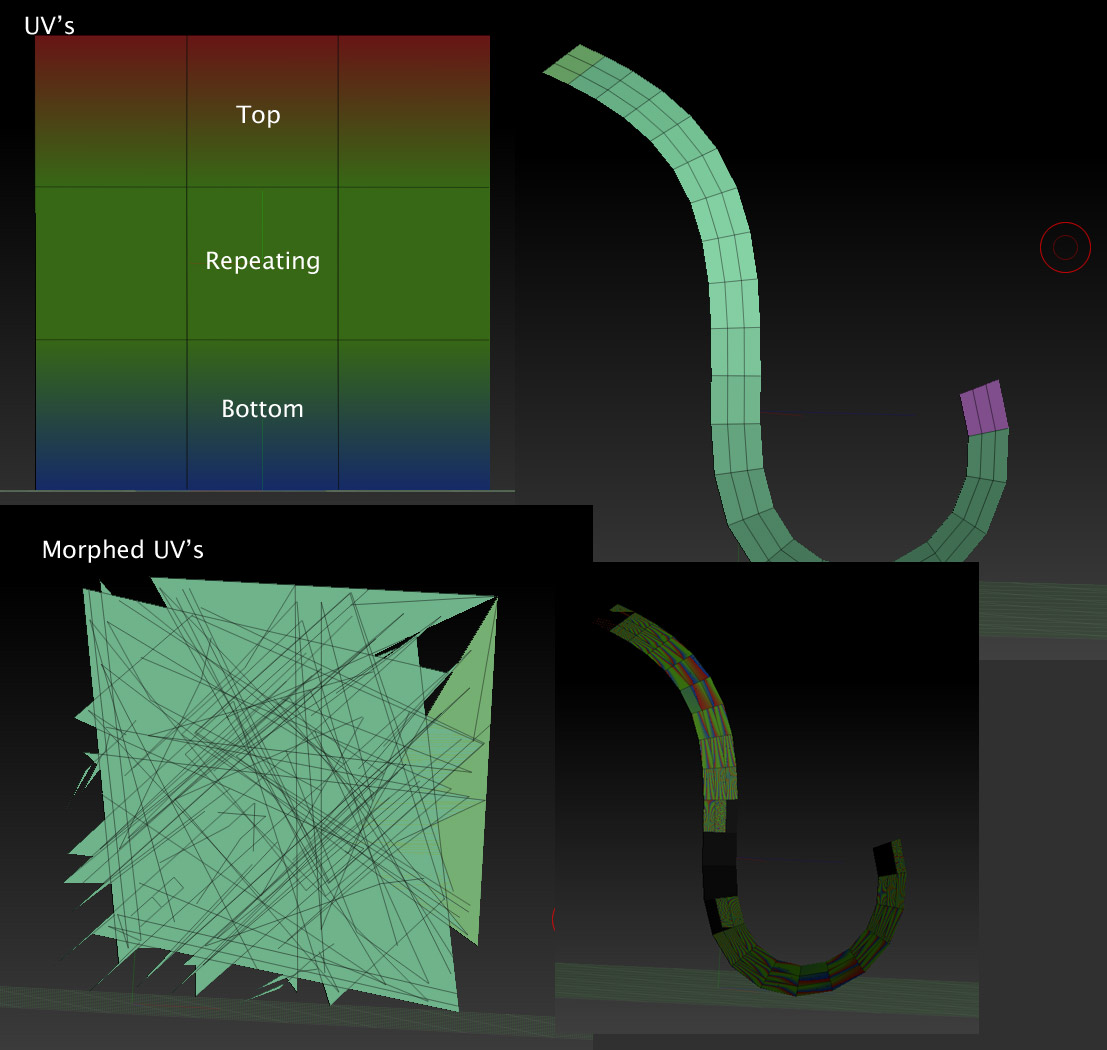
Hey blueferret, how were you able to apply the repeating texture to the plane brush? I’m attempting to use a tri-part plane brush with mapped uv’s to hold the hair texture. If you look at my image below, the “top” part of my uv’s is the top polygroup, middle uv’s are the middle polygroup, and bottom uv’s are the bottom polygroup of the tri-part brush. Therefore, in theory, when you draw the brush out, the middle part of the brush that repeats should simply have the same uv’s overlapping each other and take on the same part of the texture occupying that uv space.
However, my uv’s get all messed up as soon as I turn it into an insert brush.
Thanks for any advice!
Please use this thread to post and answer questions regarding the Insert Multi-Mesh Repository Thread.
It will help us keep everything more organized.
Thanks!
Well I think the reason It works for me is that its just a single IM brush not three parts, maybe ?
Then I used a 5k x 5k texture as a planar map in the texture map slot creating a uv map…
Does that answer the question? Oh yeah, I welded the points as I was using the brush and then sub_D it a couple of times…
ps with a smaller map you can just tile it .
PPS: I didn’t map it untill after I had drawn out the brush !
Where is it? I can’t find. I can only see Insert Mesh Dot and Fit.
Moreover if I use either of those, the modifier “multimesh” is grayed out…
Sorry this took so long, I sort of got sidetracked and then the post got popped over here…
Ok, um… lemmy see…
Mostly its just normal IMM brush stuff only using FiberMesh…
So for example if you want to make a feather boa type thing you would do something like this:
Here is an example:
SkdzinesFiberPoofBrush.zip (52.5 KB)
And this is what it looks like:
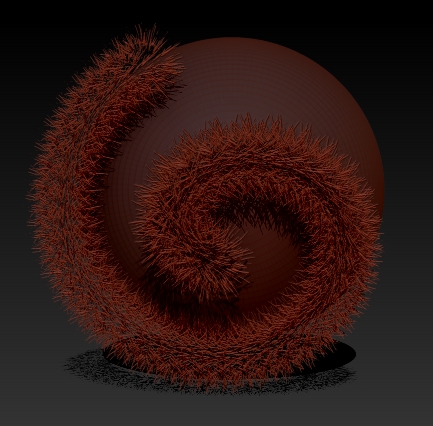
If you instead of using a sphere use masks to generate your fibers you can do a LOT MORE.
Also play with things like Weld Points and Stretch in the Modifiers Sub Pallet in the Brush Menu.
If you make a bunch of these and append them into one brush you can use a bunch of different fibers in the same curve and it looks MUCH more random, its also very fun to play with the Curve Modifier pallet to change things like size and so on.
Sorry this took me so long, Im a bit of an airhead but there not much air at the moment, its been displaced by ZBrush and caffeine.
Cheers!
MealeaSkdzinesFiberPoofBrush.zip (52.5 KB)
There are a whole bunch of them and you can make your own as well…
The reason you cant find it is that it is the TYPE of brush not the name of a brush.
So:
Try any of the brushes labeled “IMM” in the brush pallet. For example: “IMM Zipper M”.
Once you see what they can do you will want to make your own, and then you will be addicted, its very cool stuff.
heres a link with a bunch of great tutorials:
http://www.pixologic.com/zclassroom/homeroom/lesson/insert-mesh/
Cheers!
Mealea
Indeed! Amazing stuff!
|This brush is not working for some reason, I have looked at the settings for other brushes such as the zipper ones and cant see what I am doing wrong.
|
There are three brushes in this, hook and eye, hook, and eye.
the hook comes out a different size than the eye and neither can be adjusted to fit the other when drawn separately.
There are also serious depth problems and orientation is chaotic, sometimes they come out aimed in or are twisted…
The depth problem is out of control and I do not even know how to describe it other then its just wrong somehow.
If anyone knows what I’m doing wrong I would be thrilled!
I’m including both bits and the resulting brush, I would have included the two parts combined but I foolishly messed with the deformation pallet and it did its usual nasty.
HookAndEye.zip (63.3 KB)
Cheers!
(and thanks!)
Mealea
|
HookAndEye.zip (63.3 KB)
Hi Mealea,
Is this supposed to be a chain? Do you have a reference image you are working from so I can see what the final outcome should be or can you draw what it’s supposed to look like or how they should be connected when drawn out using curve mode?