Great tutorials,
One question. In the first tutorials what is the song(s)?
G
Great tutorials,
One question. In the first tutorials what is the song(s)?
G
Hey Nick, these are really great. I created a video response to the broken wall tutorial that I would love for you to check out. 
Click here to see the post at Sculpt. Paint. Create.
Thanks for the great tutorials.
Ryan
These vids are really helpful - Thanks!
Wow! These vids have really helped me alot! thanks! ummm…how do I put vids in my post?
Sorry for the delay in response…I’ve been a tad busy here lately.
Plakkie, Thanks, this is my first environment piece I have done so far… won’t be my last. It was a lot of fun and something new for me.
NightWolf, No problem. Glad you liked it.
gregsf, It says at the end of the video who the music is by. This one is by Karre Norge “Dreams.”
Ryan, thanks for the video response…I learned a ton from that, I will pass that along to my students. Thanks to Seb about the Sub D technique suggestion as well. That should save a lot of polys for me!
Webhead, Not a problem, glad I could help!
DaMaher, Thank you. If you have a veoh video it will look like this [ veoh][ /veoh] then your video id will go in the middle of the ][, should look like v1480701J74FxJ23 on your veoh page. I can’t write out exacly what text would be or else it trys to embed a movie in my post. ([ veoh]v1480701J74FxJ23[ /veoh]) just take the space out from in front of the first v and the second /v and it should work. Clear as mud… right?
Peace,
NickZ. 
I would really love to know yiou normal map workflow, mine is full of seams  and your real time alien is awsome
This is great, thanks. Learned a lot from it.
Nick?
Nick?
Don’t go run off now… hope you are not done with the tuts, or if you have relocated them (selling them?) don’t forget to let us know.
Nate,
Never fear, free tutorials here. I have been adding a lot of information to this thread:
http://209.132.96.165/zbc/showthread.php?t=46740&page=9&pp=15&highlight=nickz
This series is called “3D Using One Source” Check it out when you get some time. There is a lot of info to take a look at. When all my post are finished I will migrate all my post to a new thread… I guess to this one.
Thanks and have a great New Year!
Peace, love and good happiness stuff - Steve Vai
Thanks, Nick.
I am going to double check to be sure I have all the tuts, and keep tuned in for whatever may be next. Your class in Sarasota sounds quite interesting… any transcripts of that available (or video)?
FYI/for what it’s worth…
I see you are in Orlando.
Looks like I am late to the party, thanks for this! It really helped me seeing your workflow.
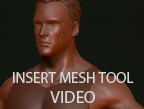
In this video we will take a look at how to use the InsertMesh Tool to turn a multi-piece model into one model.
This will let us take all of our pieces from our sub tools and combine everything into one model.
[veoh]v41533015CQYSDTN[/veoh]
Peace be with you. 
Nice tutorial. Thank you!
Great stuff Nick!
Thyanks for sharing.
r
 that realy answered alot of questions for me… thanks for the post!
Just learning here… what would the purpose/advantege be in turning a multi-piece model into one model?
JuanVal -Thanks.
Ryan -Thanks for the info so I could make the video.
Lostinlimbo - No problem.
Wozrush - Let’s say that you have only a Left arm and you want to sculpt a Left and right arm at the same time. You could take your Left arm, clone it, then use the deformation tool “mirror X” then take your new left and right arm and combine the two meshes into one model and then paint/sculpt both the Left and Right arms at the same time.
Another thing you could do is import in a bunch of models or one model and use that over and over again on your model, place them on your model as sub tools and then join them all together as one model.
Hi ,
first of all i want to thank you for all your great video and the time you spent.
i think i all ready told you in the forum before a few month .
very soon i going to start to teach class in Israel zbrush and i have one unresolve problem that realy bother me each time .
i try many times to retopologize my mesh by bring
another “orgenize” mesh with the correct edge loops and flow from Maya then try to use the function project all like you used in the tutorial of resurface mesh .
but almost every time i try to use that function 95% of the detail projected great but the other 5%
looks funky and points are preety mess up and i need to bring each point to the original position or use the morph brush but that going to smooth my mesh so im preety stuck here.
also i tried to project full character with the same fuction . the result was that points from the leg go to the hand and so on .
it will be great and much appriciated if you can help me somehow ? and you probably know what i talking about …right ?
smeagol - I store a morph target before I project and then use the Morph Brush to paint out areas that didn’t project the way I would like. Some times if I am having a lot of trouble I use the “switch” button in the Morph area and then I use the Morph brush to paint/sculpt in the projection.
Hope this helps,
NickZ.
thx for replay so fast !
the part with the morph target before press Project All i knew
as you present in the tutorial .
i thought maybe you have some function to play with like in the
Topology function before you press Projection ( projection strength/range
and max strip length )
its mean that i need to clean some area with the morph brush…
area like mouth and eyes where i refine the detail there very carefully .
some of the points on my model go very far from the original position and even with morph brush its very frustrating .
in the tutorial your model looks so clean after you use Project All
i hope this can work for me exectly like you did on my model .
if you have any suggestion it will be great