I’m so happy right now. Thanks for the vids I enjoyed them.
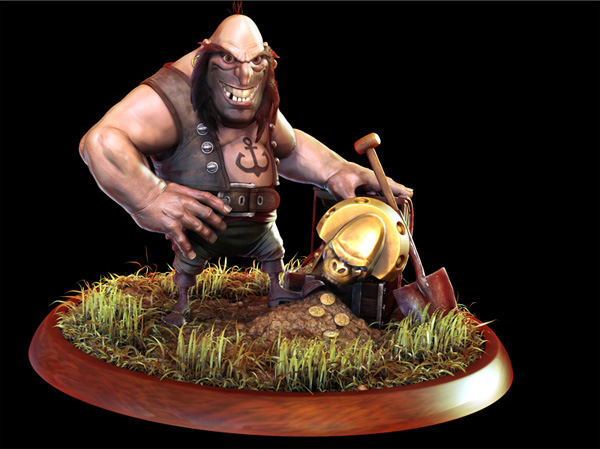
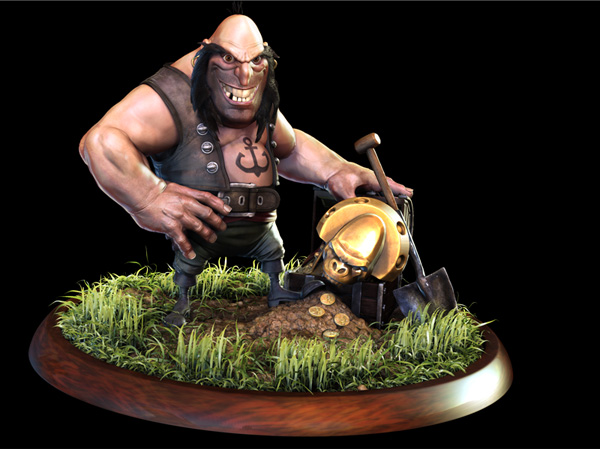
Keep forgetting to mention! This character (and stuff around him) isn’t my own brainchild, he’s a character from Certain Affinity’s Age of Booty:
http://www.certainaffinity.com/ageofbooty/
http://www.ageofbooty.com/
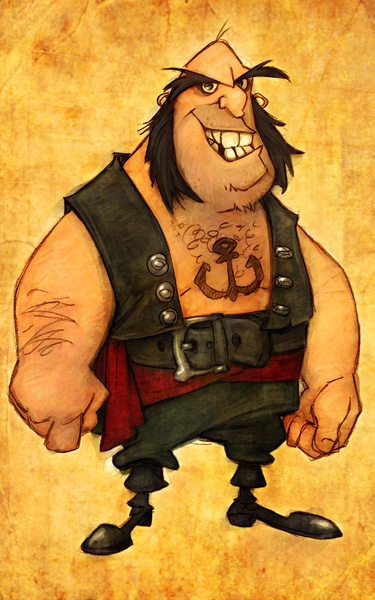
All in all, from the sculpt, polypaint, pose, and props, took about 16 hours (only had a weekend to do it, so two days worth of work and change; did the character in one day, and the props the second day). Rendering took a few hours (got a pretty good base using lightcap) after the bulk of the work was done. I’ll also put together (along with the rendering stuff) a quick breakdown of how everything was made. The pirate gold was surprisingly easy using custom insert brushes and automask > topological to shove them around.
Hey Pixologic, where is our part 5? (or Michael, are you still working on it to post it??)
Michael, I just learned more on that last video than all the time I have spent up here at ZBrush Central. That little trick with Creasing and Shift+Uncrease… AWSOME tip!! Wonderful stuff-:D small_orange_diamondsmall_orange_diamondsmall_orange_diamondsmall_orange_diamond
Just watched the last video, and I have to thank you for taking the time to make them.
Very well presented, and I learned many things and tips that I didn’t know before.
Thank you and I hope to see more from you in the future.
Might well invest in your eat3D trainings I think.
Another awesome set of videos Michael! I always pick up something new when I watch your stuff.
Glad to see you finally updated your website nice looking stuff.
Thank you so much
These videos were really helpful
Just wanted to say thanks again for incredible tutorials. I would have said mini tutorials but they can’t be classed as that because they are full of such amazing tips and tricks. Fantastic quality… and ZBrush never ceases to amaze. Thank you
Thanks for the kind words everyone, glad you enjoyed the videos, they were fun to put together. I’m going to have a few hours free this weekend, so I’ll post some render stuff and maybe some prop building info.
Thanks again!
These have been some of the best instructional videos I’ve ever watched. Cheers for taking the time to make them. :D
I’ve been watching these roll in over the past week and figured now that they’re all out I should chime in with my appreciation. I have thoroughly enjoyed them and found them to be very informative. They helped me grasp a few crucial Dynamesh concepts that just weren’t being explained in other tutorials.
Cool, can’t wait.
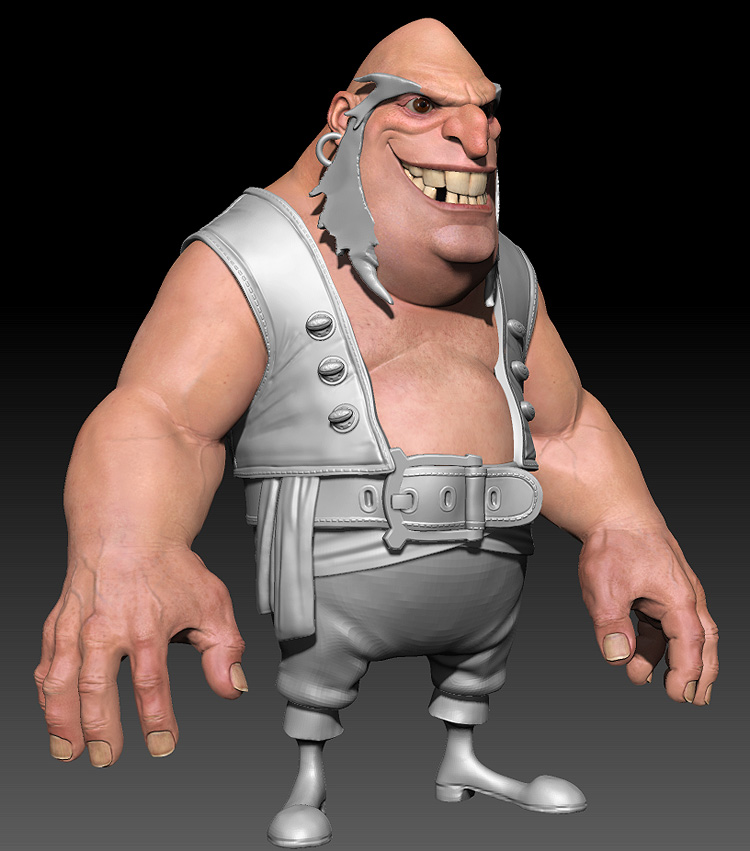
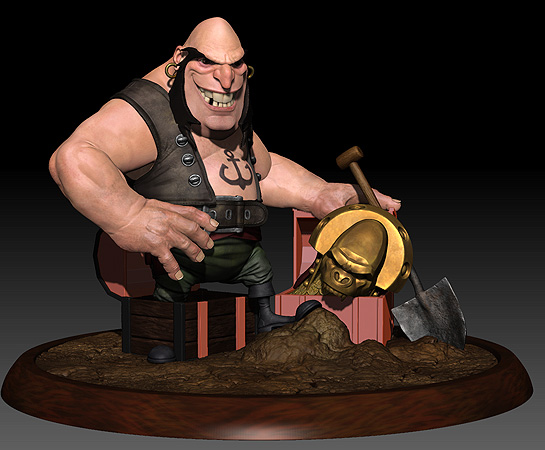
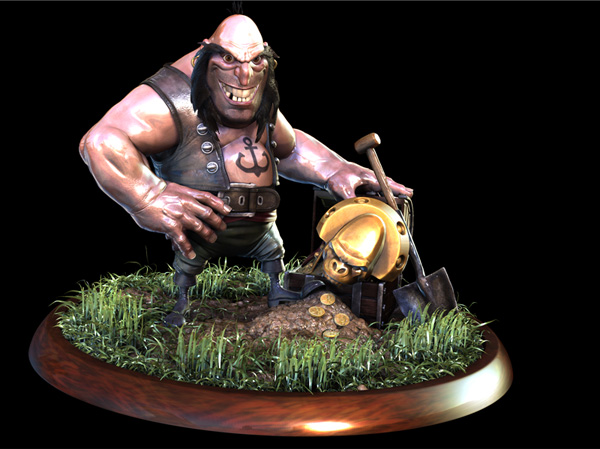
Ok! Put some images together.
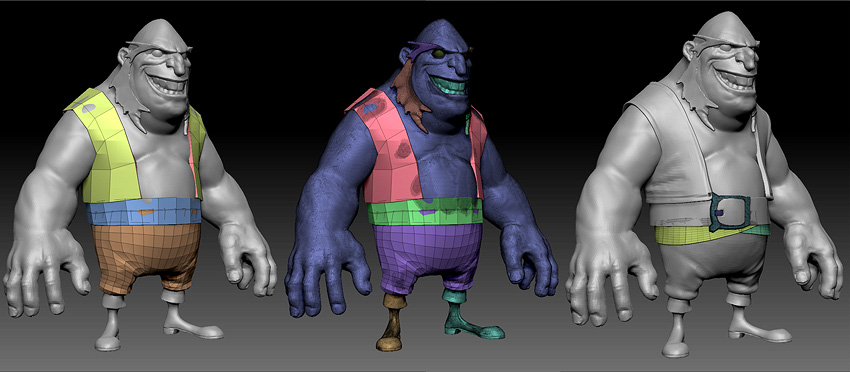
For his body, I started out with ZSpheres, made an adaptive skin, sculpted it out a bit, made it a somewhat low res dynamesh, and sculpted it out a bit more. For his clothing, I used the same method I used on the neck strap in the video (appended a ZSphere and drew his clothes on). This gave me the added benefit of having those polygroups with the creased edges, so when I subdivided his pants, jacket, and belt, it kept it crisp for me.
His boots, teeth, eyes, and hair started out as zbrush primitives (probably cubes) and mushed / sculpted roughly into place. His belt buckle I made using shadowbox (duped his belt, made it a shadowbox mesh, cleared the mask, made a mask for his buckle, applied it, moved it into place).
His “wraps” (cloth underneath his belt) I made using the same method as the neck cloth in the dynamesh video, using Brush > CurveSurface.
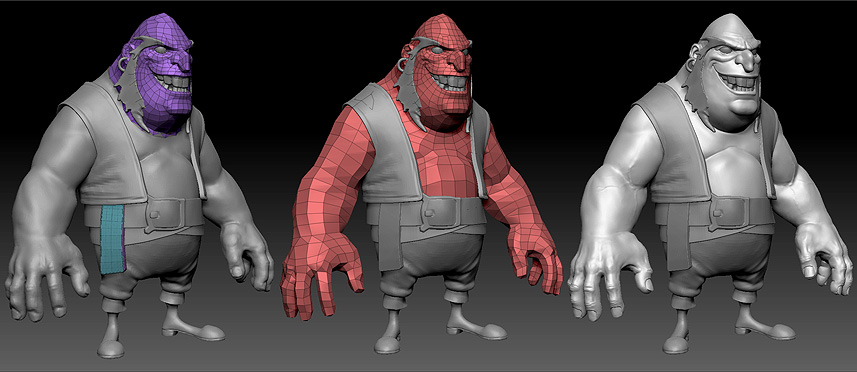
I retopologized his entire body using an appended ZSphere, made an adaptive skin (density at 1), appended the adaptive skin, and with his original dynamesh body showing and the appended adaptive skin selected, I used Subtool > Project all to apply the original detail to my new adaptive skin mesh. Subdivide the adaptive skin, Project, all, Subdivide again, Project all, etc… until I get to a high enough resolution to grab back all my original detail. However! I don’t subdivide TOO high while projecting, just high enough to get the information back I had temporarily lost. Then I continue to refine the body sculpt from there, deleting my original dynamesh body.
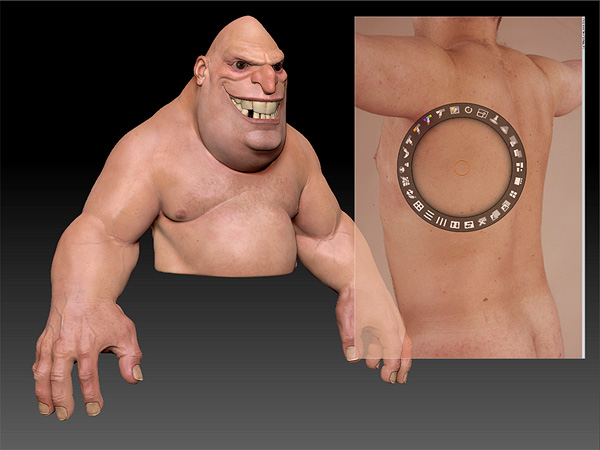
Using spotlight and some body reference from www.3D.sk, I paint a quick coat of skin on him.
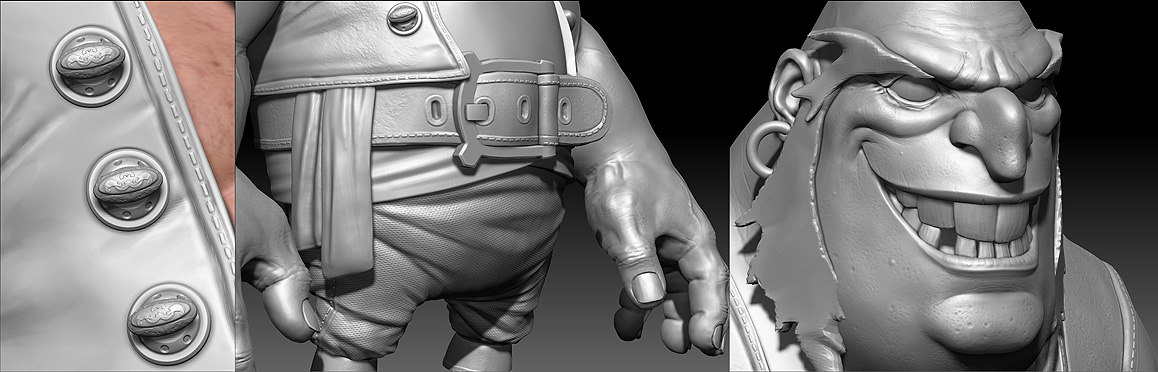
Continue to refine the model. For the pants texture, I used UV Master to lay out his UVs quickly, and Tool > Surface > Noise with a weave alpha loaded (applied it on a layer for maximum control). His buttons were just dynamesh objects boolean’d together, with a little deco brush scrolled on it. The simple stitching all over him was a modified stitch brush (hit the “,” key to bring up lightbox, go to the brushes tab, drag sideways to the stitch folder, and load one of those). I used this simple alpha:
and utilized the stroke > roll settings in the stitch brush.
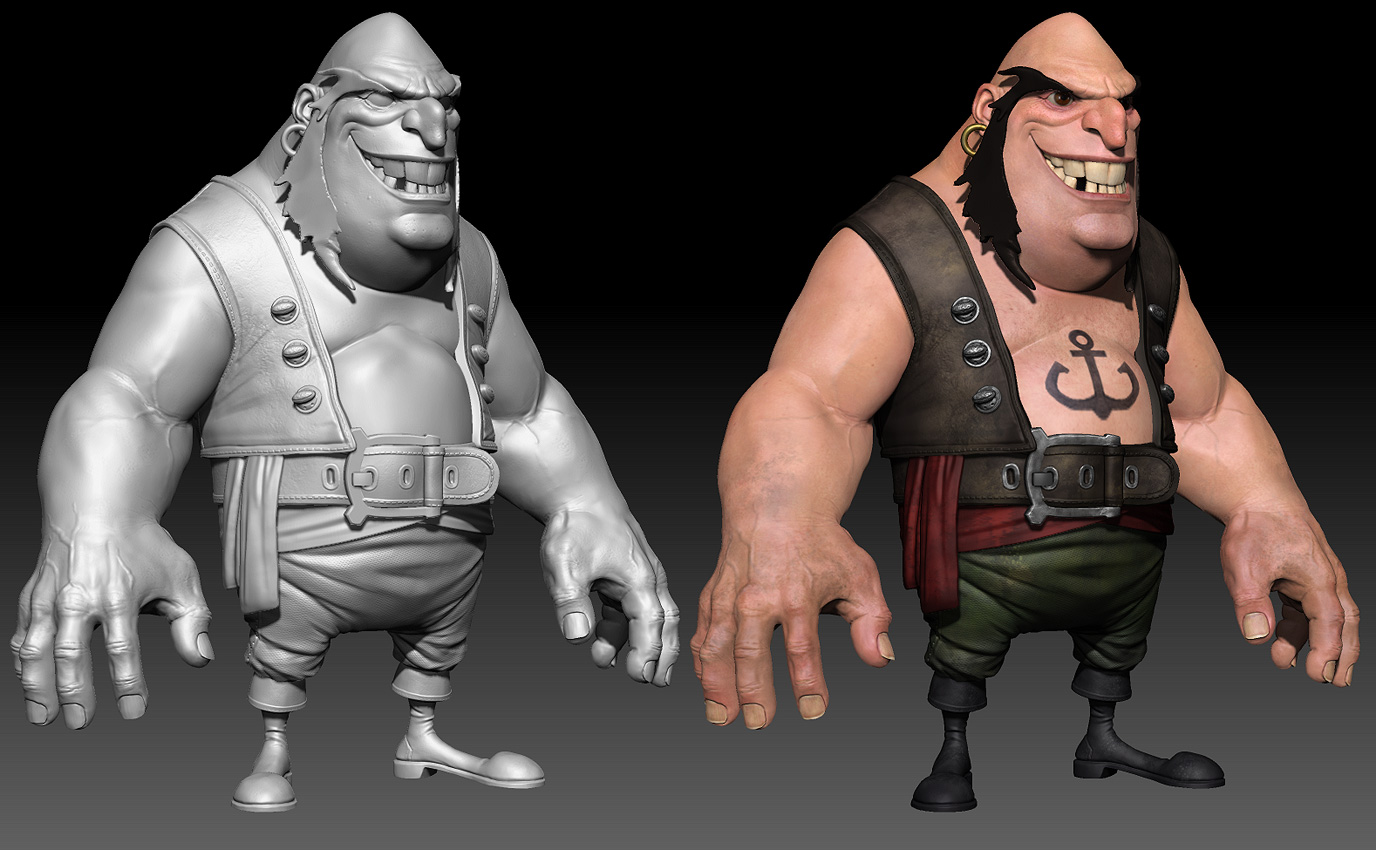
Model and texture complete, about 8 hours start to finish. Color > Fill object with a base color, and some standard brush > drag rec stroke with a dirty alpha loaded to apply some different colors.
Alright, start putting him together. I usually use ZPlugin > Subtool Master to pose complex objects, but it was giving me a bit of trouble, so I opted instead to Subtool > Merge objects temporarily that were a “part” of eachother (jacket and buttons, belt and wraps, pants and boots, head, eyes, and hair), pose them, group split them back out, and reconstruct subdivision history.
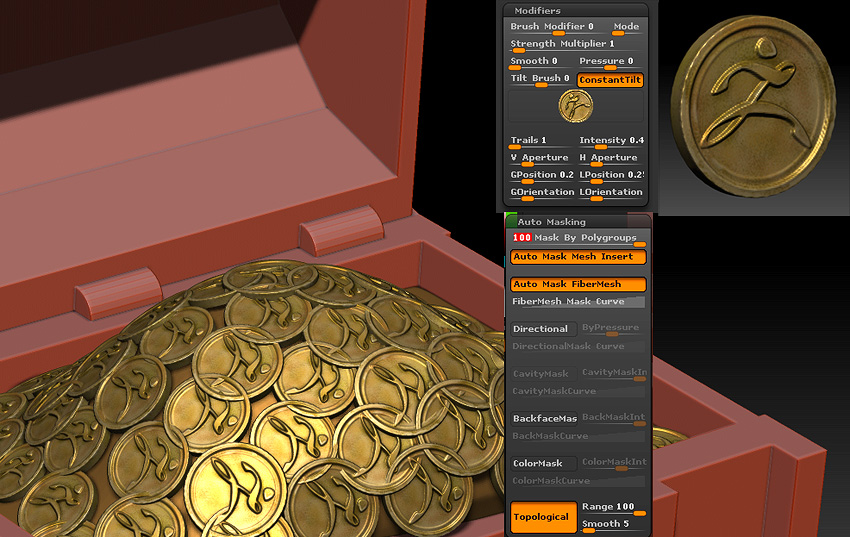
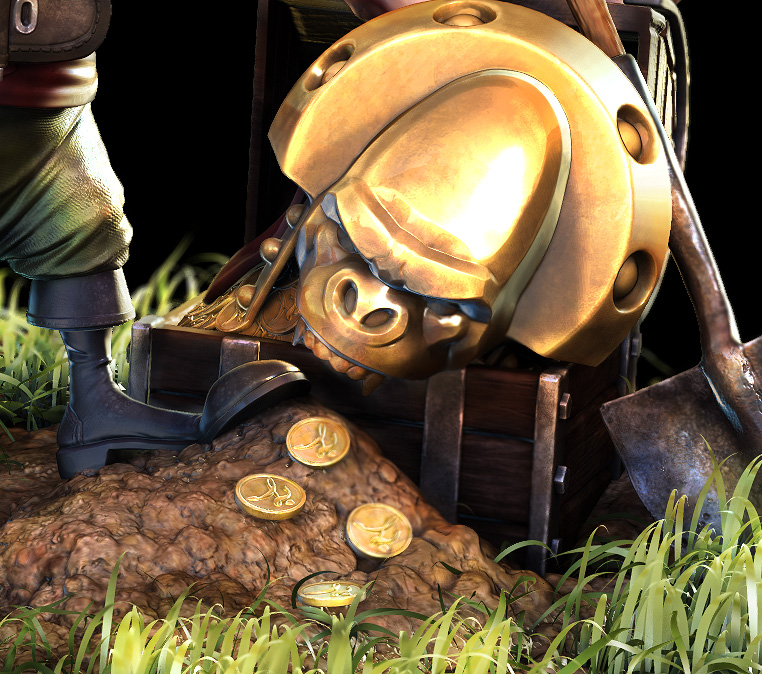
For the coins, I put in a base dynamesh “hump”, made a tool of a zbrush gold coin using the cylinder primitive, selected an unused insert brush, and with the insert brush selected went into the brush > modifiers section and replaced the original object with my gold coin. I then was able to drag out copies of this gold coin onto the underlying dynamesh hump. To move then around and not overlap, I selected my move brush, and either turned on the Topological button (at the bottom of the Brush > Auto Masking menu) and set the range to 100, or turned Mask by Polygroups (at the TOP of the Brush > Auto Masking Menu) up to 100. If you do the second option, make sure you go to Tool > Polygroup > Autogroup to make sure all your coins are separate polygroups.
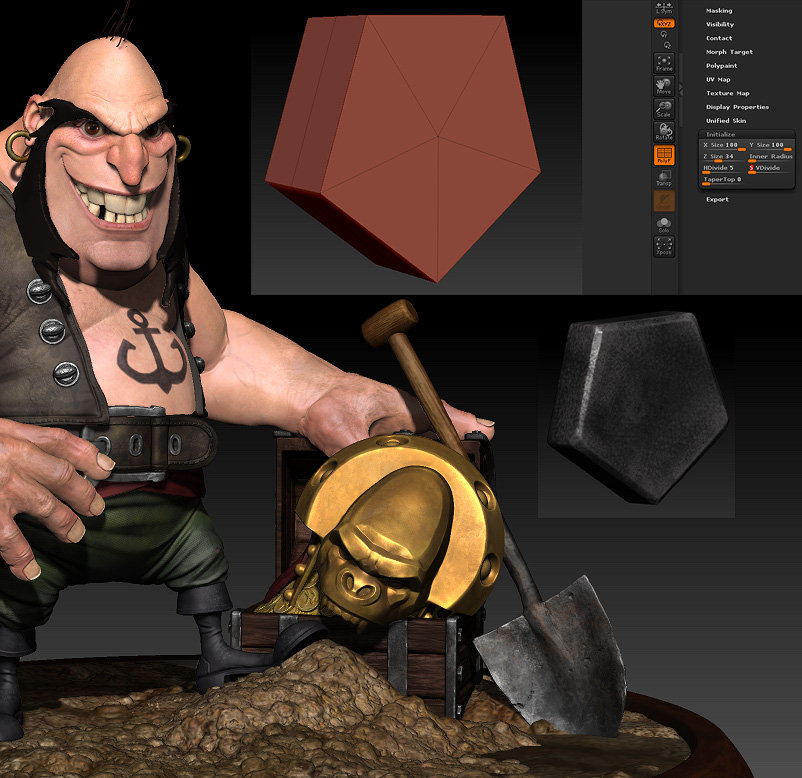
Same basic idea for the hex bolt, used the cylinder ZBrush primitive initialize settings to create a quick hexbolt, made it a dynamesh, gave it a quick paint job, and inserted it all over the treasure chest (made with a combination of ZBrush primitives, simple imported models from maya, and Dynamesh. Did I mention how much dynamesh rocks?!?!)
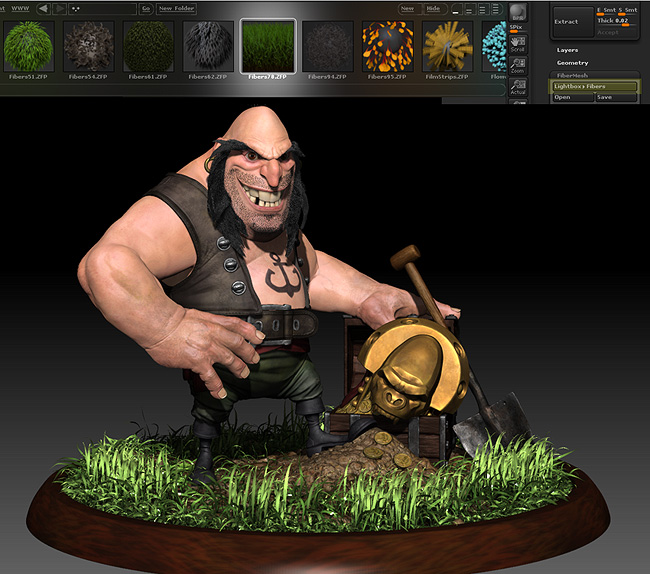
Alright, getting close. Added face and hair fibers (there’s some really good fiber videos on pixologic classroom already, check those out). Used a variation of a preexisting fiber from the lightbox menu (Tool > Fibermesh > Lightbox Fibers) to create the grass.
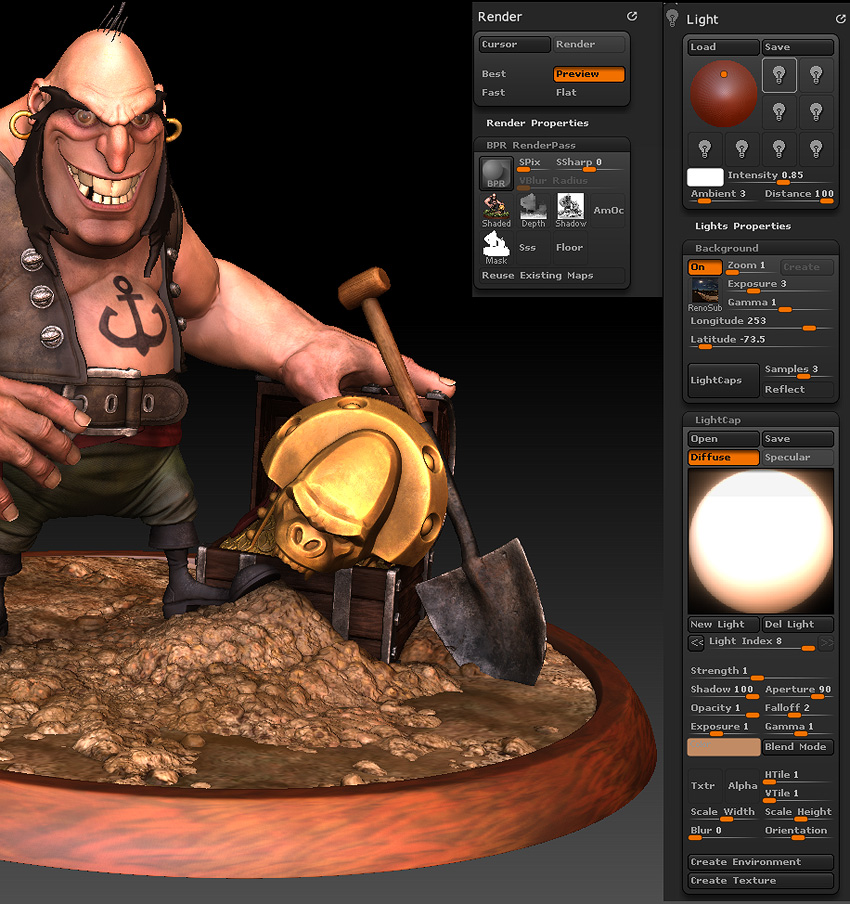
To get a base render out of ZBrush, I used the Lightcap system. I won’t be able to go totally in depth here, but the basics are: Under the light menu, open the background section, click on the texture swatch, import an HDR image, play with the exposure if you need to (depending on the HDR image I may or may not do this), and with the samples set (I used 3 samples in this case; this controls how many lights ZBrush will create), then hit the LightCaps button.
Open the LightCap menu, and you’ll see your new shader ball created with lights recreated from your HDR image. you can use the light index (or roll over the ball and click on the lights) to select lights. I usually play around with the Longitude and Latitude to light my character in a specific way; remember after changing these settings you’ll have to hit the LightCaps button again to update your material. If you’re getting a lot of lights casting shadows, select the lights in the LightCap menu and turn down the shadow strength to 0 for the ones that are casting too many shadows (shadow casting lights are usually found at the top of the shader ball).
I don’t remember exactly my shadow or AO settings, but I’d guess somewhere in the 2048 range with a blur of 2 or 3 for both.
And it’s all photoshop from here on out, which will be what the next post is. Export your render passes from the Render > BPR RenderPass section, and open them into photoshop.

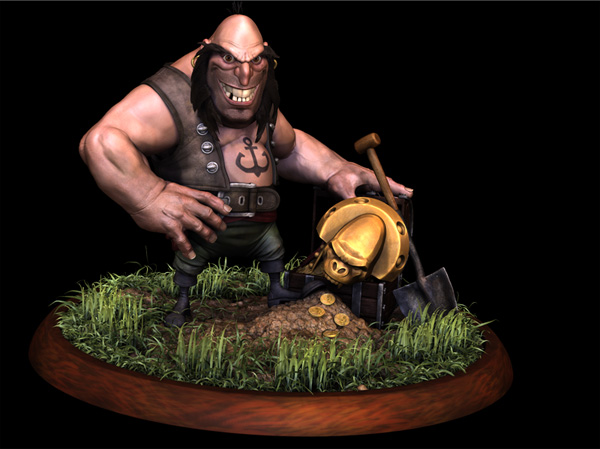
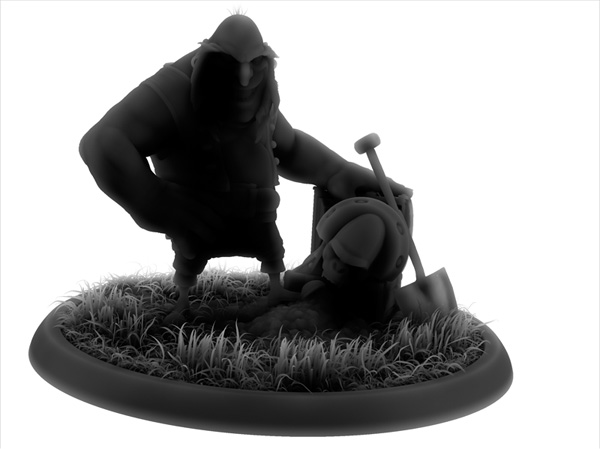
Here’s the base image I got out of ZBrush. Oh! remember to turn off any default lights in ZBrush (under the light menu, make sure none of them are turned on) if you’re using LightCap. Or, use them if you want if it’s giving you better results with them on, just be aware that LightCap doens’t turn off any ZBrush lights when you’re using it.
AO Layer

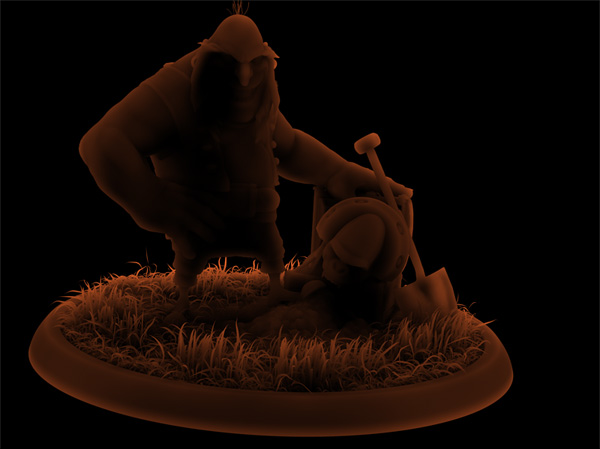
Fill Light Layer (see earlier posts about how to grab these out of ZBrush)
Key Light

Rim Light

Fill Rim

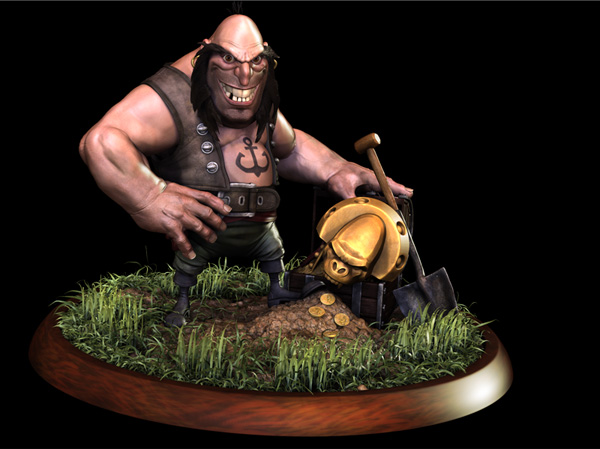
All the lights turned on!
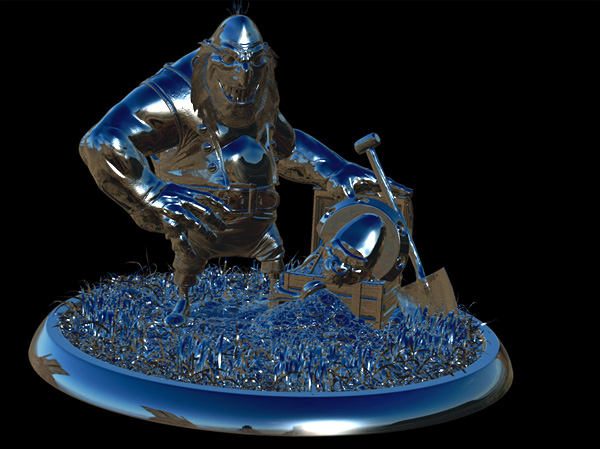
Exported a liquid metal version out of ZBrush to apply as a reflection layer
Liquid metal color dodged over the whole thing
Masked out areas that I didn’t want metal (although really, I probably started with a black mask, and painted in the areas where I DID want reflection; probably close to 100% on all the metalic objects, 30% on the shiny areas of his skin and the wood base, and just a dash of reflection on his leather areas, especially his boots).
Here’s the SSS map I got out of my Render > Render Pass menu. Just used the default settings. Copied this into the alpha tab of my image, so I can use it as a selection.
Ctl+clicked the SSS mask in my alpha tab to get a selection in photoshop, filled it with this red color on its own layer above my image.
Here it is applied as a color dodge over my image. Obviously I don’t want everything to look like a piece of deli ham with a flashlight behind it, so I use a layer mask to paint in the areas I want this effect.

Here it is applied to some of the skin areas, the rest masked out.
Copied the same color filled SSS layer, used a hue / saturation adjustment layer to give it a yellow green color, but instead of using a mask to apply it to his skin, I used it to give the grass a little bit of translucency, to not look so opaque.

Threw a few more layers on top; used a color dodge and an overlay layer to pop some areas…usually add a bloom layer to make the hot specs bloom a little bit, but looking at the final image I think I forgot to do that. Also realized, just now, that his wooden base is actually an old version…there was a better one created, saved that late updated file in a weird spot because I got lazy, and now it’s too late. Don’t be lazy like me!
Attachments
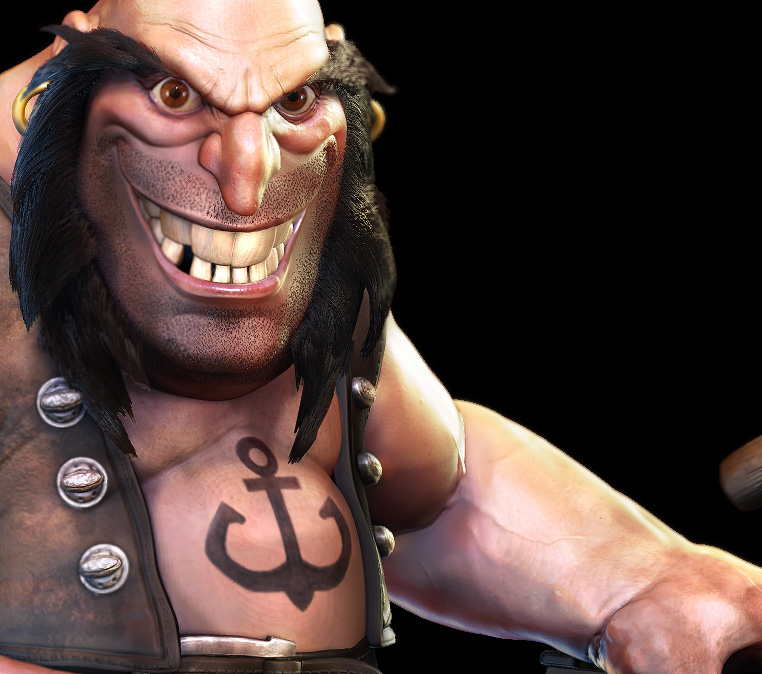
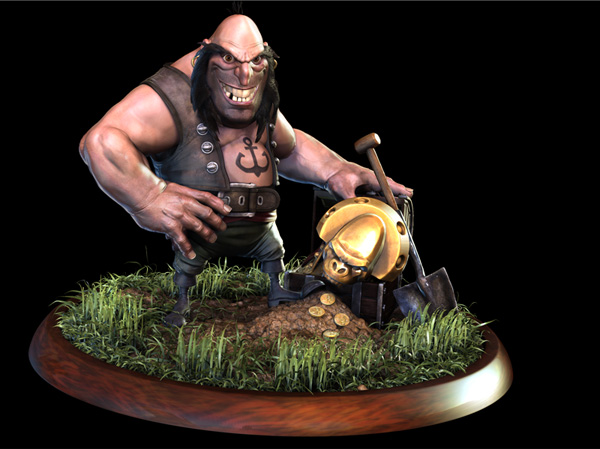
And that’s about it! Here are some closeup shots of the full-res render:

Hope this helps! I’m going to TRY to get a video made of me doing this basic process, but it might have to wait, I’m bogged down for the rest of the weekend. Plus it’s dinner time!
Thanks again for checking out the thread everyone! 
It’s brilliant to see this in such detail. The videos are excellent, but I have to say I especially enjoyed the compositing walk-through. You answered a lot of questions I had (and some I didn’t know I should’ve been asking…) about getting from dynamesh to a finished image. I’d love to see a video of it if you have the chance.
Thanks a lot!
Excellent set of videos. Thanks for taking the time to do 'em! Love the final images.