It was very much a compliment, and I think its working very well, shes stunning
hehe yeah man… i been busy 
i should explain a little something about myself… im kinda like an exponential learner… almost any program on a computer that you throw at me i can learn in minutes and master … like utterly rule over… in a month or two… if i really want to. i’ve learned video editting audio edittng photoshop cad etc etc… but then i tried zbrush and i enjoyed it… thought i could do fun things with it… but there was this roadblock of me being completely nonartistic in anything but music… spent two years franticly absorbing every single tutorial i found on here… and just trying things learning the limits of the tools and how to render and everything that you need to go from concept to production… and somehow somepoint in the last 2 weeks everything kinda just clicked… i understand how all the tools that perplexed me before worked and im being patient and applying things 1 tiny bit at a time… im far far far from being a zbrush master and alot of what im doing i can stand to be doing much faster and much better… but i think now that im past my artistic hump… im gonna be able to get much much better much quicker … not to be too ****y about it or anything 
 … i’m setting a goal now of producing myself a 5 star front page production within the next year… i never thought i would ever have anywhere near the talent to try that boast but i think… i think if i keep spending the time to practice i will get there…
least a boy can dream
Really nice job on her…Congrats…

Thank you a million times over for your Photoshop compositing breakdown, much appreciated!
I had a similar experience as you though. Spent a few months trying to learn it and it was just not working for me at all, but one day I looked through Pointpusher’s thread, used a custom matcap for sculpting, changed the terrible background gradient, put my tools in a custom interface and bam! Something just clicked overnight.
Glad you got over your artistic hump, those are the worst
spiritdreamer & polaroid… thx to u both…
polaroid… yeah it’s a strange feeling when that happens… zbrush has been one of the very few cases where i felt i was actually being challenged when it came to learning the deep nuts and bolts of how it worked… there was just …soooo much stuff packed into it that i literally needed to just start throwing information at myself trying to make it stick on how it all worked. and even when i understood a bunch of it i still couldnt really produce anything spectacular… but dunno… guess starting when i was working on the bane mask attempt and more specifically after working with the retopo tools for the backyard scene… it was like i took a deep breath settled in and all of the various workflows and settings and mentality shifts u get told are necessary… all just slid into place.
i’m still far from any place where i feel i could say ive mastered the program … not to the point i’ve dominated excel or access or autocad or vegas… hell i dont think anyone could even “Master” zbrush. Even the pros are constantly finding new things they can pull out of it. but i damn sure will do my best to try … none of it would be possible of course without the zbc community… you will never anywhere in this life see another group of dedicated proffessionals and amateurs mixing it up together on a daily basis, basically training their own competition to one day become better than them (or at least as skilled equals). just out of love of a piece of software.
mind boggling no?
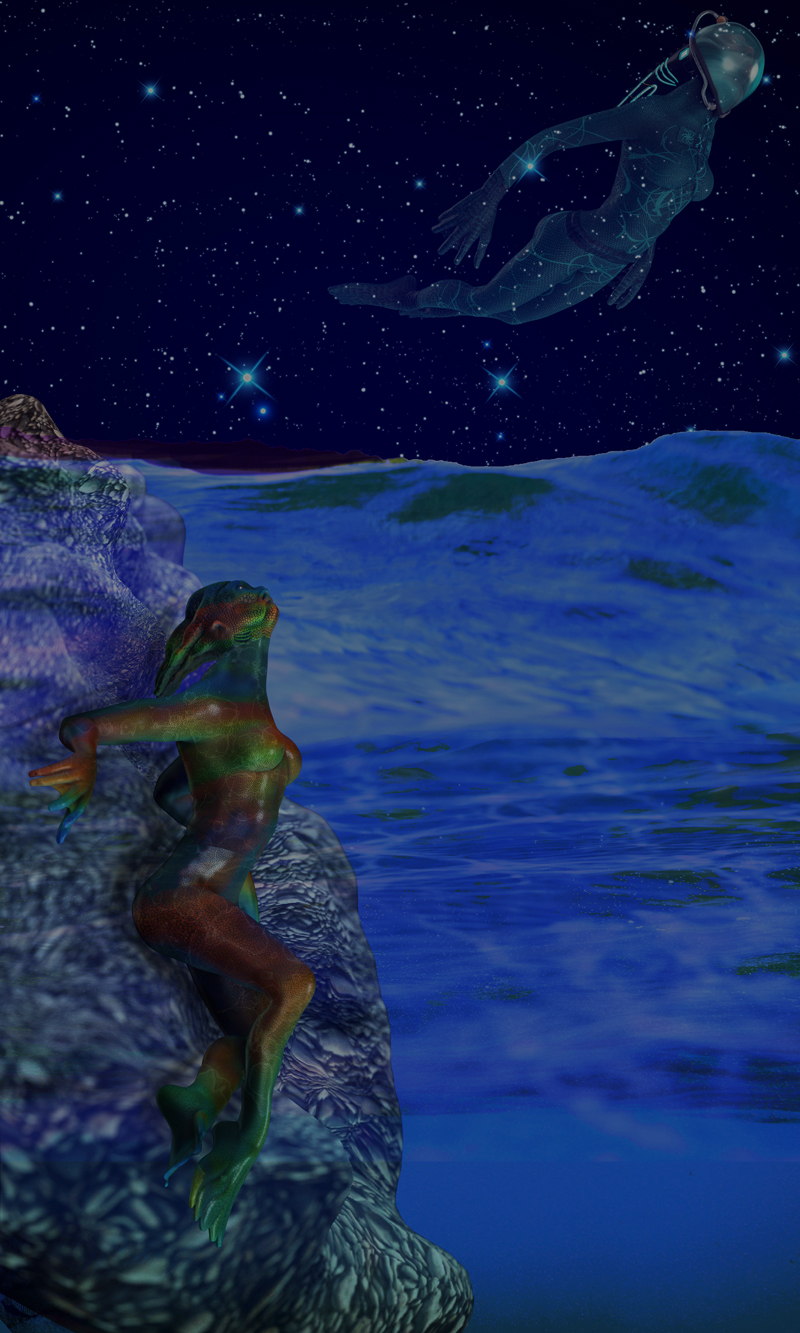
quick test of planned composition :
i need to redo some things but the placement seems good for now… i want to rerender the rocks with her in the picture as i added them in seperate layers this time around and wasnt happy… overall though nearing done :
full size : http://farm7.static.flickr.com/6072/6083701048_de79b103ef_o.jpg
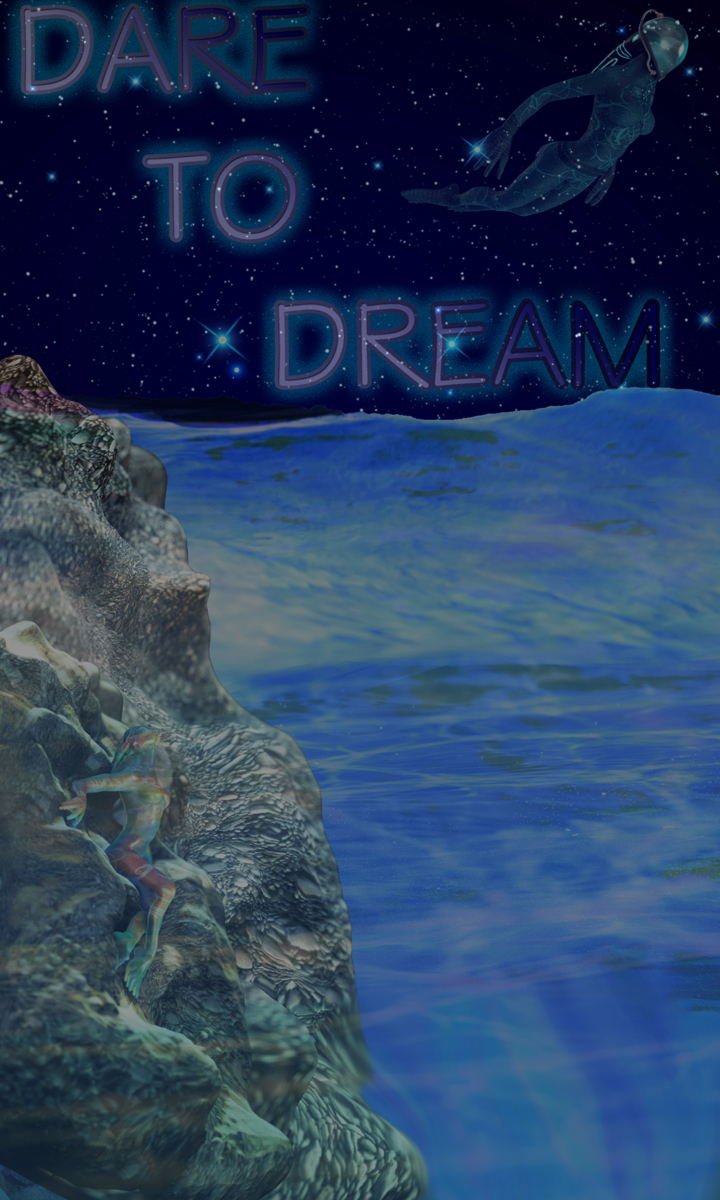
i think i need to leave her at this stage… happy with the final composition… but if i play with it anymore im gonna destroy details i dont want to lose
so heres the final… time to plan the next idea :
full size : http://farm7.static.flickr.com/6210/6086946065_e265d8e556_o.jpg
now the next 2 planned ideas im bouncing around… 1 either a man with a screaming in agony type facial expression bent over ripping his chest apart and bright “soul” light pouring out… yeah… thats gonna be a challenge  or the other plan is aku from samurai jack… done very smooth and stylized… should be a challenge as well.
all east coasters good luck tonight
-d
i really am gonna need a lot more playtime with the mats :\ … i spent a good hour toying with settings and putting together an interesting mat that was actually working using a copied layer from the reflectedmap mat to let me use texture files to apply a fairly nice subsurface skin effect…
but then i go to render it it no worky… looks ok in regular exporting… but niether bpr or best render produces anything even close to the effects it gets from just preview render. i guess i overdid it with the layer blending maybe ? or something in my settings maybe looks one way in preview only… dunno… deleted the mat at this point anyway cause the rendered result was hideous
heres a sample of the non rendered result…
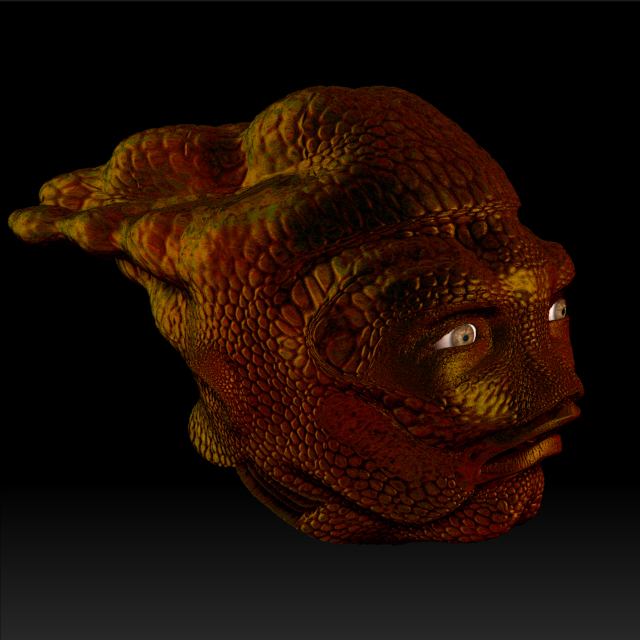
actually looked much better in zbrush itself… any area where theres the camo green in the top tendrils is a result off the texture map on the sss layer… but yeah still not doing somethign right here.
I will be fiddling with that later this evening I hope, when I get home.
Will post any decent result as well. Keep on brushing
starting point suggestion
use reflected map and copy out s1 to s1 of quad shader… also then copy s2 from reflected map into s2-4 of quad shader. In all shader channels remove reflectivity and spec and you wont have the shine of reflectionmap but the underlying texture should show up. for this i just used a nice 3kx3k tileable skin texture.
what im noticing with the s1 from reflectedmap mat… you can tweak the 2 sliders and get a really nice balance of how much the texture you add “pops” from where it’s “reflecting” … but again only seems to work way i want in preview mode.
Will do, hope I can get a session in tonight, if not it will be weekend fun.
Like the message…and also like the way the figures blend into their backgrounds… …No crits from me.
A suggestion that might be useful to you …don’t know…but maybe try out a few different compositions for this theme that you’ve created…crop the composition / make wider horizontal rectangle for a broad ariel perspective vista effect …circular composition ect…you know, stuff like that…You might come up with something that enhances the theme even more than it is now…One idea always leads into another…why settle for one composition, when you have a great theme to work with…That’s just my personal opinion though, and the way that I see things, and was taught…Push the boundries on a good theme…nothing to lose,…and alot to gain…you just never know, until you do it…
Dream On…
thanks spirit  … a part of me is definitely wanting to continue with her… maybe make different outfits for different purposes… expand on her idea… but another part of me also wants to make some other good ideas i have before i lose direction on them … go figure
anyways i have to post the link to this video here … i’m sure most people on these forums already very well enough know of the legend meats meier … if you follow his work with any regularity you’ll know he likes to make stuff for maynard james keenan of tool’s side side project puscifer… his latest video for queen “b” … oooooooooooh man … i love meats… he’s a very insane person
http://www.youtube.com/watch?v=Cvo1LwH1XXE
if you dont have a youtube account (someone with no sense of humor flagged the video as adult content :\ … just watched a video of a nude girl in times square getting body painted on youtube no problem… this gets flagged for adult content :\ …) try here :
http://myplay.com/videos/puscifer/queen-b
this is an older one if you’re interested … for “the mission”
http://www.youtube.com/watch?v=MrQOBcFfEj0
enjoy!
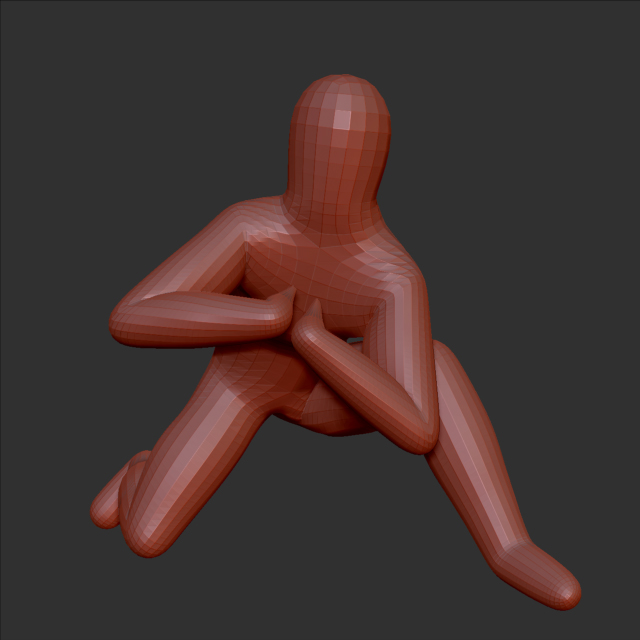
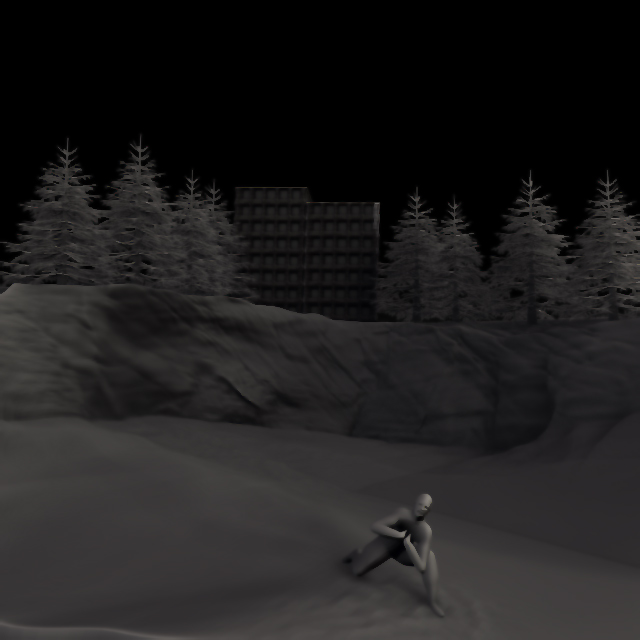
1st stage on my next planned model. i decided on this one to start off going the completely completely non-symetrical route. i wanted to get my pose created first so i used one of the male mannequins zbrush provide and worked out how i want the guy to be crouched on a knee, head staring upward with look of intense fear/pain/primal scream. hands ripping apart his chest.
once i was happy with the pose i used marcuscivus’s mesh insert script to replace all of the mannequin pieces with starter cubes, tweaked the adaptive skin and generated a 1k poly base pose. after beefing up the body structure this is 1 div level in and primary body mass laid out. i’m without my tablet until tomorrow so im done for now but tomorrow will be getting this div level as “done” as i can while laying out basic body mass and muscle structure, and then bringing it up again to start really ironing out details, start seperating off hands and feet. and hopefully by wednesday have a nice basemesh to start going for the deeper details with.
I fully expect the entire planned project to take me at least a month as this is pre-vis work for a video project and the guy is only one of maybe 10 individual pieces i need to try to make ready to be animated and merged into 2 minutes worth of outdoor shot video … the previs part of the project will likely take a month… the project itself i expect to take a lot longer cause it’s for both me and a friend to try to create a sizzle reel of sorts… help him break into film and help me to show what i think i’m capable of.
i’m going to try to post the various stages in progress as seen from a novice’s eyes so others who are considering similar ventures can see everything necessary for the process.
should be fun
test of environmental layout… everything so far is just test models. the quarry and building will be reworked to be much mroe detailed though in the final product…well hehe you’ll see… and the trees will be …changed  … in the final product and are there for scaling purposes at the moment. final image is also going to be a taller one like my previous composite… the focal pieces will be the top and the bottom of the image with whats going on in the middle…well again you’ll see… im hoping to do this idea justice so im still holding some of my cards to the table. better then letting myself down if i cant deliver.
anyways here’s where the quarry environment layout stands so far

thinking bout covering him with tats and then sticking him in a diaper and bonnet… can’t imagine he’d be happy about that
Attachments

worked him into a sitting down pose… gonna try to make it a bit more appallingly calender-esque as i go … also built out the diaper and bib… bib im happy with but diaper needs some work. gonna stick with the camo cause it goes with the theme of this being a bit of a twisted rapper whose into big baby-ism…
yeah… i don’t know where it came from…sometimes i have odd ideas rattle around in my head :\
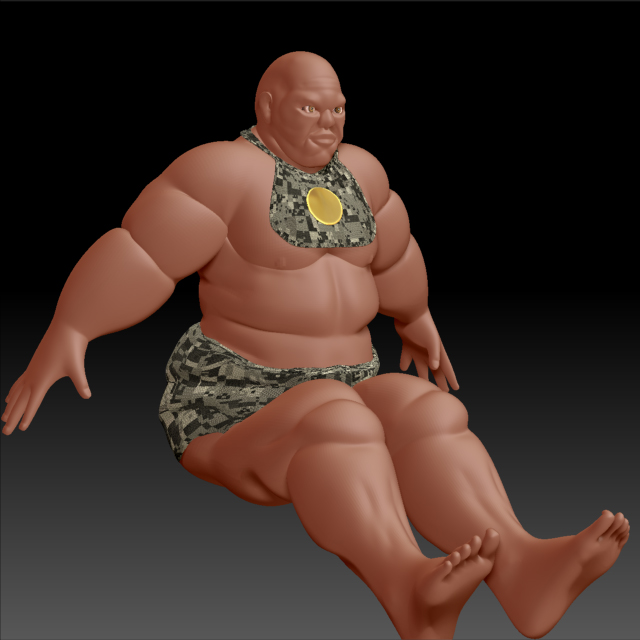
next up is retopo which im dreading on the main body… and then i start reworking the fat folds to have more gravity and structure. and then i add skin detailing… i think this time around i’m going to attempt to make the skin as a texture file first… try to get as much more detail in as possible this time around
Great stuff with the Topology experiments! There was a guy a while back who was bending polyspheres into basic shapes of mechanical objects then retopolizing it into a good clean hipoly shape. Made a pretty nice batmobile with it. I think it’s in the turntable gallery, you should give it a look.
thanks lucas. think i have seen that one. yeah, none of my experiements are probably anything that hasnt been done already and i definitely credit some of the greats on these forums with giving out secrets that led to me being able to pick up enough technique to get where i am now.
even the box modeling stuff i did was from a tutorial going back to the early zbrush 2 posts, where i think either sebcessor or marcus civus where talking about using displacement to create box models in zbrush. everything i try to do at low poly levels utilizes something from that tutorial to accomplish what i intend from it. ill see if i can find the original link one of these days.

not even gonna try to explain
[attach=271609]bigfatz-sm.jpg[/attach]
fullsize : http://farm7.static.flickr.com/6169/6141586511_94b06b72e5_o.jpg
this still not finished… gonna retopo once more to fix some seam issues… and finish up posing and props… but happy so far with his texture… first real “human” i can say i’m semi happy about with that that ive done
-d
Attachments
