Great job. Thanks for the tut.
thanks eiad… i appreciate that coming from someone whose been in the community as long as you have.
-d
ok… totaly confused… but I think I almost have it… GRIN!
This is fun…
haha love that movie, did one of the guardian some time back too
keep at it
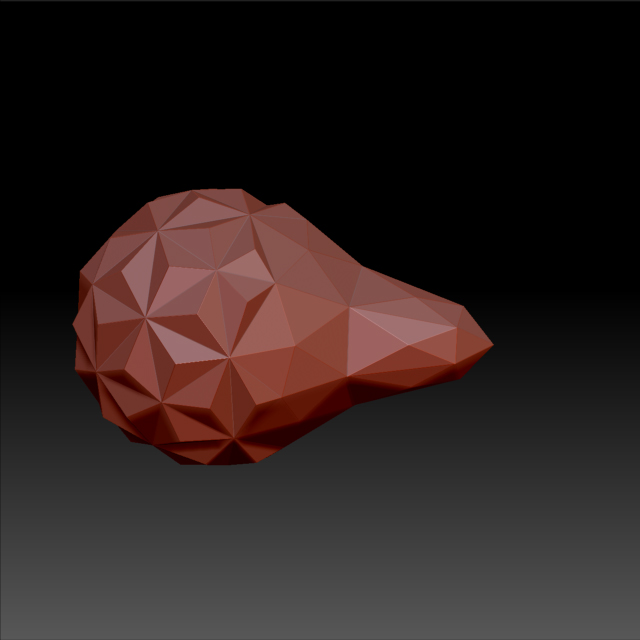
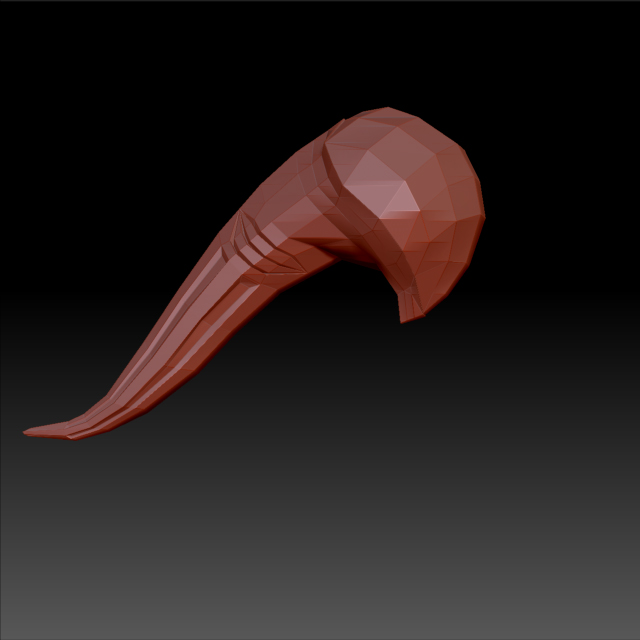
so this is yesterday and todays experiment… starting off using topmod to produce a shape within reason of the primary shape i wanted :
initial topmod mesh :
[attach=267993]topmodexport copy.jpg[/attach]
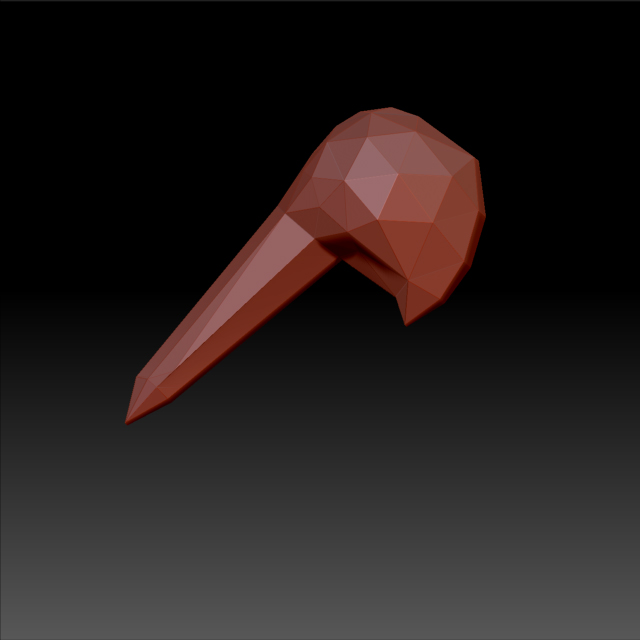
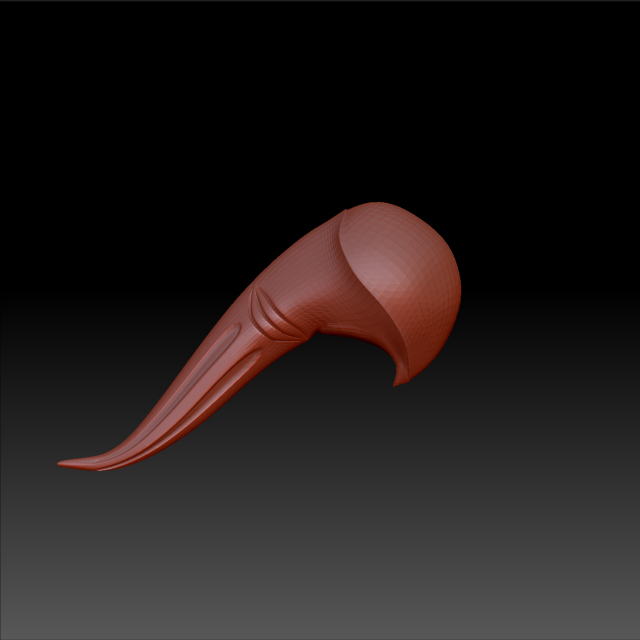
1st topo pass :
[attach=267994]topmod-1stpasstopo copy.jpg[/attach]
more topo :
[attach=267995]meshfromprimitive copy.jpg[/attach]
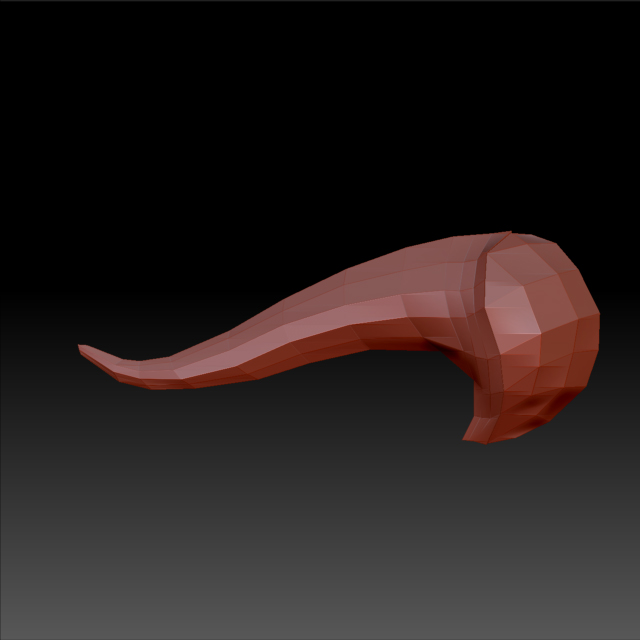
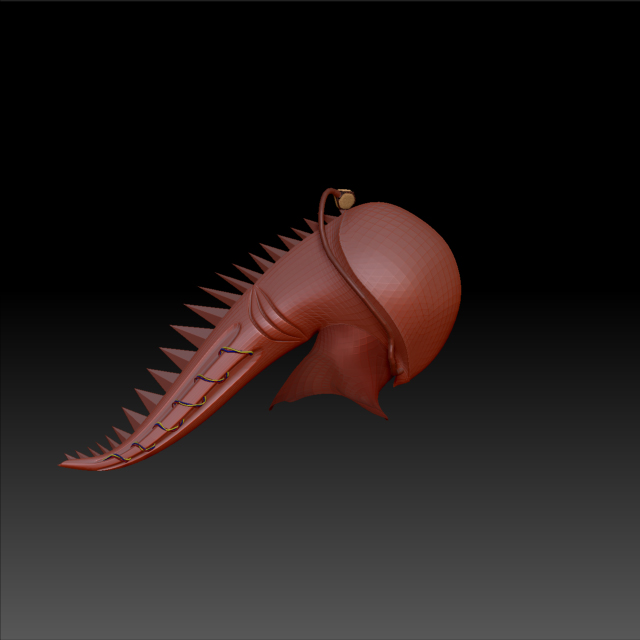
1st hard surface plus use topo to prep areas for more hard surface :
[attach=267996]someharsurfacelines copy.jpg[/attach]
bringing up the details :
[attach=267997]smoother copy.jpg[/attach]
adding in features (sensor on top of head is another primitive this time created with jenn3d):
[attach=267998]moredetails copy.jpg[/attach]
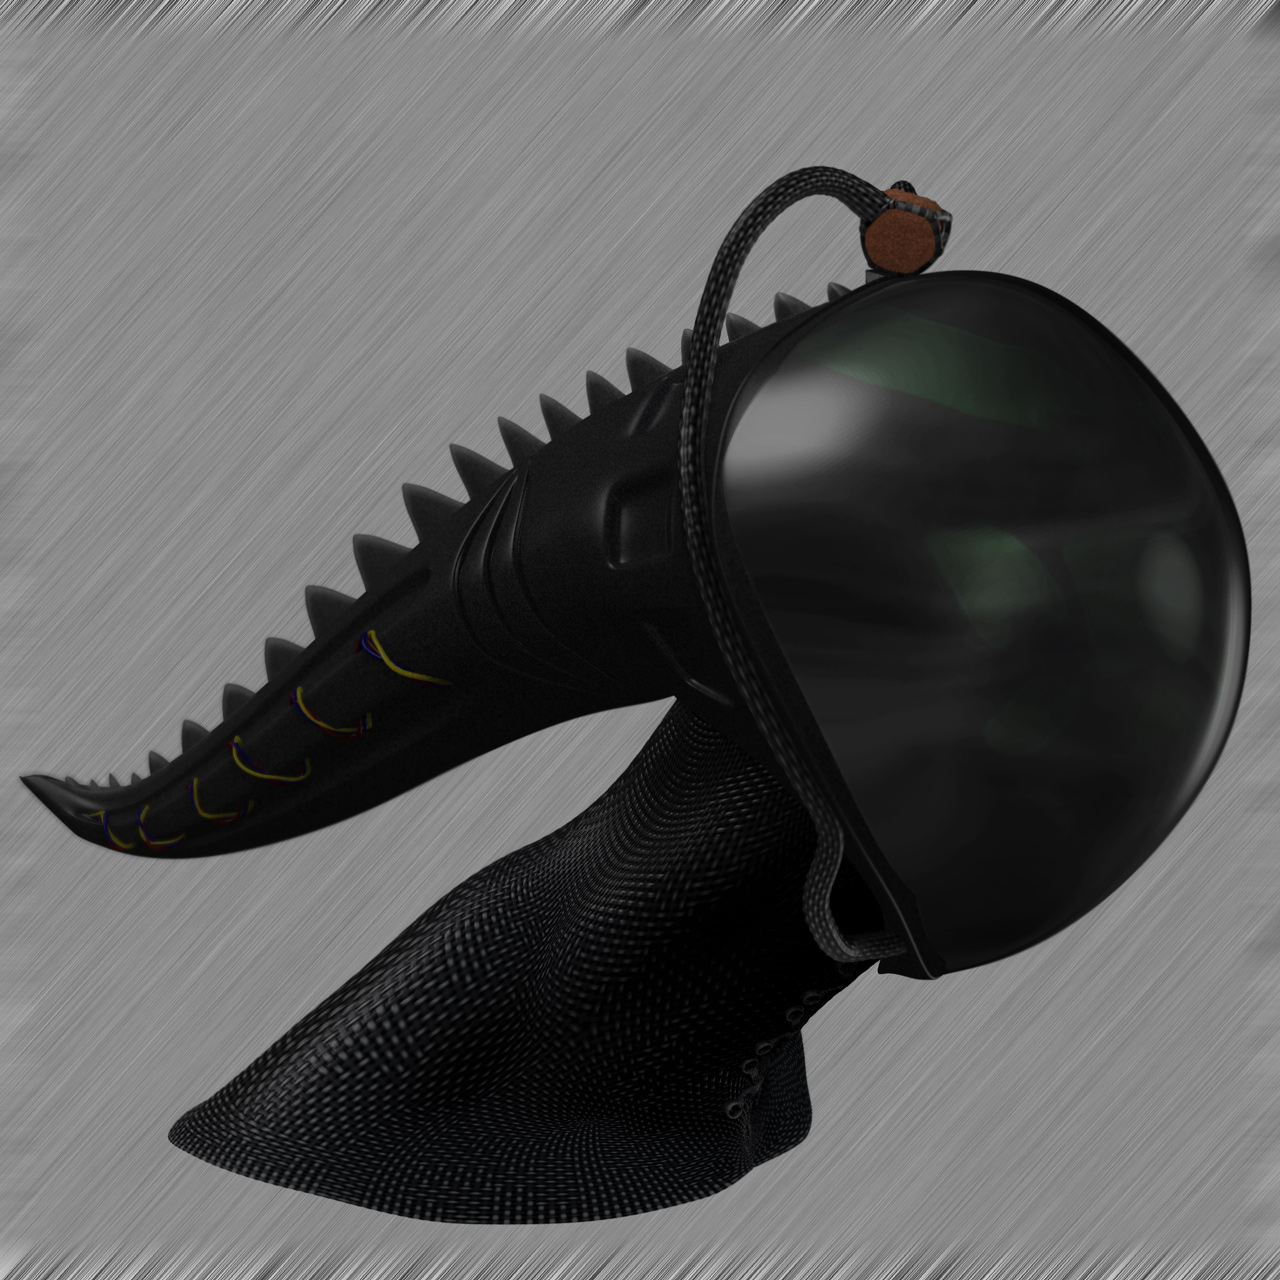
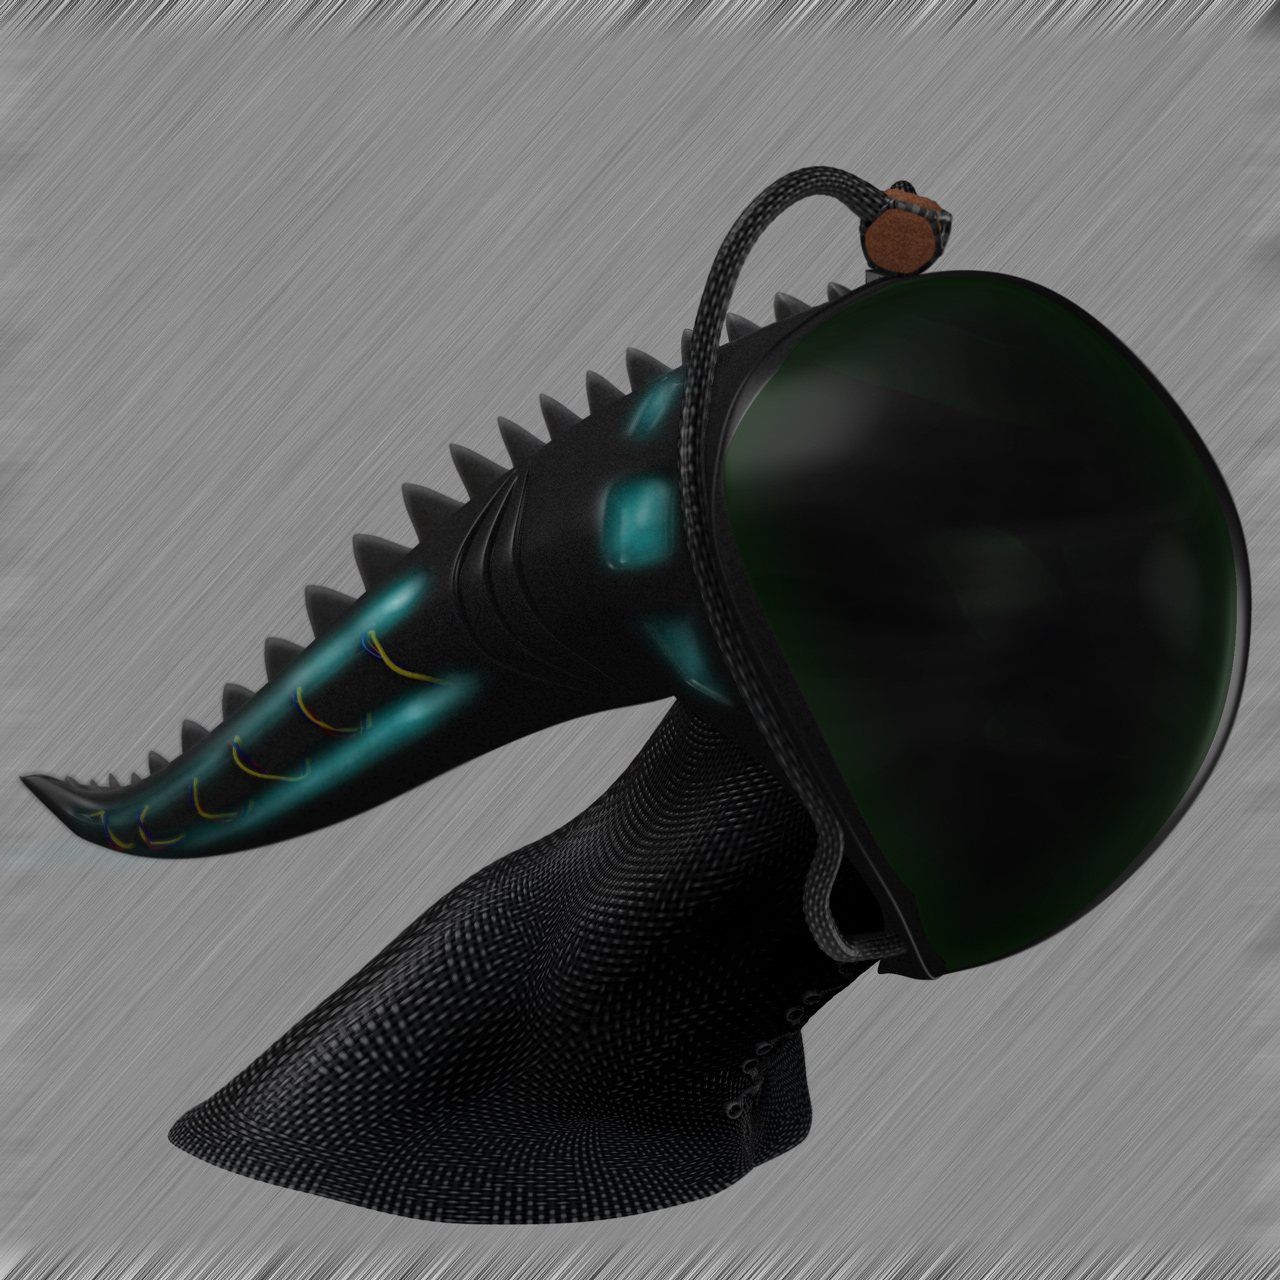
final render :
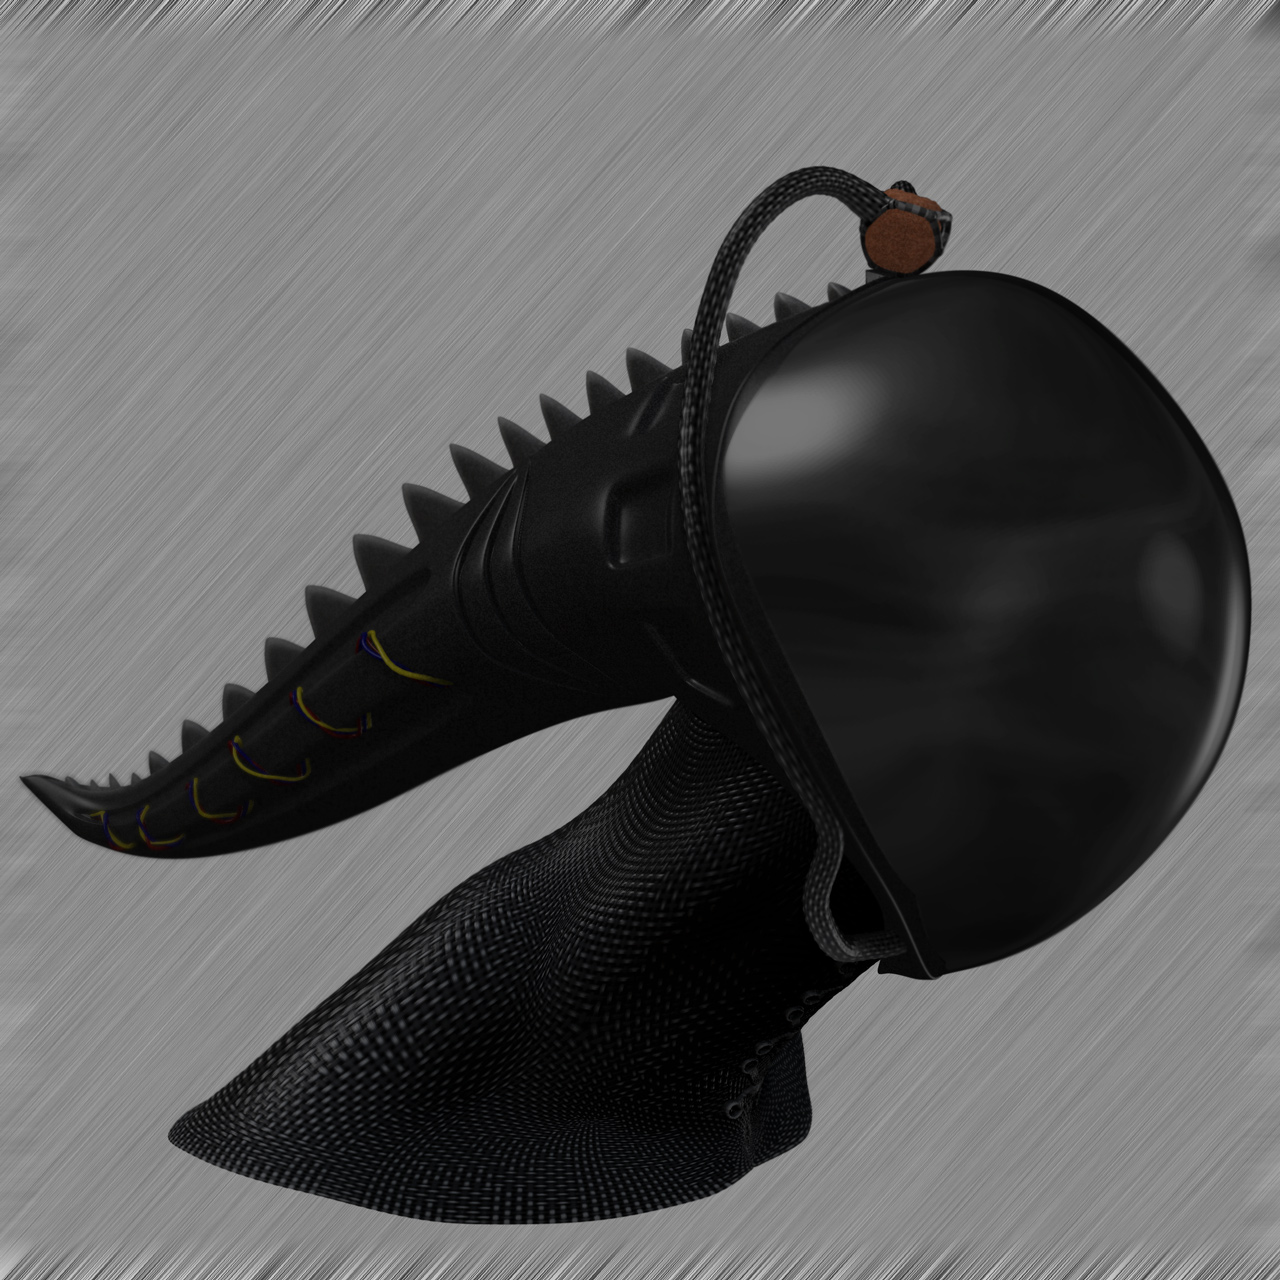
full size here : http://farm7.static.flickr.com/6200/6062951789_77ab79edbb_o.jpg
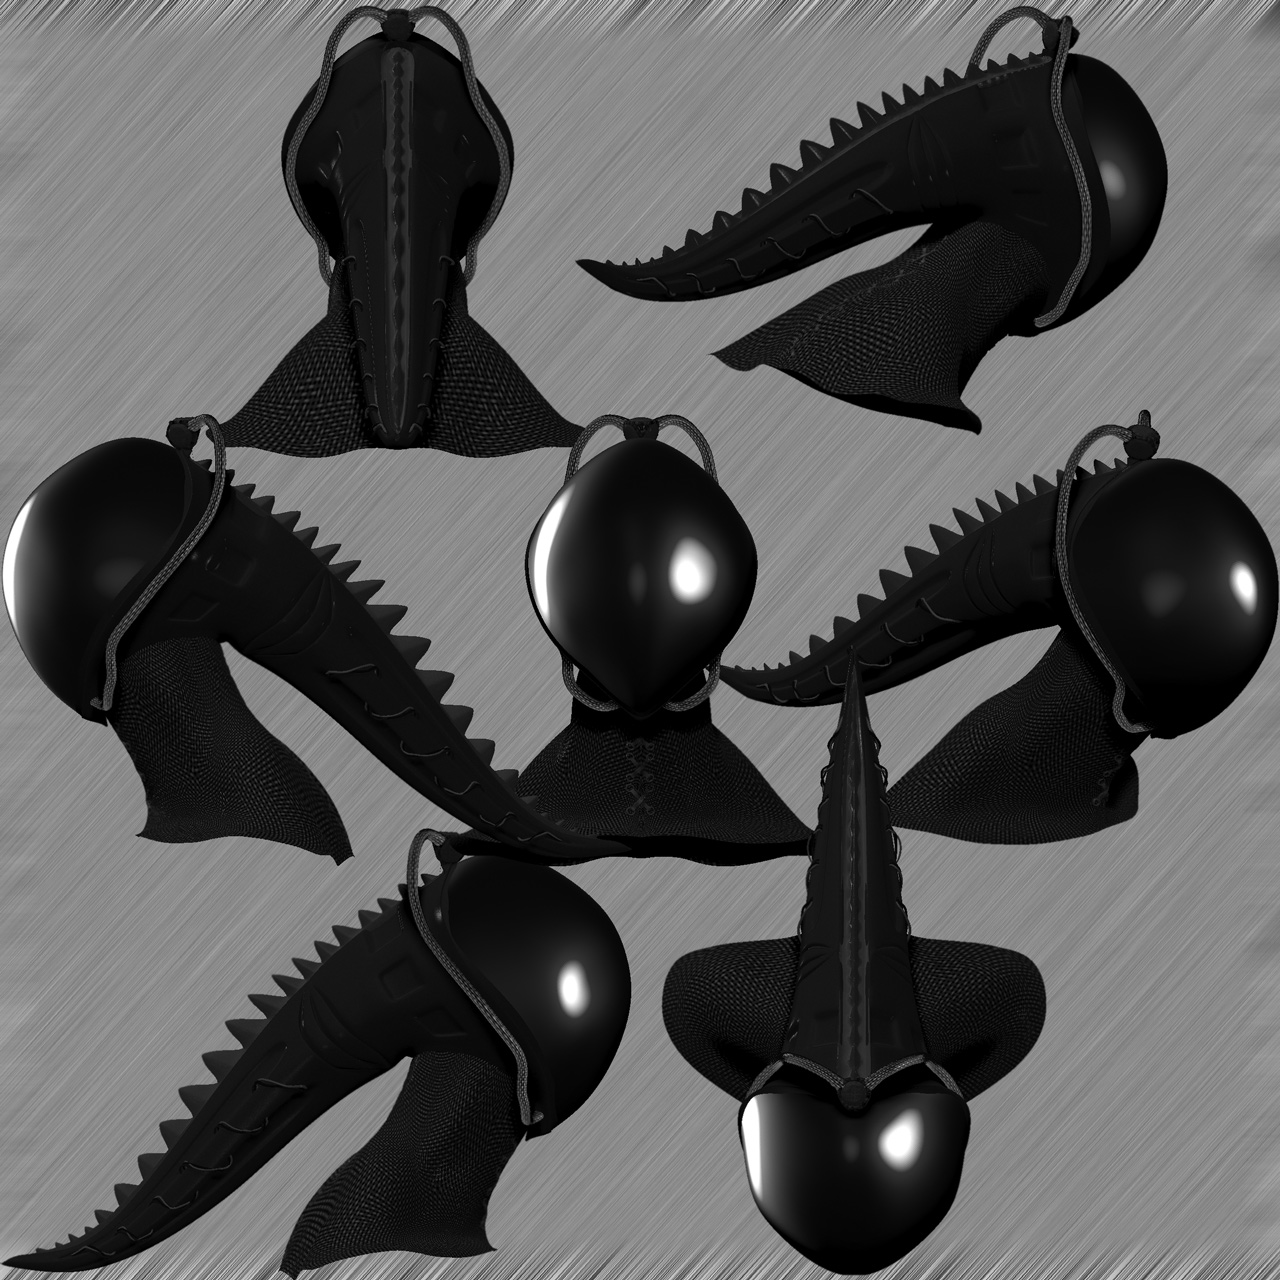
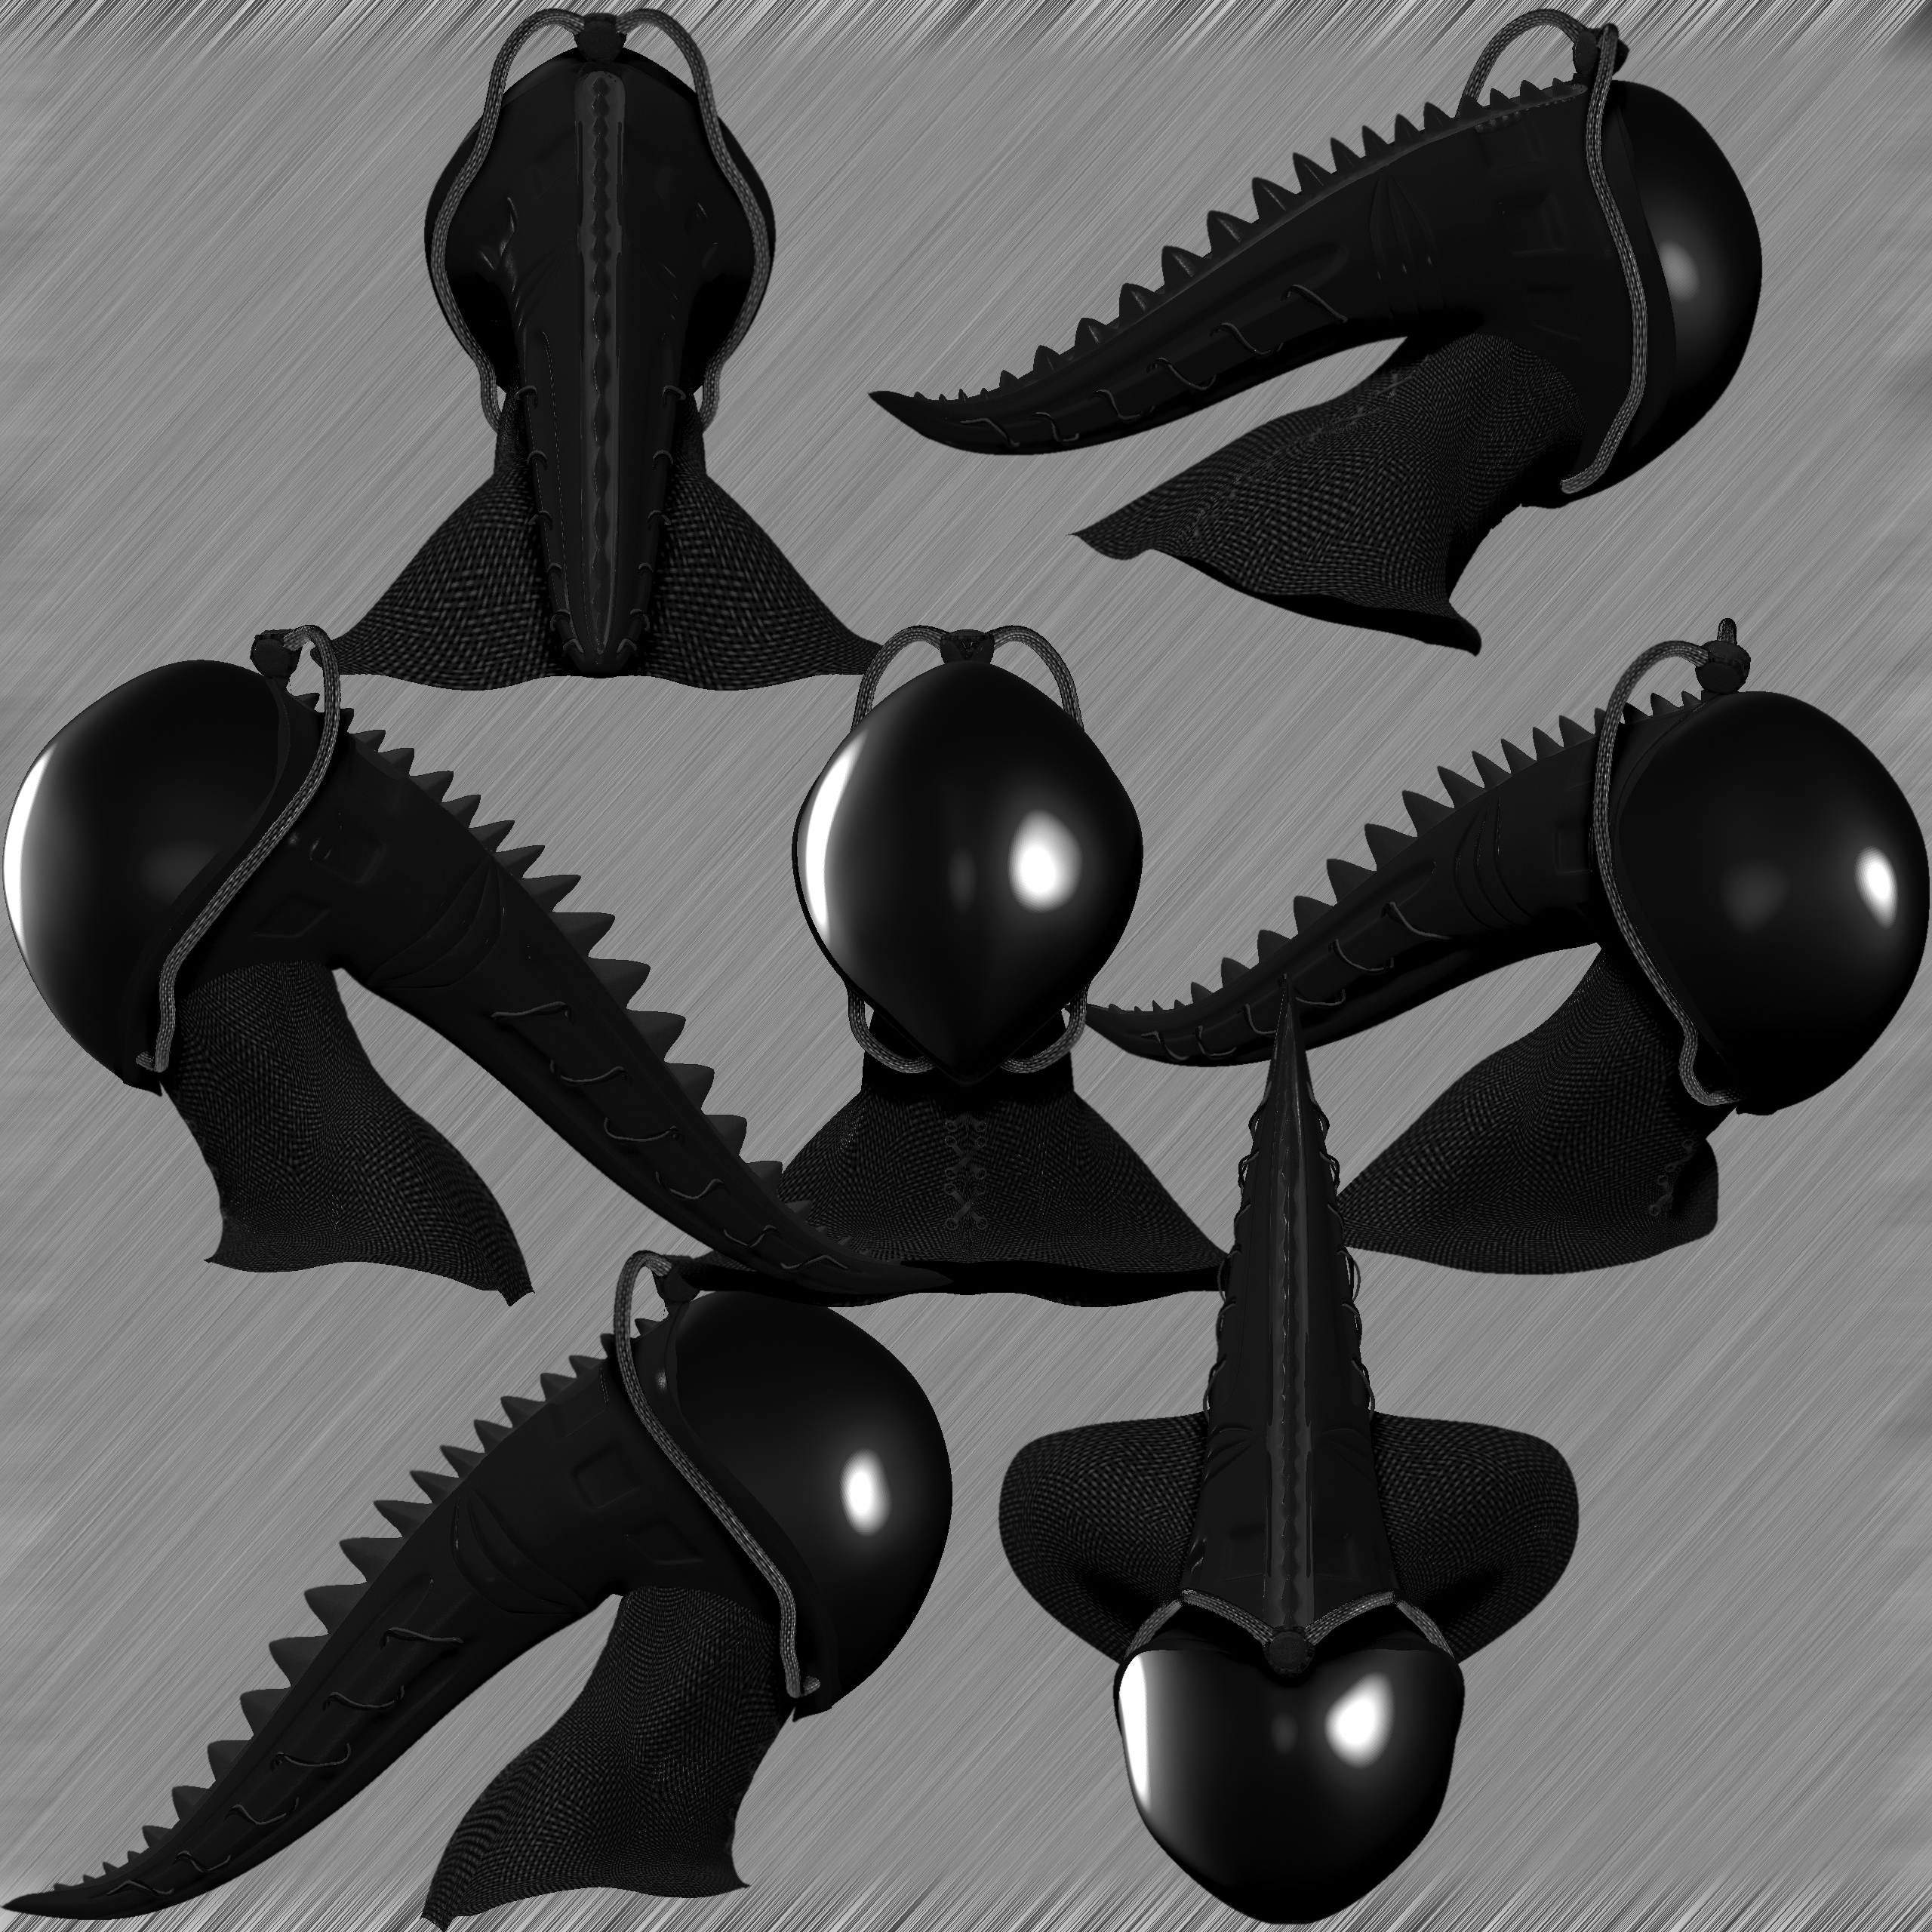
character sheet :
[attach=268000]sensorcharsheet-sm.jpg[/attach]
full size here : http://farm7.static.flickr.com/6074/6062952111_fd58ccd0bb_o.jpg
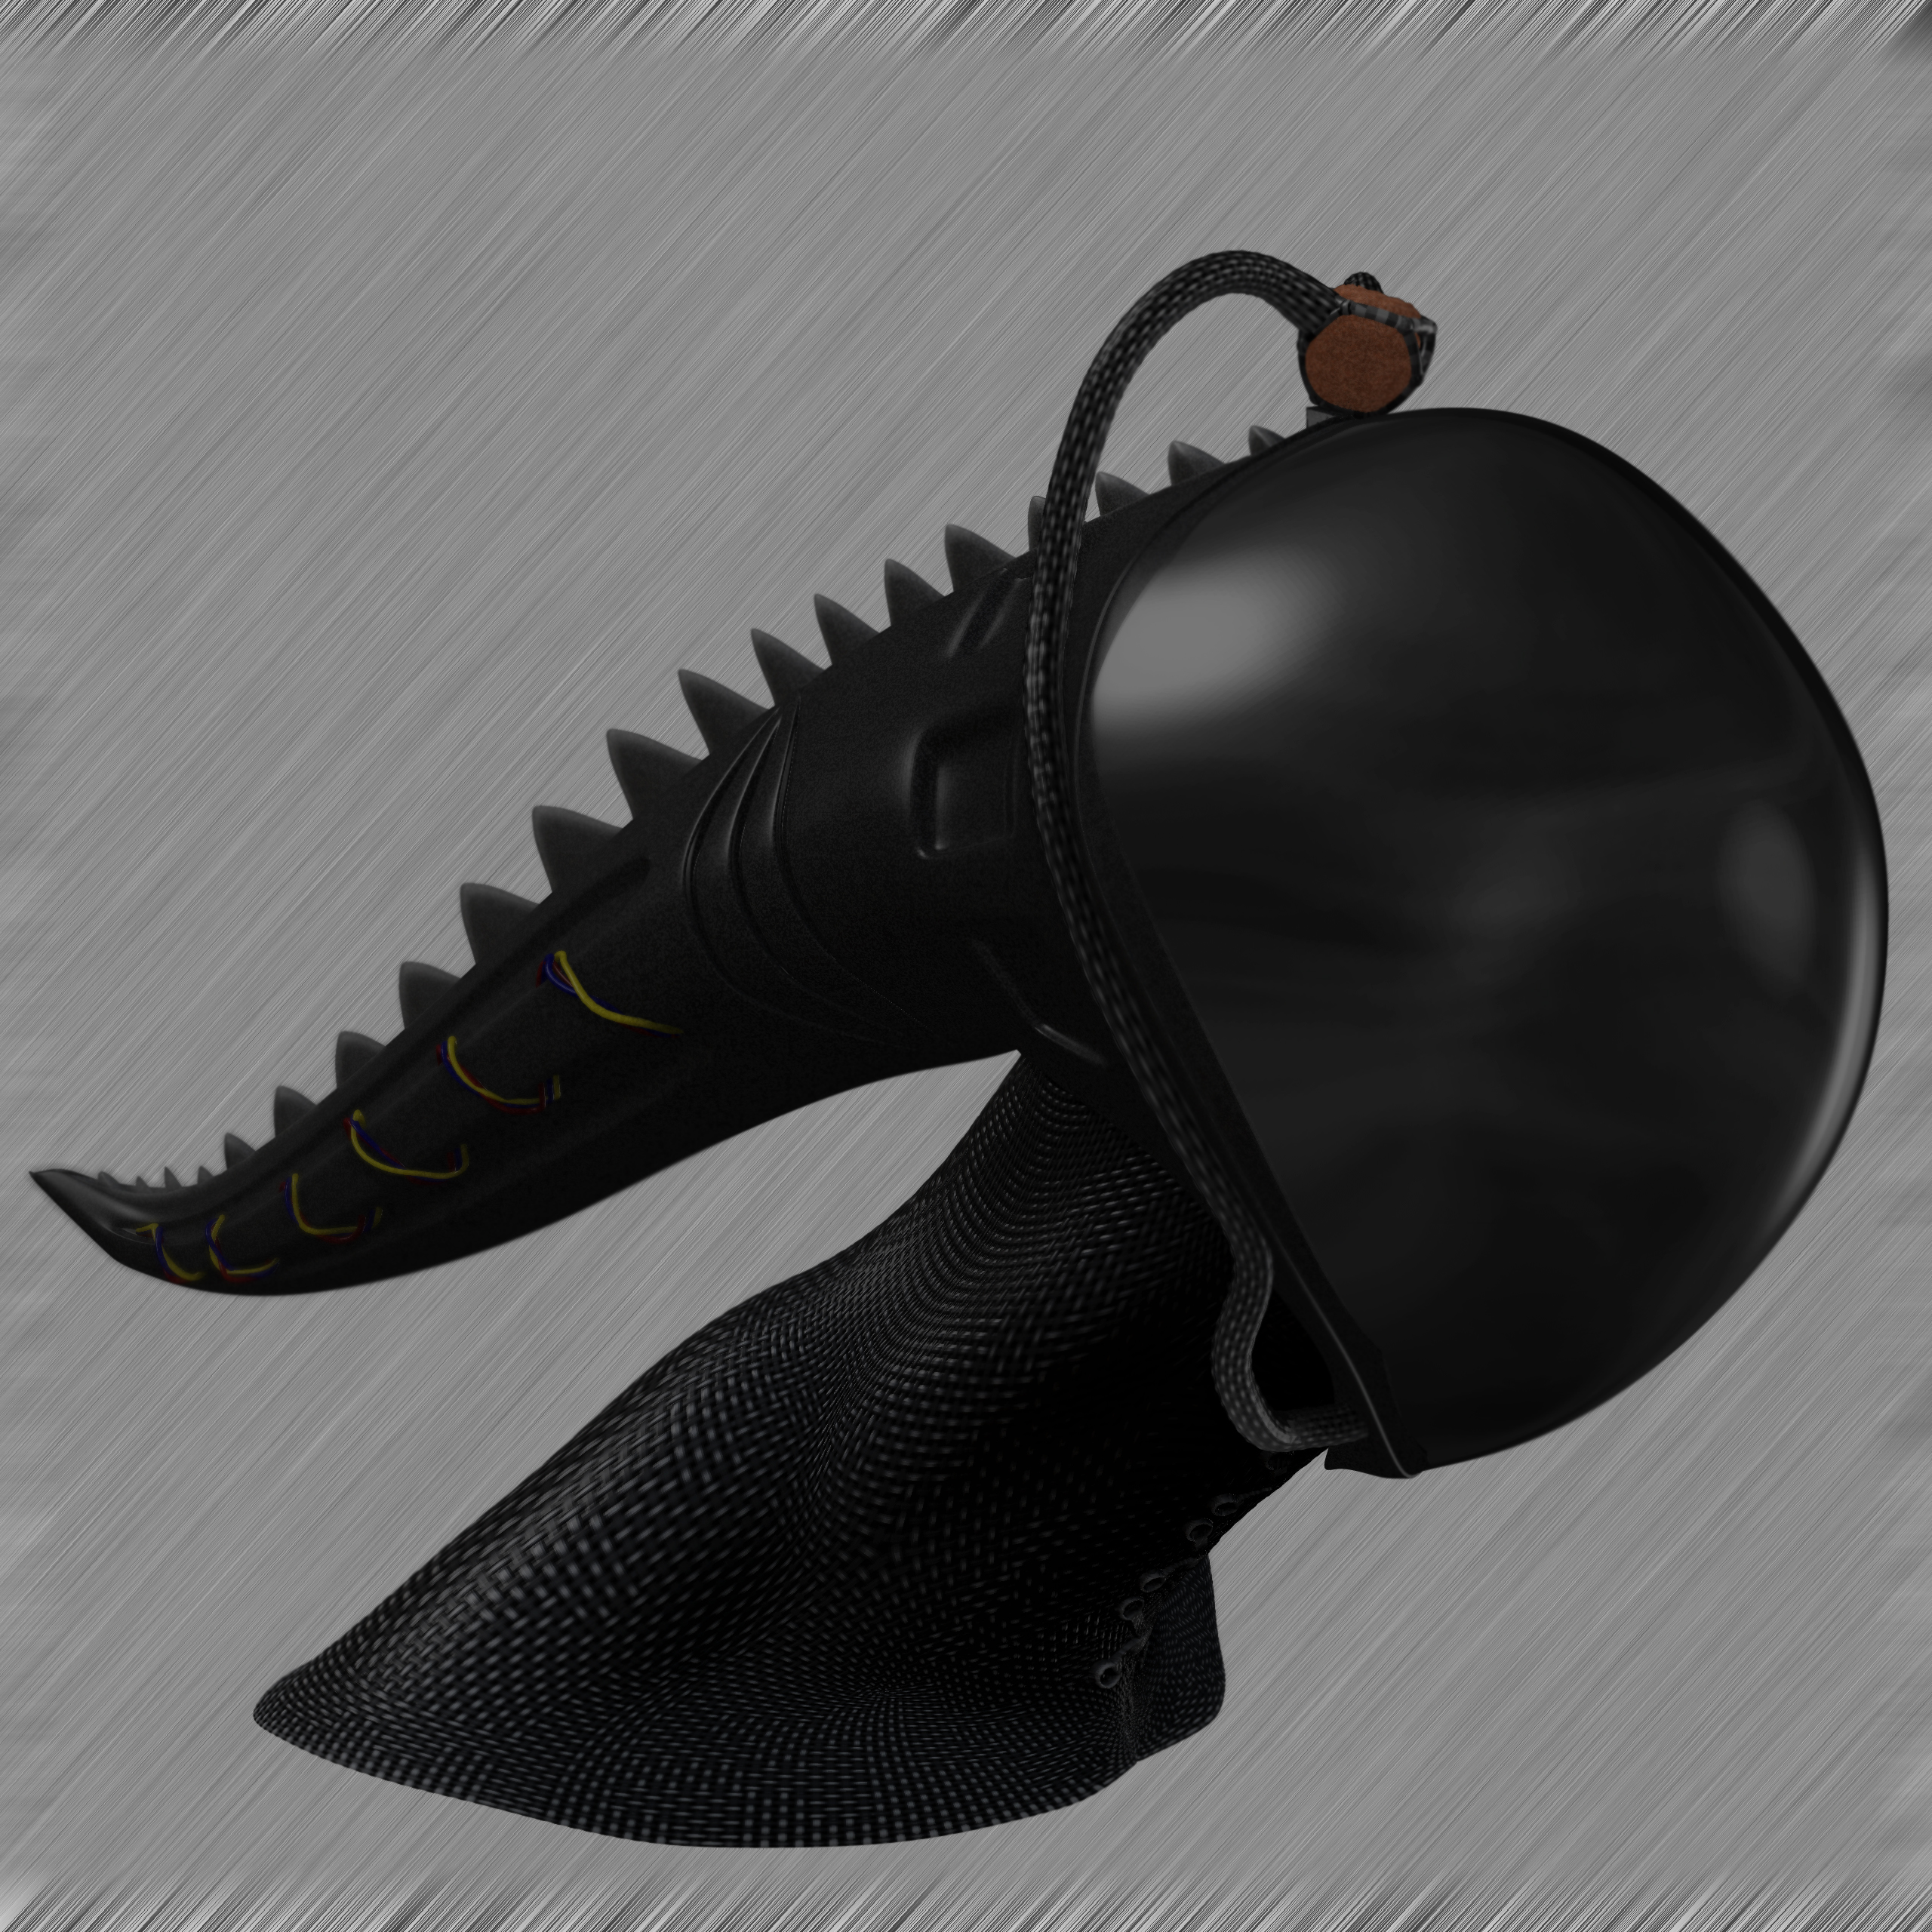
the basic idea for this guy was an alien life from a world that evolved primarily for water living, but the advanced lifeform decided to explore space… so i wanted to make the outfit hardedged but more organic and this being the first model i sketched out ahead of time i’m happy with the result… i may extend it to a full body project to experiment with more anatomically correct modeling but we’ll see what other ideas hit me in meantime.
c&c welcome and thanks dman and malea for the comments  oh and dman i had to look up your guardian sculpt … awesomeness
Attachments
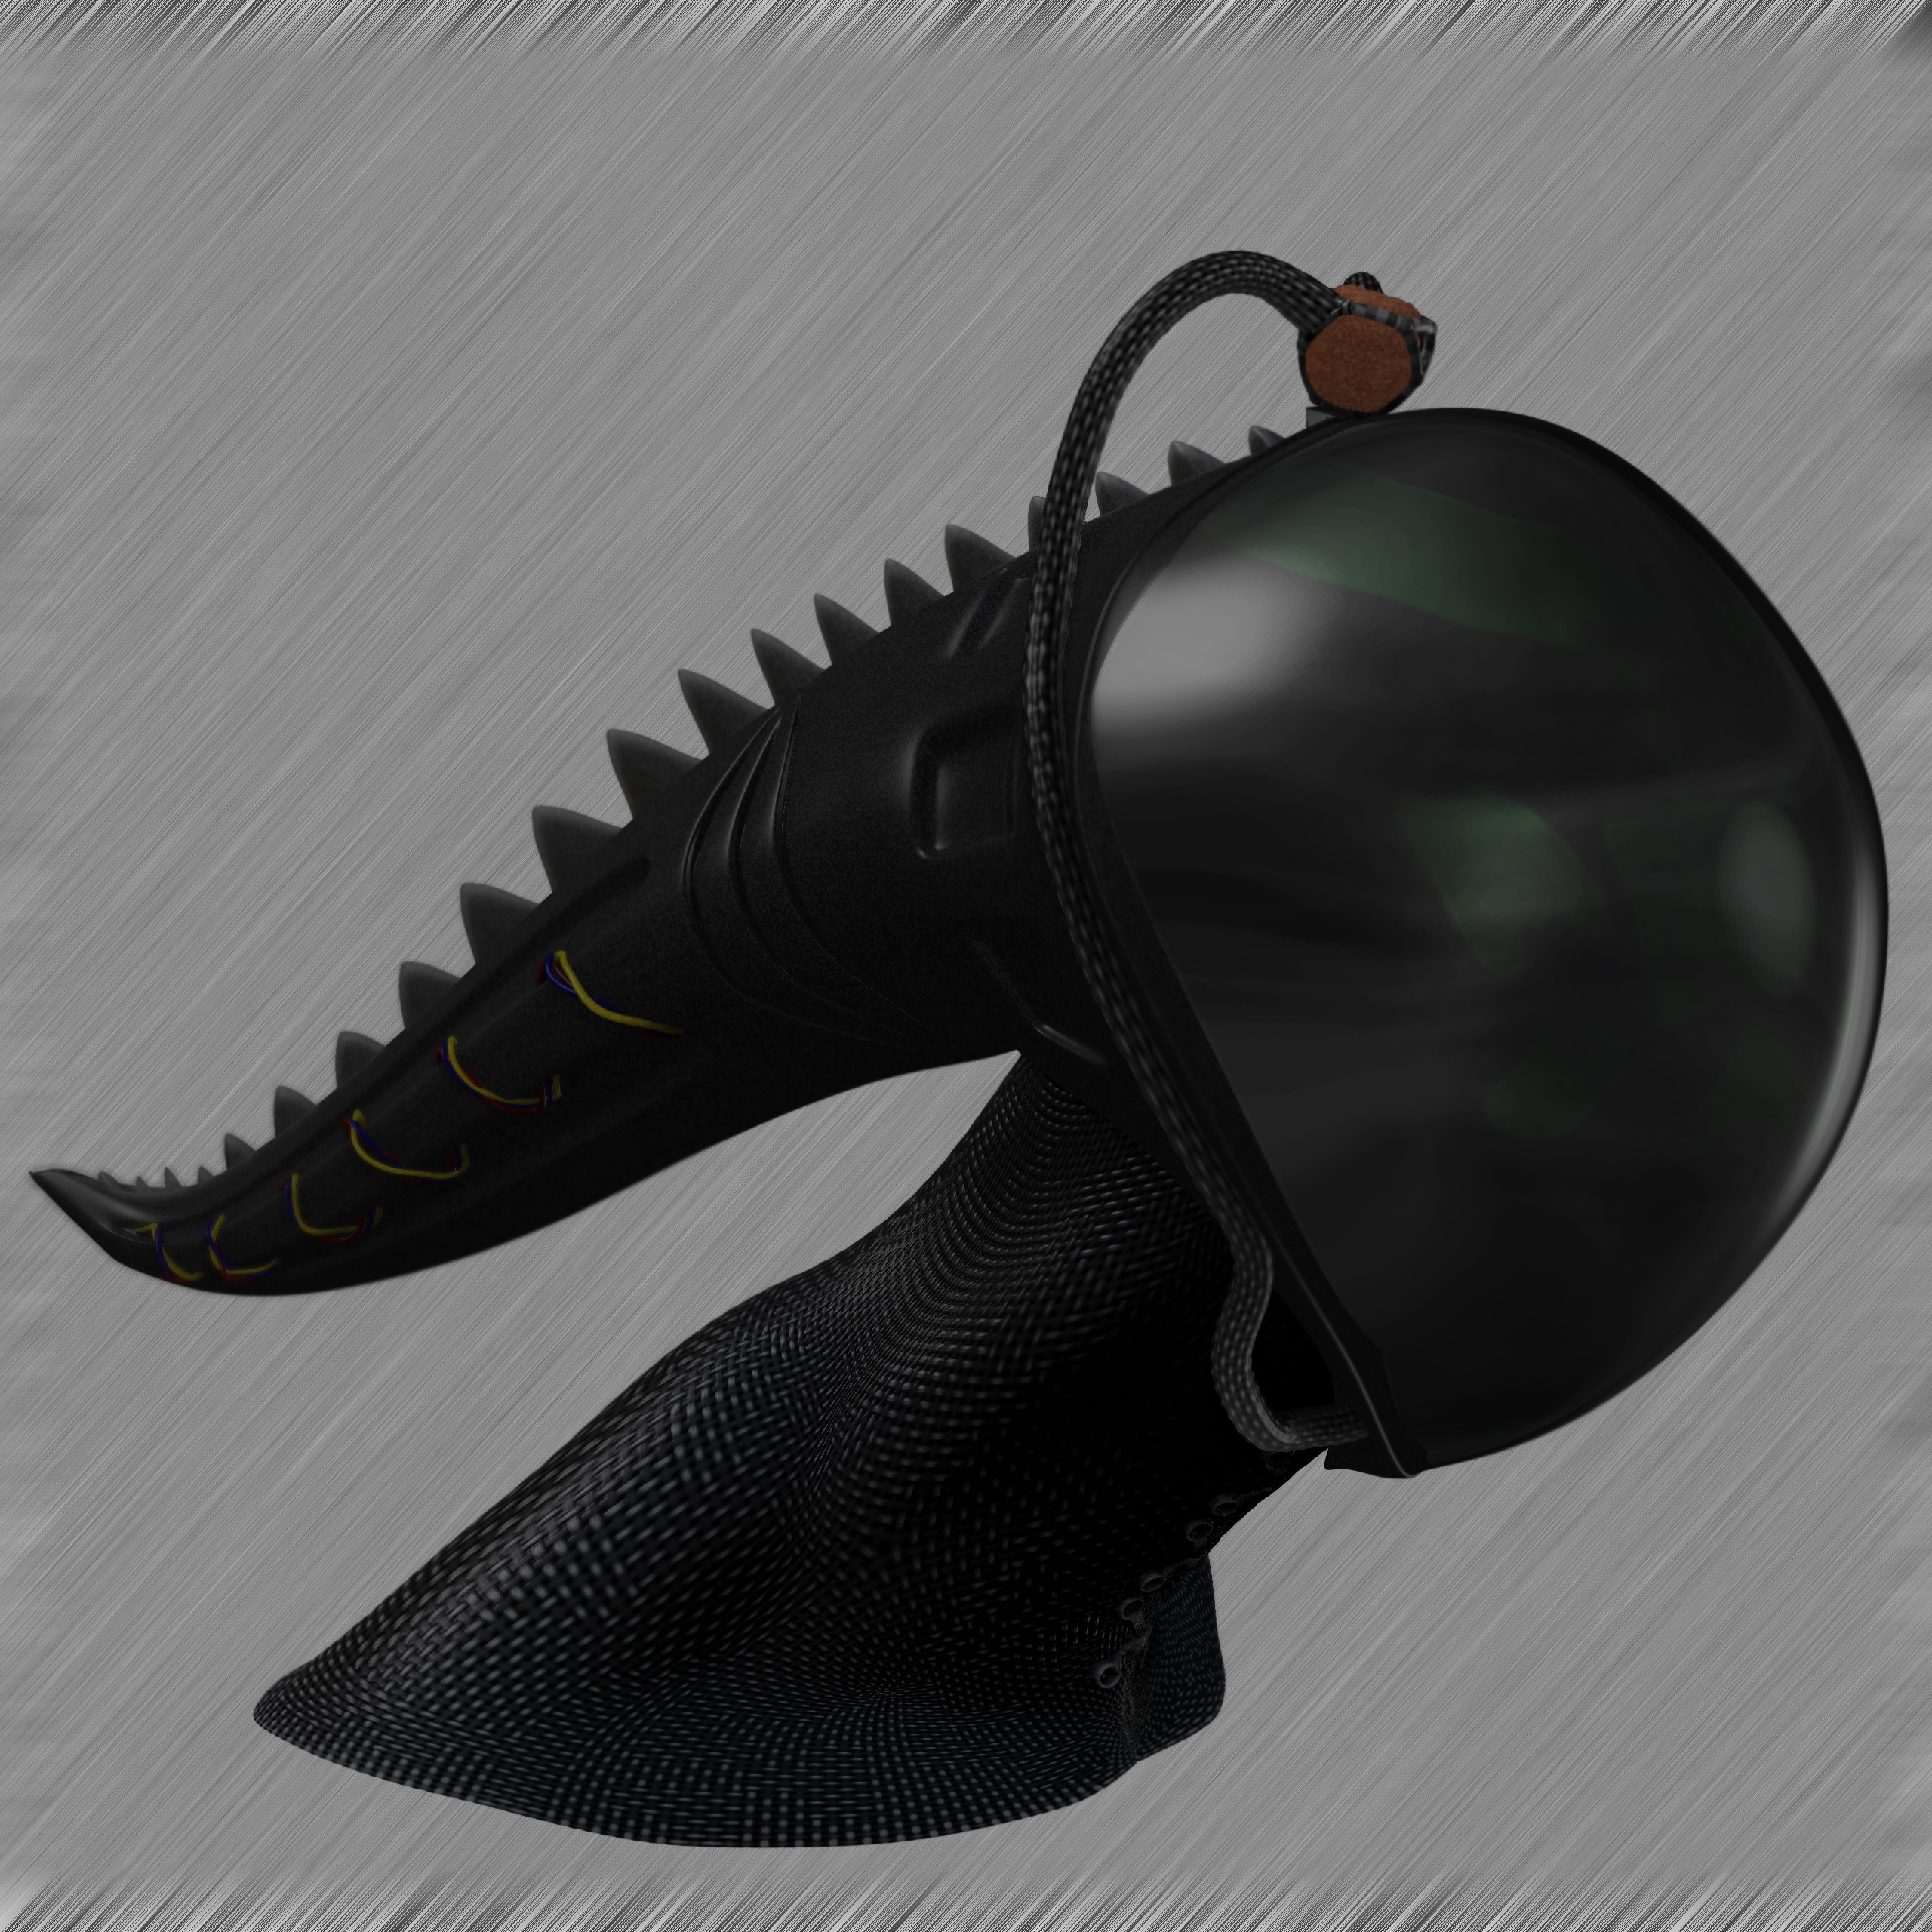
small update … added in a fluid-ish backlit user interface meant to look like it’s glowing from inside the visor… think it adds nicely.
full size : http://farm7.static.flickr.com/6061/6063872616_642102cb32_o.jpg
BIG TROUBLE IN LITTLE CHINA!!! Nice dude! sorry for caps.
thanks sega… no need to apoligize for the caps  … i was excited when i finished the thing too
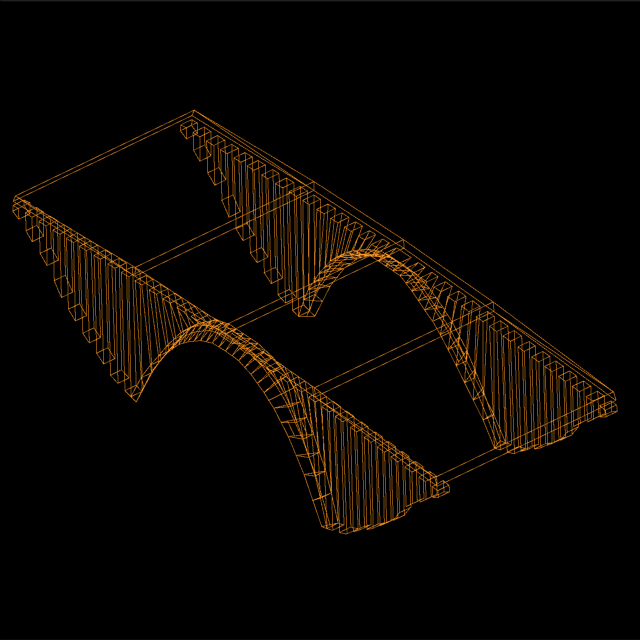
said in mealea’s thread that i felt like making a bridge… using only topo tools… so i made a bridge… using only topo tools  took about 3 hours start to finish on the form… have no real interest in making it 100% complete but was good for an experiment.
starting box for painting primary topo :
[attach=268119]bridgebox.jpg[/attach]
primary topo :
[attach=268120]bridgetopo1.jpg[/attach]
some more topo :
[attach=268121]bridgetopo2.jpg[/attach]
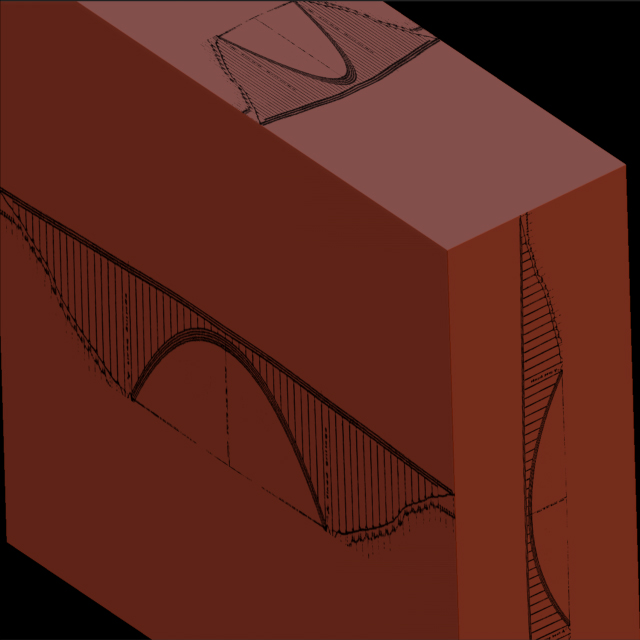
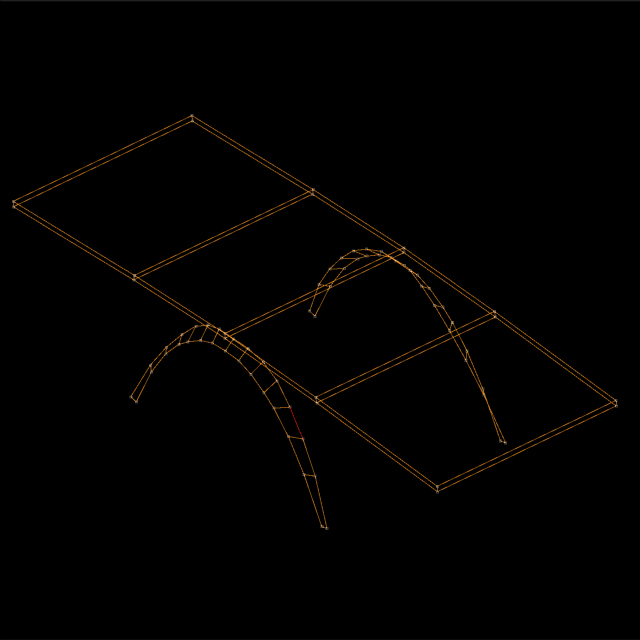
final topo layout :
[attach=268122]bridgetopo-final.jpg[/attach]
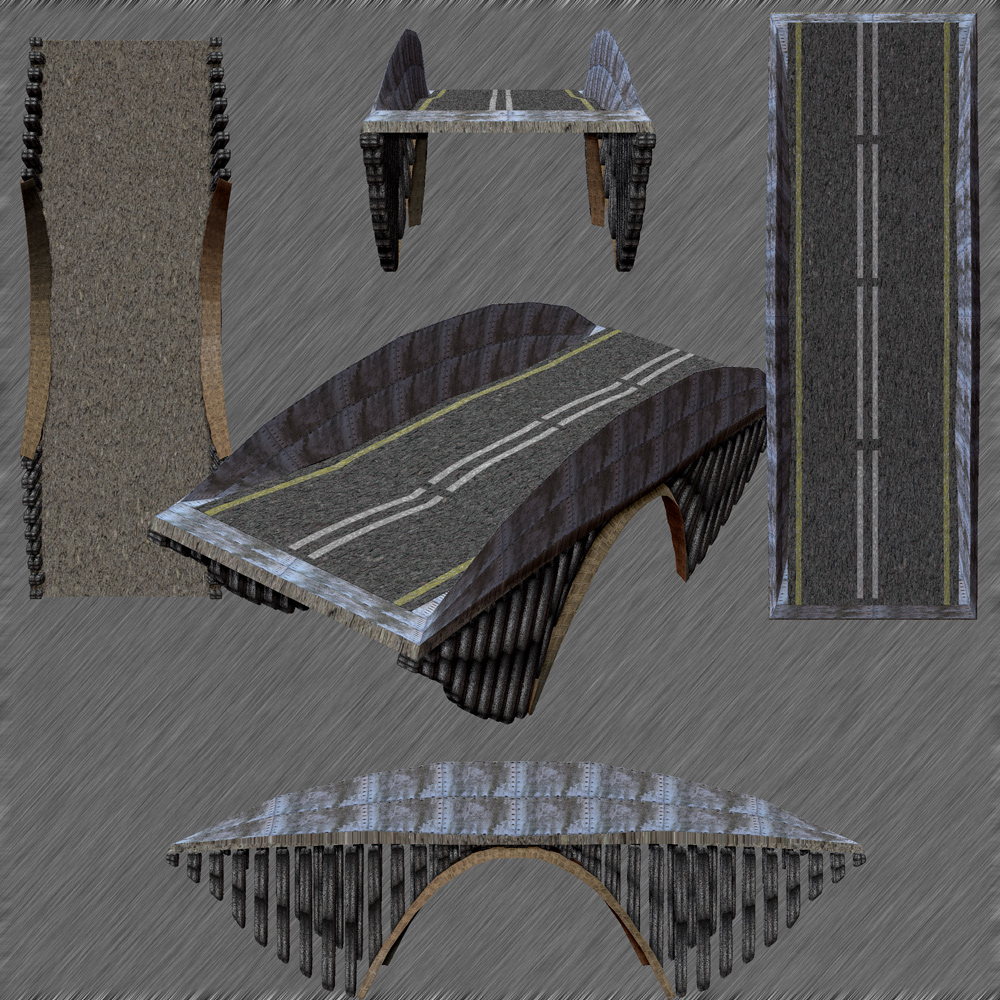
after this step i seperated the bridge surface and struts… and used some edge loops and transpose to mold out side walls and road surface
views sheet :
[attach=268123]bridge-charstrip.jpg[/attach]
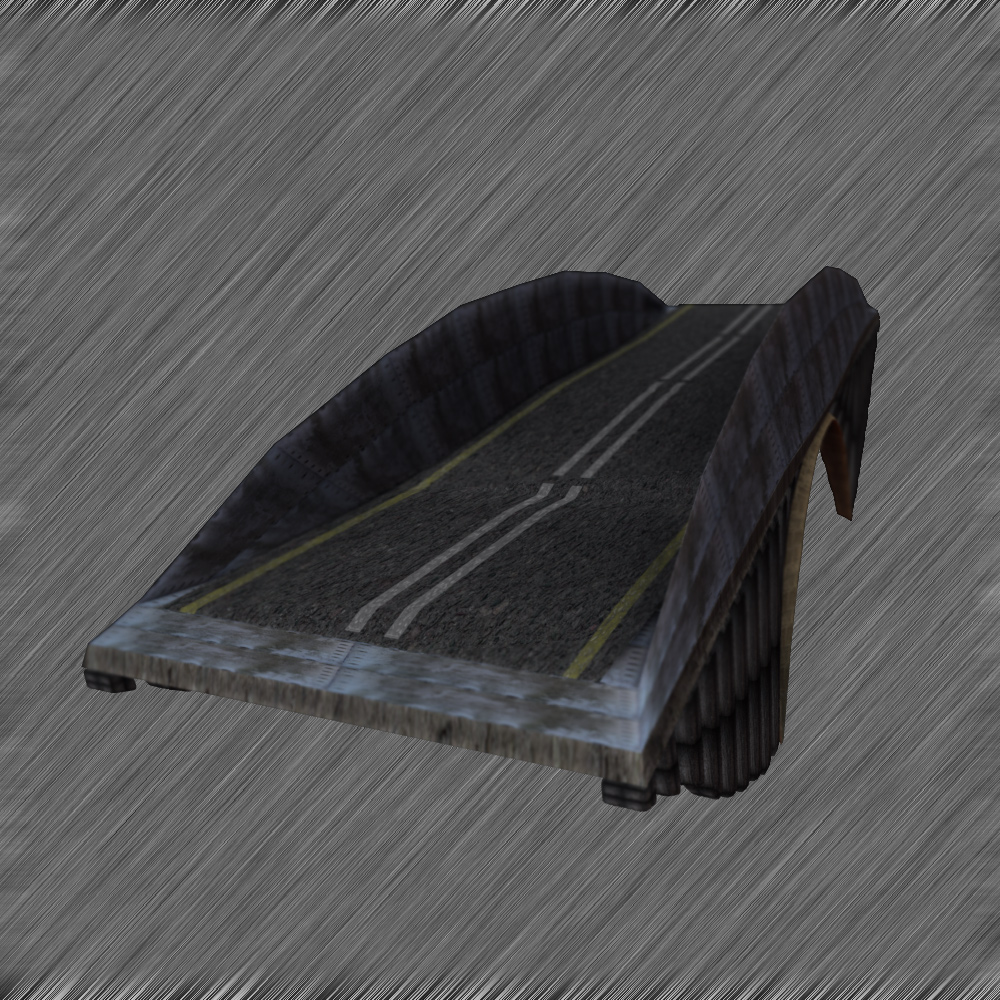
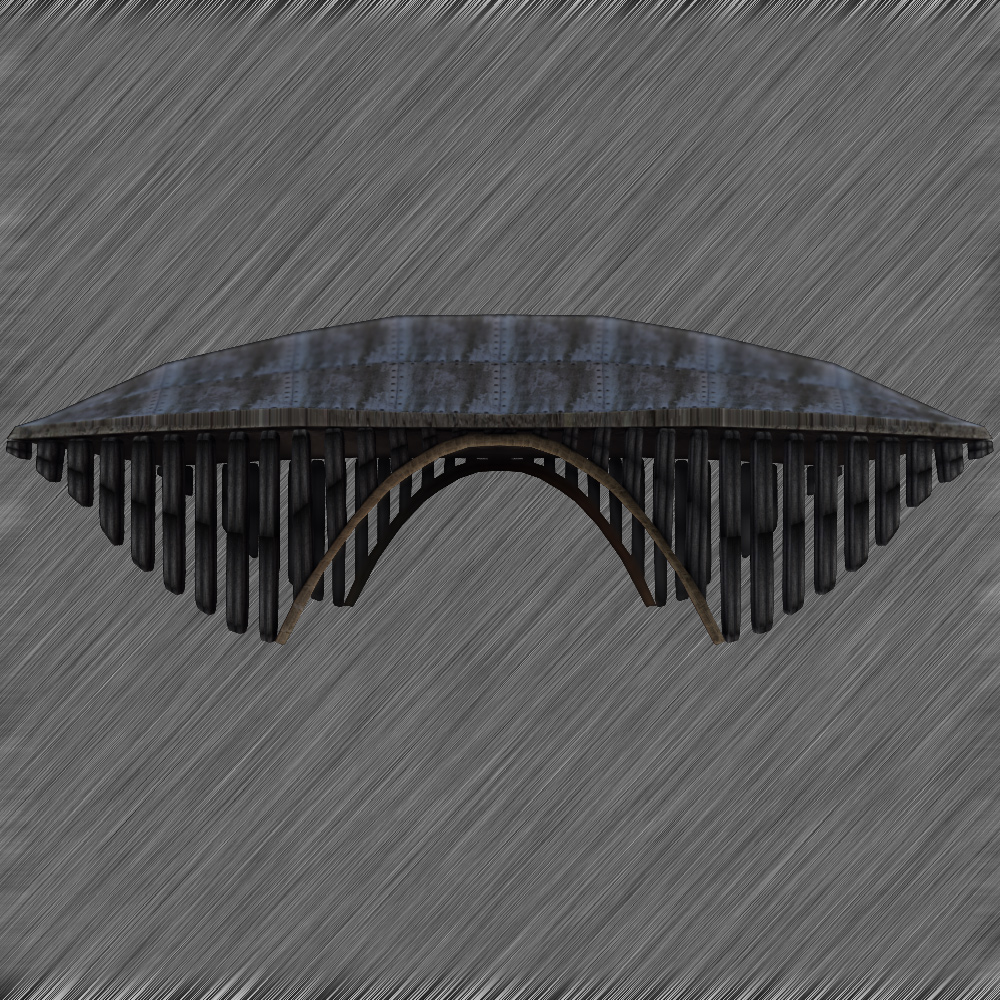
final renders :
[attach=268124]bridge1.jpg[/attach]
[attach=268125]bridge3.jpg[/attach]
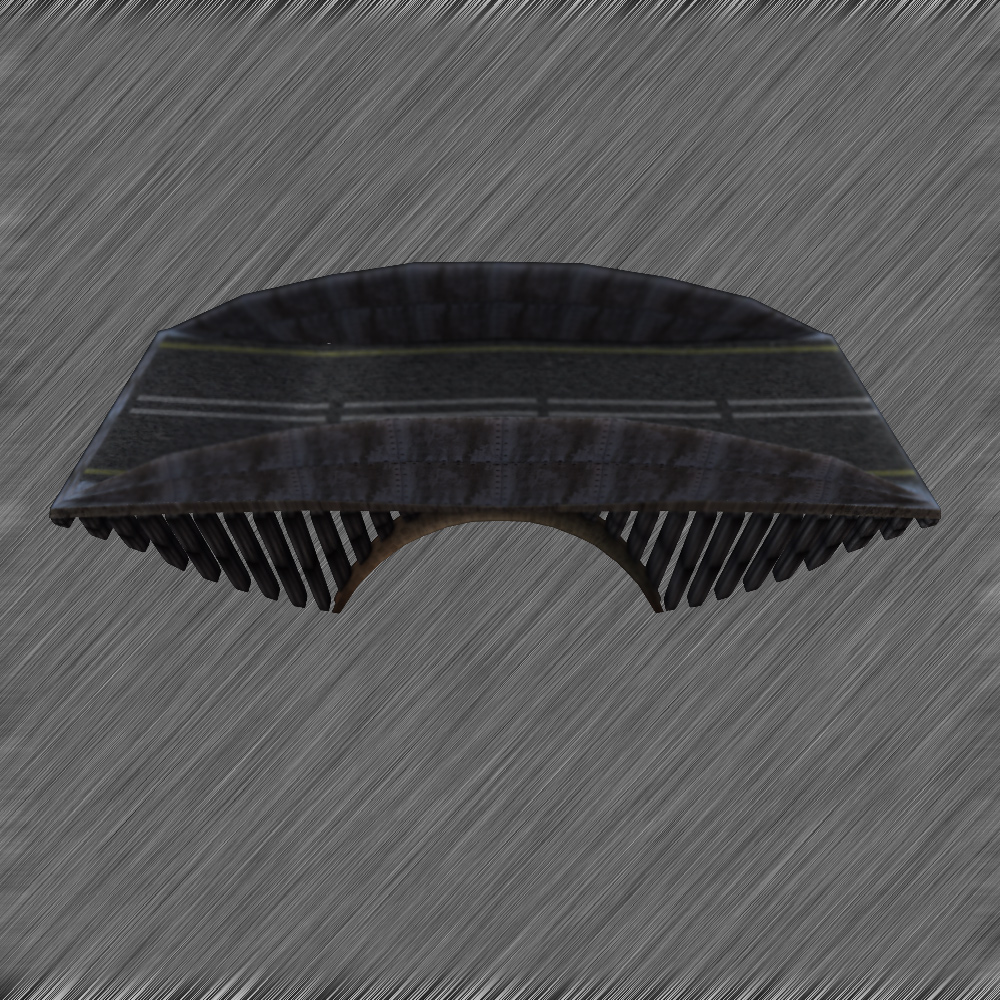
so the point of this is… dont let anyone tell you zbrush topology tools are weak 
Attachments

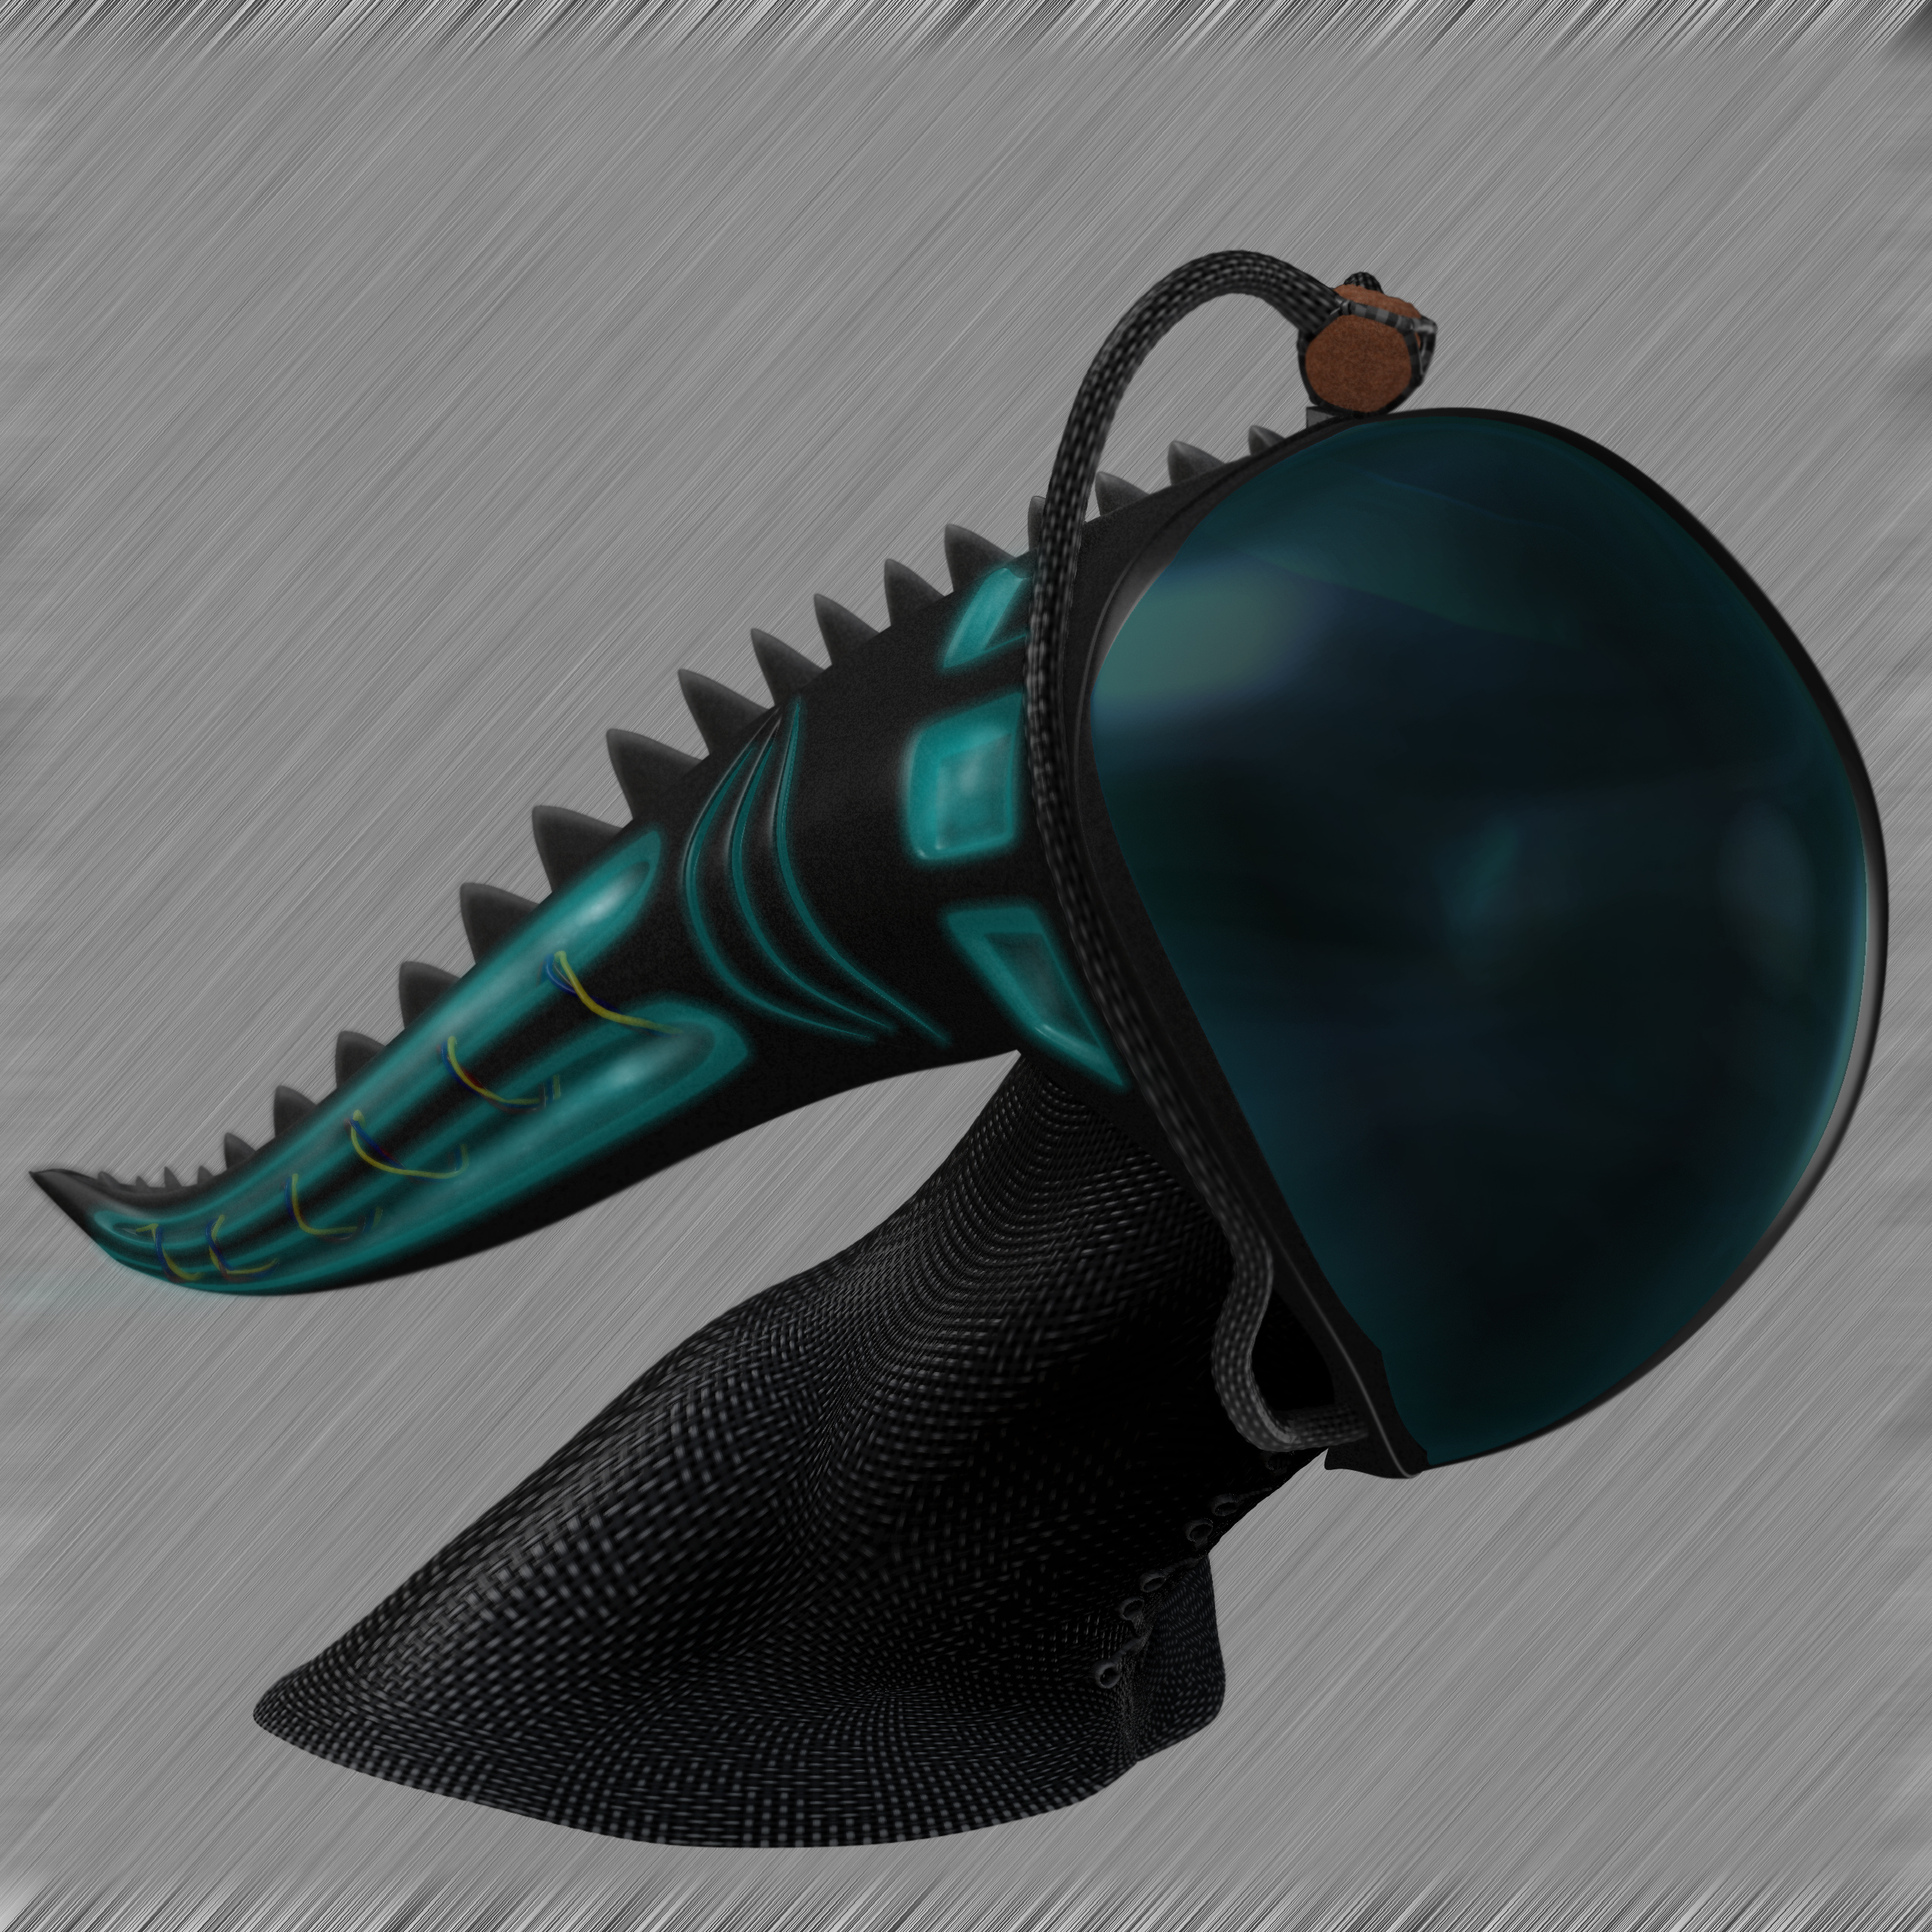
another update on the water alien suit … decided first i wante dto try adding some glow effects… but the glow effects actually seemed better suited as backlighting for water tubes… i figure the mask needs a water rebreather for the guy… used outer glow for the glow effect with a bezel layer and a stamp layer using bubbles… and then put a screen layer on top of that just to white in some shine to make it look like rounded clear tubing around the glowing water.
then did the reverse with the visor and added an inner glow layer to match the coloring of the hud i added earlier… so now the entire visor gives off an organic glow of the info he’s seeing inside.
[attach=268177]sensor-glow-sm.jpg[/attach]
full size : http://farm7.static.flickr.com/6189/6067327672_577e14ffb4_o.jpg
any thoughts for improvement?
edit :
second little update… couldnt go to sleep without doing a bit more …touched up the tubes to add more definition and glow… added a little glow to the vents… and changed the inner glow of the visor to closer match the tone of the water tubes… trying to be a bit more uniform with it. also tweaked the layers so some semblance of a facial form is evident in the “mist” … ala tali from mass effect.

full size : http://farm7.static.flickr.com/6079/6068289676_9e14092ed3_o.jpg
Attachments
i couldnt leave well enough alone and spent a good chunk of yesterday and today working on the alien again… very happy with what ive come up with… too tired to type more… will let pics speak for themselves.
c&c as always welcome
full size (please view as its only way to do the detail justice):
http://farm7.static.flickr.com/6078/6071626917_1f7e5b0824_o.jpg
[attach=268336]sensor-nearfinalcharsht-sm.jpg[/attach]
http://farm7.static.flickr.com/6067/6072170334_8a7f193780_o.jpg
Attachments
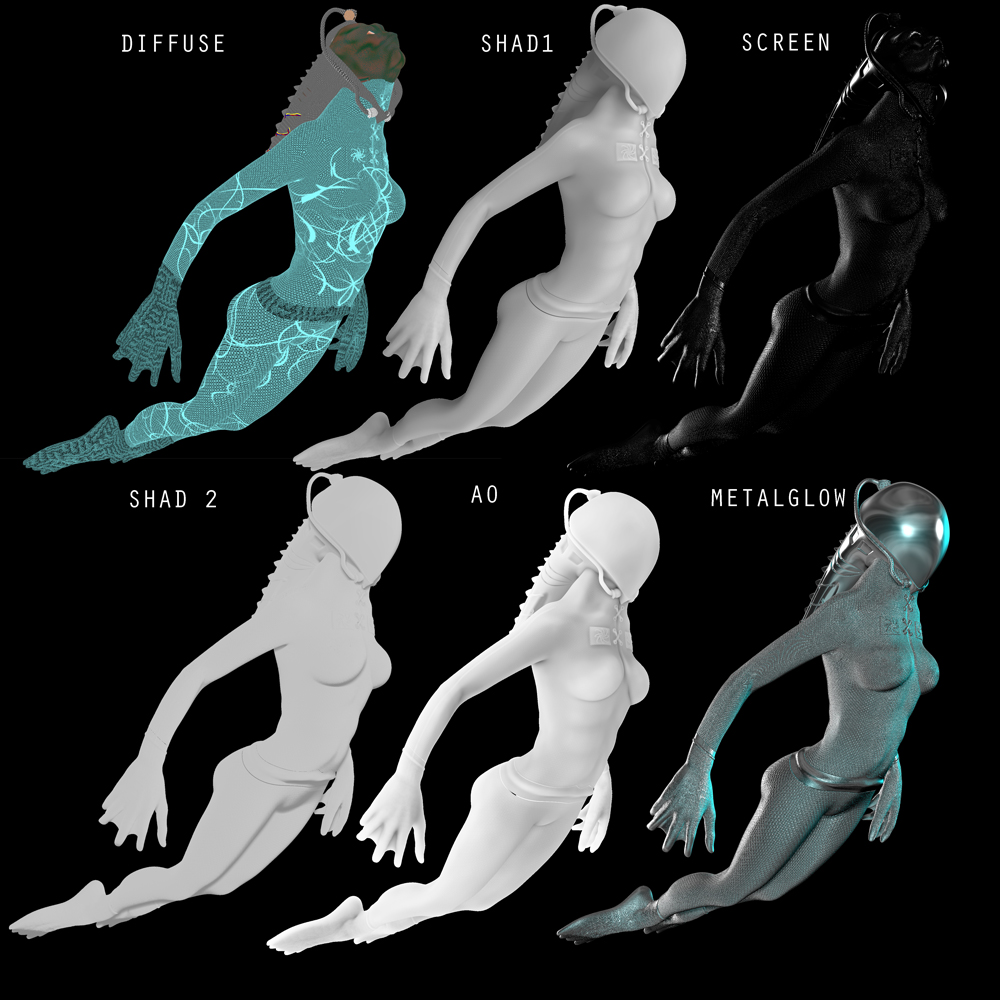
composite of the various render passes that made this up :
full size : http://farm7.static.flickr.com/6076/6072975224_f8e4d7193a_o.png
if anyone would like to know the photoshop layer settings let me know. i’ve been using a “recipe” as it were the past few projects i’ve done that seems to be producing pretty nice even results for me out of the basic few passes i feed it. most of the process reults in small incremental changes but it’s being layered in such a way that i can tweak by small degrees to get exactly what i want out of it which is always a good thing.
edit : also decided to post the custom materials i prepared for this render… i like the gorilla material but i wanted to be able to use it as a traditional material and not a matcap so i copied the shader channels to the standard double shader and modified things from there. there’s 2 different versions. one is more standard rubber with lower spec and some noise… the other is a blue tinted rubber that produces some nice exclusion effects which soften along shadows. when you combine the blue gorilla with further blue in the polypaint you get some really nice gradiants in the shadow tinting. very happy with this mat.
Good job. excepcional trabajo…Felicidades.
Could show the composition in Photoshop?
Thank you Jaime I’ll do you one better
My compositing process is a bit complex, probably overly so but it gives me results I like. Eventually I’ll trim unnecessary things and learn to be more efficient with it but fow now it works for a wide range of more realistic type renders. Your mileage may vary and depending on your lighting and materials you may want to switch multiplies and overlays for each other, or use different types of lighting then I have listed, but I find these general settings are a good place to start. I want to make this as in depth as possible to help along anyone in the position I was in last year which I like to call the brick wall of compositing hell.
Materials/lights used :
Plastics - custom gorilla mats
Skin – Anytime I render something with flesh that flesh is gonna be based on Julian_K’s amazing progeria mat and one of his eye mats available in his sketchbook. Also from Julian I used his Life Fast Forward lighting rig as hands down it produces fantastic results.
For Spec Pass – Basic Mat with diffuse and ambient turns all the way down. Spec between 60-100% as needed.
For Shadows Pass – Basic Mat with spec at 0, diff at 0 and ambient at varying ranges as needed.
Any metal shine, use straight ReflectedMap2
Render settings in Zbrush :
Document size of 2560x2560 is good unless you have a beast machine that can push higher in which case do so. Make sure photoshop can handle the massive files first though. For BPR Pass : Check Shadows/AO/SSS/SoftRGB and HDGeometry if you had any in the model. Also make sure create maps is checked off. For each setting I’m only listing things that need to change. Most of these are model dependent but these work for me.
- Shad : Str (.75) Angle (45) Res (2560)
- AO : Str (.5) Rays (12) Res (2560) Vdepth (1)
- SSS : across (Y) Rays (8) Angle (360) Blur (14) Vdepth (4) Ldepth (-16) Softrad (1)
- Antialiasing : blur (20-30) edge (20) size (2) super sample (2)
Render passes needed :
Diffuse : flat render
MainRend: The final product of a BPR rendering. Make sure you click document > export as this saves a different version then what’s created when using create maps.
BPR_Rend/BPR_AO/BPR_Shad/BPR_Depth/BPR_Mask : save each of the maps created during the BPR render.
Spec : Good habit is to save one spec pass per lightbulb in your light rig and one combined pass. Vary the material spec settings as needed depending on how strong you want each spec pass to be in each specific lighting area. Export while still in preview render.
Shadow : Make sure your preview shadows are on to your liking. Same as spec. One pass per lightbulb and one combined. ORRRRR have 2-3 passes with varying ambient/diffuse levels and all lights on at once. At least one light should be very hard and one should be very soft to achieve a good composite balance later. Export while still in preview render.
Additional Material passes : whatever material you decide to use for various parts, use your judgement on whether to render with BPR or export as is. Some materials like reflectedmap actually work better as is, but some like skin you may want to run through a full BPR again, using options that fit the material.
Masking passes: I’m assuming you all know how to set up masks using a flat material on each of your subtools and saving multiple passes for every piece you wish to apply a different setup then the overall image to. If you don’t… Well here’s a good time to learn. In the case of this image I used a mask on the visor to apply glow effects and the smokyness and shine on the glass, and masks to lay out the lighting effects on the back of the helmet. For every piece that you are planning on rendering an additional material for, make a mask for it now.
<?xml:namespace prefix = o ns = “urn:schemas-microsoft-com office” /><o:p> </o:p>
Composite settings in photoshop: Save every few steps as file can get large and crash.
<o:p> </o:p>
- Open up the fully processed bpr render (Mainrend.psd). Duplicate layer or unsecure as background , your preference.
- Add the following layers with the indicated number of copies :
Diffuse (2) ; BPR_AO ; BPR_Shad ; BPR_Rend
- Arrange layers in the following order with the noted layer type :
Top [ Diff (color@100) ; Shad(Overlay@100) ; AO(Mult@100) ; Diff (Normal@100) ] Bottom
- Group these four layers and name it Prime. Duplicate the group and merge the copy to a layer. Leave the original group intact.
- Arrange the resulting layers and groups as follows :
[ PrimeCopy(LinearBurn@40-50) ; Prime (HardLight@20) ; BPR_Rend(Luminosity@10-15) ; Mainrend@(Normal)
- Group all except the background layer (original mainrend) as “Base”
- Add all shadow files including BPR shadow again. Group all shadow files into “Shadow”.
- Set the Shadow group blend to multiply, and every shadow layer within the group to multiply as well. At this stage you need to use your best judgment on the values but I would set each layer to between 20-40% depending on how strong you want that particular segment of shadows to stand out. When you’re happy with the levels between the layers use the group opacity to control the intensity of the shadows as a whole. 40-60% is good here.
- Add all spec files, group as “Spec”. Leave the group blend as normal and change all layers to screen. Again use your judgment on the value depending on how much shine you want in what areas, but I find @10-15% works well.
- If you have any additional materials you wish to apply to your render now is a good place to do it. Like if you have a metal shine that isn’t pronounced enough you would load your Metalshine file and mask for the pieces you wish to affect, and set blend to screen. Or in the case of the glow add a blank white layer and the mask for the areas you want to have the glow come from and change layer blending to include outer glow, and maybe bevel and emboss to fake a glass surface to the light. Get them in now because the next major step is to balance the whole image and make it nice and uniform.
- Group all except original background layer as something like “Composite” or “Beta” At this point you should generally be near to your desired result with minor tweaks to overall levels and adding depth but again this next step balances things out first. Before moving on duplicate this group and merge to a layer. Hide the group so you gain back some ram for photoshop and so you don’t accidentally alter anything in your master copy.
- Duplicate the Beta copy layer again and set their blend as follows :
[ Beta (Exclusion@10-20) ; Beta (Normal) ]
When you use two of the same layers with the top layer as exclusion really high you get a really funky reverse gradient type effect on an image, but if you use it in the 10-15 range I find that it adds a pleasing color softening to shadows… it takes the primary colors of the scene and blends them into the areas of black just enough so that it makes everything have the slightest tinge of a chalk drawing smoothed out by someones thumb… Really subtle evenness… But this is my own personal opinion and you may not need to include this step if it doesn’t suit your needs.
- Group these two layers as “Delta” and duplicate the resulting group. Set the two resulting groups as follows :
[ Delta (Screen@20-25) ; Delta (Normal) ]
When you use two of the same layers with the top layer as screen you’re basically just giving yourself a light dimmer switch. At this point you’re able to change the luminosity of the scene directly to beef up your brightness without damaging your shadows and coloring. Also when combined with the prior exclusion pass makes white lines on dark material get a nice latex paint quality (like the lines in the legs and shirt) or when you use the settings on skin rendering like with the guardian image, really helps lock in the look of tight skin over blobby fat folds… like the very outer edges of wrinkles and skin folds and such. Again the values are a personal preference.
- Group these two groups as “Final” make a duplicate of the group and merge to layer.
- If you hadn’t already been masking layers to remove any background gradients and give yourself ability to make a background of your own later do so now on the resulting Final Copy. Apply the mask so everything outside your render is transparent and then lock transparency.
- With a very careful hand edge around the very very outer edge of your render with a blur brush just enough to remove any artifacting. Unlock transparency at this point. Duplicate the layer
- On Final Copy 2 (top layer) apply a lens blur using your depth pass. Try not to go overkill with the radius but don’t worry about being precise. After applying the blur use the opacity to dial down the blur to a more precise mix with the non blurred layer.
<o:p> </o:p>
After that add any background you want and you should be ready to save as your final output file.
<o:p> </o:p>
I know… Probably too complicated… probably some redundant stuff in there. But I’ve been toying with this formula now for the past 10-20 things I’ve practiced with and the last few end results have gotten me more views on my threads then I’ve had combined the entire time I’ve been posting on zbc prior. So gotta be doing something right I take it. Depending on your computers power and your knowledge of photoshop you can probably get more out of these settings then I can but hopefully this can give some people who are still struggling with composites a better idea on where to start then they had before. The ZBC have always been helpful to a point with learning how to do the composites but I found nobody ever really went into detail explaining why certain blend modes work certain ways and theres a lot about it that really comes down to trial and error.
<o:p> </o:p>
Anyways… Enjoy… Hope it helps.
-D
Gracias…
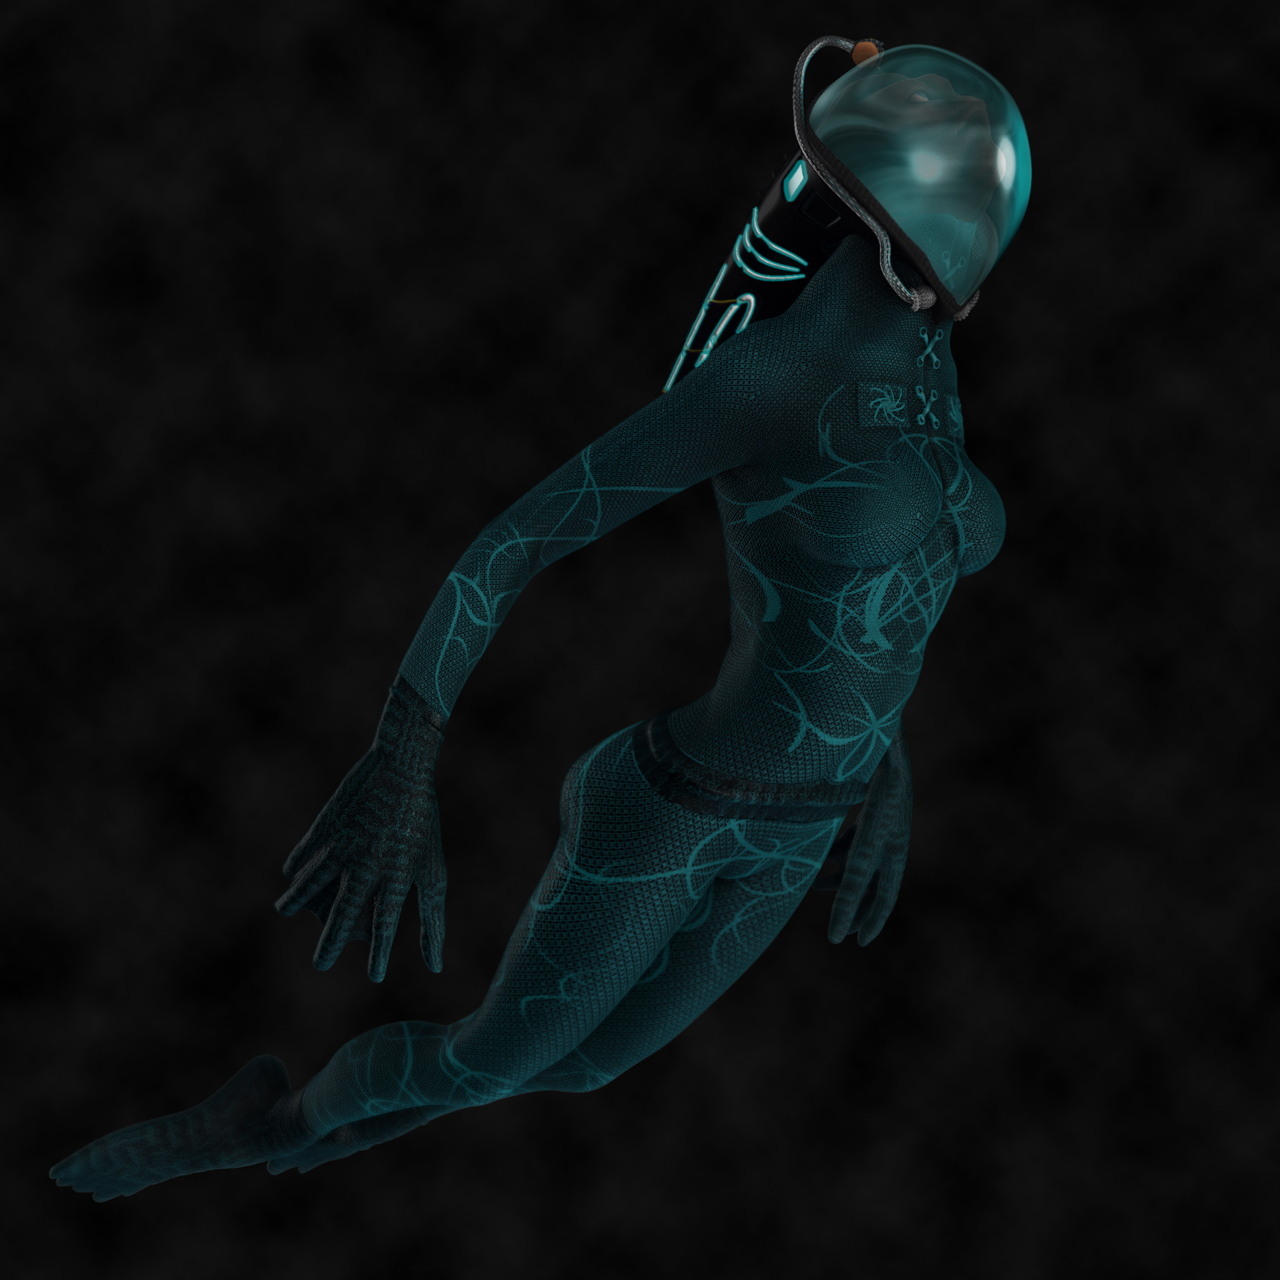
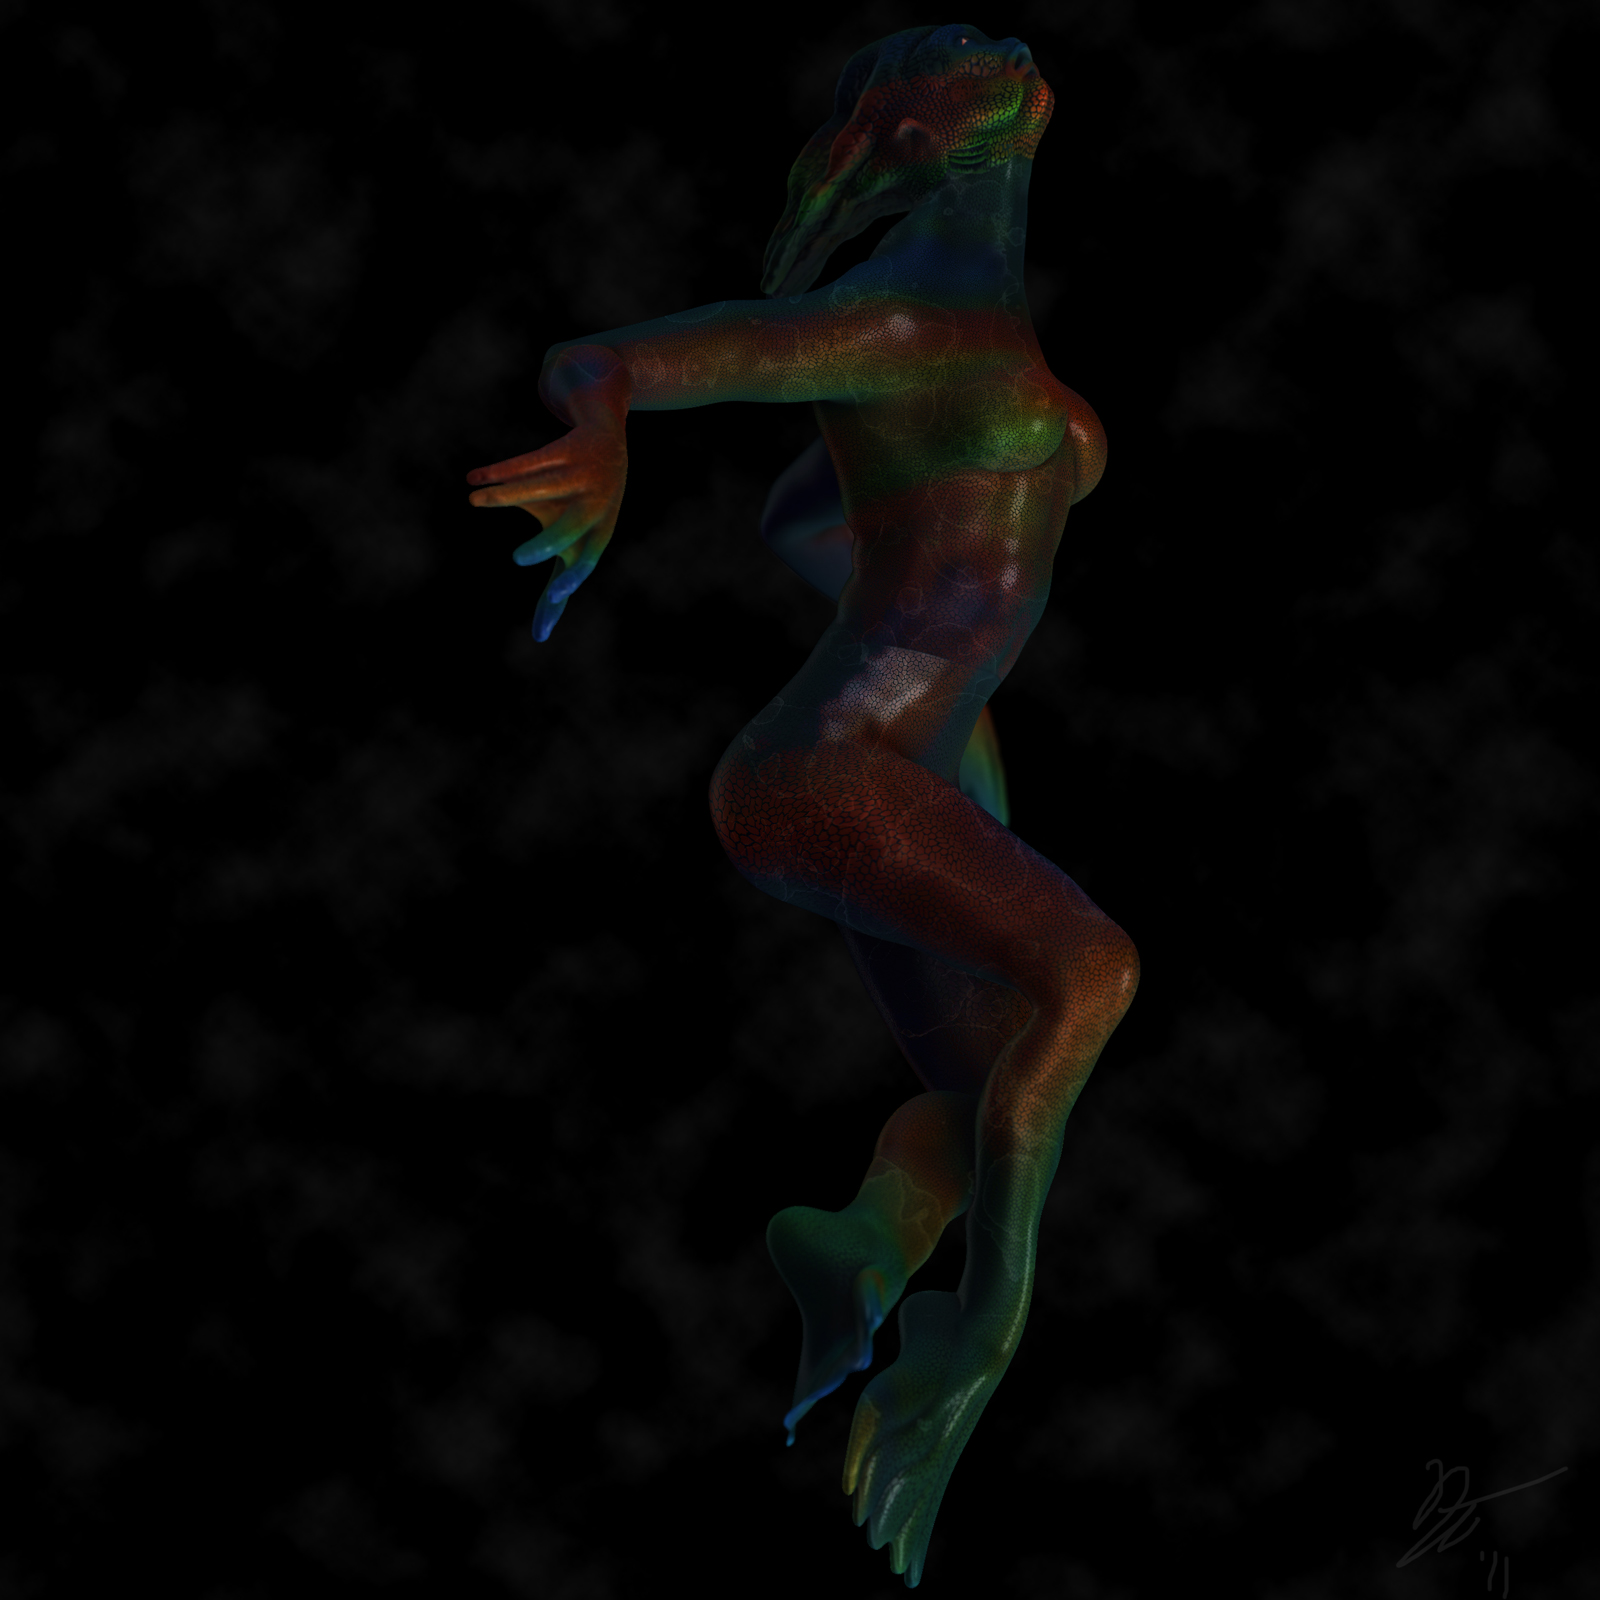
decided to keep playing with my fish girl… this time around i want to ditch the fancy skin suit and try to do some anatomical posing. i liked how her anatomy came out when symetrical but decided best way to learn is to break symmetry and see how i faired. this is the result so far… i know i have quite a few areas i need to tune up but the pose itself is done.

full size : http://farm7.static.flickr.com/6074/6077482420_0033c52383_o.jpg
the next step is to fix the musculature in the areas that need it like the left leg which needs to be softened in the thigh area… was hard to see it with shadows turned down low but now that i’ve renders it i know what im looking for. I also know i need to add more detail to the hands and feet to differentiate them from their gloved/booted counterparts. after that when im happy with all anatomy and posing, then i will move onto the detail passes and coloring… finally not getting ahead of myself and i gotta say i never though i’d be capable of getting something anatomically decent looking like this. i’ve also never planned out anything as much as i have this girl… to the point i have her whole backstory, ambitions in life… etc… planned out… this particular shot is her dreaming of “space” … a concept none of the others in her species even entertain and their entire universe has been their underwater world and they dont dare to dream beyond the sky beyond their sea… Sensor is different… She dares to dream… and the suit/mask she’s wearing in the previous picture is her answer… Her body, being built to handle pressure chanegs humans couldnt dream of, with proper propulsion and rebreathing systems, is fit to be it’s own spaceship… basically swimming through space…
that’s the idea at least … the last image was a test of the prototype suit… no propulsion yet… just sensor systems and water recycler. Now i just need to finish the dreaming pose and maybe go back and repose the flying/swimming mesh and build propulsors that attach to her legs.
on this version especially, c&c is not only welcome but desired. If you see anything glaringly wrong with the anatomy please please let me know. Anything other then those things that were intentional like the extra length in the legs and arms, and the thumbs being longer then every other finger, or the “toes” needing shape and more bone structure in the foot… The limb length was planned to make her feel more alien… the thumbs too serve a purpose… she sues the partially webbed hand to aid in swimming but i wanted it so that she could hold something and use the webbed hand at the same time. This require more manueverability in the thumbs. I’m still trying to figure the feet out but im getting there… i think probably 3 main "toes’ with webbinb between them will fit the mold planned out with the original suit picture… will see.
-D
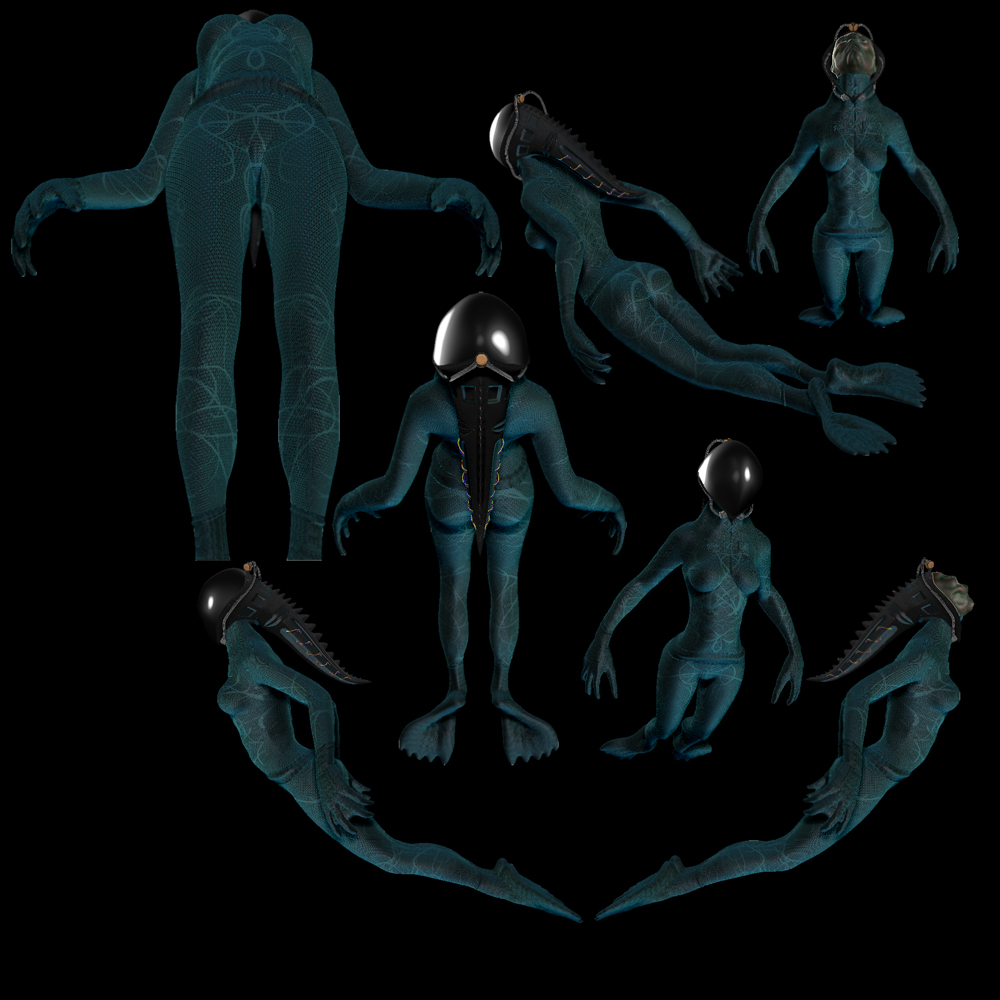
for the love of dog… if this doesnt prove to myself i’ve come a long long long long way as a zbrusher from the garbage by comparison in my old sketchbook… well damn… dont know what else would
c&c much appreciated :
full size… worth seeing  : http://farm7.static.flickr.com/6186/6080828435_c3a6b06f97_o.jpg
there’s some small issues i’ve already noticed but i gotta stop for now… i know what the full composition of this model is going to be now… and now it’s just a matter of updating the previous model with the newer more detailed head… created a sea crevice set piece to pose behind this new model and render as a seperate ps layer… and a skybox viewed from below an ocean surface… i do not have any dang clue how to do that yet but i’ll figure it out… i really really hope the end product comes out the way i think it will
how the hel… ahem… heck…
wow.
Dog I should think is thrilled!
i think i shall take that as a compliment … yeah im still trying to figur eout how i managed it as well… i’ve had this pretty girl in my head the past week and she just keeps getting more realized by the day  … i wanted to make her as alien as possible… but at the same time i wanted her to be beautiful and her body move very sensuously… and i just ran with it
how on earth did I miss all this?!?!?!?!
That last one is nuts, but now Im going cross eyed at the bridge…