My output model after using zremesher could has more than 100k poly?
I loose my sharp edges after remeshing.
Before:
After:
Attachments
My output model after using zremesher could has more than 100k poly?
I loose my sharp edges after remeshing.
Before:
After:
100K isn’t too much? Maybe using crease before would help. Do you have polygroups?
I clicked crease, but there was no effect.  I don’t have polygroups.
I’m completly fresh in zbrush but already I found documentation about zremesh, today I’ll start study.
Thanks for answer.
It depends on how you’re remeshing. If you’re remeshing via dynamesh, you need to make sure “project” is on in the dynamesh menu, and you need to make sure the resulting mesh has enough polygons to hold the detail. So turn the resolution slider up until you get the quality you’re after.
If you’re using Zremesher to clean up the geometry or establish subdivision levels for a high poly dynamesh object, the resulting mesh is generally going to be too low poly. Duplicate your source mesh in the subtool palette, run Zremesher on the duplicate mesh, subdivide it several times to the level it needs to hold the detail. Then with the original mesh as the only visible subtool, use the “Project all” function in the Subtool Project menu on the duplicate mesh at the highest subD level. You may need to turn up the Dist slider. The original mesh should now be a copy of the original with all the detail, with better topology and multiple subD levels.
It’s more helpful to also show the wireframes. You can do this by clicking on the PolyFrame button or Shift+F.
It might help show some of the issue with the remesh you’re having.
I’m not sure how visible frame could help me, but I’m switching on wireframe often.
Spyndel, it’s quite complex solution for a layman like me, but I will try it later. Thanks
It’s actually pretty simple. You’re just pressing a couple buttons and you get a low poly version with decent geometry and multiple subD levels, capable of projecting normal or displacement maps on, or unwrapping for UVs. The remeshed model in your screenshot is simply not high enough resolution to hold the crisp detail you’re asking of it. You need to subdivide it further, then project the detail from the original model as I described in my previous post. Once you do it, you’ll discover how painless it is.
The problem is, I think you’re expecting magic where you sculpt out a polygon mesh in the millions of polygons, and want to press a button and get perfect low poly wires on a hard surfcace model with edges perfectly placed and creased, as if you had box modeled it in a traditional modeller. Zremesher does wondrous things especially with more organic meshes, but that’s expecting a bit much. If you want that, you’d have to manually retopo the model.
But the good news is, you don’t neccesarily need it. Zremesher only needs to get that mesh in the ballpark of the right shape, and then you can subdivde it it and capture all the lost detail back at high subD level with projection. From that you generate normal or displacement maps for external rendering.
Using the Zremesher guides can help Zremesher distribute the polygons more efficiently.
If you want something like that to come out the other side as geometry and not normal mapping then retopo it with and external app of your choice for use with subdivision surfaces. (SDS) That will be the most efficient way to distribute the polygons and have detail. If you use an app that has a good implementation of edge creasing that is an option by I prefer to do it with edge loops still as it is more predictable.
If it is for a render this is the most efficient as it will subdivide the polygons into a smooth mesh at render time. And it is all about polyfflow.
If it is for a game you will want to retopo a very low poly version that just wraps around the basic volume of the mesh and then read up on how to export normal maps from Zbrush and map those with UV Maping to the model for export to the game engine.
For some good tips on subdivision surfaces there are lots of tuts around.
I have a good free one.
It is basic an d written for LightWave but can be applied to anything.
Sample images of sharp edges with SDS from my tut:


On my website in the gallery you can find some images of hard surface modeling I have done with SDS:
Go to the gallery page.
Good luck.
And also, nice model!
Sorry, what I meant was when you post the screenshots it’s helpful to us to show the wireframe (polyframe).
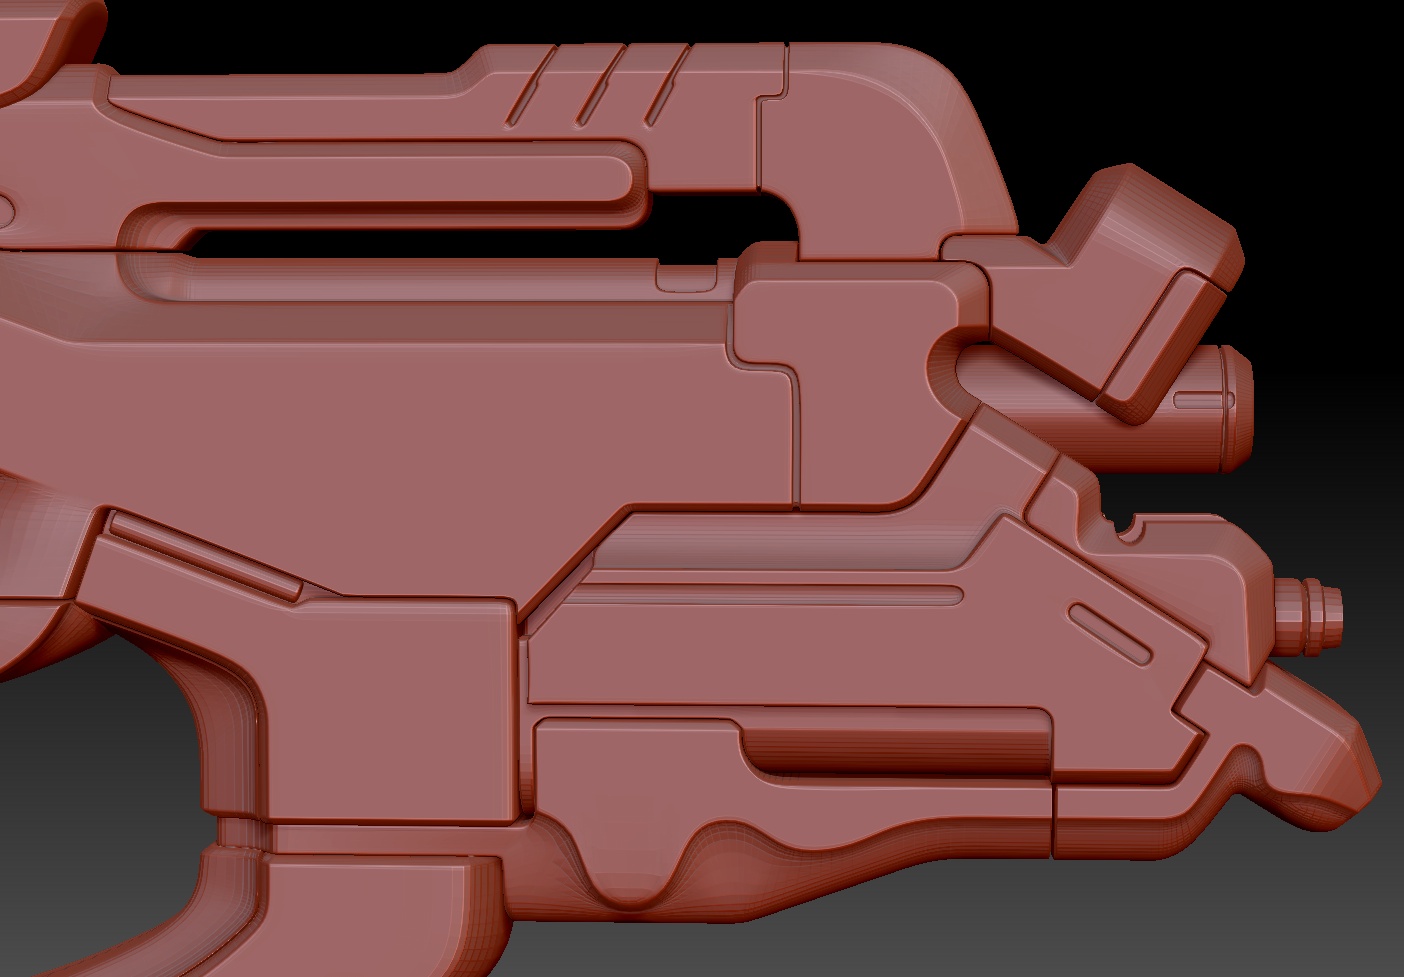
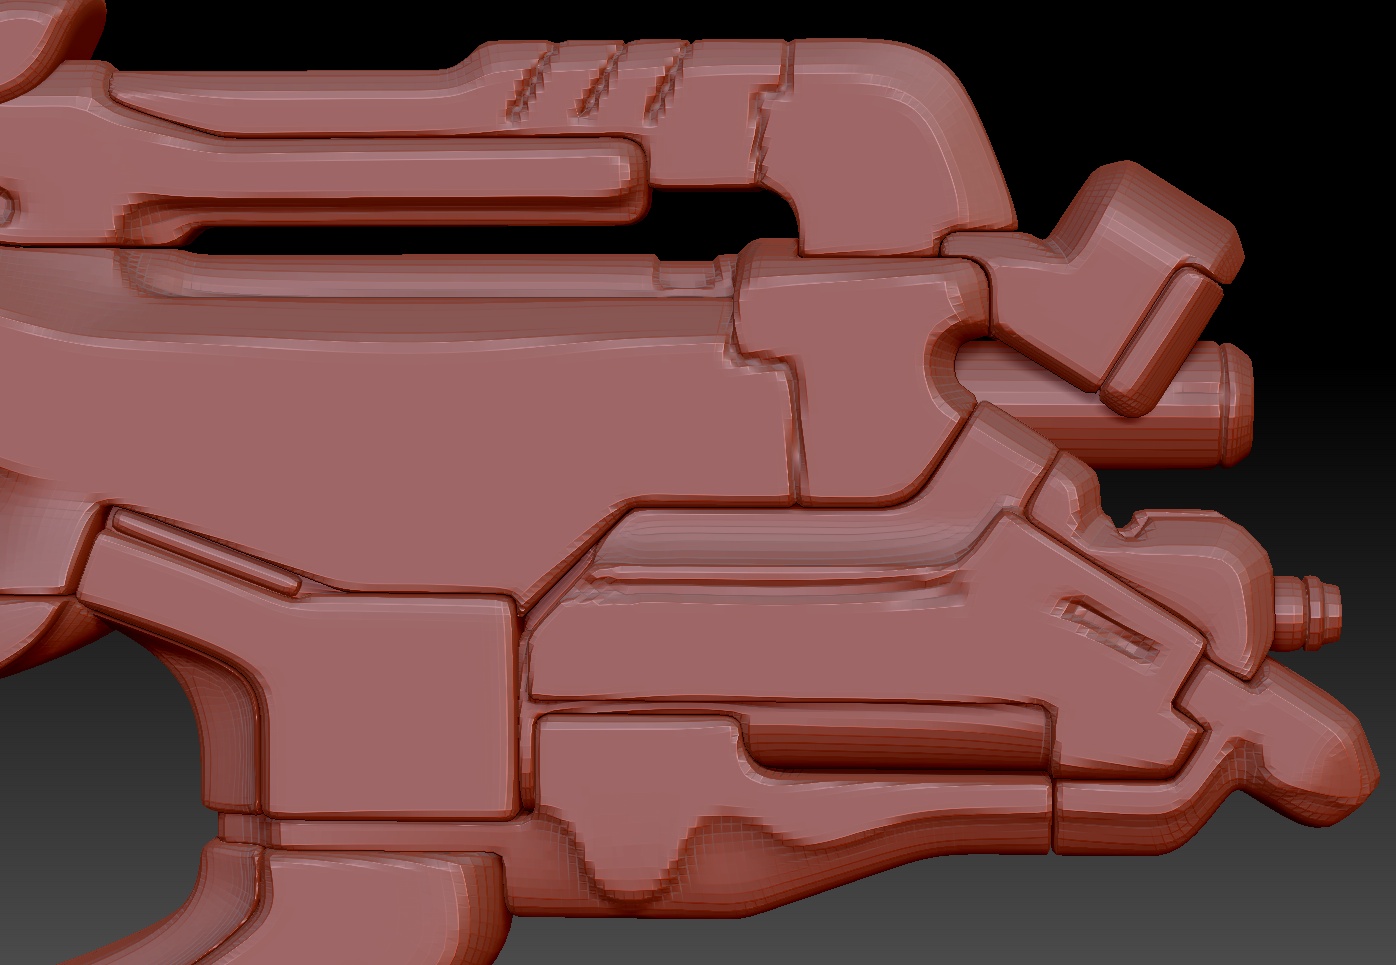
Oh, hehe, right. :)Beside of zremeshing the model, I have another question. Because I don’t have sense how many polys I need for a particular details I put a question here.It’s really necessary to have 12mln polys (after subdivision) for gun like this, to cut quite sharp these marked circles? Before I sculpted it, I thought 2-3mln will be enough.Maybe my topology is so suxx?
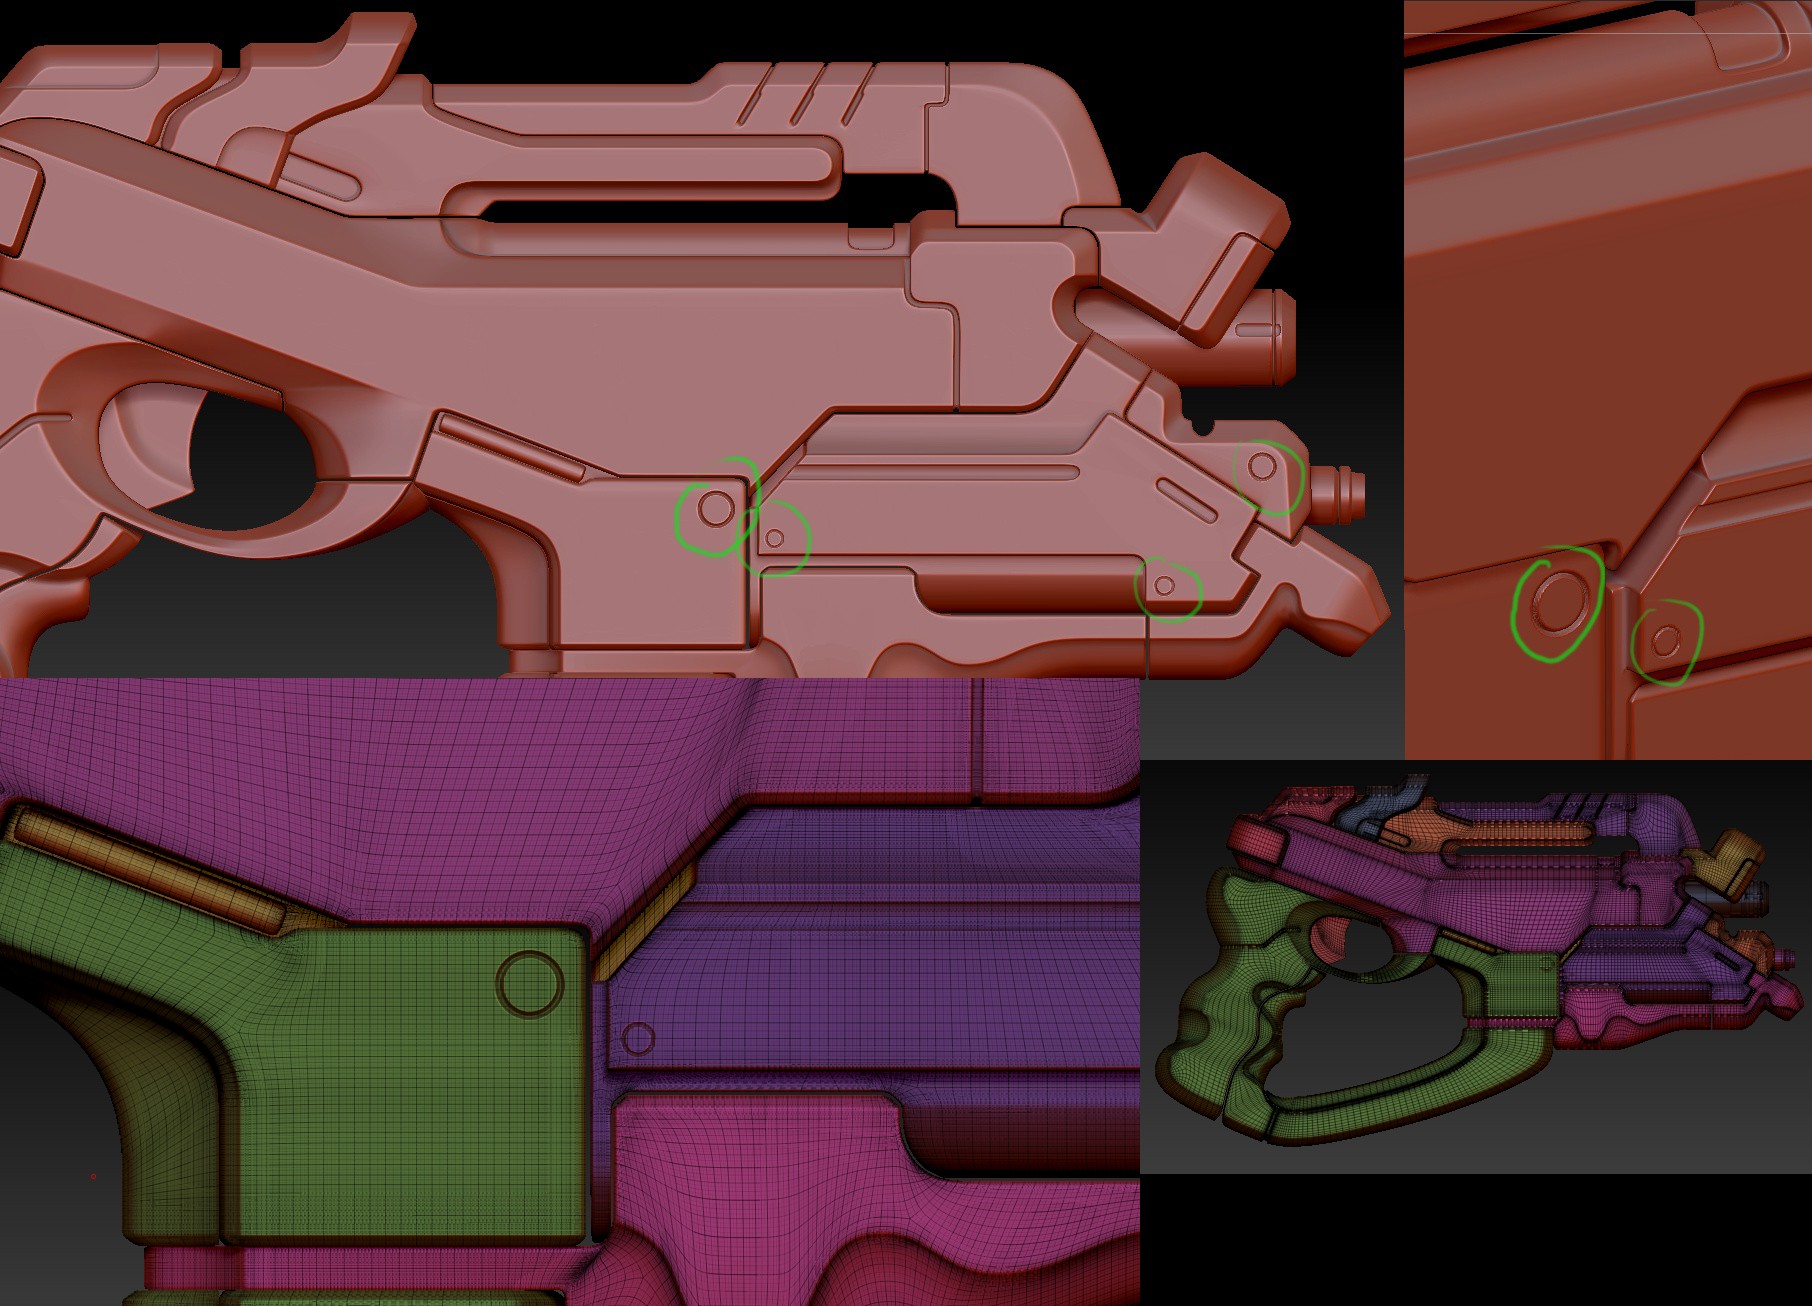
It may be, or it may not be. If the entire object is one mesh and the topology is very grid-like in its nature then you’re going to need a lot of polygons for a tiny circle to be crisp. If you had edgeloops that flowed around those circles, then you’d need considerably less. You would also benefit by splitting up the mesh into several smaller components so that you can locally subdivide an area for more detail, without unnecessarily increasing the vertex count exponentially across the entire model (you can also add more geometry to areas by subdividing with masks, but this will prevent you from stepping down to lower subdivision levels if you need to). You can also decimate the mesh when the sculpt is locked in.
Thx for the answer. Splitting model to several subtools is a good solution. I’ve made it with another model.