ok if You not understand me tray this steps : note: i use this steps all my works
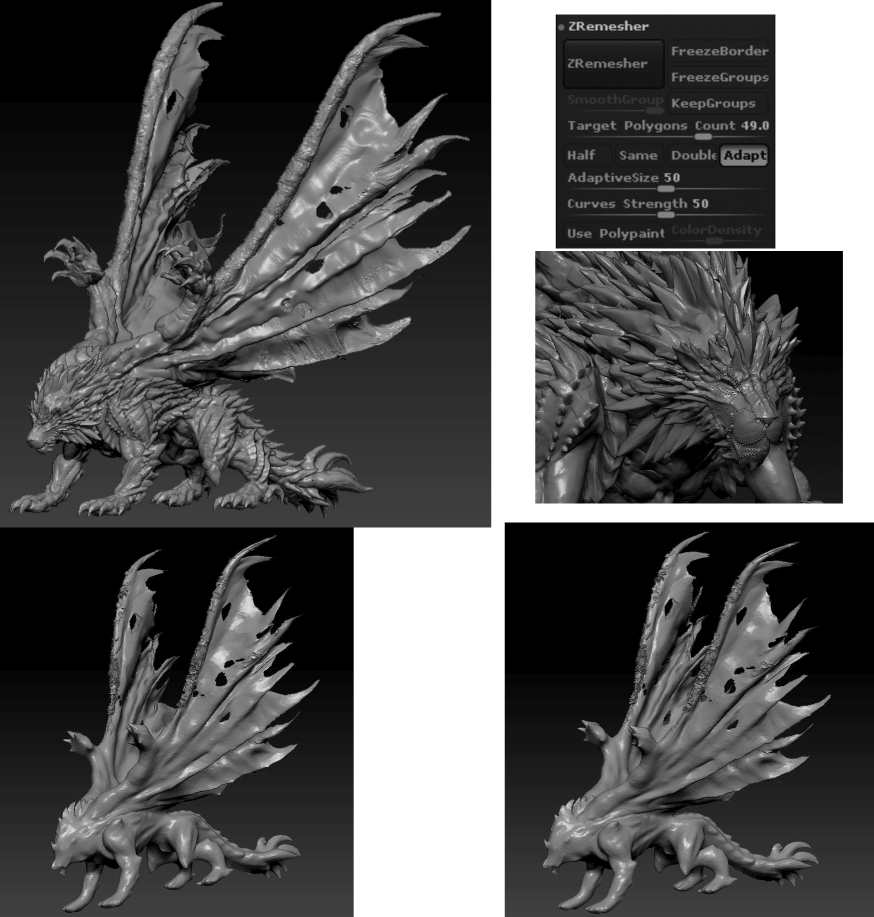
Zremesher your SubTool
- Duplicate your selected orginal SubTool by clicking Tool >> SubTool >> Duplicate.
- Hide all other SubTools, including the duplicate. The only one that should be vis*ible is the one that you will use ZRemesher on.
- Use ZRemesher with any desired settings.
- Turn on the copy of the SubTool that has the sculpted details. Make sure that this SubTool is at the highest subdivision level.
- With the remeshed model still selected, click the Tool >> SubTool >> Project All button. The controls in the Project All UI group can be adjusted to refine the projection as you work. The Dist slider is the one that you will most likely use the most.
- Subdivide the remeshed model to create level 2. Project All again.
- Repeat step 6 until until you have the desired number of subdivision levels and all of your sculpted detail.
- You can now delete the original version of the SubTool.
Note: It’s recommended that after each projection you turn off the detailed SubTool and check to ensure that you are happy with the projected results. If you aren’t satisfied, press Ctrl+Z to undo and then modify the Project All settings before projecting again.
Advantage of this technique:
By copying the detail one subdivision level at a time, you will have more control over the projected results. This process can be faster than the Freeze Subdivision Levels approach.