ZBrushCentral

Zremesher 4r6. Any help :).

Hi Guys,

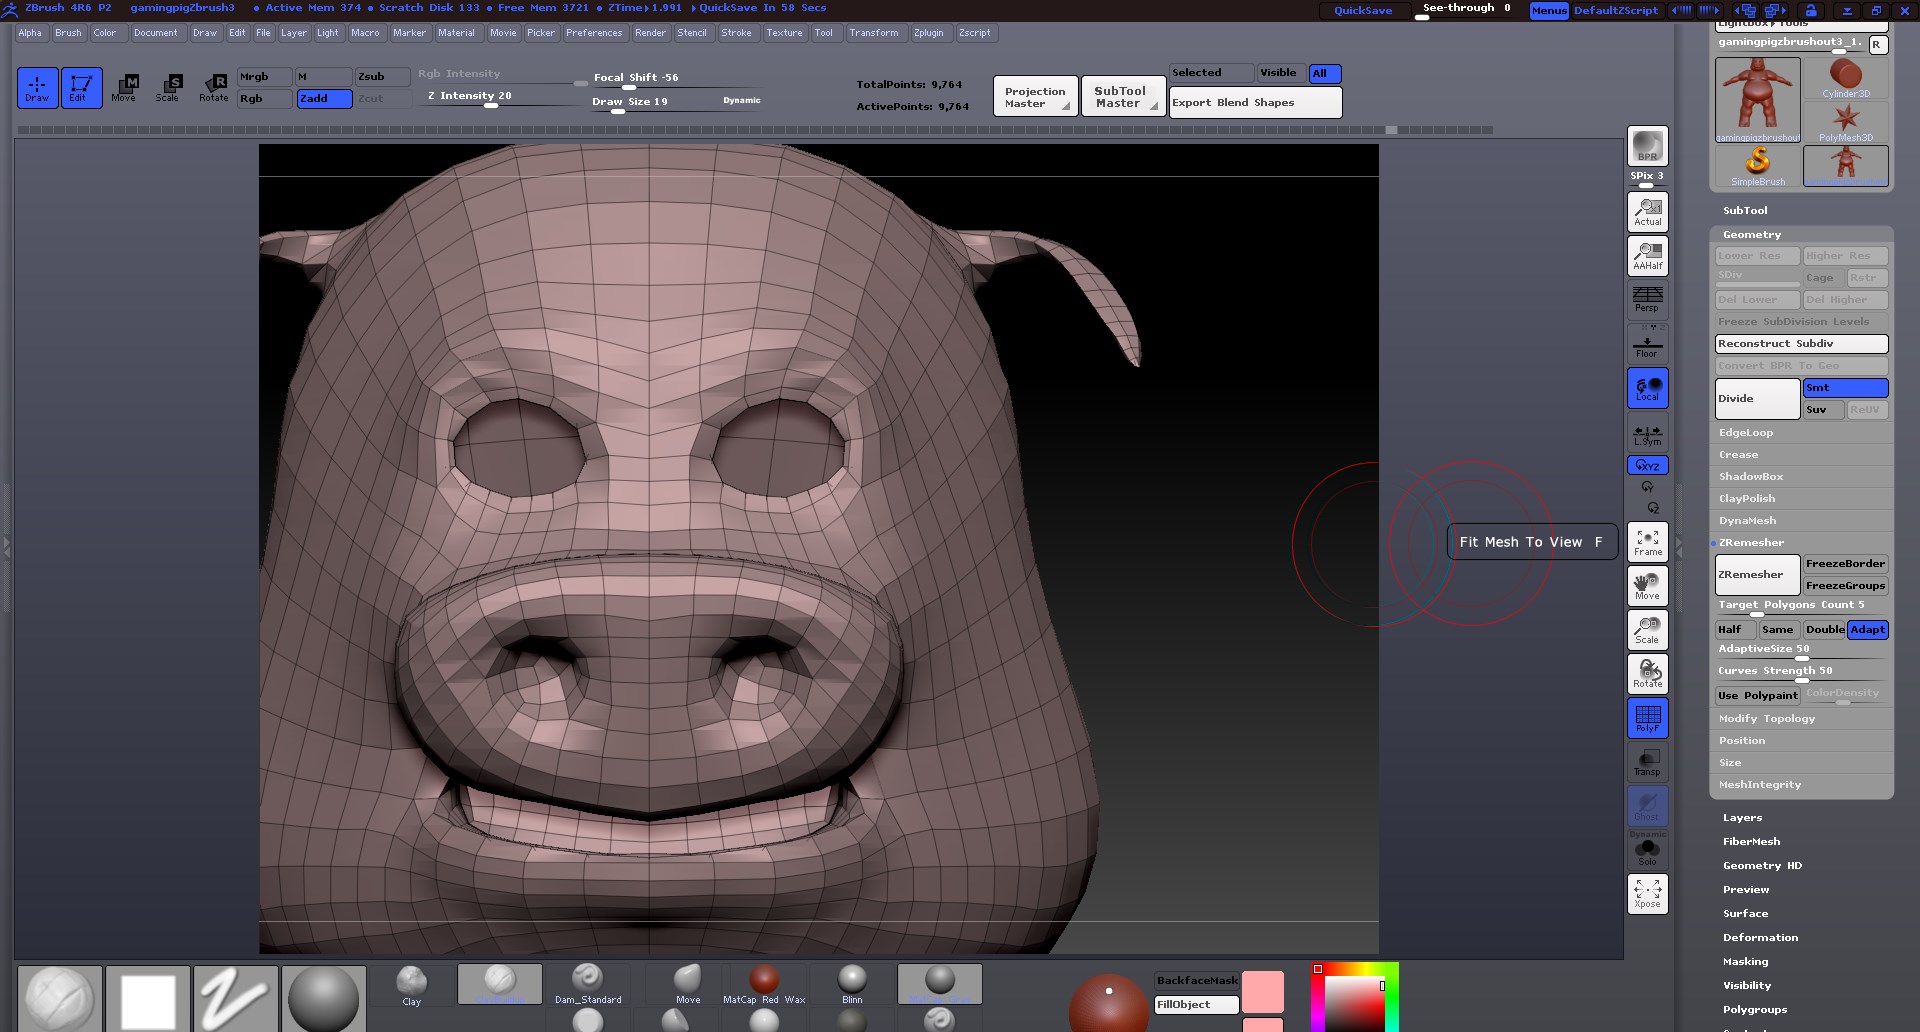
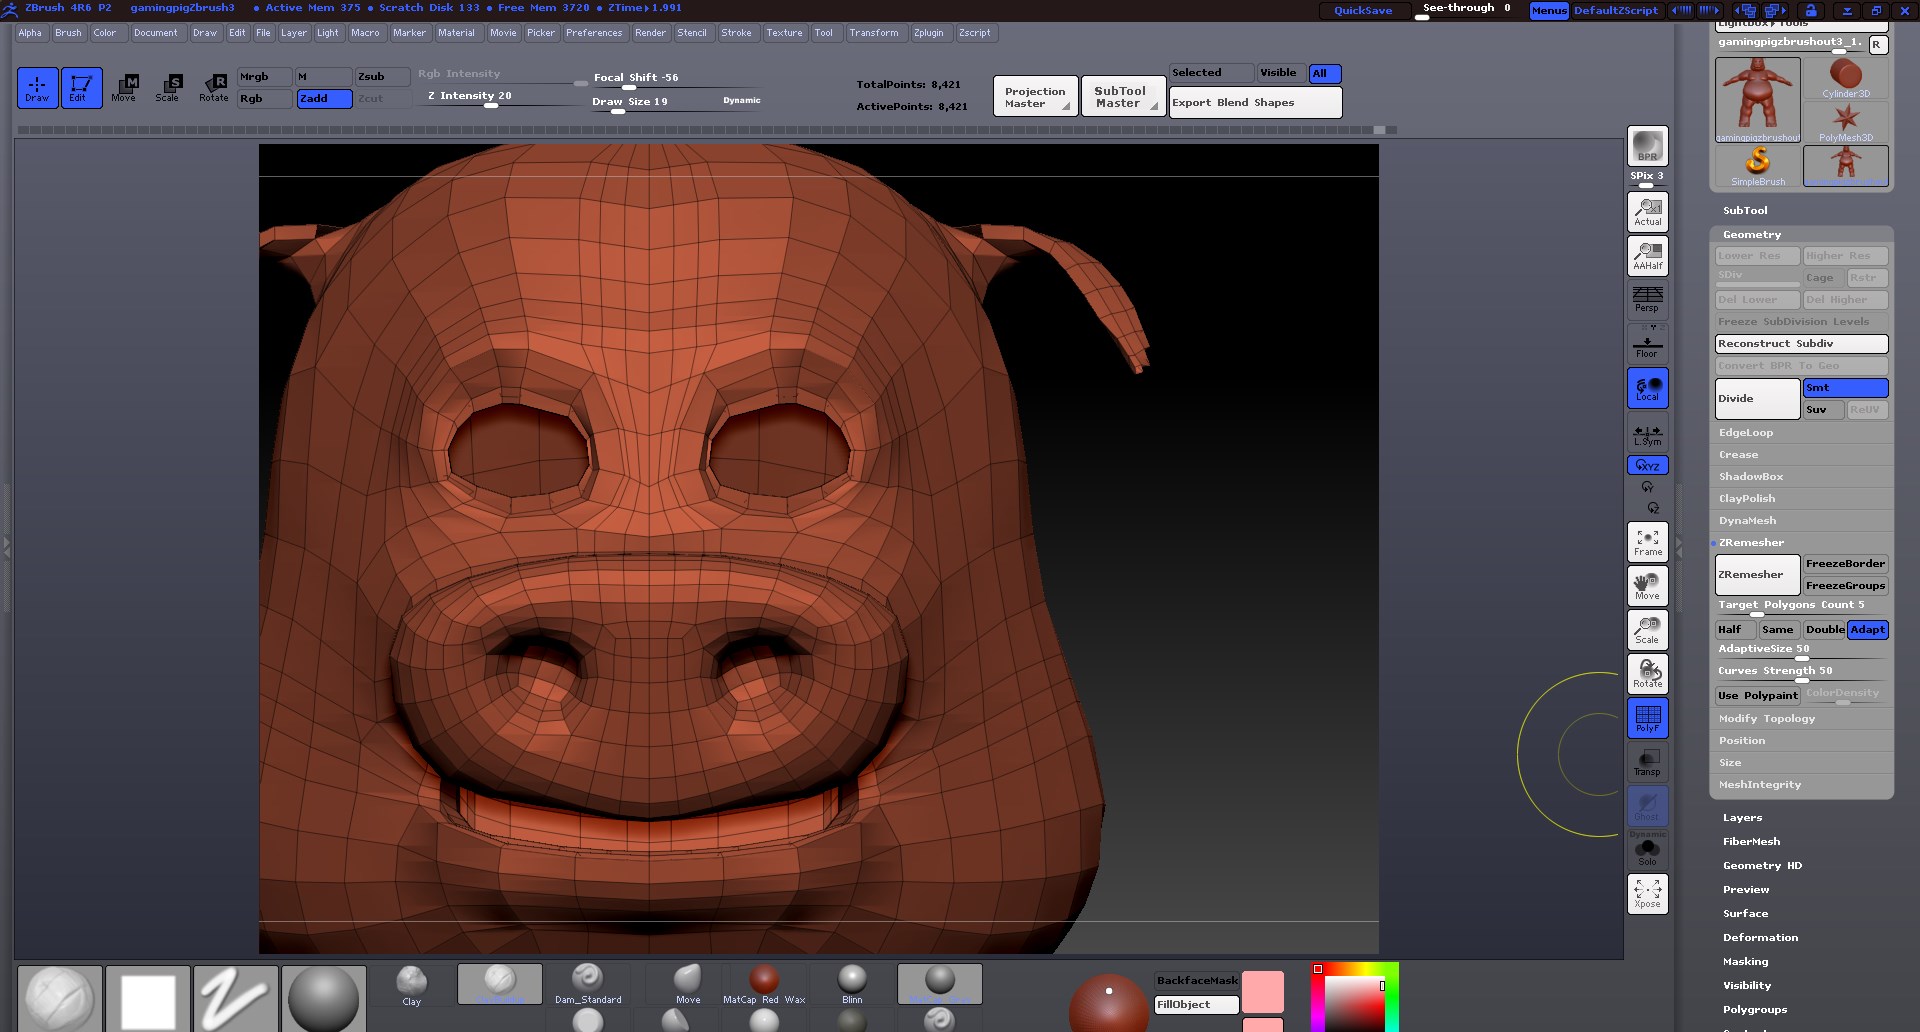
I was following along with the Zbrush classroom on the Zremesher. The two pictures I’m posting is without the zmesher guide tool. I had used that tool with and without the polypaint (red to add more detail to keep the edge flow and detail), and still am losing my eyelid detail.

Ryan, in one of his demos, shows a much better result just from the default settings, however, I keep losing the eye lid detail. This model is originally from Maya, and I brought him in to clean up some of the detail and later add some clothing etc.

Can anyone tell me, besides just manually redoing the topology, if there’s something I’m missing with the tool…It’s not like this is a complex model by any means.

Thanks!

Attachments

screenshot_09.jpg

screenshot_11.jpg

https://www.dropbox.com/s/fho82a2q203uda2/gamingpigZbrush4.ZPR

Here’s a link to my current project :).

What does the original model from Maya look like?

The bottom (orange looking pig) is the one imported from Maya, PRE-zremesher.

Sorry, should have specified that.

Have you tried polygrouping around the eyes and then FreezingGroups under ZRemesher? Only draw back is that I have noticed it pushes the active points up!

Attachments

GamingPig.jpg

https://www.dropbox.com/s/ygl7wr94e917i0j/Screen%20Shot%202014-06-03%20at%208.02.40%20PM.pngI did try drawing with the zremesher drawing curves tool, as the picture will show. I also froze groups but that didn’t seem to work. I keep losing the eye’s detail and worse yet, it creates a really crappy edge loop.

It didn’t seem to work either. The eyes are still losing the edge loops.

this is just speculation, perhaps it’s way off base.
you have an inside shell for the head so at the borders of the eyes and mouth the geo curves greatly,
like a fold going into the inside of the head, analogous to folding a piece of paper in two, the border isn’t really an edge but a fold.
so when you zremesh it can’t make those curves tight enough.
i don’t have a link handy but there are videos showing how to get stronger curves in some areas over others using paint and the sliders.

if the head were just a one sided outter shell you would get different zremesh results.

Ok, that makes a lot of sense, I guess. So making the eye socket, and the mouth sack isn’t a good idea until AFTER touch up and resculpts in Zbrush? At least if I plan on using Zremesher?

The head itself is a single plane, as is the whole body. The eye socket isn’t a solid mesh, it’s just extended behind the eyes. So the only way that it would work properly is if I stopped the mesh AT the border of the eye lids, and didn’t extend behind the lid?

Thanks for the info.

So the only way that it would work properly is if I stopped the mesh AT the border of the eye lids, and didn’t extend behind the lid?

that’s what i’m guessing, that it might work more as you expect it would.

but in any case figuring out how to get more resolution in those areas over others is still needed. that coupled with subdividing later on
should get you there.

Thanks Zeddie,

I had watched several Zremesher videos, Ryan’s was one, and even did the “use polypaint” method to assign higher poly counts to the face and hand areas. That worked ok, but each time, I’m losing the shape drastically in the eye area. I agree, from your assessment as I have no other explanation. I’d love to see it work though, as I love zremesher from what I’ve seen others do with it.

Thanks again!

Sean

as an experiment, you could try taking a sphere, cut two slits for the eyes and one for the mouth. give it enough resolution and roughly shape it around the head.
then use “project all”(play with settings) from the subtool palette to project the detail from the head to the sphere. clean it up a bit and then see how zremesher does on that.

Hey Zeddie,

I will try this later when I get back from work. Thanks for the input. Very excited to get this project done so that I can then use him for my rigging reel :).