ZBrushCentral

Zetman - WIP

Hi 3D artists,
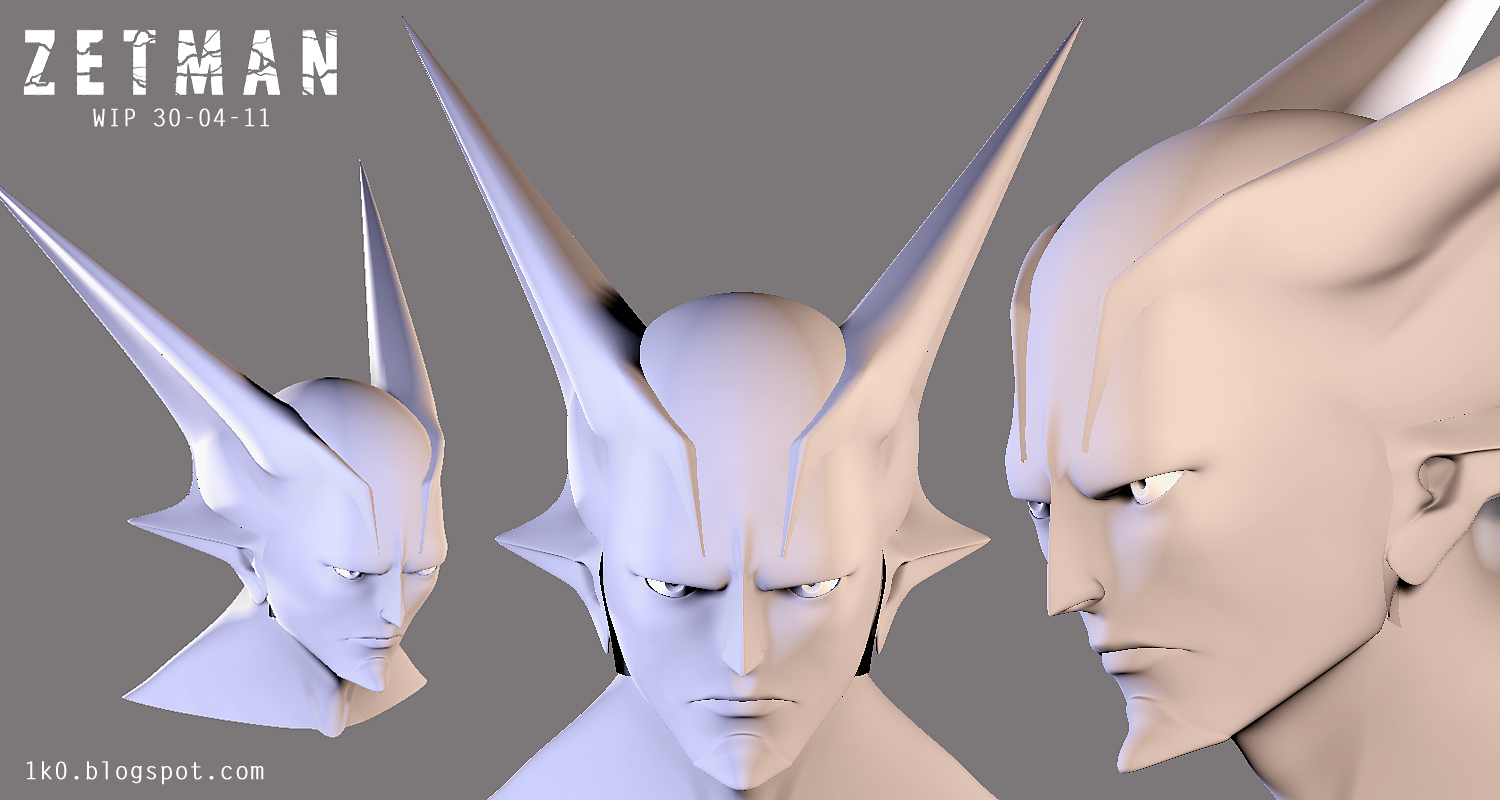
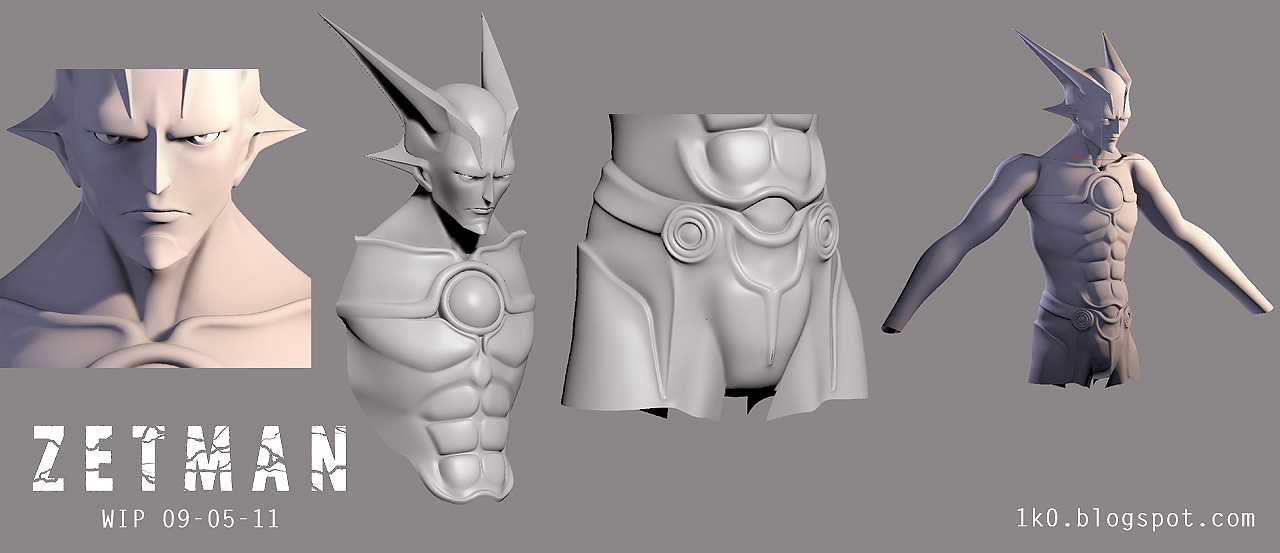
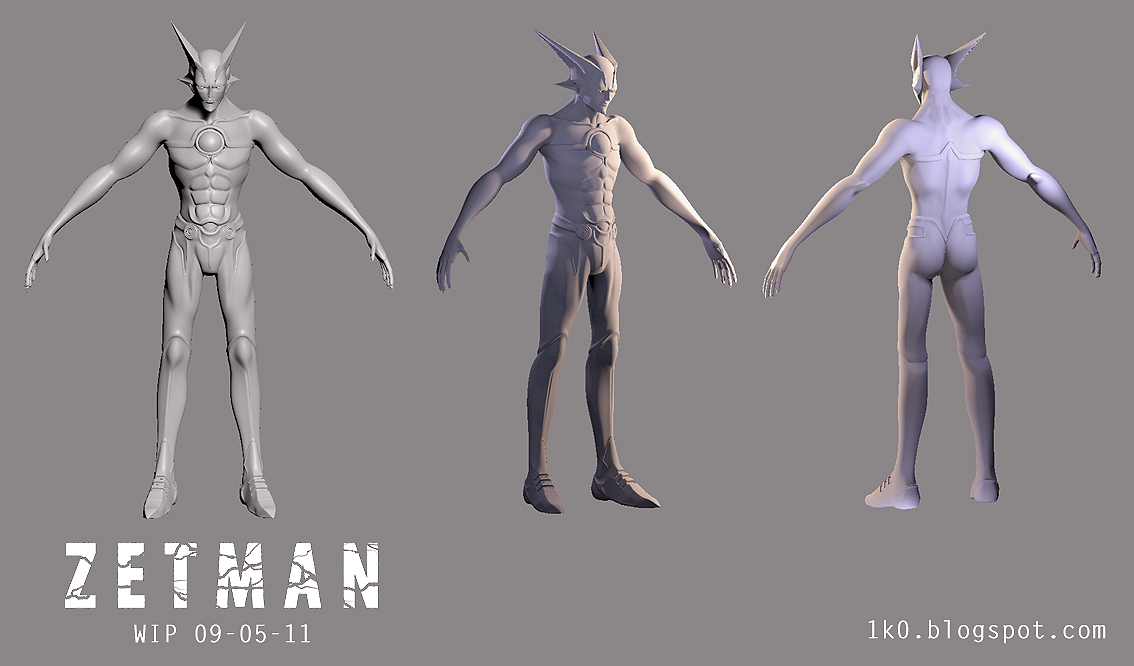
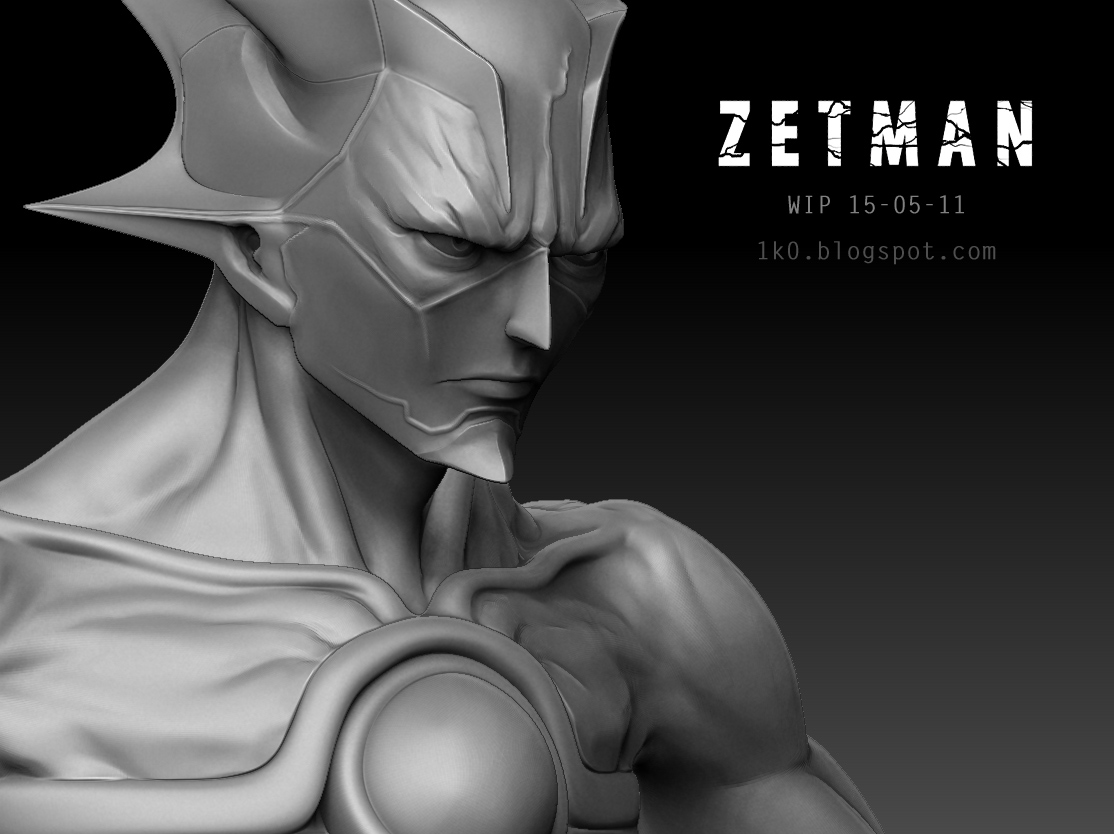
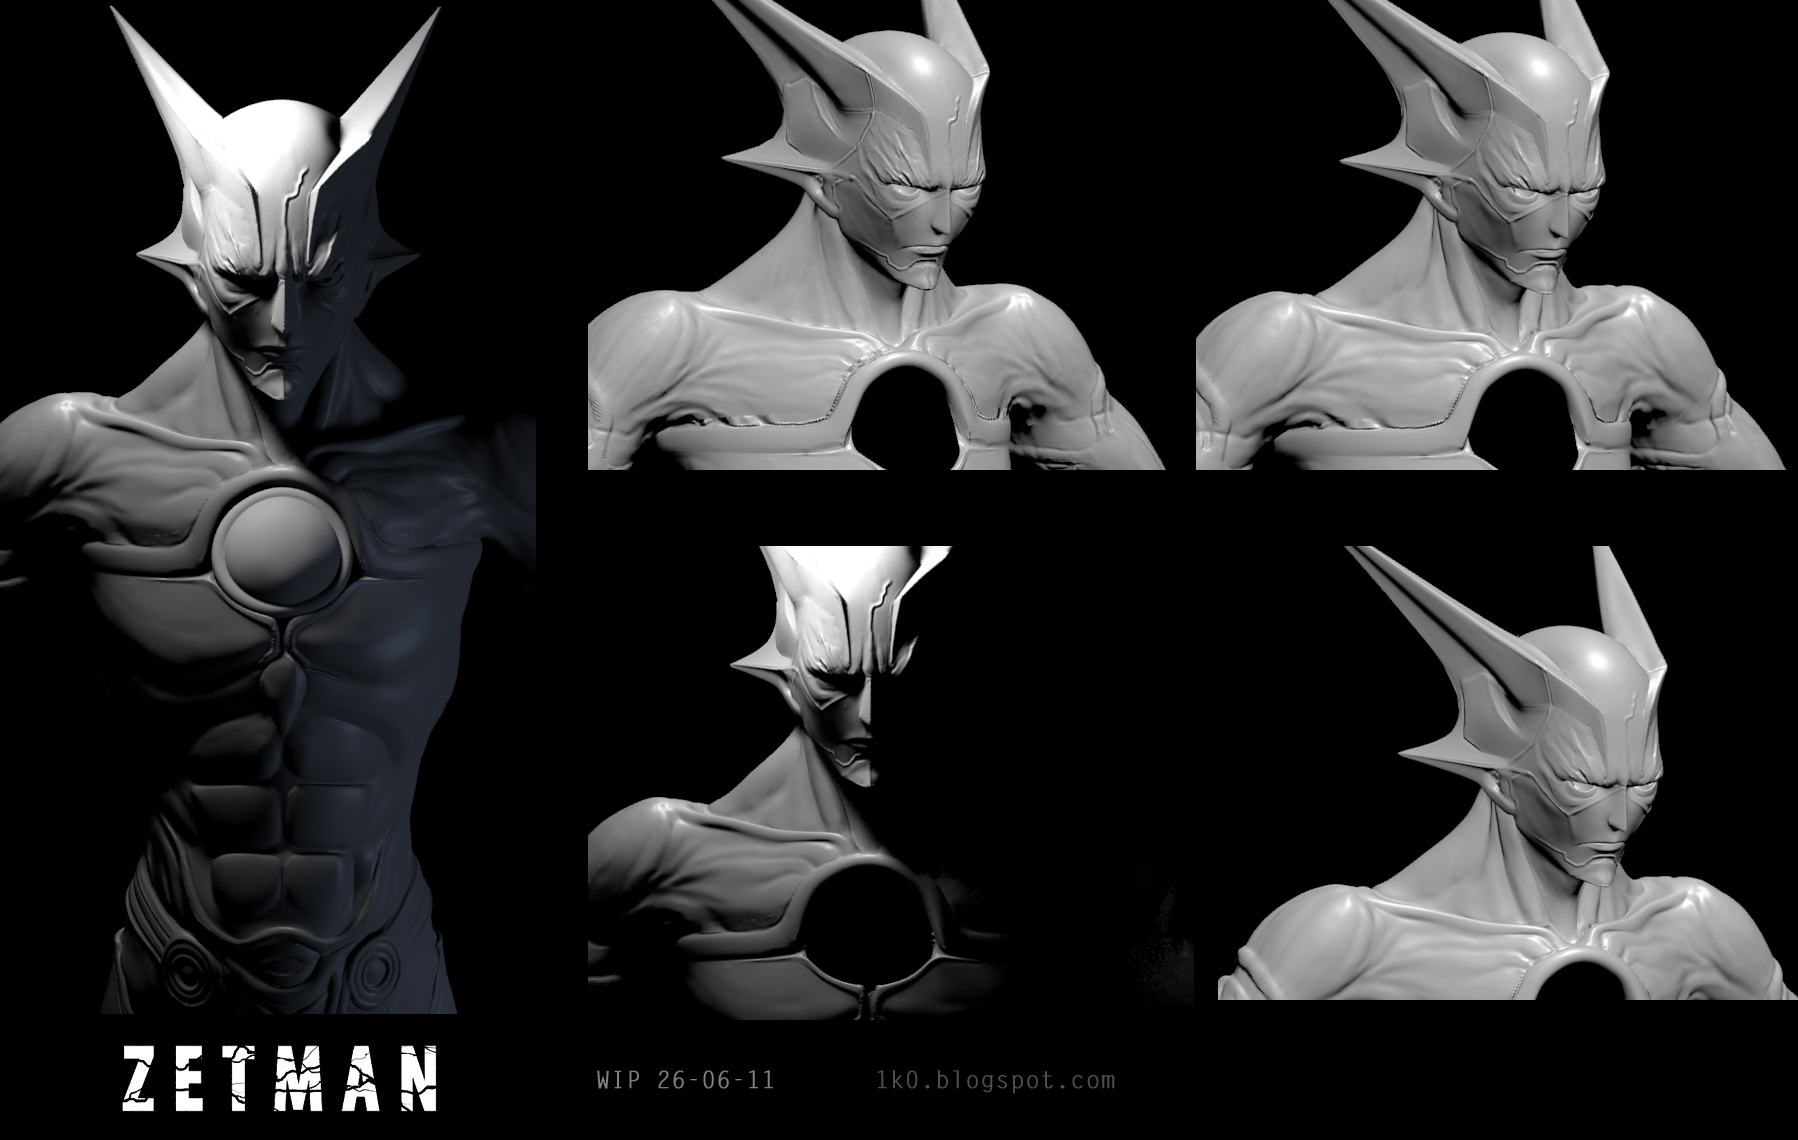
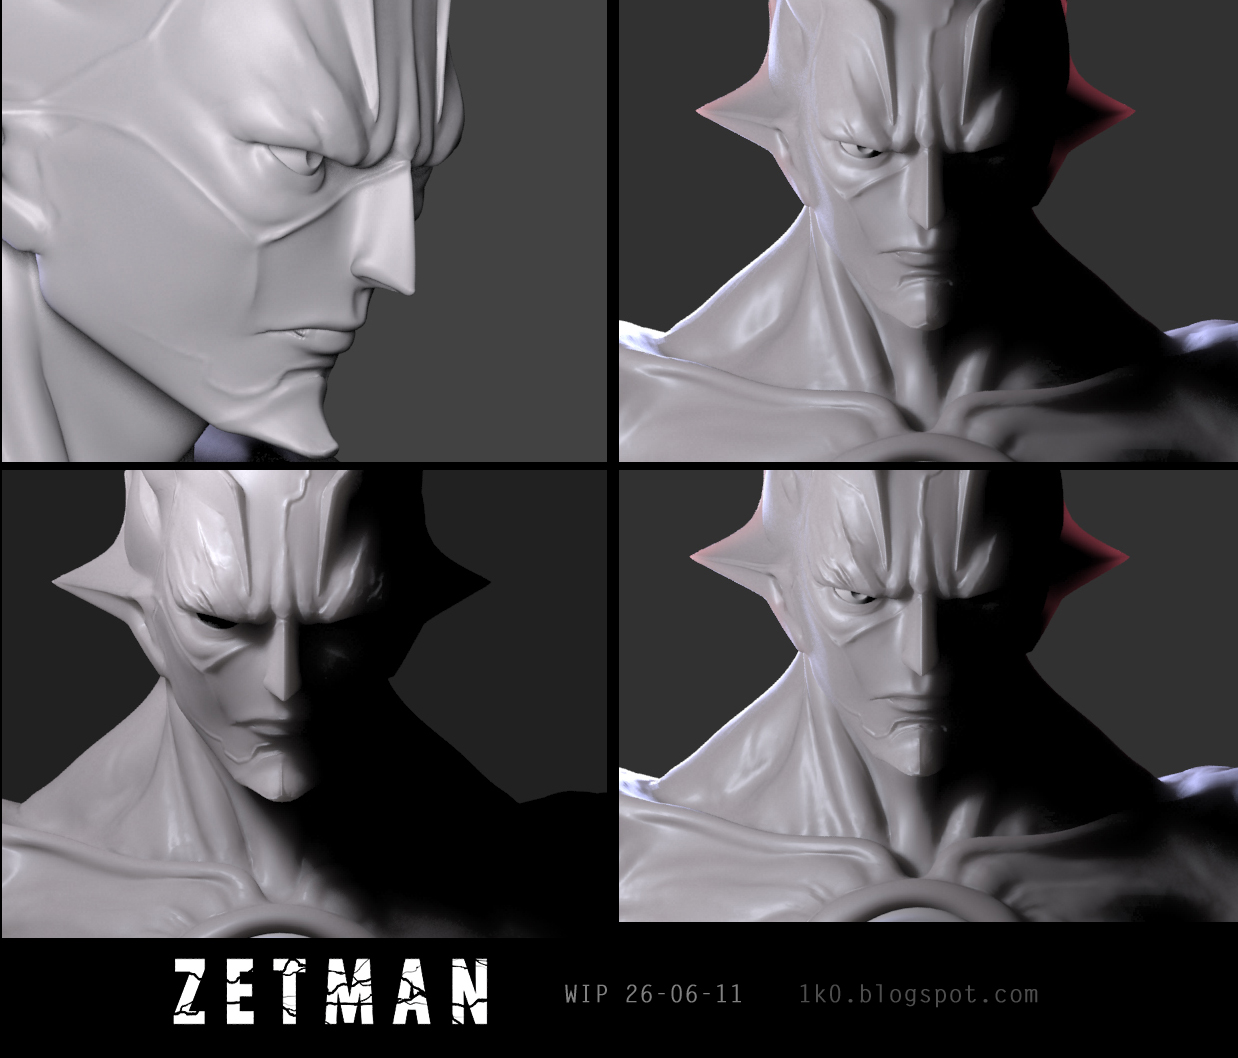
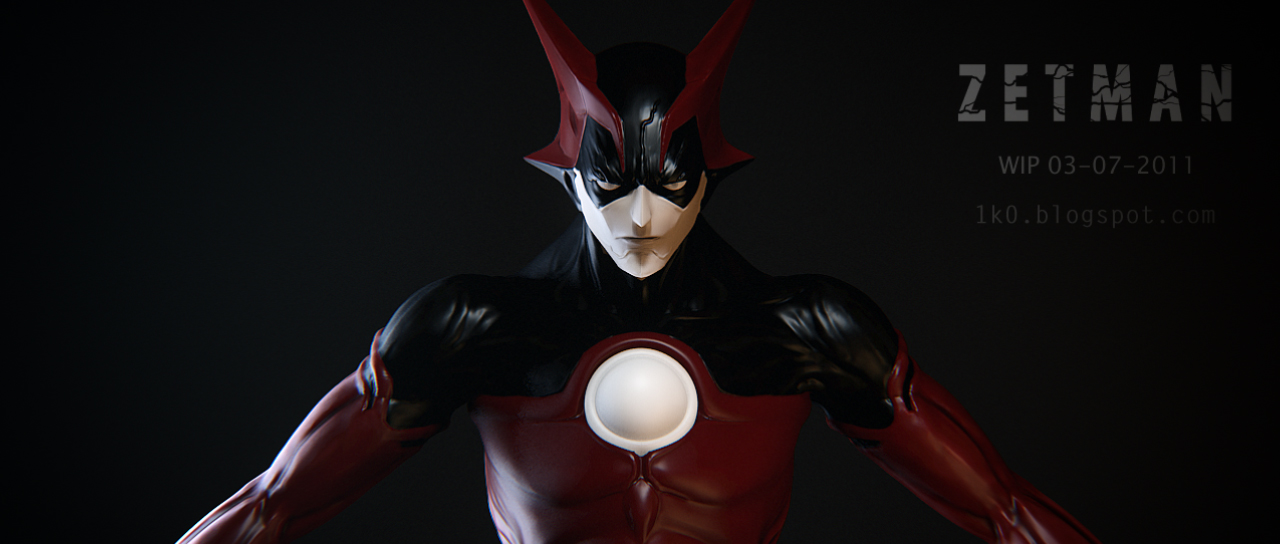
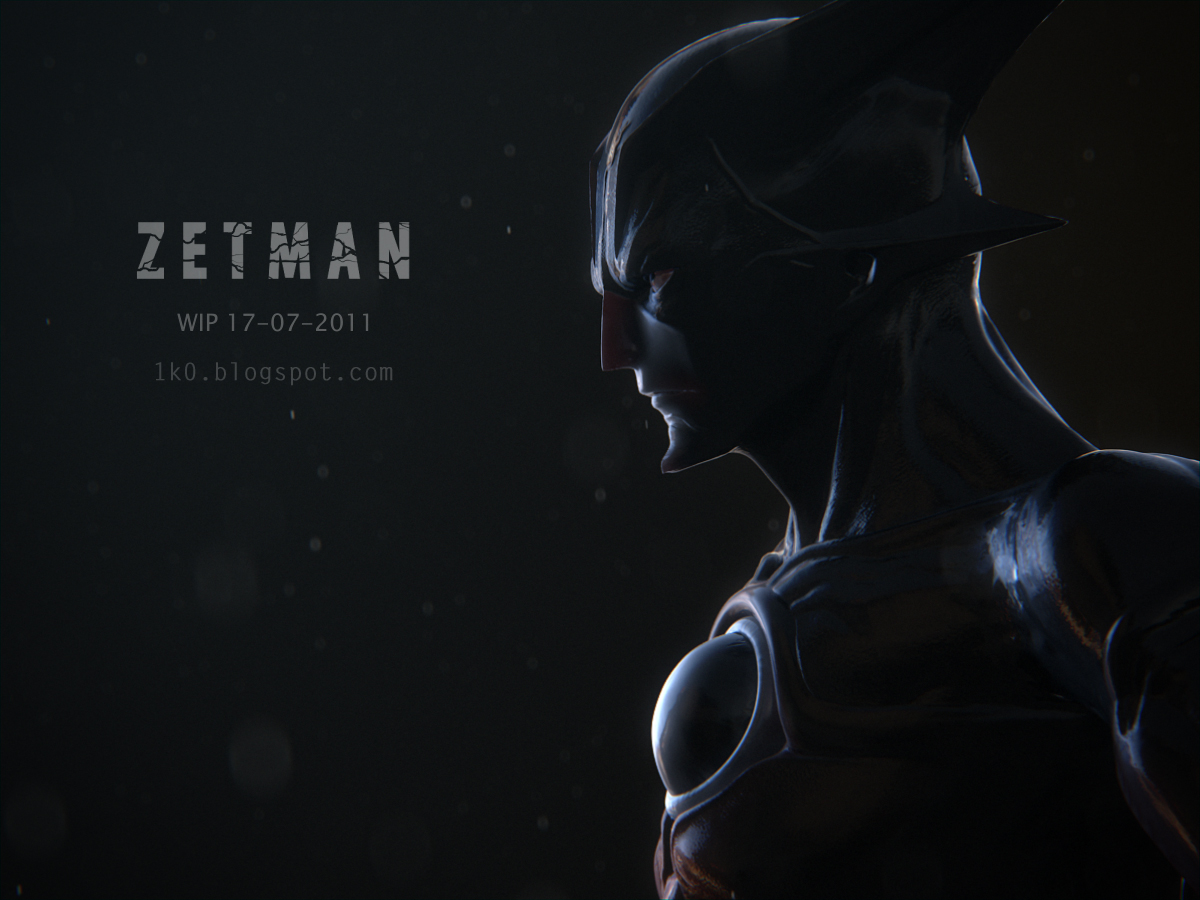
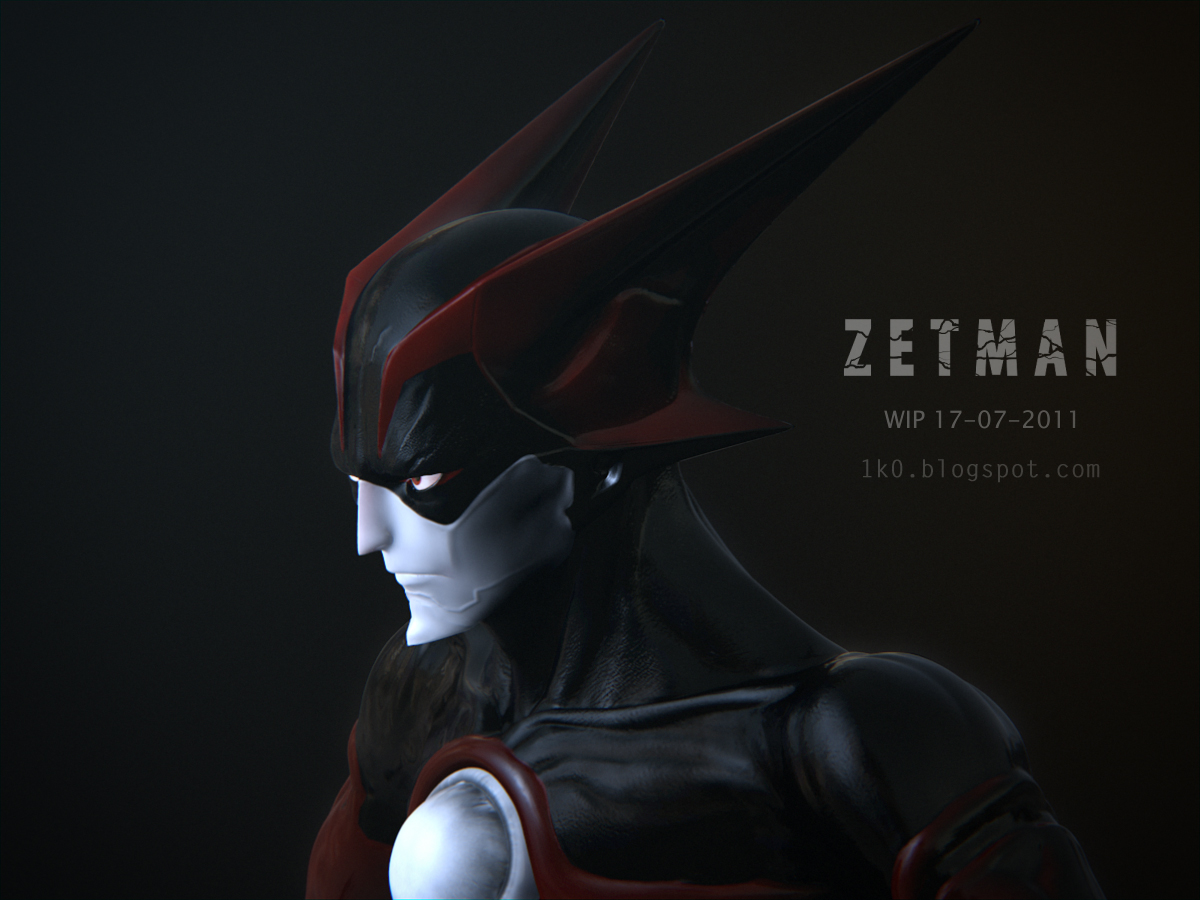
I’d like to share with you my 4th attempt on modeling a Masakazu Katsura character, Zetman.
I started the base shape in 3ds Max.
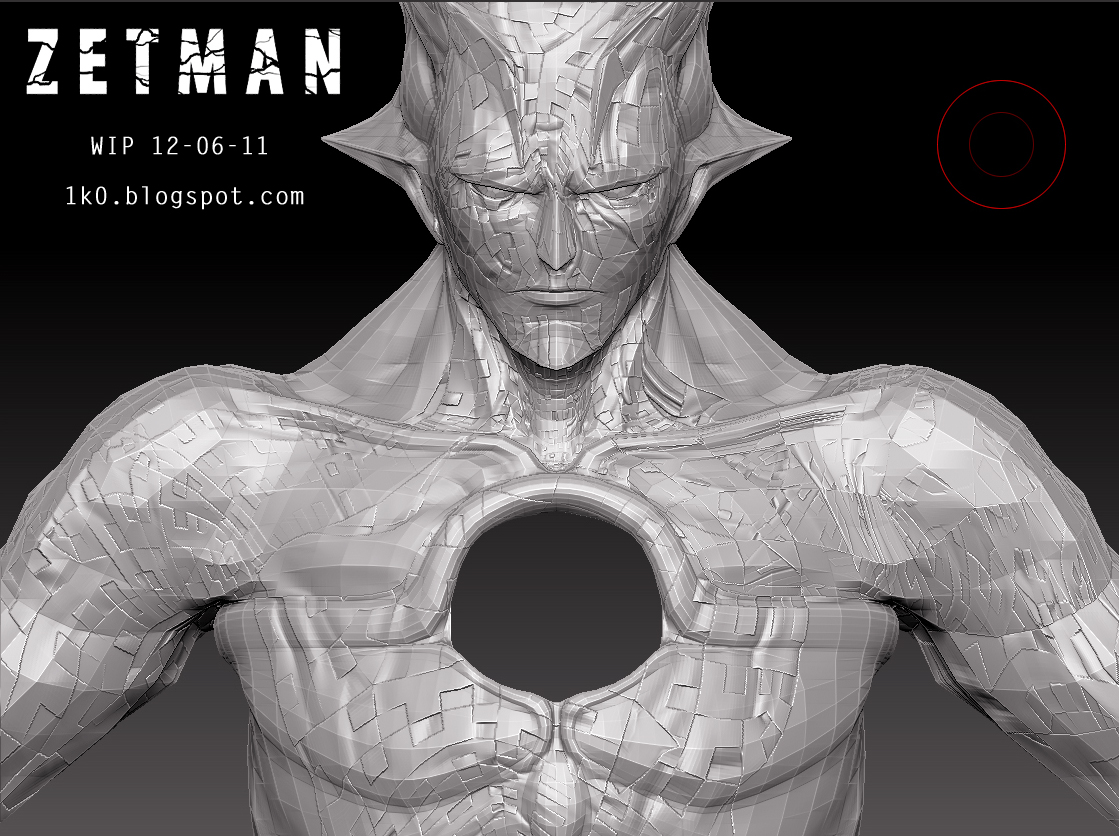
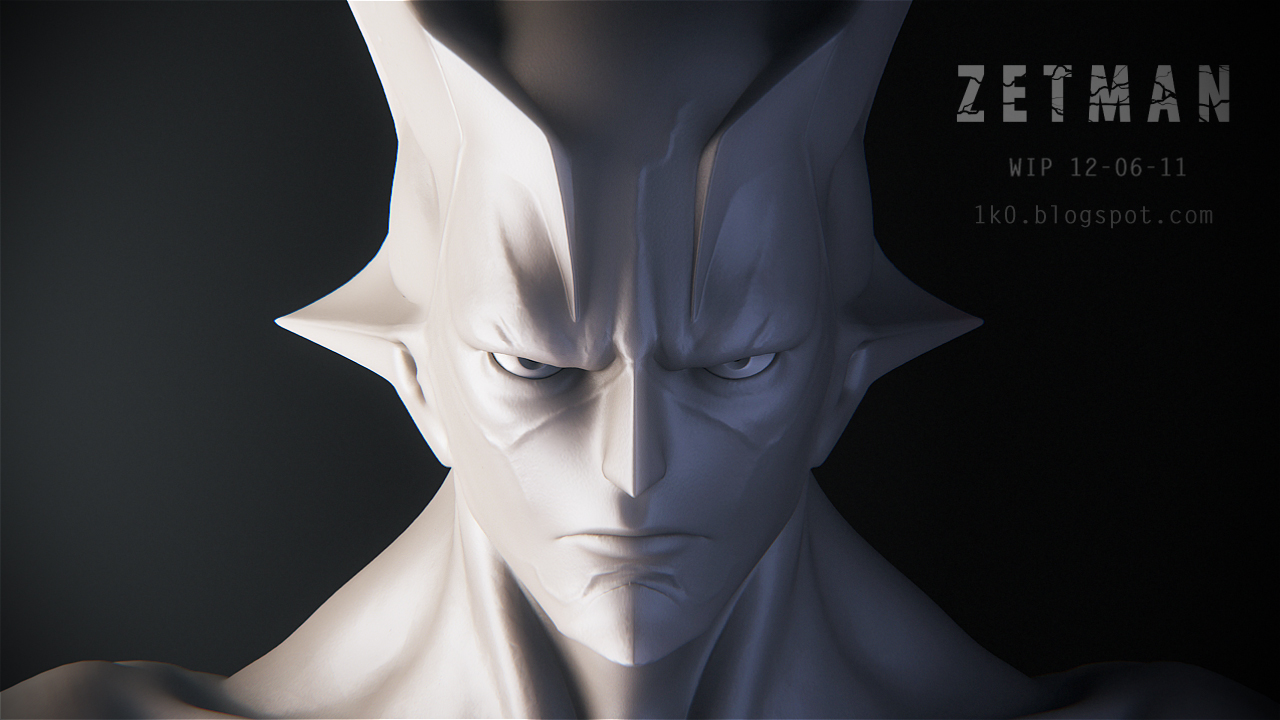
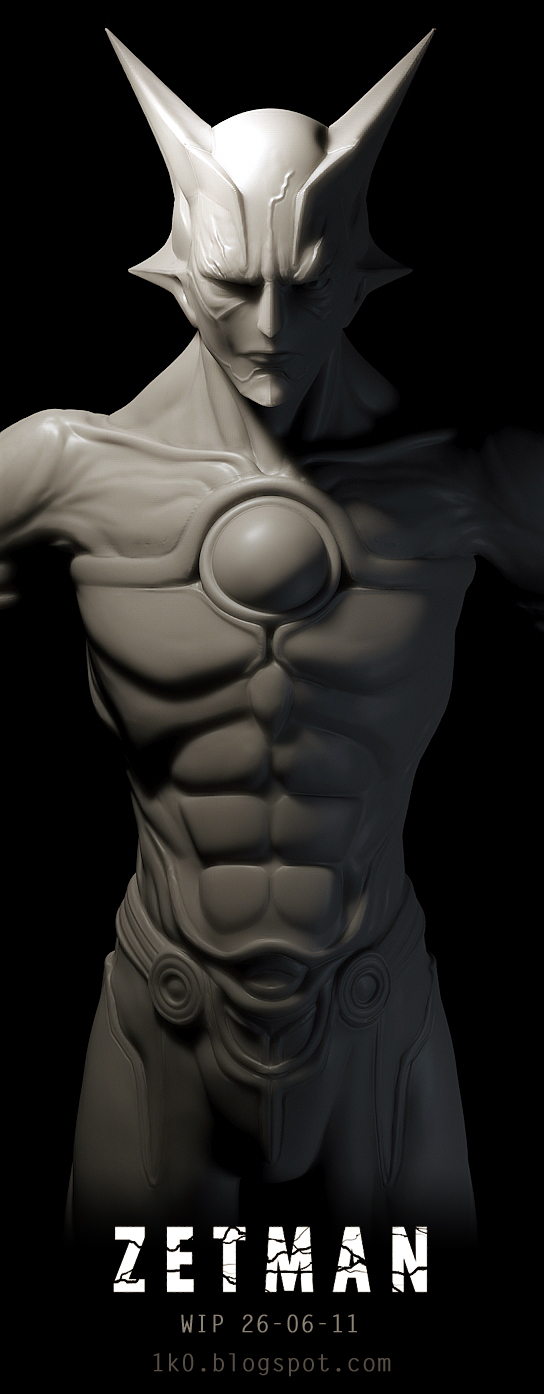
Now I’m in the sculpting process with Zbrush to add muscles, details, change some body proportions.

[Zetman_WIP_02_1k0.blogspot.jpg]Zetman_WIP_08_1k0.blogspot.jpg

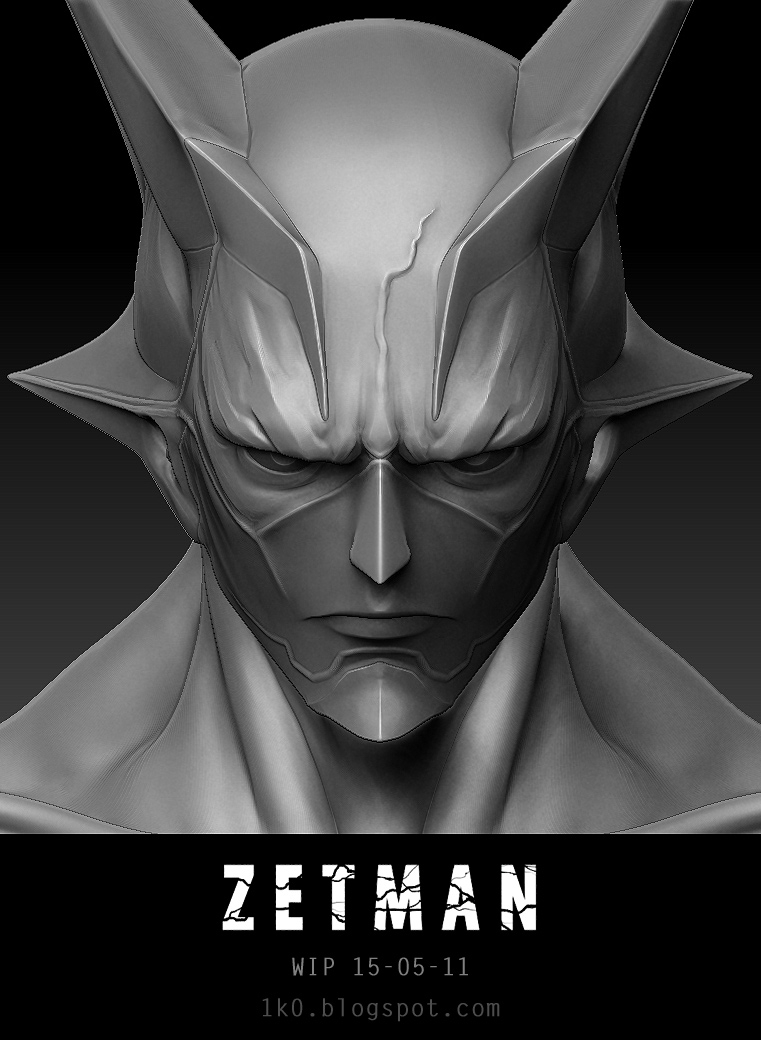
I try to make a blend between real world and hybrid anatomy from the original design.
Next steps: refining the upper body part and sculpt lower body part!
See you next week end for update :slight_smile:

Attachments

Zetman_WIP_04_1k0.blogspot..jpg

Zetman_WIP_05_1k0.blogspot.jpg

Zetman_WIP_06_1k0.blogspot.jpg

Zetman_WIP_07_1k0.blogspot.jpg

Time for displacement mapping is coming, and I’m trying to find a way to generate displacement for each ID from my mesh as I created 6 UV parts.

Each ID material in 3ds max= 1 polygroup in Zbrush but when I create the displacement map all the parts are on top of each other in the displacement map, hmmm, it seems I have to RTFM a bit more :) Or if anybody could give me a hand about this weird process? I have a sneaky way in mind to come to the result I'd like but I'd like to keep things clean. For the moment I was able to generate my displacement map (with another sneaky way) Here are the test results in 3ds max and Mental Ray:

[Zetman_WIP_10_1k0.blogspot.com.jpg[/ATT]%3C/font%3E%3C/a%3E"]Zetman_WIP_10_1k0.blogspot.com.jpg](http://%3Ca%20href=)

Attachments

Zetman_WIP_12_1k0.blogspot.com.jpg

Zetman_WIP_13_1k0.blogspot.com.jpg

I finally found a way to get rid of the spiky artefacts from the project all step.

Once I put the right values after several tests, all I needed to do was hiding part of my mesh to be able to see the inside and then smooth the places where spikes come from, it sounds logical now …:slight_smile:

I first tried to use the flip faces in display properties to make the same tweaks, but I learned it totally destroy my UVs coordinates when I went back to original faces orientation and tried to export the displacement map.

Another problem I’m facing now is a bloody seam I can’t avoid, I wonder if you can avoid this with a higher border size in the Multi Map Exporter option? You will see that in the following test renders.

[Zetman_WIP_15_1k0.blogspot.jpg]Zetman_WIP_13b_1k0.blogspot.jpg

Attachments

Zetman_WIP_14_1k0.blogspot.jpg

Ha! I love it. Just I love it :slight_smile:

Thanks Framedworld :slight_smile:

For an entire body like that the texturing process take me a lot of time to be achieved, even if I only focus on the parts the camera will see.

Here is where I am now:

[![Zetman_WIP_20_1k0.blogspot.com.jpg|800x600](upload://ule6SFlOUTzU7rE9bH4Prwluc8R.jpeg)]![Zetman_WIP_73_1k0.blogspot.com.jpg|1200x544](upload://2hOrBYnnZSTf9JDdyzuzNcLpzaq.jpeg)

Turntable with the SSS overall texture on:
http://vimeo.com/26293529

Now comes the time to make it less plastic, but the final render will take place under the rain. I’ll play with HD geometry to create fine bump mapping.

Attachments

Zetman_WIP_18_1k0.blogspot.jpg

Zetman_WIP_64_1k0.blogspot.jpg

Zetman_WIP_19_1k0.blogspot.com.jpg

very nice man! love it! :wink: congrats man!

Outstanding work. Did you make those renders with passes or just from 3ds max mental ray? What is your rendering setup?

dude, keep track of all the bugs you get. i’ve never messed with displacement mapping, but i’d like to know how to smoothen the learning process when i give it a go. but awesome work on this guy so far.

I really like the way this is looking so far. I would love to see a more dynamic pose, but I’m sure you’re working on that. :cool:

awesome work and excellent render!!!

Thanks everybody :slight_smile:

Eiad, the render passes are made in 3dsmax and Mental ray, I use SSS fast skin + displacement and render a separate reflection with custom arc&design material.
Then all is mixed in After Effects ^^

memania44, he will have a more natural pose soon ;) The texturing process is nearly done for this character, I used polypainting for the 1st time, it's a powerful tool! Now I have to focus on some "make up" on the character face, and make my brain working on a smart solution for a water drop map because for now the character looks too much oily. Next week end I'll make a break (geek break) and leave the character to model the environment. The last 2 tests, light by 1 rectangular photometric light:

[Zetman_WIP_CP04_1k0.blogspot.com.jpg]Zetman_WIP_CP02_1k0.blogspot.com.jpg