ZBrushCentral

ZBrush to 3ds Max workflow

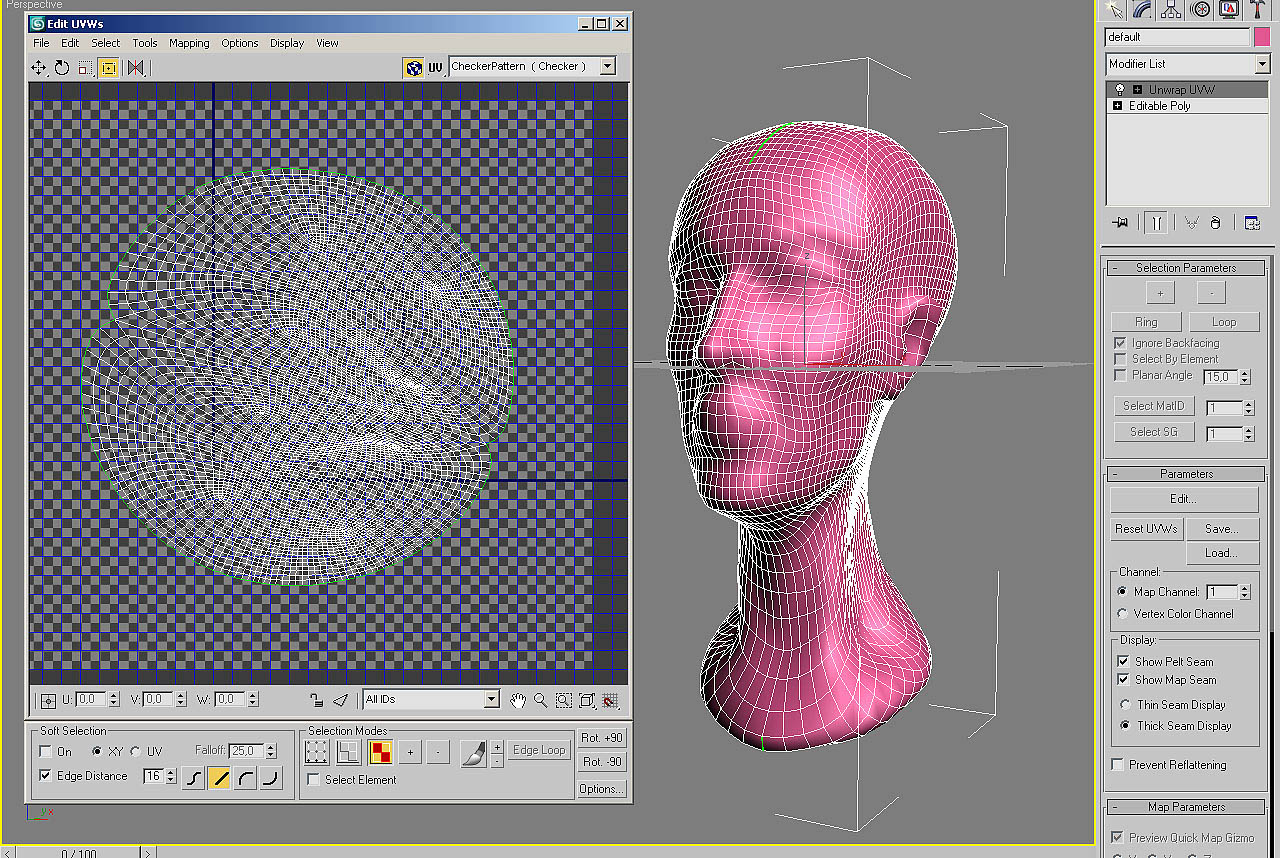
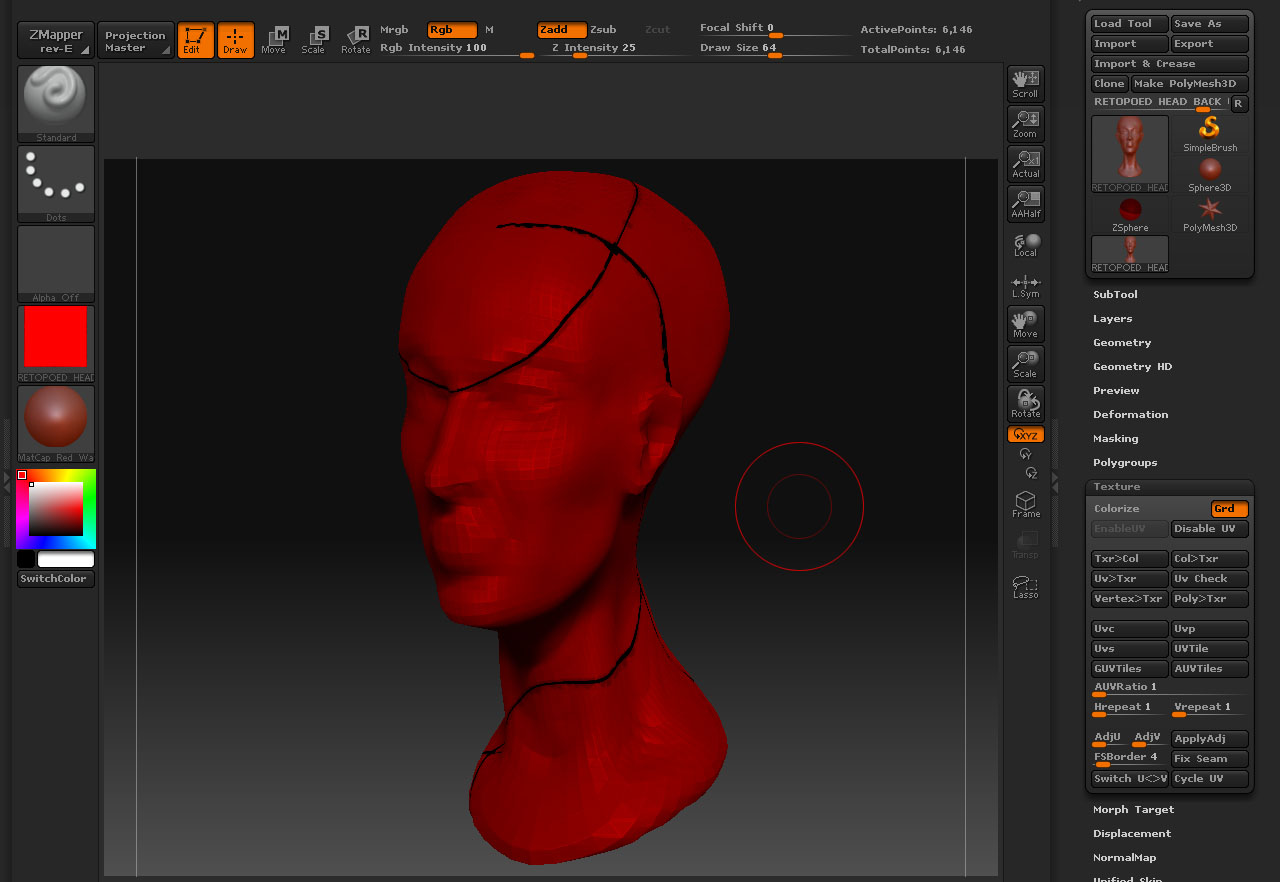
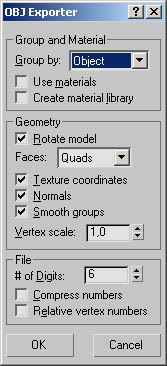
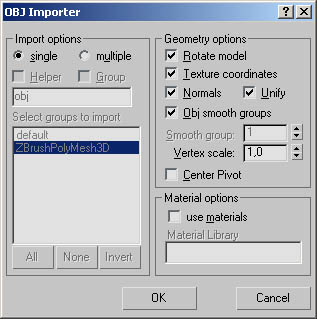
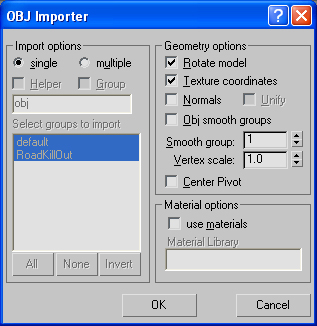
After working through several tutorials on this fantastic(!) forum, I still have serious difficulties accomplishing a functioning work flow between ZBrush and Max generating UV maps. My test model created in ZBrush is a head and I exported it into Max to apply the UVW unwrap modifier. Pelt wrapping gives me a perfect result. Re-importing the obj. with it’s new UV map into ZBrush always shows overlapping UVs (red area running across the texture thumbnail). I might add that I retopoed the head model, so maybe that creates a problem in this workflow. I do want to get a g rip of this with 3d Max because I plan to map and texture much more complex models (characters and subtools). On most of the postings here it seems to be so easy that rarely anybodey mentions the critical point in this process of generating UV maps outside of ZBrush. UV maps that one can paint in Photoshop.

Thanks in advance Zbrushers!

Could you show the model, the mapping, and the UV check result?

this is the max part after successfully applying the Unwrap modifier

Attachments

head with UVs in Max.jpg

And here you can see how completely messed up the UV map is within ZBrush.
I’ve tried repeating this with a simple sphere and had the same result: overlapping UVs and weird lines running accross the model. I actually managed to get some correct UVs with Blender but I want to work with Max not Blender for my more comples projects, so I need to understand and learn this workflow thoroughly.

Attachments

are you retopoing before or after you UV?

I retopoed before. I just tried the whole operation again with Zbrush Demo Head. Same thing happened again. I really don’t know what I’m doing wrong at this point. I even tried the reset xform modifier and ofcourse collapsing the stack before exporting beck to Zbrush.

Could it be that I laid out the seam in the wrong place and that I created stress marks? If so is there a ressource on where to idealy position the seams for things (like a head or a character?)

try it on a simple box or cylinder or something of the like. And what are your export and import settings from MAX?

I tried the import export procedure with a simple sphere, as I mentioned and it gave me the same problem. Here are my Max export settings:

Attachments

max export settings.jpg

Yes and her the import settings (Max):

Attachments

import settings in Max.jpg

Ok, so now I made the UV map in Blender. It worked just fine. So it seems I’m doing something really wrong in my import export settings within Max. Any suggestions?

Thanks guys!

it’s during your import.
try these (i’m pretty sure it was the unify that was killing you.)

make sure you convert to an ePoly as well

[importsettings.jpg]

Well it seems that this doesn’t do the trick. I tried many many things today, exporting back and forth between Max and ZBrush changing all thinkable settings. Bottom line what seems to mess up my UVs is when I apply a UV unwrap or even the regular UV map modifier. Then suddenly ZBrush shows all these wacky red areas. As soon as I delete the UV modifiers and export that same obj. back everything is ok again. Obviously then with the undesireable ZBrush UCs. What is the problem here. Do I need to do something special within the UV unwrap dialogue boxes?

I’m clueless at this point.

you need to collapse the stack inside of MAX…it doesn’t “bake” the UV’s into the model until you collapse…right click on the modifier, collapse all o collapse to.

you can also just right click on the object and convert to>epoly. Then export.

So after scientifically narrowing down the problem I finally stumbled over the solution and you might not believe how silly it was. Actually so silly that nobody seemed to know the issue so here it is:

It doesn’t matter how you export your obj. from ZBrush, it also doesn’t matter at all how you import it (like unify option turned on or off, or mrg in the ZBrush exporter dialogue). All that doesn’t matter when you export your laid out UVs from Max back into Zbrush.
What really matters is what you do with the unwrapped UVs in the UV editor. Remember after pelt stretching is finished (without overlapping UVs!) you always select under tools> Pack Uvs and it automatically shrinks them into your blue square. THAT is wrong!!! You have to shrink it manually a tiny bit more, get the UVs away from the blue border, give them space. THAT was the key. Now I can happily export the Max obj with the new UVs back into ZBrush. And it also doesn’t matter to collapse the stack or apply Xform Reset. None of that matters. At least on my machine, maybe you guys have different experiences, but this was mine. That was like 10 hours “waisted” or better learning curve.

Thanks for your help guys.