ZBrushCentral

zbrush normal is showing the hard edges of my low poly model

Strange because I’ve never had this issue before when creating/exporting normals.

Would anybody have any advice? I’ve looked around but have yet to find a solution to this. Other than incredibly old posts where people talk about using other software instead.

Well it’s 2012 and like I said, I’ve never encountered this issue so I’m a little confused.

I’ve uploaded a sample of my normal map. It seems to show all the grids and hard lines that make up low poly mesh.

Help please? Thank you

Attachments

Corleone 2 512 NM.jpg

where did you unwrap this in?

You might need to check in an external program to make sure the UVs are welded.

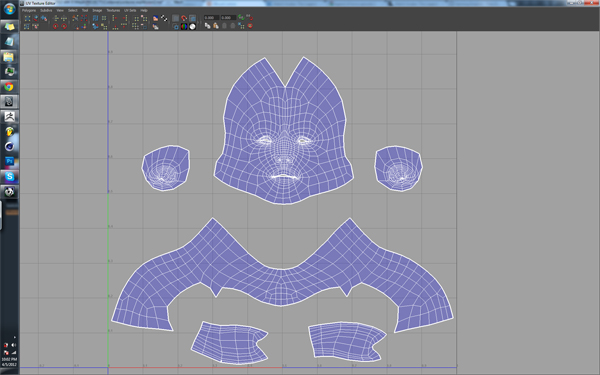
I used Maya to make the initial cuts, then brought it to Headus UVLayout editor to do the actual unwrapping, packing, etc.

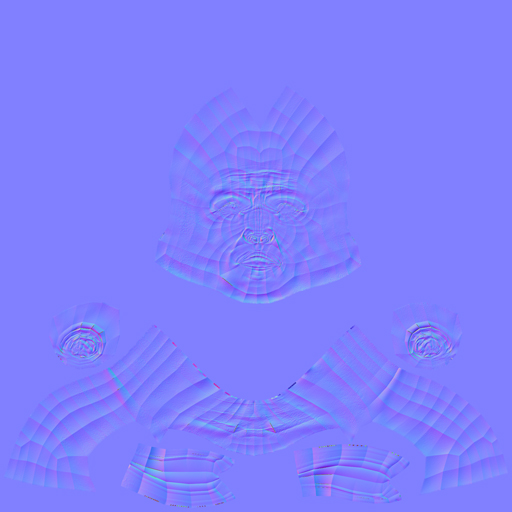
The image I’ve attached is a screenshot (sorry for the low resolution) of the UV layout tool in Maya. It shows my UV’s laid out, with the cuts where they need to be, and I’ve turned toggle texture borders, so the thicker white lines show where I’ve made my cuts on the model. My faces are facing the right direction cause it’s all blue, not red. I don’t get it… I just reimported the obj into zbrush without using GoZ (into the original ztool, transferring all the high detail onto this new(same) obj… and tried to create another Normal Map, to no luck. Once again, I have hard edges running along the face.

I’ve also generated a 32 bit displacement map, and that has no issues whatsoever. No hard edges, nothing. Just a nice proper displacement map. Same with my texture map.

I might give this vector displacement a try maybe? I mean, this is just some portfolio building activity here, thank goodness it’s not work related, but still… very frustrating as I thought I was long over having problems generating normal maps, which before were just a result of me not understanding UV’s very well…

sigh. erm.anymore advice? uvs in maya.jpg

Whats the normal map look like when applied to the exported mesh? You can’t really see any errors when looking at a map alone as the gradients could be correcting smoothing errors present on the mesh.

Safest bet, since you have an external program like Max/Maya, is to bake the normal map there so that the tangent basis used during the bake is synced with the render.

Only do what Cryrid said if you’re going to be viewing/rendering this in max or maya. Polycount has a whole break down of different engines bakes and viewing in different applications/engines. Pick the one that works best for your needs.

Headus is breaking your UV’s. After your alterations inside of headus, take it back into maya and check your edges.
also make sure you have weld turned on inside of Zbrush before you import.

held in tool.import I think…might be tool.export though, don’t remember off hand.

edit: Did you say you made cuts inside of Maya? Like, physical cuts to edges to double up on Verts? Why on earth would you do this?

Thanks for the tips :slight_smile:

I’m going to try out Cryrid’s advice as well as just do a retopo within Zbrush. I’ve never actually done a retopo (or tried the uv master plugin) within zbrush so, I guess this is a good opportunity.

Oh and when I said I made cuts I meant just cutting the UV’s within Maya. I just got Headus a while back and I’m still more comfortable making UV cuts within Maya, then getting something like Headus to stretch/arrange it for me. Granted those Uv’s are far from spectacular, but I swear I had a bigger picture in mind when I was doing it. haha.

Anyways, Thank you everybody for your quick and helpful responses! This board is incredible.

I’m still not completely sure whether it was Headus that broke my mesh or was it zbrush? or did i just do something stupid in Maya? Because I tested out a bunch of other meshes I had that ran through the same workflow (Maya->Headus->Zbrush) and none of them came with messed up normals.