@EricShawn: Thanks for the kind words!
I’ll go through these images one by one:
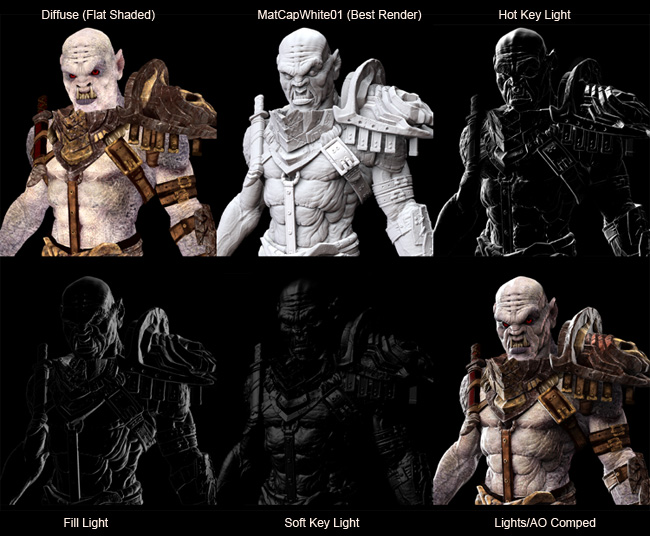
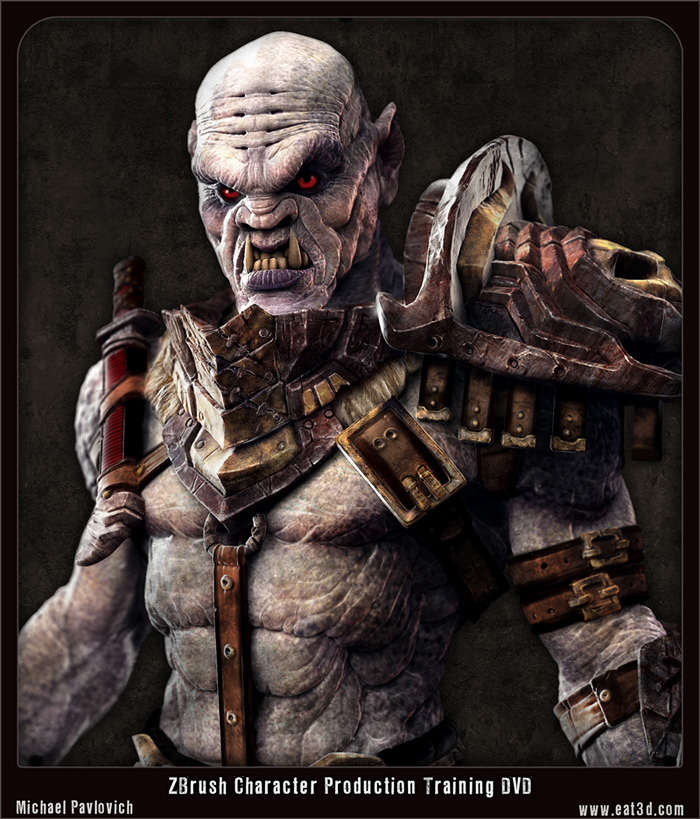
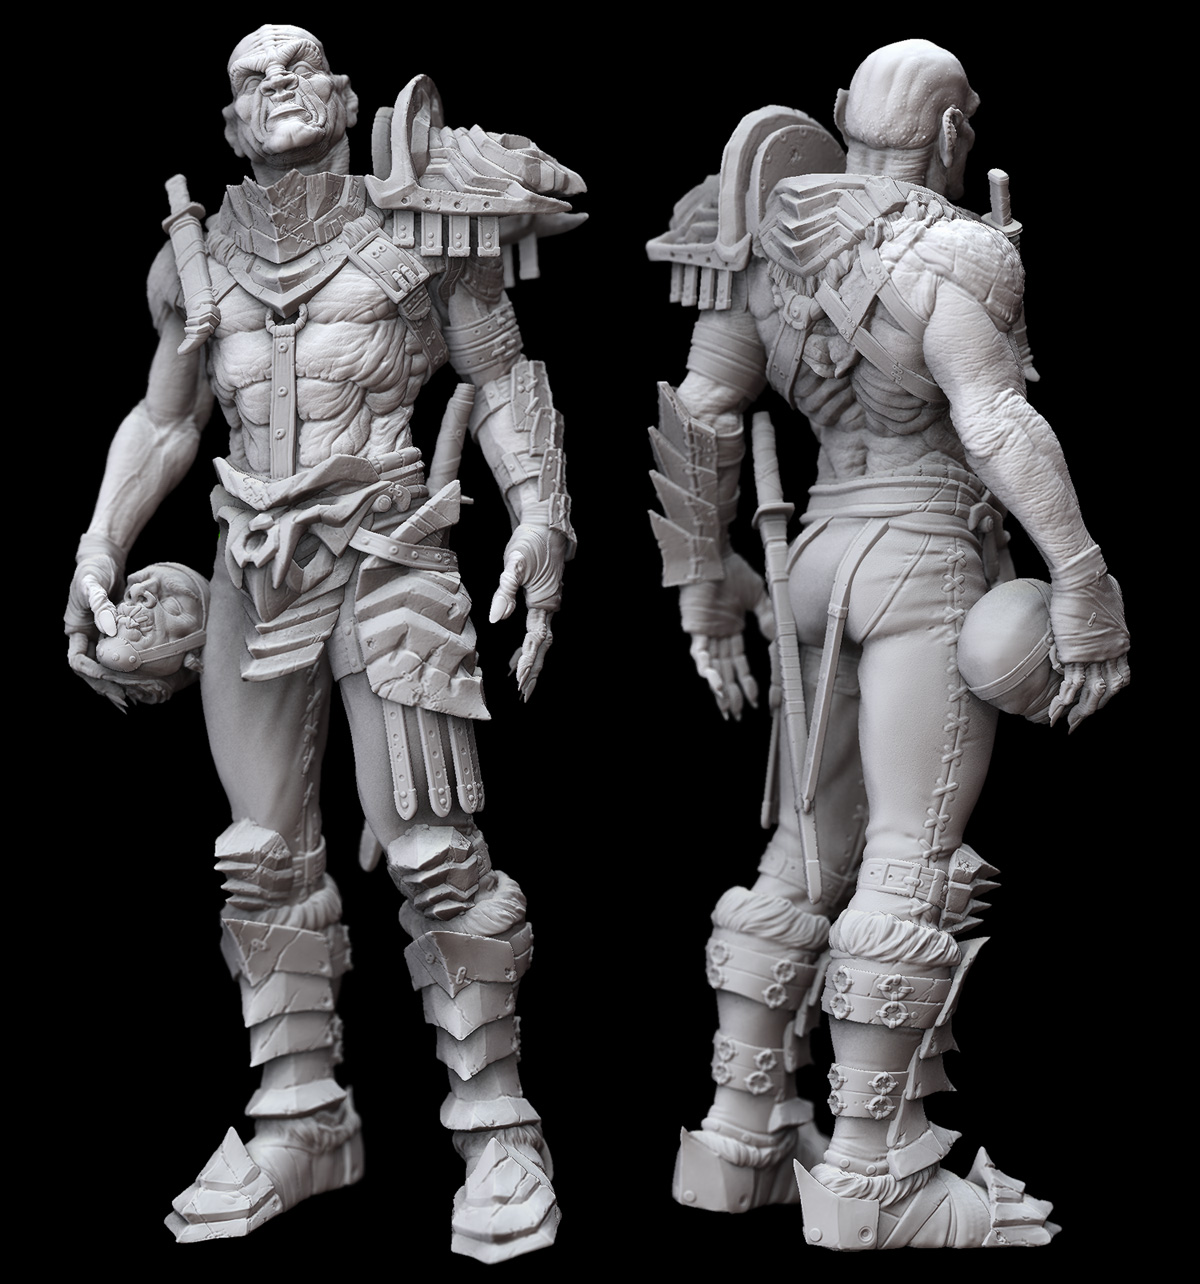
[attach=173580]CompedImages.jpg[/attach]
Diffuse (Flat Shaded)
You can use subtool master to make sure everything is at it’s highest subdivision level, and then use the fill option in subtool master to make sure colorize is turned on for all of your subtools (click the box until the “S” is rainbow colored):
[attach=173588]SubtoolMasterColorize.jpg[/attach]
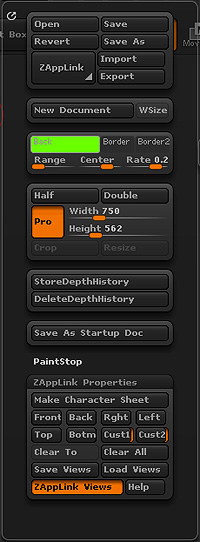
Under the Preferences menu, go to the edit submenu, and at the very bottom you’ll see an “inactive subtool dimming”. I’d turn that up to the highest value, 0.9, to make the differences between the selected subtool and unselected subtools negligible. To get a background you can key from, I choose a bright green color, then make sure under the documents window to turn my range down to 0:
[attach=173581]DocumentSettings.jpg[/attach]
As far as document size, a good rule of thumb (just as when you’re going to export a turnaround) is to make it twice the size you want so you can shrink it down later and make it anti-aliased. You can press the AAHalf button (on the right hand side of your screen) after you make your 2x document and Texture>GrabDoc from that, but I avoid doing that for selection purposes–I work on the actual pixels in photoshop, then shrink it in there when I’m nearly done.
Also, doing a best render on your AO pass will actually kill a lot of jaggies as well, so you might not need to shrink it as much as you think.
Also remember, if your document is too large to fit in your viewer, make sure while you’re working to use the Zoom button (a few buttons above AAHalf) so you can see the entire document. If you want to go back, hit the “Actual x1” button (above AAHalf).
In the Document Settings picture above, you may have noticed a “ZAppLink Properties” menu. ZAppLink not only allows you to texture and stencil in Photoshop, it also allows you to save camera views, which is a lifesaver when you’re doing render passes in ZBrush!
With the entire document viewable (probably using the zoom button, click and drag), position your character the way you want. Then under the ZAppLink Properties menu, click any one of the Front, Back, Right, Top, Cust1, or Cust2 buttons. For a one-off, I usually use the Cust buttons, in case I want to use the Front/Right/Top buttons to make a character sheet (ZAppLink will do that for you too!).
With a Cust button selected, you can safely tumble, scale, pan, and rotate to your hearts content, and always be able to snap back to your render view just by hitting your Cust button! Once you have views, I would suggest saving them out (by pressing the Save Views button under the ZAppLink Properties window) so you can load them in later if you need to make adjustments.
Now that your setup is done, the rest is easy! Do a Texture>GrabDoc and Export your Diffuse pass with the green screen.
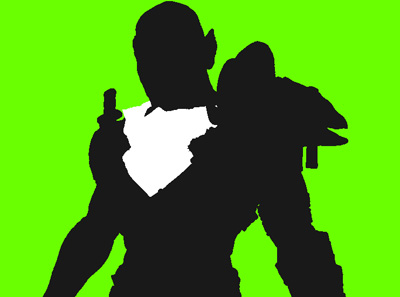
Optional Masking Pass:
Use Subtool Master to turn colorize off for the rest of these steps (like above, in the fill menu, click the box with the shape in it, only this time make sure it’s gray instead of rainbow colored); you don’t need color information any more.
You should still be in Render>Flat shaded mode. Go back to the Preferences>Edit>Inactive Subtool Dimming, and turn it down to .1. Make sure you have white selected as the color in the color picker; what this method allows you to do is click through your subtools, turning them white, all of your other subtools will be near-black, and your background will be bright green. Perfect for getting a selection mask for each of your subtools!
[attach=173587]OptionalMasking.jpg[/attach]
MatCap White01 (Best Render)
Since you have colorize turned off already, all you have to do is go to Render>Preview, make sure your Preferences>Edit>Inactive subtool is set back to 0.9, and select MatCap White01 from the material library. Using MatCap White01, we’re going to make a really nice AO Pass to multiply over our diffuse pass.
I just use the default light with the default light settings and get pretty much the results I need, but feel free to move your light around, change the intensity, and play with the Shadow settings, all found under the light menu (remember, the shadow settings under the light menu are cast shadow settings).
Make sure you press your Cust ZAppLink button every once in a while to make sure you haven’t “jiggled” your subject around, and when he’s set up with your MatCap White01 applied to him, go under the Render menu and hit the “Best” button.
This will kick off a Best render, so give it a minute and you will see it start to update from the top down.
Note: If you’re having problems getting it to do a best render (if you’ve got tons of subtools and maxed out polys for your machine, this can happen), there is a solution: Hide all of your subtools except one when under the preview render. Then, hit the best render. Keeping the best render on, show your subtools one by one–this way, Zbrush only has to update a small portion of your canvas, and you’ll still get the great best render results. Even better, once you have all of your subtools showing, if you have other saved views of your model (back 3/4, front, etc…) in the ZAppLink Properties window, you can snap to these views, and you should be able to get a best render of all of your angles without having any problems. Win!
Once you have your best render of the MatCapWhite01, go to Texture>GrabDoc and export it. Then, make sure to go to the Render menu and click the Preview button. For the rest of the steps, the preview render should work fine. Using this method, your AO only needs to be a best render–this will give you a very high quality multiply over your diffuse, and you probably won’t have to shrink down the final image much, if at all!
HotKey Light, Fill Light, and Soft Key Light
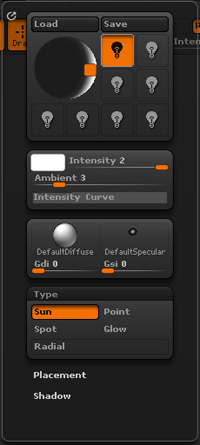
I’ve found that when doing render passes with lights, sending the light “behind” the model usually gives me the best results. To do this, go into the Light menu:
[attach=173585]LightMenu.jpg[/attach]
On the preview lighting ball, you’ll see the orange square–this is what you use to move your preview lights around. To send it “behind” your subject, just click on this orange square–then move it around to get the results you need.
To get just the light information, choose a black color with your color picker. To get the right spec, I usually choose the BasicMaterial, and go into the Material>Modifiers menu (click on “Show Used” to make this menu only show the material applied to your model, useful if you have the menu docked and want to save some scroll time). Under modifiers, I’ll adjust the Specular value, the Specular Curve (making the spec more or less tight), and if I really want to blow out my highlights, I’ll move the High Dynamic Range slider until I get what I want.
You can also increase or decrease your light intensity unti you get what you need. If this is your first time through, I would suggest having ZBrush and Photoshop open at the same time, so you can go back and forth, Texture>GrabDoc-ing what you need and testing it out in Photoshop as you go.
Materials:
Don’t be afraid to try other materials as well! You can overlay reflective metals, chrome, gorilla, etc…and get interesting results in Photoshop. It’s all about experimenting with the layer modes and using your masks to apply it on appropriate objects.
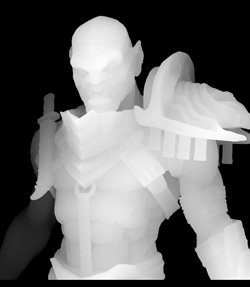
ZDepth:
[attach=173589]ZDepth.jpg[/attach]
Super easy! With your guy on the screen (hit your Cust button to make sure he’s aligned), under the Alpha menu hit the “GrabDoc” button. This will throw a ZDepth 16bit grayscale image into your Alpha window. Export this, and we’ll use it later in Photoshop for some crazy lens blur action.
Photoshop:
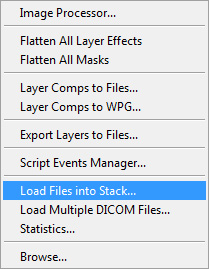
Once you’re in Photoshop, you’re going to want to get all of those passes into one Photoshop file with multiple layers. The fastest way to do this is to use the File>Scripts>Load Files Into Stack option:
[attach=173586]LoadFilesIntoStack.jpg[/attach]
The good thing about this method is that if you’ve been naming your files as you export, it will stack the layers named whatever the file name is. Which will save you a little bit of time and guesswork!
Once you’ve browsed using the Stack script and selected your exported GrabDoc images, hit OK and watch as photoshop magically places all of your images into separate layers. Use your magic wand to get rid of the green, and to make selections based on your subtools if you did that step.
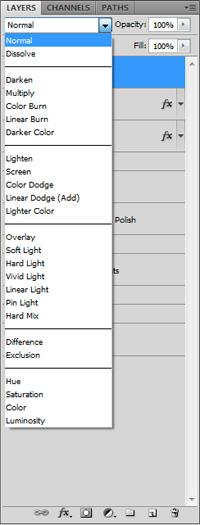
Now! Getting your lights set up on your subject is just a matter of changing layer modes:
[attach=173582]LayerModes.jpg[/attach]
A quick way to switch between them and test their effect is to press the arrow, select normal, then when normal is blue-highlighted, press the down arrow to change the blending mode. Keep switching until you find the one you like. For lights I usually use Screen or Lighten, sometimes using Color Dodge for fill lights, depending on the effect I’m going for.
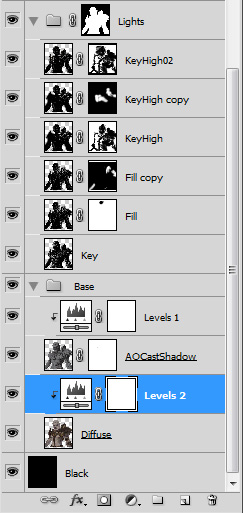
You’ll probably notice that some lights are shining where you don’t want them to. I apply a layer mask to my light layers:
[attach=173590]LayersForCompedImages.jpg[/attach]
Then paint the lights out or back in using black or white and the brush, respectively. This way you’re not actually erasing (or “being destructive”), you’re just creating a mask you can change at any time. You can also use adjustment layers to apply hue/saturation or curves/levels changes to any of your layers, working non-destructively of course.
You might have noticed the little down arrows next to the adjustment layers in the above image–this means that adjustment layer is linked to the image below it, and will only effect that image, and not everything below it as well. To do this, hover your cursor between the adjustment layer and the layer you want it to effect, and hold down alt. When your cursor turns into an icon that looks like two circles and an arrow, left click, and your layers will now be linked! I’d post a picture of what the icon looks like, but it won’t let me screen capture it! :mad:
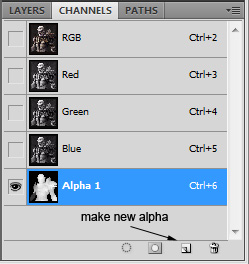
Now the icing on the cake! Select All and copy your ZDepth layer, and paste it into a new alpha channel (go under the channel tab in photoshop, and click the “Create new channel” button; once it’s created, select it (it’ll probably be Alpha 1) and paste it:
[attach=173584]AlphaForLensBlur.jpg[/attach]
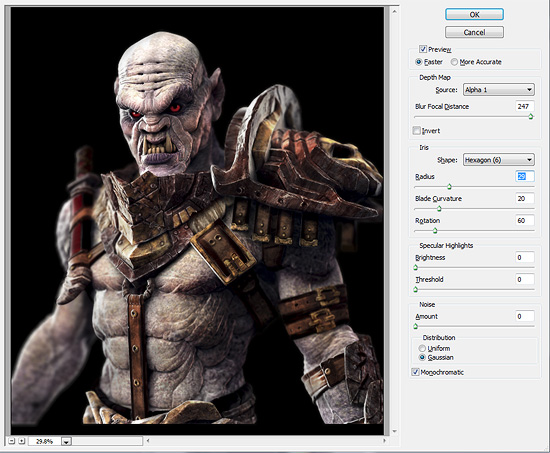
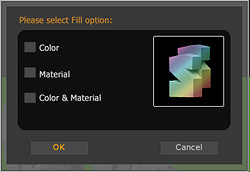
Now, do a copy merged of your subject up to this point, and paste him into a new layer. Go to Filter>Blur>Lens blur, and make sure you have your Alpha 1 selected as the source:
[attach=173583]LensBlur.jpg[/attach]
Use your cursor to click in the image to set your blur Focal Distance (ie, if you want it to be focused on his head, click there), then use the radius to let photoshop know how much to blur based on your grayscale map. To be honest I don’t know what the other stuff means or does (Blade Curvature?  ) but feel free to fool around with those settings. Hit OK when you have a sweet lens blur effect.
Well, I think I’ve rambled on long enough. If you have any questions let me know, or if something isn’t clear I can try and clear it up for you. I’ll also be back around with at least some more images and maybe some other tidbits of useful information 
Attachments

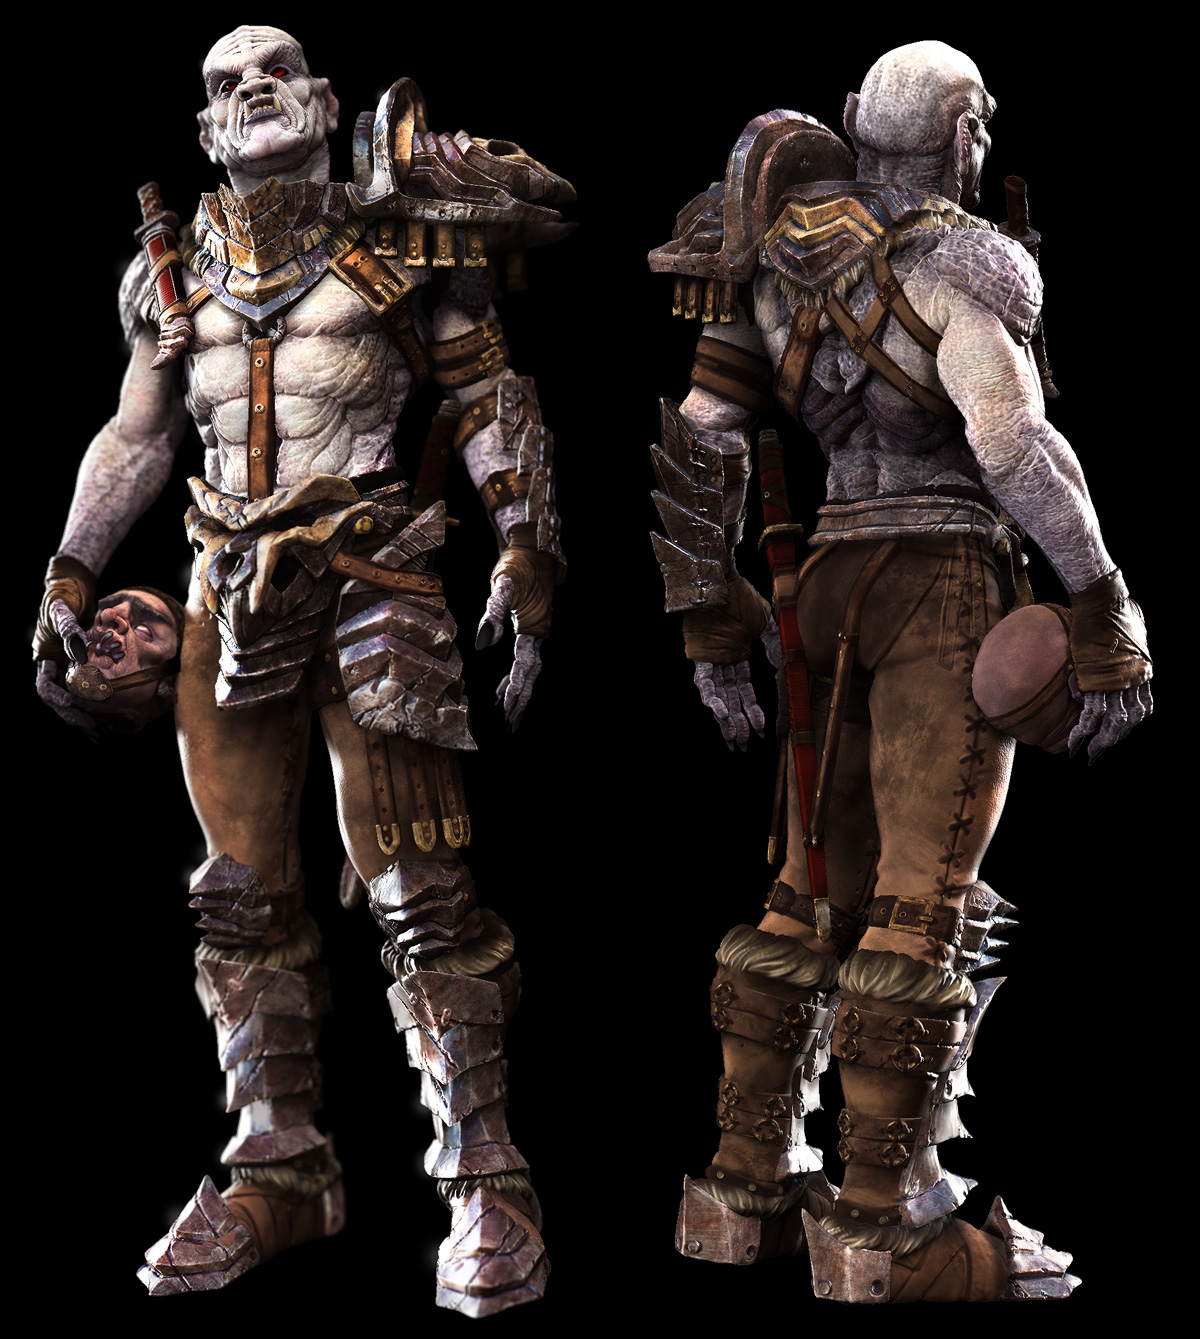
![12_30_zbrush35_character_large[1].jpg](http://www.zbrushcentral.com/uploads/default/original/3X/f/1/f1f99c7c25dd2f2e4e5709c585961dfec75e61b9.jpeg)

