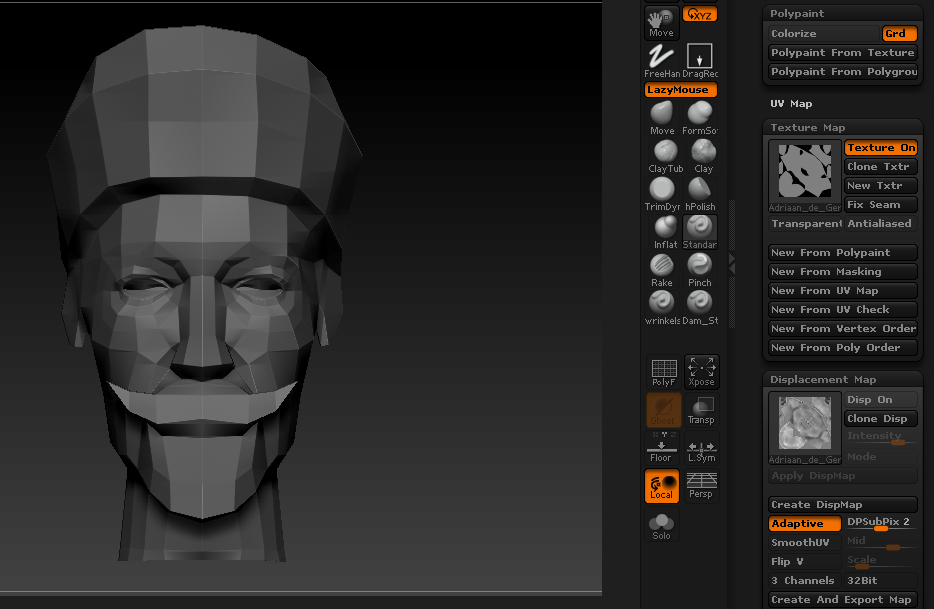
ZBrushCentral

ZBrush, 3ds Max, UV Master workflow problem

Workflow Summary:
Max: base mesh
Zbrush: Modeling and UV unwrap
Max: Combining UV’s from multiple subtools into a common 0 to 1 UV space and reposing
Zbrush: tweaking model in response to new pose
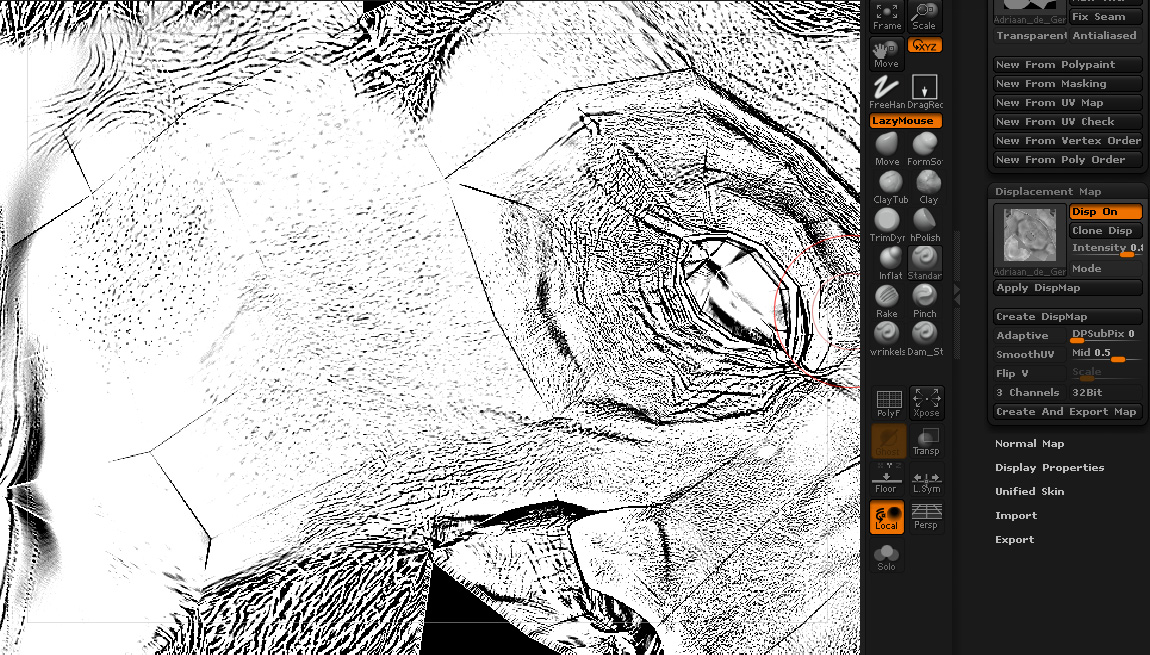
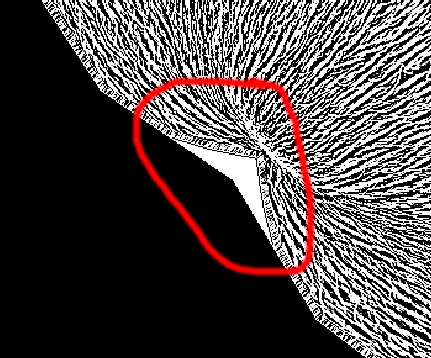
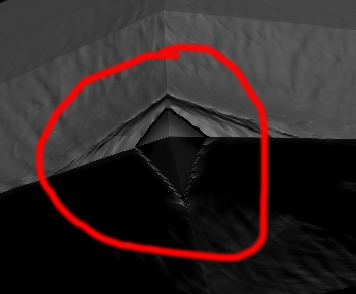
Result: faceted Normal map

More Details:
I made a base mesh in Max, and imported it to ZBrush to sculpt. After sculpting, I created the UV maps for each of the subtools with UV Master (which is awesome). I exported each subtool at the lowest SDiv level as an obj (with txr and Mrg on and Flp and Grp off). In 3ds Max, I laid out the UV’s from the separate subtools onto a common UV 0 to 1 space, reposed the model (without adding any verts or changing the geometry of the mesh at all) and exported each mesh as an obj again. Back in Zbrush, I took each subtool down to the lowest SDiv level and imported the reposed/UV tweaked obj. All of this seemed to go great. (I may not have had mrg checked in the import drop down, I’ve tried it that way since and it doesn’t seem to help)

I then did some more modeling in the highest SDiv levels to respond to the new pose of the arms. The problem occurred when I attempted to bake my normal maps. The normal map is faceted along each UV seem. Bakes in Zbrush, xNormal and Max produced the same result. I tried to unwrap again in ZBrush with “use Existing UV Seams” in UV Master on , but ZBrush kept freezing. I exported the mesh back to Max, and even with the mrg box on, the uv's are all broken. I’ve imported reUV’d models like this from Maya before and it went well. Any thoughts on what the problem is and how I could resolve it?

screenshot?

Here’s a detail of the faceted normal map. I hope this helps:

problem.jpg

For anyone else having similar problems, here’s what I’ve figured out. When I reimported my UV’ed mesh into ZBrush after editing the UV’s in Max, the UV’s were separated. The verts all stayed in the same UV space but each individual UV face was flipped both vertically and horizontally.

I did not have MRG on in the Import dialog box when I imported in ZB, so this is probably the cause the problem. I plan to run some tests to see if having that box checked at the time of the original import solves the problem.

After imported the reUV’ed mesh into ZBrush, I did a lot of resculpting and reposing. So my immediate issue is how to get the work I’ve done to bake into a normal map. So far, the only thing that’s worked is reUVing each subtool in ZBrush. I have tried to copy and paste good UV’s, but that has not worked.

ReUVing in ZBrush will mean losing the edits and layout I did in Max, but it will work for now. In the future, I hope to figure out how to do the initial unwrap in ZB, edit the UV’s in Max to get exactly the seems and layout I want, and then reimport to ZB for baking. Hopefully having the MRG button checked on import will make this possible. I’ll add an update after I run more tests, but would love to hear from anyone else who is dealing with similar issues.

Having a similar prob here but it’s just along my UV island seams, not over the entire face of the model.

Same problem with both Displacement and Normal maps.
GoZ’d the model from ZBrush to Max. Assigned proper UVs, GoZ’d BACK to zBrush and…no UVs.

Then, tried to import an OBJ with proper UVs, and it look like the model took the bait. But on creation of DISP and NORM maps, I get the same result that you have. Each individual face appears to be broken and flipped around.

Please let me know if you’ve made further progress in solving this. I’ll do the same.

~tsp

Here’s a thread that found another possible solution to this problem:

http://www.zbrushcentral.com/showthread.php?p=760126&posted=1#post760126

same trouble here.

LowPoly from Max to Zbrush -> sculpting -> UV Master -> exprot LP Mesh to Max -> combine or relayout UV’s in Max -> Create a Displacement Map in Zbrush to bake matcaps into my texture.
The Displacement map “Displaced” my lowpoly wireframe on some places…?
here’s some screens
you can hardly see it in the DISPMap, but if i apply a outline shader you see it right away. problem is i just need that shader for my model :frowning:

if i put on SmoothUV the “wireframe” lines are gone, but then the Displacement detail doesn’t follow my UV borders. (last 2 screens)

Attachments

Zbrush1 copy.jpg

Zbrush2.jpg

UV copy.jpg

UV-1.jpg

Sorry to bring back an old thread but I was wondering if anyone found a true solution to the problem. I am exporting from max 2010 and I have the same broken UV issue. I’ve toggled the mrg button on in the import settings for zbrush and I’ve also tried the cycle uv’s button in UV Map. I was wondering what others have done to resolve this broken UV issue.
thanks!

when you bake a UV map, wherever you have borders in your UV there will be a seam. Same goes for smoothing groups.
Make sure you plan your uvs and make sure that your seams run along the correct spots in your model. (in a natural break in the model, hidden under an arm, tucked away behind an ear and a hairline etc., etc).

Read up on the way a ray travels while baking the normals from the hi to the lo, and you will understand.

With that being said if it is just a zbrush problem I would make sure that you check merge uvs and double check to make sure that all your verts are merged on the model and the UV map inside of max/maya/modo or whatever DCC package you’re using.