Your absolutely right about the veining. Another feature that is frequently present are small irregular patches with color variance usually white. Of course you might be shooting for “imperial jade” that has no visible flaws, then you’ve already nailed it.
Great job,
Gary
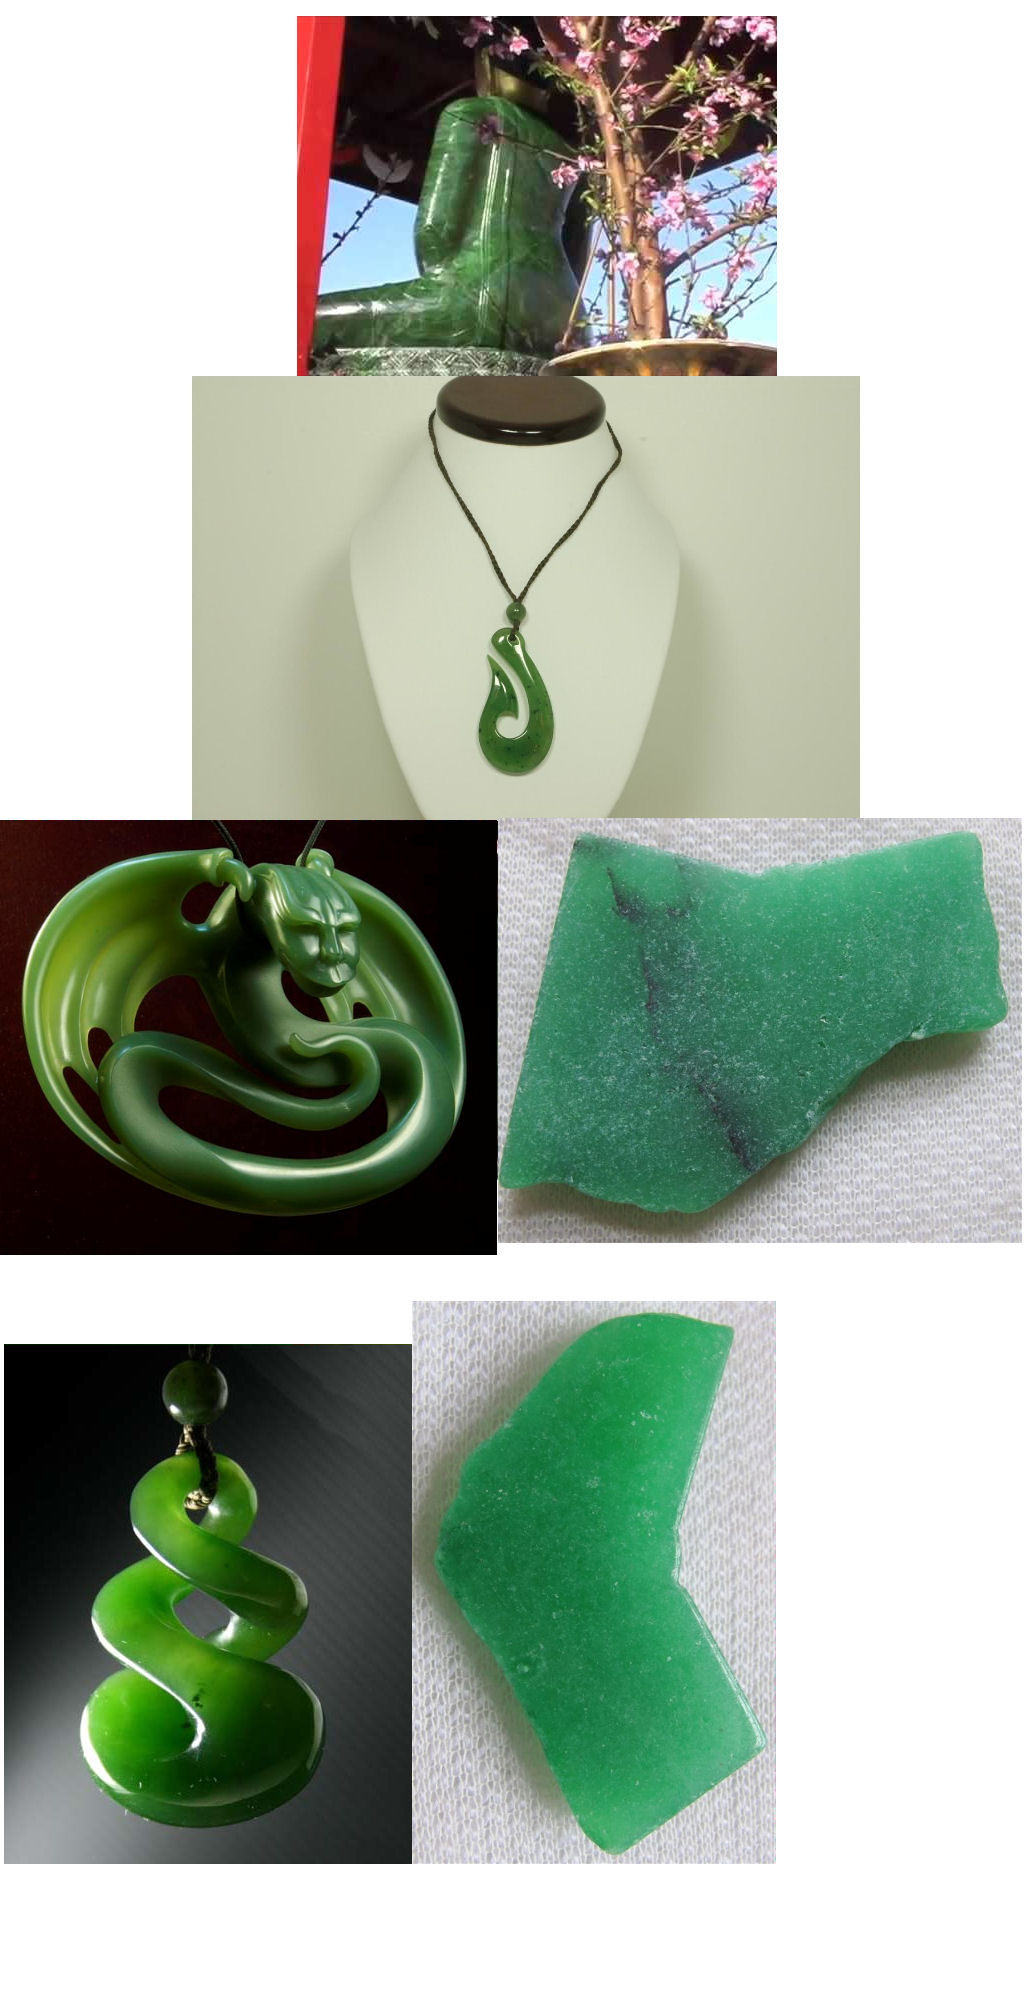
Another Test. Try to perfect ta couple different colors and the cloudy/milky look. Still no painting yet. The patches of variation are several levels of material noise.
Coming along nicely Mah. I’m preferential to the first version, I think I like that blueish coloring a little more. They’re both beautiful materials though, good stuff. The effects from the new BPR and mat settings are addicting aren’t they.
I too like the bluish one a little better. Thing is, there are so many different types of jade that its hard to find one that just looks unmistakeably jade. First one is REALLY close I think. =|
BPR is wicked addictive alright. I highly recommend having create maps on with Mgray, that way you can have a Popup preview of just how much the shadows and ao are affecting the render. Helps tons when trying to figure out dark areas in an sss render.
While everyone else prefers the first. I personally like everything you’ve done! Jade is one of those funny minerals who’s characteristics vary so widely that it is truely up to the artist to sculpt what he/she believes the stone is saying. I’ve seen a lavender and grey cloud dragon that was totally in the rough to begin with. So just bring it on you’ll know the color and translucency when your sculpture tells you .
Gary
I thought on the matter for hours and came upon something interesting. Jade, like Da Vinci =) is like ZBrush, it is up to the artist to find his own truth with observation, functionality and above all, presence of beauty while maintaining simplicity and freedom of expression. Jade can be tricky but, if you know the stone (or crow-quill or app), then you know which qualities you prefer to aid in making your imagination into reality!
Unfortunately, from what playing around I’ve done with SSS materials, I don’t think you can actually have a matcap be the SSS effect. Because matcaps use predefined color and light information they don’t accept the SSS info like they should.
You can use a matcap as the base material, or apply the fresnel effect to it; but for the actual SSS effect you need one of the basic materials, like one of the new fast shaders.
I’ve produced some amazing materials by combining sss shaders with matcaps. Sometimes, dynamic changes when altering blend modes. I have had hours of fun. Love to Frankenstein mats together and see the sss effect on them.
Really wonderful work, Michael, thanks for sharing. I’m in love with your eggbot Any chance you could post a bit on your workflow for that? Cheers, Phil
I am using your Custom Interface and I cant locate your Tut on how to use the Mahcut and MAHsmooth Brushes etc…
If you could please help me on its location?
Below is my specific problem with the straight and narrows. I have watched alot of the Youtube Tuts, but you are the only one to give out the settings!
Thanks
STVGRV
PS
I will bookmark it this time!
Make sure you install the brushes in the …\ZStartup\BrushPresets\ folder of your Z4 Directory. (C:\Program Files (x86)\Pixologic\ZBrush 4.0\ZStartup\BrushPresets)
I actually do not have these tutorial videos finished but I am working on a nice big Mech tut Project (Free of Course) for the community. It will have videos, all new brushes, alphas, materials, and a whole lot more. I have just put it all on hold so I can use Z4r2 and include the new stuff! So, stay tuned!
Nice quick tip though, mask EVERYTHING accept the area you want to work with. This helps protect areas you don’t want disturbed. Also, don’t forget to set you draw size no bigger then the area you want polished. I go half with a large focal length. Last, I’d hate to say it but its true effectiveness is with a tablet, not a mouse. =\
As for a Newbie like myself, I know when watching a tutorial video, it’s great if the resolution is high enough that I can see all the UI’s settings being used i.e., Brush, Draw Size, Intensity etc… Annotating the Hot Keys in use would be nice.
Sorry, I’ve watch a lot of high speed You Tube videos lately.
I appreciate what you are doing to help others and myself.

 The effects from the new BPR and mat settings are addicting aren’t they.
 .
. ](javascript:zb_insimg(‘211715’,‘Jade-Manthis-Composite.jpg’,1,0))

