Sorry I do not. 
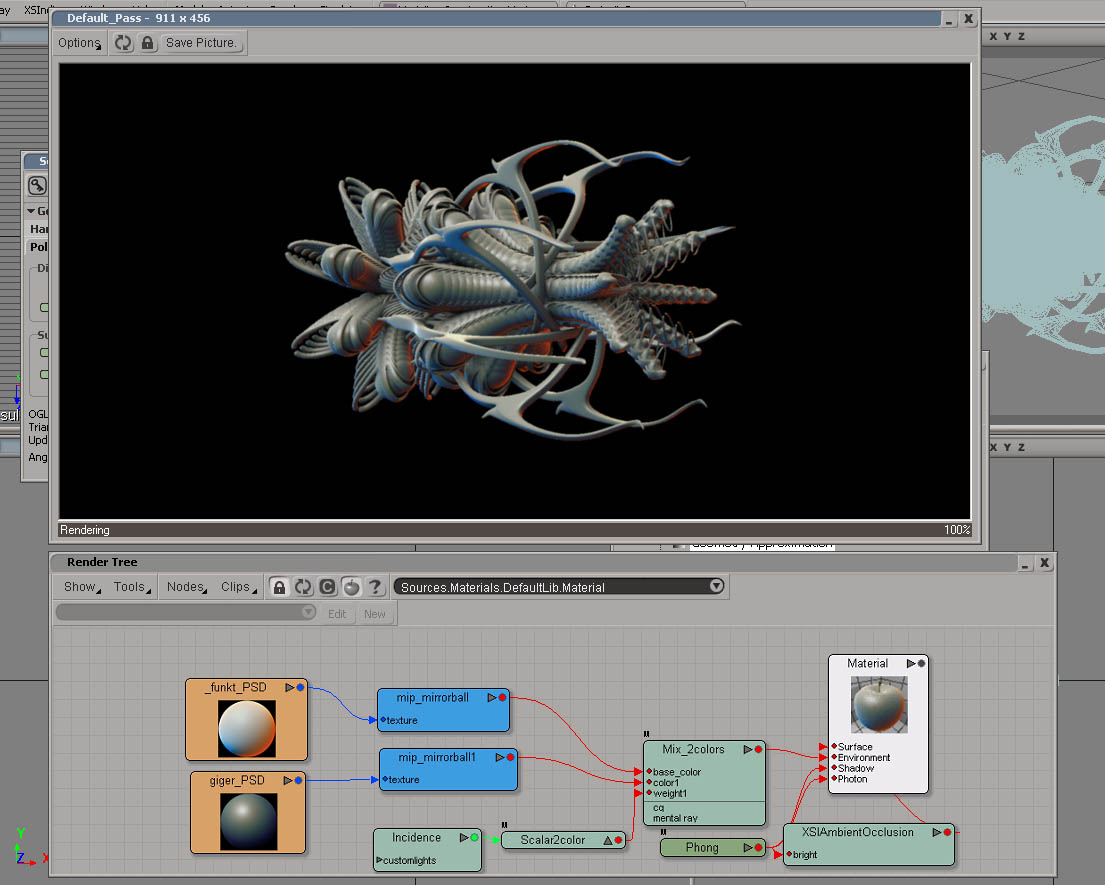
have been playing with this for a while now, the problem is that you cant use cavity maps to drive the mix and AO usually looks weird if used to drive the mix of two mip_mirrorballs. However incidence looks sweet sometimes.
BTW the whole matcap/mirrorball stuff has been around in Max for ages now (since 2004), it started with Master Zaps chromeball plugin, however it is now part of the production shaders. See http://www.master-zap.com/chrome
production shaders explanation: http://mentalraytips.blogspot.com/
My experiments so far seem to suggest that its best to use this technique as a number of layers to composite. Although I usual approach renders like that anyway as it gives much more flexability. This allows you to use Ao passes as masks etc to combine your renders.
Wayne…
yup, thats true. The problem i was having though is that AO is more proximity based than cavity based, thus still a cavity map from ZB would give better results (on complex models i have tried the results were pretty poor, at least compared to the ZBoriginal). Nevertheless you can go very wild and creative with abusing the mirrorball shaders in MR. And obviously its very fast to render even big scenes.
the drawbacks of using it this way are that camera animations are more or less a no-no and that you need to be careful with reflections to not expose the back of your matcaped models (which are black), FG is also a bit more tricky to use.
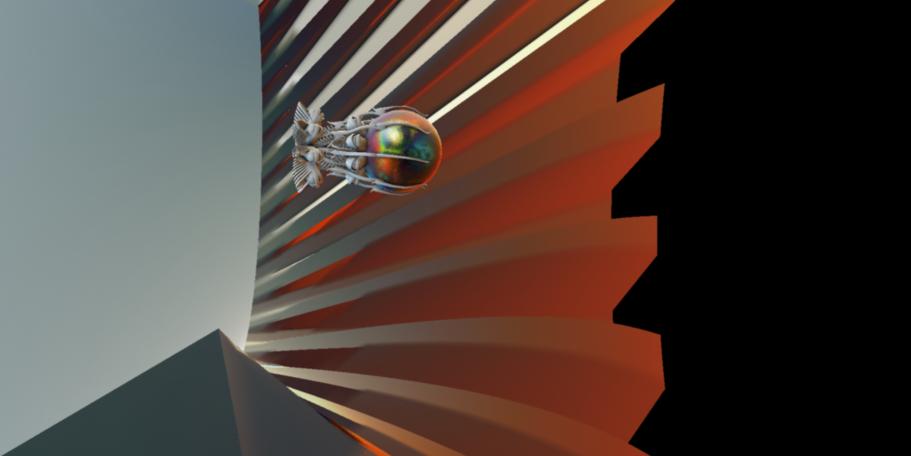
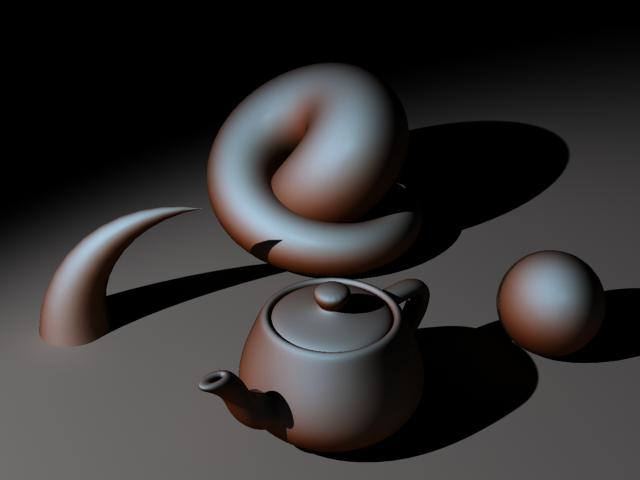
But apart from these weaknesses, which are by design, I rarely do any shader without it anymore  I have already converted dozens of my matcaps to ready to use images. Have attached two renders i have done when i was testing the method, its really fun!
PS: if youre doing postwork, you should even be able to get a replicate of the ZB matcaps, but i havent tried it yet: render 3 passes, two matcap reflection passes and one pass with just the cavity map and no shading, then mix the two matcap passes in post according to the weight that the cavity map pass is giving you
Attachments

:eek: beautiful!
but this works in MR for Maya?
if the mentalray version of maya has those production shader, then yeah, it should.
There’s a thread over at CGSociety that detail how to unhide them in Maya 2008. (This only works withe mental ray that ships with the latest versions as pre MR v 3.6 do not have these hidden shaders.)
Hope that helps.
Wayne…
Norman3d:
Nice thread! As for recapturing any existing MatCap material to a spherical image for export, here is a link that explains the simple ZBrush steps. Hope that might prove helpful.
Sven
I can’t see any Tutorial link in first page plz Update …
Strange… I edited the post. I’ll post it there again, just in case.
Thanx dude ,
I saw ur TUT but I have a Problem with this … I wanna Export Arran’s Bone Materials but They have Bump Maps and I can’t ScreenShot it cuz it has Transparencies …
Here Arrans’s Materials :
http://www.zbrushcentral.com/zbc/showpost.php?p=433323&postcount=1
I really need it cuz I take a part in character design competition and need a an OLD Bone material for Mental Ray …(.MAT)
If the Zbrush material has bump, you wont be able to “project” it in 3dsmax… it will look stretched. There is a possible workaround tho. I would take the texture and add a blur. You can do this in Photoshop or adjust the Blur value in the GreyBall map.
Then I would add a texture in the bump slot. Your object should have proper UV coordinates. You can add a bitmap or could play with procedurals.
Thanks Norman3D this method of having Zbrush like materials in 3ds max 2008 works for me and is another step forward
Attachments
Hmmm… ok, now… how does this work in max2009? Since the production_max.mi states that the "mip_gray_ball "“Included in 3ds max 2009” Although I can’t seem to find it anywhere in the mentalray shaders. Anyone?
Edit: nevermind. Its “environment probe” I think?
yep, thats right 
So… cool. I got them to work, but now how would I apply a texture on top of that? Or, is that even possible? Also, someone mentioned using this method with the sss fast skin shader. Could you please elaborate on that some more?
Anyone?
the only thing i can think of, would be to render separate layers and compose them afterwards.
I sorta figured it out. Still experimenting. For combining with sss fast skin shader, you’ll need this though: SSS Fast Skin+ from zap’s blog which is a modification of the default sss fast skin shader. just put it in your mental ray shader include autoload directory.