Thank you so much guys!
Moni: thank you! what about your 2D work! it’s benne a while that you didn’t post a skecth done in paintstop no? héhéhé any way  happy new year for you too!
Fernando Kuhlmann : thank you Fernando, and don’t worry i’ll have to finish the kid in 3D too… because we’ve changed our mind AGAIN! so the boy wil be in 3D too!
Al.tintop : thank you man!
Etcher : thank you my friend. I’ve to work on a commercial till mid february but as soon it’s done i’ll finish Emrold just for you my friend!! 
Maxinkuk: thank you! as soon as i can talk a bit more of the story (which i secret for now ) i will!
Gentleman: for my new illustration, i’ve decided to redo him from the beginning in order have the cleaner base to work with… and now i’m calm !!!
azcher1986 : thank you
Captain sensible : in fact Crystal palace was one of my reference
Santis : thank you and happy new year for you too!
Now that we have worked a bit more on the project, we have changed our mind AGAIN! The kid, his name is PITO, will be in 3D too…
So i have to finish him in order to use him in all my illustrations (except the 1st one)
I’ve decided to redo him in order to have the cleanest base to work with.
I’ll go back to my low poly to make a model that i’ll be able to use, including UVs and textures ( in order to thank you Gentleman!! ), for all my illustrations
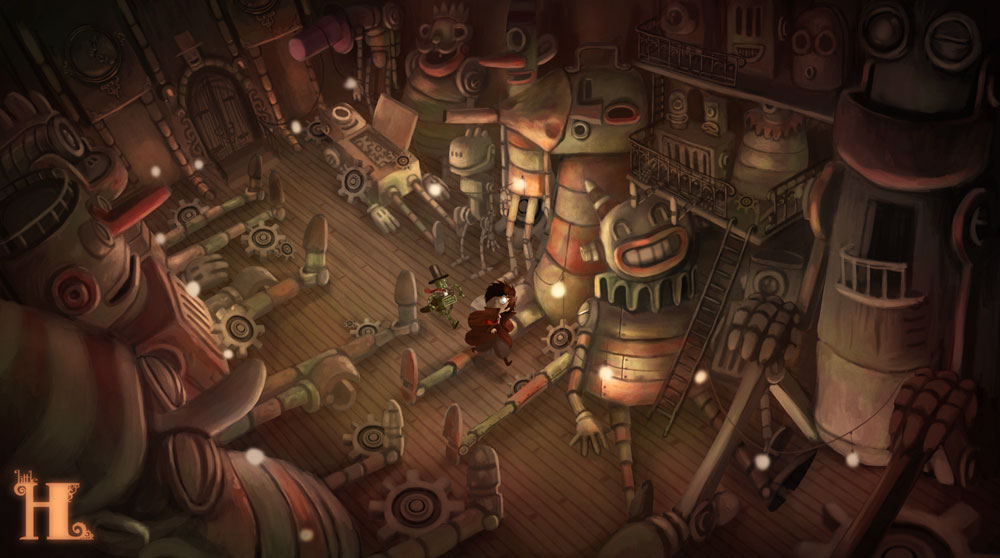
Here is my next pre-production illustration for our project. You can see the boy, PITO and the robot, EMROLD in the center of the image.
Here is how i work :
1/ a quick sketch in photoshop which let me resize the frame till i’m happy. In this picture, for example, i was much more closer of the 2 main characters at the beginning of my skecth and i have decided to resize the picture in order to add bigger robots…
2/ i add a medium gray layer on which one i paint my main lights with 4 types of greys maximum (and no black for now)
3/ when i’m close from what i want, I choose the main color of the illustration to create the ambience.
4/ I start the painting. I use photoshop as i f i was painting with acrylic (from darker colors till lighter colors)
5/ Once all the illustration is done in a monochromatic mode, i add several layers in order to think of the best way to add colors.
6/ I add my 3D characters sculpted in Zbrush, painted thanks to polypainting, Zapplink, Photoshop (a bit of bodypaint) and lighten in XSI.
7/ I refine all the lighting work by using levels, brush and dodge tool in photoshop
8/ I do some final color adjustements if needed
9/ Done!
This was the process of my last illustration, i’ve always worked like that in Photoshop. By following these steps, i’m sure to respect all the aspects of my work, lighting, color, etc…
In my new illustration i’ve just started the step 4, you can see that the foreground is more painted than the rest.
I’ll try to post all the next steps.
Hope this method will help some of you guys EVEN IF IT’S NOT COMPLETLY A 3D WORK …
but it’s always interesting to mix technics no?
a bit of painting with our friend ZB?
isn’t it fun hummm? no? ok…