So I am one of those 1000 that have looked multiple times… sorry man.
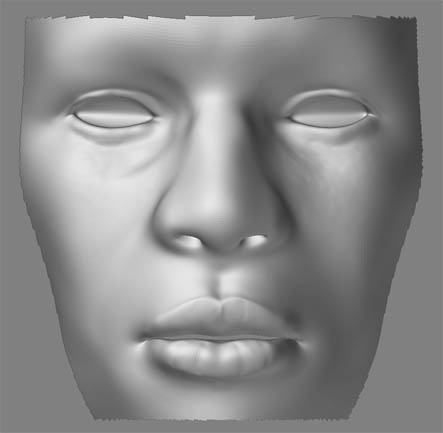
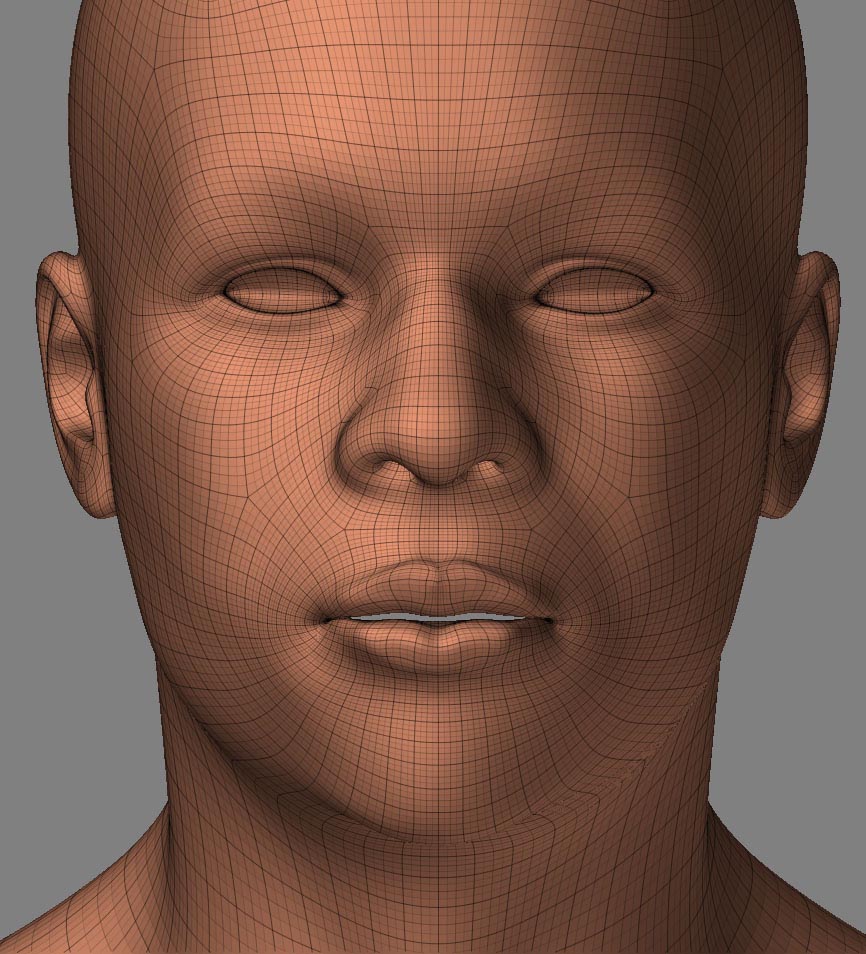
In reference to your lips question… get to the resolution you need to make your crease (personally, 3.3million seems rather obsured to achieve the result… you should be able to make it happen at 1million+… you really only need to go that high if your try the technique womball referenced … sculpting with your texture) … anyway… get to the side view of your model… use the hide functions…CTRL+SHIFT+DRAG to get the green hide box around your lips and it will hide everything else outside. you should be able to perform your crease very easily with just your lips present at the high poly count.
now, your textures… take womball’s advice on this one. check out those tutorials, which are really great. i’ve found though that you should always keep in mind your final product. if you’re doing a headshot that’s closeup, you can really gain a lot of depth and detail from this technique that makes it VERY convincing, but high res source images means HIGH EFFING RES:eek: so that you really get the detail you need. if you’re doing a model that will be viewed from a distance, good normal mapping can get the job done, but do take the time to put the detail in there because it always helps, just when you do those closeups, go the extra distance.
do take those extra pictures of yourself like womball suggested. so far your textures seem EXTREMELY blurred and fuzzy like you have peach fuzz all over your face. NEVER and I mean N-E-V-E-R take your source images in a lighted room. That is the worst place to take images for texturing. Either wait till it is a cloudy day outside or find a room with similar soft lighting and take your images there. The result is a lot less specular roll off , less shadows that are more smoothly occluded, and color at the level it should be. If you were to use the sculpt with your texture technique from images like you have now, you’ll get a bunch of bumps, maybe, and raised areas from where the light was highlighting your skin. not good.
also, on your lips, go back and fix the gap/opening that has been created between them in ZB. my guess is that you modeled this externally and your subd in your external app didn’t show the lips that way… well when you import this new .obj back into your app, your lips WILL be parted, even if you fix the obj in your app, your disp. map will want to make them that way, so extrude the edges on the inside of the lips a couple more times and it should fix it.

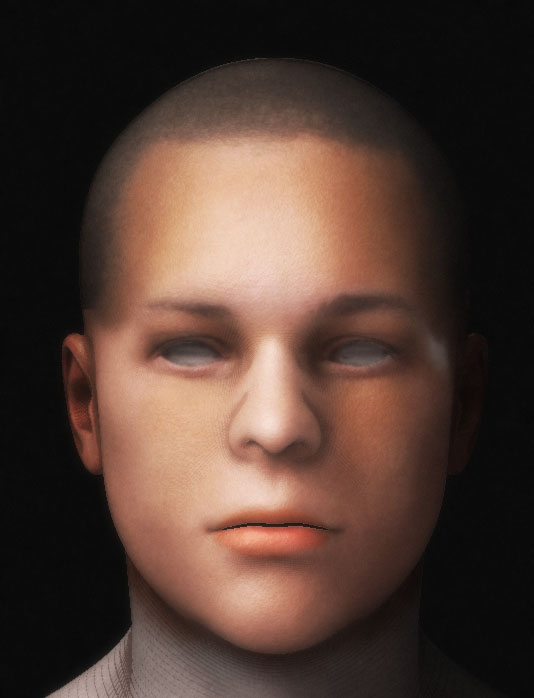


 Some are multiple views from the same person, including you. You might want to take several images of your face from front side, and 3/4 views. Than slap those textures on the model. Than you can use those textures as alpha mask and roughly bring out the tiny details of your face! There are several tutorials on how to do this on the pixologic website. I think this will guarantee that at least 1000 people will look at your work, if not more. And if you can get the eyes right, even more than that. Eyes are very tricky, although you could fake the effect by simply taking an image of the eye and slapping that on the texture map.