ZBrushCentral

Wolverine

Hi all!
This is my first post in ZBC. I’ve been working on this image some while now (on and off). I’m (kinda) new with zbrush, and this is my first finalized work from it. Software used: Zbrush, 3ds max, Photoshop (Textures), After Effects, Melody, Xnormal. Rendered with Mental ray. No retopology, just extported from Zbrush on 3rd subdivision level and rendered with displace-/ normal maps. I know, it’s a cliche but you have to start somewhere… :slight_smile:

I’ll will also post some wip images… at some point…

Cool job. Hope to see more of your work!

So I reached the “some point” and here is the image from the base model(s) that I started from. Originally I planned to make him punish some “always bad things in mind” ninjas but desided to let that idea go for the sake of having even something sometimes finished… :slight_smile:

Start.jpg

Attachments

Comp.jpg

finals.jpg

scene.jpg

Zbrush.jpg

nice work man. keep em coming

Excellent! You have some serious skillz.

I love it without those lense flairs.

Wow!!

Oh nice! Thanks for sharing. Seeing your process motivates me to do stuff myself.

Five stars btw :+1:

It’s a very good sculpt, the anatomy shows you have tremendous skill! Good job. :+1: :+1:

Wow, exquisite work and love the lighting.

I dig the initial set up you had with the other 2 guys getting a beating. I urge you to press on and make it a complete scene. I wanna see the claws coming through that guys spine.

Awesome stuff !
you truly know what your doing:+1: thats one heck of a first attempt :laughing:
the arm hairs in the render…wow.
makes me want to redo my version…KEEP IT UP man.

and ninjas are always cool!

Thank you all for your kind comments! :slight_smile: There’s a lot of stuff to improve but hey, life’s a one hell of a learning curve…

It’s been a while since I had actually modeled/ sculpted something myself, usually I just rig and animate other peoples stuff so I desided that it is time to go back and start to do that stuff again that got me in this field in the first place, before I forget. Also want to improve my material/ texturing & rendering skills. So much stuff to do and so little time!

Akaikami: Since I was doing a cliche character so I thought that it also should have a cliche lens flare… But I didn’t dare to place a spinning 3d logo on it… :wink:

Perspective: Go ahead! Doing stuff is always cool! :smiley:

EricShawn: All thanks to great book called: “Strength Training Anatomy”, it has some awesome illustrations of human anatomy and poses.

matb63: Only time will tell… :slight_smile:

Walt-Art: Ninjas do rock! (But silently) :lol:

Very nice model and final image! :+1:

And more super heroes! Based on image made by Alex Ross. I’m not happy of the pose of Bruce (Seeing it now), I guess that I jumped too fast to finalize this image and didn’t test out the composition and poses enough at the zbrush stage, so it kinda just stayed that way. It doesn’t have that “uff, rough day…” feeling on it… But anyway, desided that it’s time to move on because these are still just for learning purposes. Good excuse for everything! :slight_smile:

Zbrush for sculpting, photoshop for textures, rendered in max with mental ray and hair and fur made with max own hair and fur plugin. Batman’s cape first simulated with cloth, and then further detailing in zbrush. Rendered with linear workflow in various render passes and comped then in after effects. Hope you like it!

Batman_Large.jpg

Oh, and something about that linear work flow: For some reason it messes up the way different browsers displays the image. (exposure curves and stuff) Internet explorer and Opera displays this image like it is in photoshop, but firefox crunches the colors in very unpleasant way.

I need to research this stuff more when I have the time…

Love your gritty batman look. Gd job.
Agreed that Strength Training Anatomy book is a great book to reference.

ohoh!! very cool Stuff great lighting!

awesome batman scene … love it!

Thank you all! And here’s a quick brakedown of the process:
Batman_makingOf.jpg

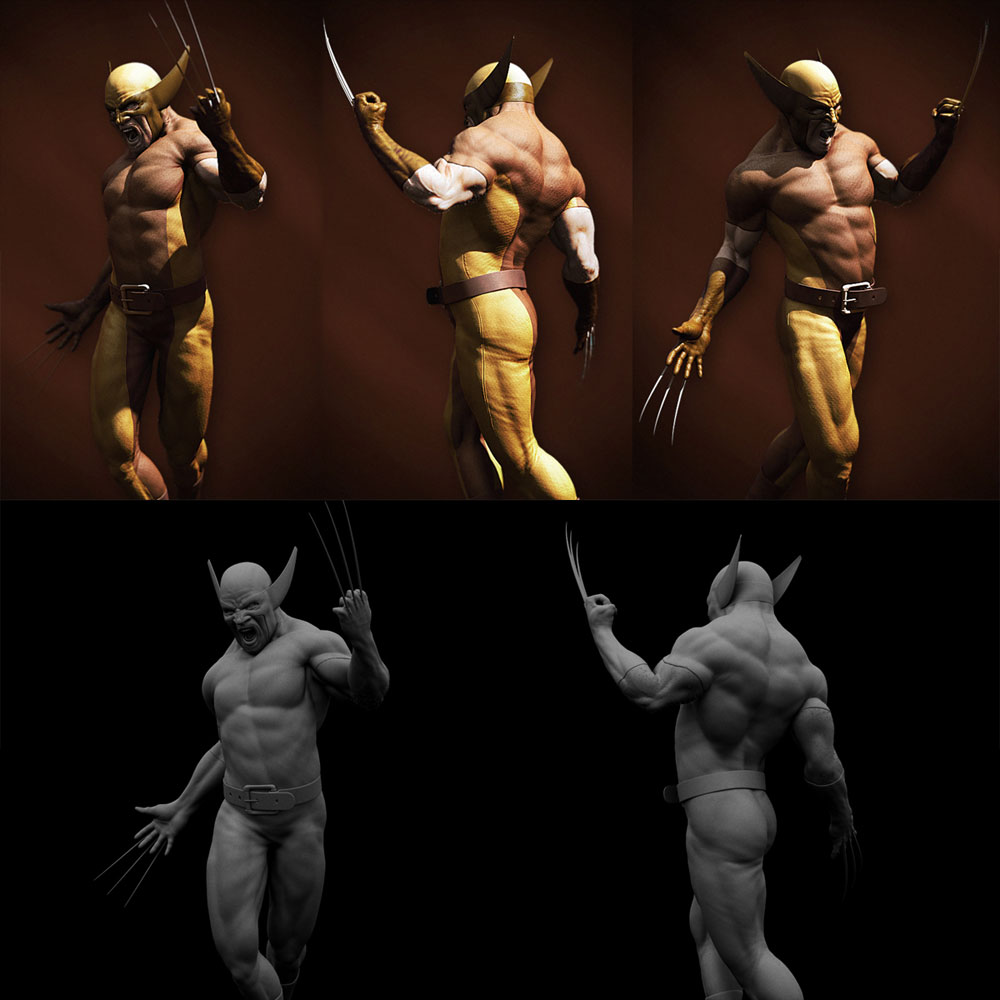
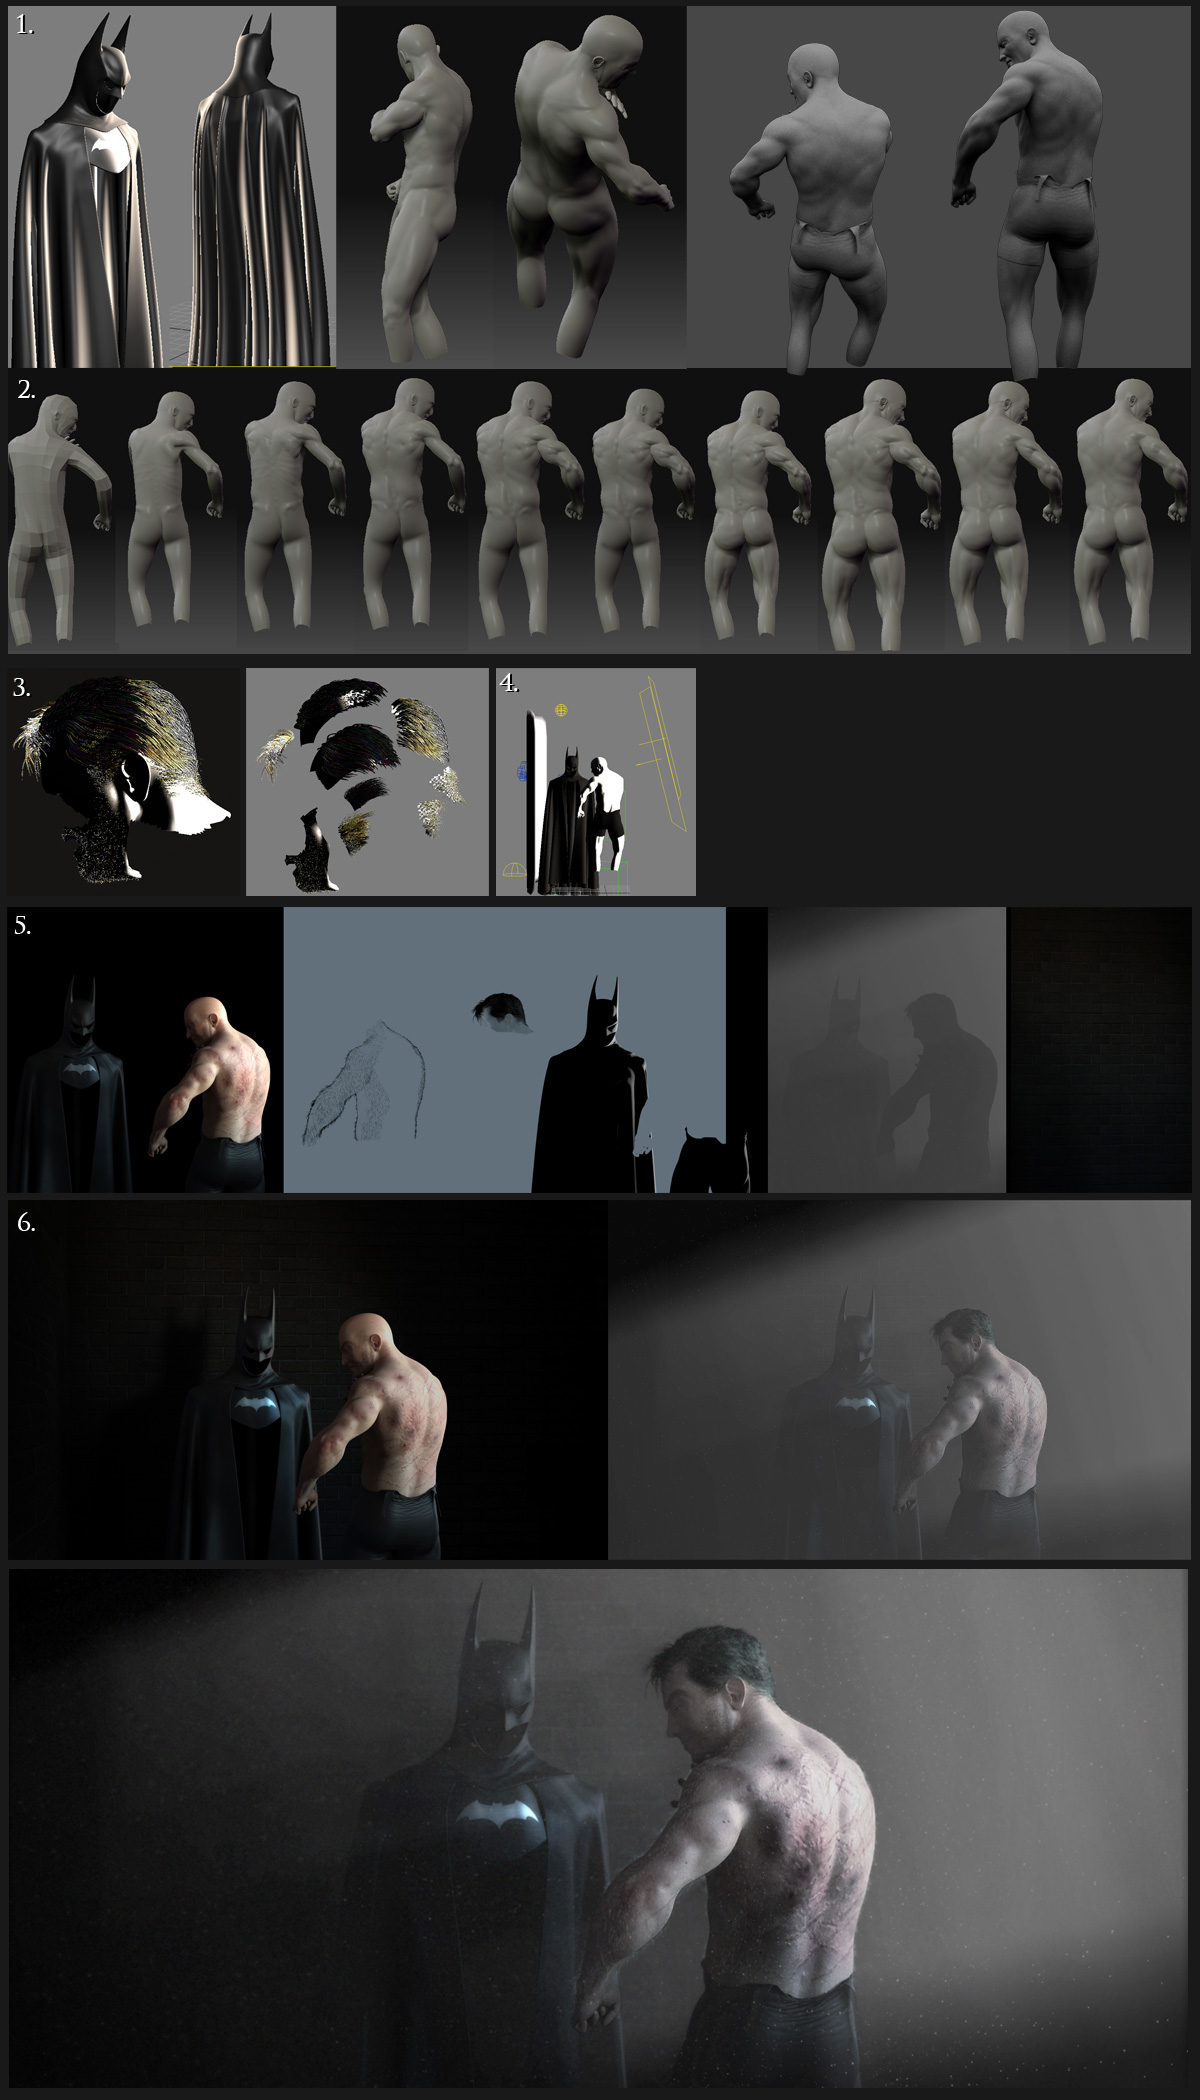
The suit is modeled in max and the cape simulated with cloth. Just a little tweaking made in zbrush for the mask and cape.

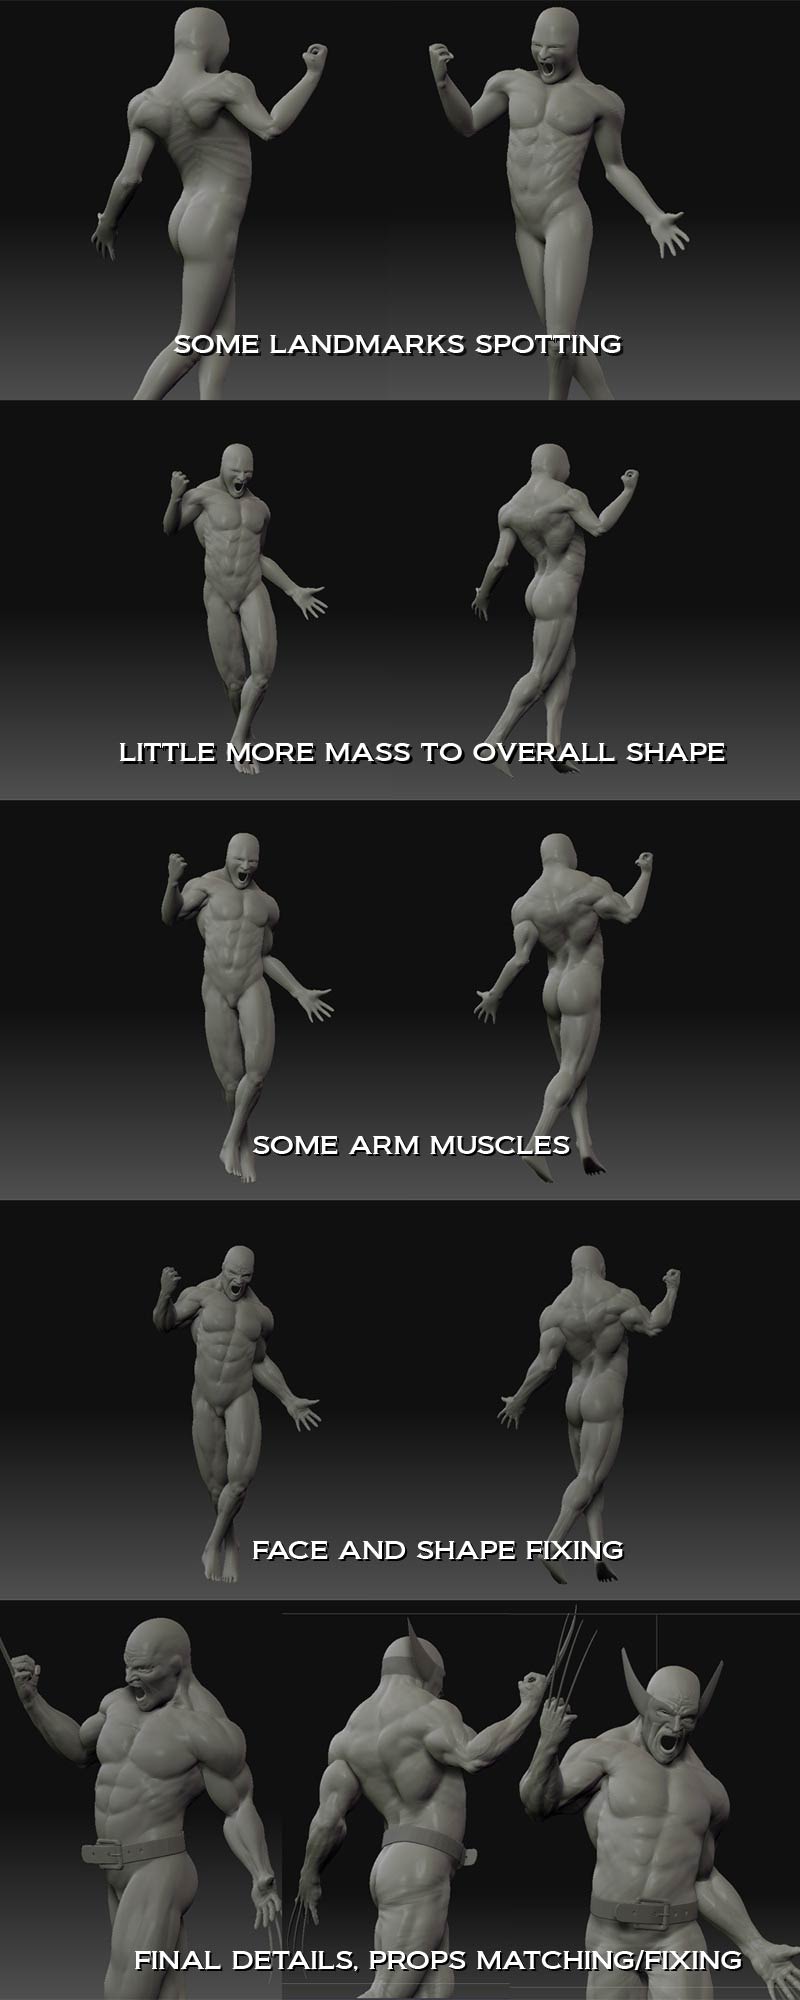
Just a timelapse from the base mesh to finished sculpt. Exported out in 3rd sub level and generated normal maps in max.

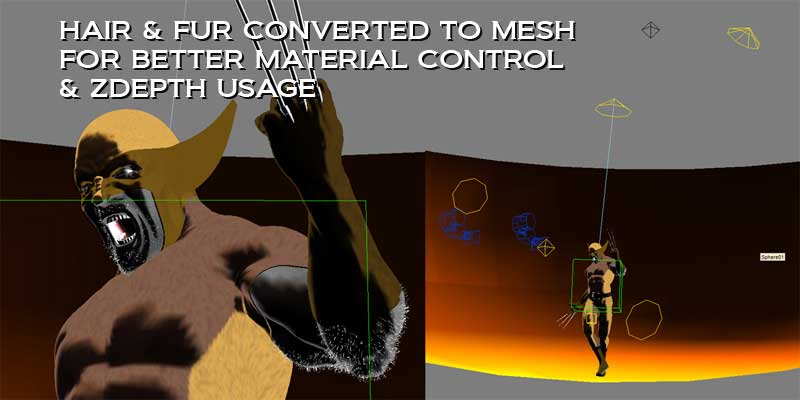
Hair’s done with max’s own hair&fur plugin. I broke the head in several pieces to really control the hair flow without messing some other part of the head. I used some texture maps for hair density and scale and rendered in mr primitive mode so I could use more control over the materials.

Light setup includes one sky light with mr sky shader, 2 sky portals and one photometric light. I rendered with mr exposure control and used the linear work flow.

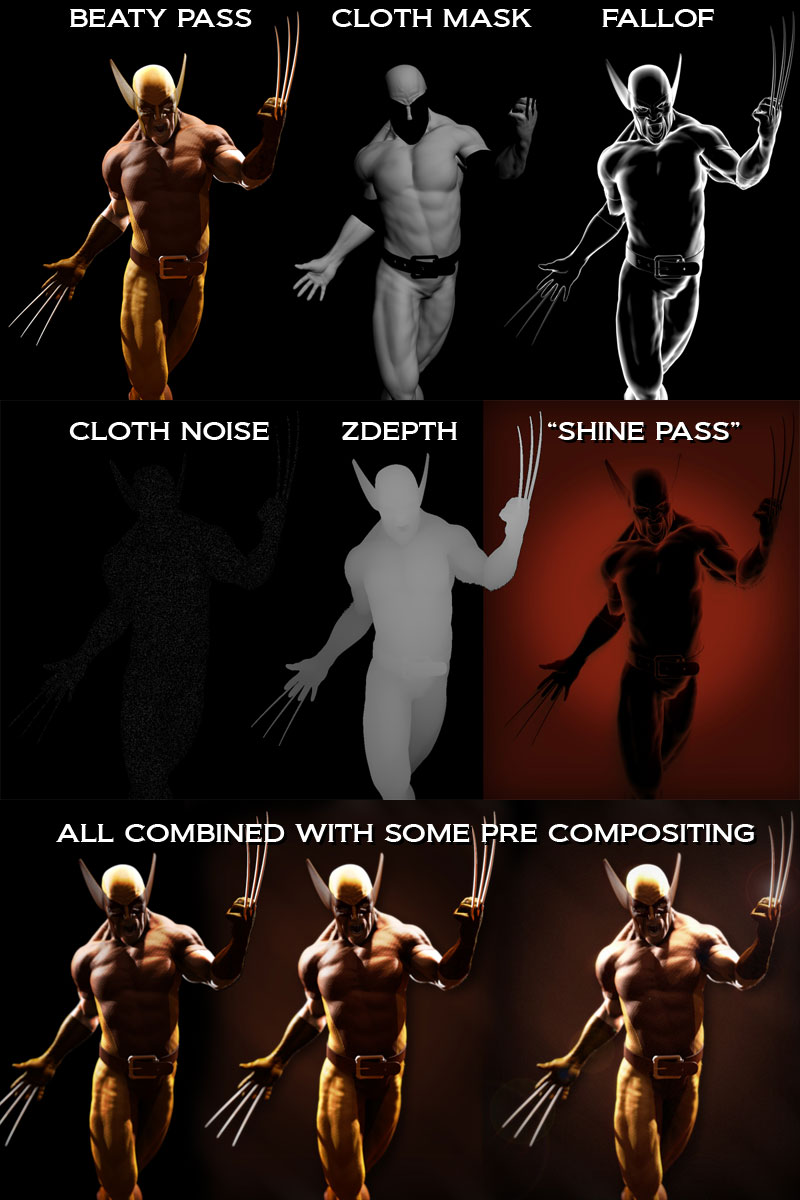
Render passes were: Suit, Bruce, bodyhair, hair, wall, fill light (Scanline) and volume light (Scanline) that I then composited in after effects.

1st image is the “raw” rendered image and the second has all elements layered together and last is the final composition. I made the dof in ae with z-depth channel that comes with in the rla format.

Great work!