ZBrushCentral

WLAD's corner


hi Guys,

Last weekend I tried something that I had for a bit in my mind.
a cabinet, ok, not particularly exciting. But intresting.
I have tried to look on the form from the perspective of a carpenter ( I am one of :slight_smile: ).
So the model should “technikaly” be fairly accurate.

Have Fun :slight_smile:

[youtubehd]1RNWzdwOiK8[/youtubehd]

[youtubehd]2-zguYy-284[/youtubehd]

ffff.29.jpg

Hi guys, happy new year for you all and all the best in the new year.

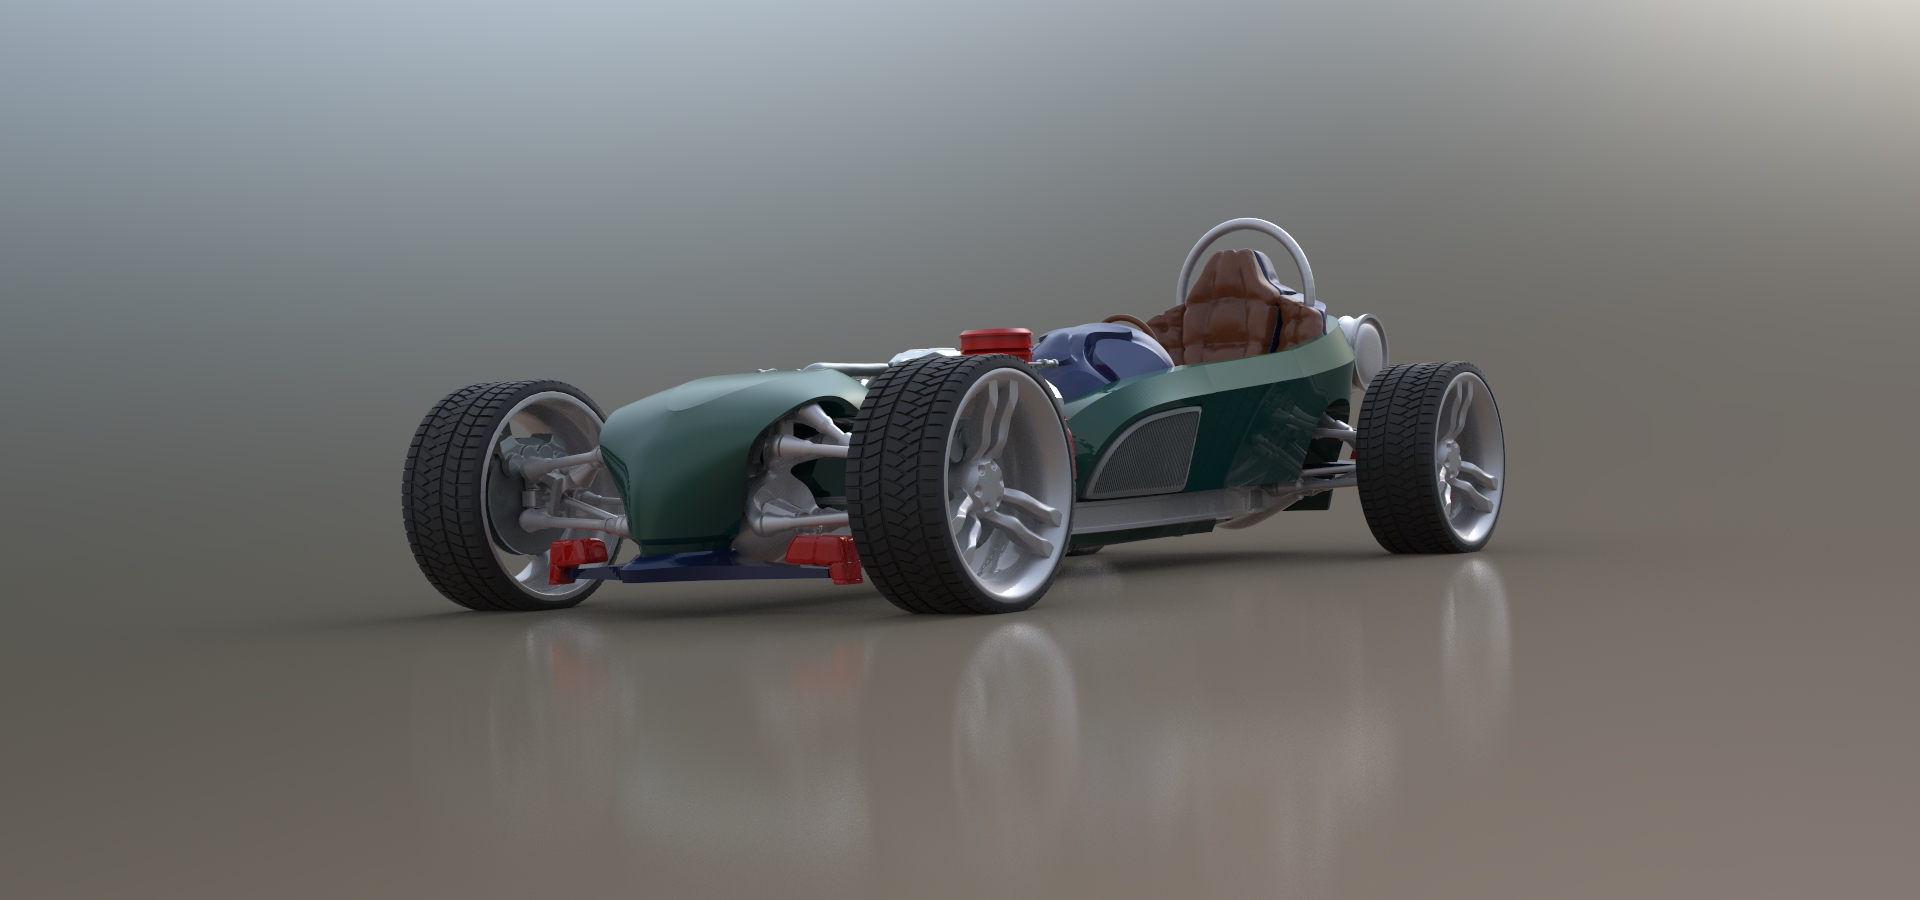
I start the year wit a new projekt. It is a kind of a Hotrod with some strange elements.
So i am not shure what it is going to be. The first few days were a bit strange. I had aproblems to
find the right forms and proportions, so the first two videos a bit boring. Bunt on the third day i got it
more or less how i wont it. But my brain still on vacation :confused: . Sooo … Have Fun :slight_smile:

[youtubehd]7ySNgie7chM[/youtubehd]

[youtubehd]lqh9IrFY_ZU[/youtubehd]

[youtubehd]uI6q-B3_PGE[/youtubehd]

[youtubehd]8gsiQ3RzfXs[/youtubehd]

[youtubehd]gCUwhftRlCs[/youtubehd]

Hi guys,

on the weekend i worked a bit on the car. I fixed the front suspention and made new wheels.
I also changed the front a bit and added some other parts.

have fun :slight_smile:

[youtubehd]1kitTxy5_c8[/youtubehd]

[youtubehd]AbAcesxyfBE[/youtubehd]

[youtubehd]_Umt9z82qHU[/youtubehd]

[youtubehd]fqAvPxvGkg0[/youtubehd]

Hi guys,

the work is going on, and here is day 8.
I still in the block-in, adding parts tweaking forms and other fun stuf.
This time i added the placeholders for the lights and the gas tank. And also worked a bit on the forms in general.

have fun guys :slight_smile:

[youtubehd]qP52qvBmEJk[/youtubehd]

[youtubehd]dreKdgoPbNM[/youtubehd]

hi peopel, here is day 9.
This time i added some deteils to the gas tank and the instrumental panel also still tweking the front.
I added the radiator placeholder ( this will be a hard time, make a proper radiator :slight_smile: ) and i added the brakes.
Also i startet the retopology, at first the frame and the instrumental panel.

have fun :slight_smile:

[youtubehd]2BR6quoiTR0[/youtubehd]

[youtubehd]B6MZWRMyAak[/youtubehd]

[youtubehd]gpWytGK9eos[/youtubehd]

Hi guys, here is day 10.

i made a good step Forward, i built the Radiator and retopologized the front panel and the main body.
there will be some jumps in the second video becuse zbrush crashed alot through the retopologizing.
zbrush seems to have in general some bugs in the manual retopology, so quicsave is your best frend.
:lol:<strike></strike> but even there is one. in the Video you can see that when you hit the quicsave buton, zbrush deactivates the
“edit topology” mode. and some times it resets the Transformation of the initial z-sphere.
when the last one happend and the zsphere get in your way you can fix it by:

  • go to “adaptive Skin” and hit “make adaptive Skin”
  • go to “Topology” and hit “delete topology”
  • deactivate “edit topology” buton
  • move the zsphere out of the way.
  • now hit “seleckt topo” in the topology Panel and selekt the generated tool from step one.
  • hit the “edit topology” buton
  • the work can go on :slight_smile:

ok guys, enough words. have fun :slight_smile:

[youtubehd]4CrqaFOcw-4[/youtubehd]<strike></strike>

[youtubehd]FGOc0fwE55I[/youtubehd]<strike></strike>

Hi guys, here is day eleven.
I retopologized the rest of the “body parts” and the gastank. But there stil a bit of work, especially on the interior.
So the next point on the list will be the transmition, and then the suspentions.

Have fun :slight_smile:

[youtubehd]7IHmuoB2WQ4[/youtubehd]<strike></strike>

[youtubehd]tN5G05gLAJo[/youtubehd]<strike></strike>

Hi guys,
so here are days 12 and 13. Actualy i recordet 3 days but combined them by theme.
Day 12 is about the transmition system and day 13 about the suspension.

have fun :slight_smile:

ps. Sorry guys, the forum do not want to show the wip Image.

Day 12
[youtubehd]H-6DLxOTktk[/youtubehd]<strike></strike>

[youtubehd]E__gLeID06Q[/youtubehd]<strike></strike>

Day 13

[youtubehd]E1J5ku2QxsM[/youtubehd]<strike></strike>

[youtubehd]raXu9JGwoIc[/youtubehd]<strike></strike>

[youtubehd]CN2ZiZiOjUs[/youtubehd]<strike></strike>

Attachments

BathTub.jpg

Hi guys, here is day 14.
Let’s start. I changed the nose a bit, made it a bit more pronounced and worked overall on details ( Part 1).
The rest of the time i spand on the lights, unfortunately i do not like the outcome, so i will work a bit more on them.
And the car has finaly got a name: Egoist ( i think you know why :wink: )

have fun :slight_smile:

[youtubehd]DujBxnWGIjA[/youtubehd]

[youtubehd]cjVGlW2giMc[/youtubehd]

[youtubehd]j_Y4JgL0jTU[/youtubehd]

Hi people,
Here are the videos from this weekend.
The car is nearly don, the only thing i have to do is the steering wheel.
i will lock a bit on the model, until i am shure i won’t change things and then render the final image.

a short description of the videos:

  • 15-1: working on the headlights, doors and brakes

  • 15-2: Retopology of the seats, Spliting the model bei parts for the rendering

  • 16-1: Deteils for the seats, konstructing the mount for the brake caliper
    -16-2: Preparing for the renderig (group by materials), and abit rendering in keyshot

Have fun :slight_smile:

[youtubehd]Thp11RbwW-g[/youtubehd]

[youtubehd]IfqwOWleW6A[/youtubehd]

[youtubehd]DsM-TwUWtOQ[/youtubehd]

[youtubehd]yGmncDW5AUw[/youtubehd]

Hi guys, This time no videos but i want to show you some images i renderd over the last time.

this one i have done just for fan. a guy at work asked me to do one for them :lol:.

Hi guys,

so … the Egoist done :).

Have fun guys :slight_smile:

and the turntable:

[youtubehd]aYauAeSicok[/youtubehd]

Hallo people, the journey goes on :wink: and i started a new project.

The idea is that the vehicle is a havi armored and havi guned squad transport for 4 units.
One driver one guner and 2 asaults. The form itself derives from the name :lol:, also it starten actually quite normal.
And the name came from my military time. I did my duty on a tank and
the older guys caled them Iron pig. And this vehicle is going to be a smal tank.

and so may I introduce
[FONT=arial][FONT=arial narrow]IronPig
have fun :slight_smile:

[FONT=arial]and the video diary if you like.

[youtubehd]rtR6HvEJN1E[/youtubehd]

[youtubehd]_O-DhjayLto[/youtubehd]

[youtubehd]w9JkxrUKiKA[/youtubehd]

[youtubehd]vm9vdJPNEIA[/youtubehd]

[youtubehd]_xjmtQZJuWQ[/youtubehd]

[youtubehd]eYRkonCkw-4[/youtubehd]

[youtubehd]Sl8MLA_Hqw8[/youtubehd][FONT=arial]

day 8_1.jpg

hi guys, here is an update on the project.
Lest time i uploadet the videos i was a bid lasy, but here you have.

day 6: sketching the waepon mount
day 7and 8: retopology the main body

have fun :slight_smile:

[youtubehd]FlPqyyFqZ4U[/youtubehd]

[youtubehd]VnEyhew3wg0[/youtubehd]

[youtubehd]ejde_AJ3c0Y[/youtubehd]

[youtubehd]v88aDCpW85E[/youtubehd]

[youtubehd]dvlVx7aG5b4[/youtubehd]

[youtubehd]_T-qSsBJ4_0[/youtubehd]

Hallo people, here is an update on my IronPig.
The past time i spand mostly on the suspentions. They are nearly done but need some tweeks.

have fun :slight_smile:

[youtubehd]qeguugYA_bs[/youtubehd]

[youtubehd]gwD-mETdH-Y[/youtubehd]

[youtubehd]cmmShhUCwk4[/youtubehd]

[youtubehd]z7BTApVcKIE[/youtubehd]

[youtubehd]RouHkiKdrUk[/youtubehd]

[youtubehd]tXxoaNvExyw[/youtubehd]

JapKückMesser.jpg

Hi guys.

Today i was in a kind of “make a Japanese kitchen knive” mood.
And here you have.

have fun :slight_smile:

[youtubehd]HXe2ypb5qDw[/youtubehd]

[youtubehd]kU_qWITc1Sw[/youtubehd]

[youtubehd]L7EuV5tFdqE[/youtubehd]

Hi guys, after a side step here is an update of the IronPig project.
The main topick was the wepon mount and some geometry fixing.

day 14-1, 14-2 and halfe of 14-3:

  • waepon mount, eye cameras

day 15 and the end of 14-3:

  • fixing main body geometry (after a little mistake i made :cry:)
    is boring a bit, but when you have nothing beter to do :).
    but i used the opportunity to give the parts a proper depth.

have fun :slight_smile:

[youtubehd]4sZnTZXBwFw[/youtubehd]

[youtubehd]bF7UenNxFk0[/youtubehd]

[youtubehd]-J-Yt0E5qOU[/youtubehd]

[youtubehd]X9D8htZv4kE[/youtubehd]

[youtubehd]Ovhu4HrMfng[/youtubehd]

Good morning ladies and gentlemen,

here is an update on the IronPig. The last time i worked on the gun.
The gun was a bit to “ordinar” from his design so i rebilded it.
And so day 16 (1 and 2) is all about sketching a new deign,
and day 17 (1 to 4) i spand retopologizing the gun.

have fun :slight_smile:

btw. i thought a bit about posting videos here. And i should have don this mutch earlier :).
Insted of posting each video separatly i will post the playlist.

[youtubepl]PLCe1Do8q9eJ9sMIfAgLuyKUAbst0gPttE[/youtubepl]

day 19.jpg

Hi guys,

here is an update on the IronPig.

day 18:
on day 18 i made the armor plating on the main body. I recordet not the whole proces because i dont wont you to watch me pushing vertices for 6h :).
But i recordet a few plates so you can see the steps. at the end of the video i adden a test turntabel i rendered.

day 19:
today i added the tail (com. aerial) and the tusks (a kind of a forcefeald projektor)

the only things to do left now, are the door handels and a bit plate fixing on the suspentions (and a bit posing).

Have fun :slight_smile:

[youtubepl]PLCe1Do8q9eJ9sMIfAgLuyKUAbst0gPttE[/youtubepl]

Hi Guys,

here is the final rendering of the IronPig. I tryed a few angels, color and light combinations but i didn’t like them.
So in the end i went to a macro like shot and all in clay shader. The idea was to make some kind of a diorama.

Have Fun :slight_smile: and cu. on the next one