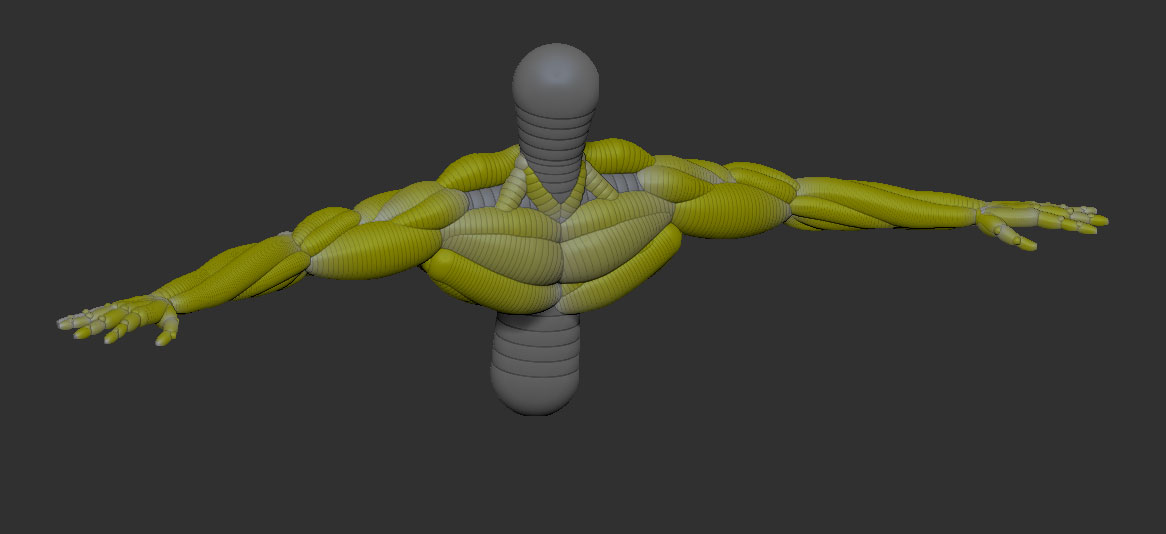
Attempting to skin this with adaptive skin -
Attachments
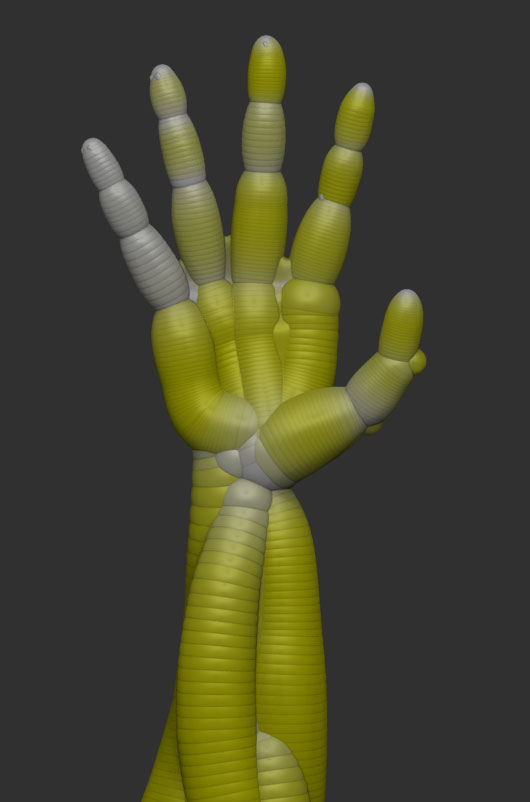
Attempting to skin this with adaptive skin -
Adapative skinning is not as accurate towards zsketching as unified skinning is. Any “protrusions” that deviate too far from the underlying traditional zsphere rig will be lost. You might have luck if you increase the density of the adaptive skin, but you’ll probably find you have to alter the structure of your Zsketch, or the size of the underlying Zspheres, or maybe add a couple more Zspheres to catch the detail there, or both.
As far as the unified skin, did you try increasing the resolution? Also, be sure to generate the skin from within Zsketching mode, as skins generated outside that mode dont seem as high of quality.
Sorry i couldn’t be more help.
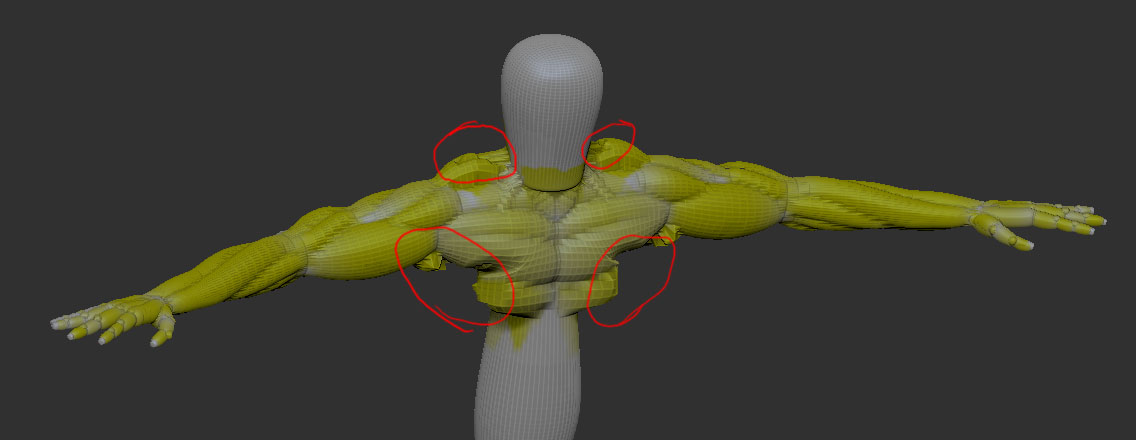
That’s okay. I’m thinking maybe I might have to add more traditional zsphere armatures underneath each of those chest and shoulder muscles. What do you mean by generating the unified skin within ZSketch mode exactly? I was previewing the skin while ZSketch was turned on I believe. Is there some other way I should try it?
No, that’s right. I was just saying it is technically possibly to generate a unified skin outside of Zsketch mode, by pressing “make unified skin”, even though you are previewing it in the adaptive skin mode associated with traditional zspheres. For some reason the quality is not as good when you do this.
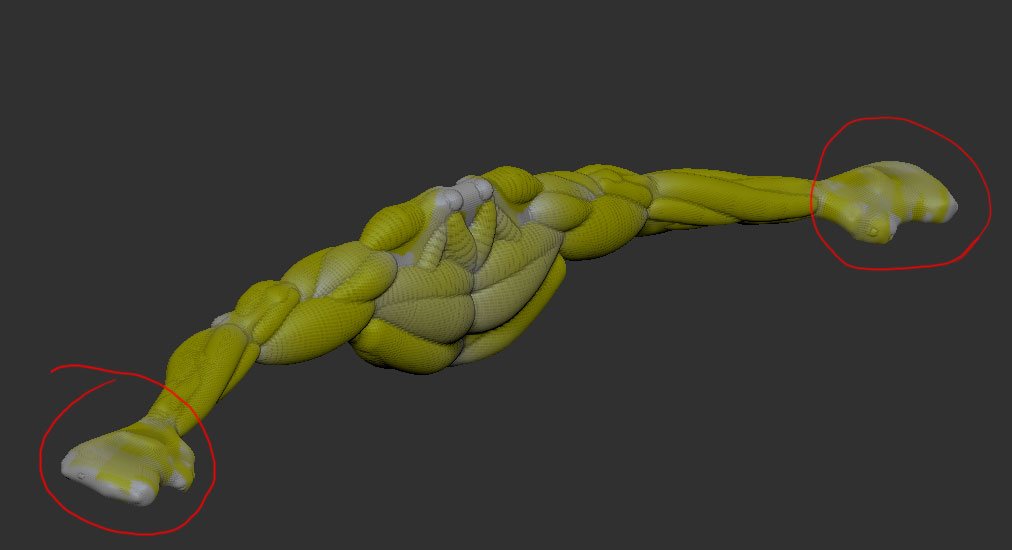
I dont think this is your problem with the hands. I dont know what is up there…usually unified skinning is pretty good at picking up that detail if you turn the resolution and density up high enough, even close together like those fingers. It must have something to do with the way you’ve drawn out the sketch spheres.
Lol, you know what? It was the resolution that was screwing up the hand in Unified Skin. I thought resolution was similar to subdivision, so that’s why I did’nt mess with it. Anyways I had to put it up all the way to 600 to make the hand skin properly. It actually renders a lot faster than Adaptive, and requires less subdivisions but still looks hi-res.
I hope you won’t mind if I tag a noob question on to this:
My impression is that, when working with zspheres (not zsketches), when I preview a skin (by pressing A), the default is an adaptive skin. So, if I go to Tool>Adaptive Skin and move the Density slider, I see the change in my preview. However, if I go to Tool>Unified Skin and move the Resolution slider, I see no change in my preview.
Not so when working with a zsketch. In EditSketch mode, I have access to the Unified Skin sub palette. In EditSketch mode, if I press A to preview, go to Tool>Unified Skin, and move the Resolution slider, I see the change in my preview. Meanwhile, the Adaptive Skin sub palette is grayed out. Through an incisive application of logic, I conclude that, while the default preview for regular zspheres is Adaptive Skin, the default preview for zsketch is unified skin.
From these observations, it follows that I can make a unified skin in EditSketch mode by simply hitting the Make Unified Skin button. But how would I make an adaptive skin, given that the Adaptive Skin sub palette is grayed out? Of course, I can leave EditSketch mode, and make an adaptive skin for my regular zsphere armature, but how do I project the zsketch into an adaptive skin?
The Pixologic tutorial on ZSketch first treats unified skins then goes to adaptive skins by saying: “Now, when we press A, we get an adaptive skin.” May be I’m missing something, because I have no clue as to why A now previews an adaptive rather than a unified skin. How do you make that happen?
Doc Pit