ZBrushCentral

Weird Displacement Map Glitch

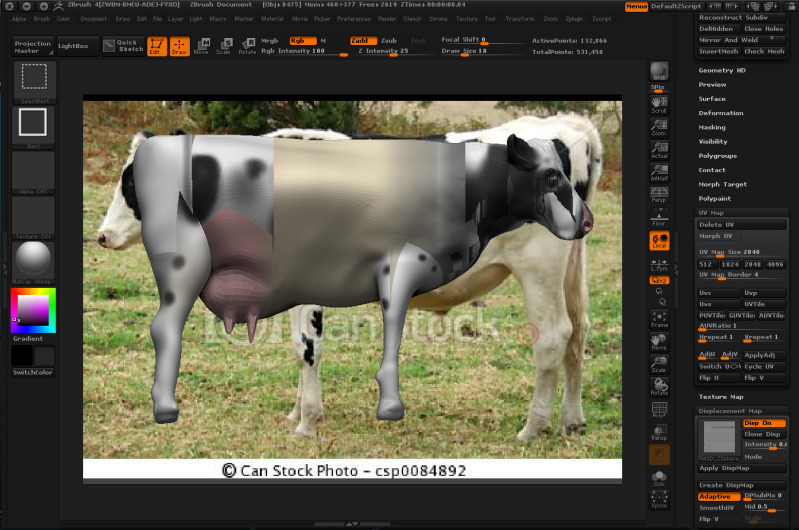
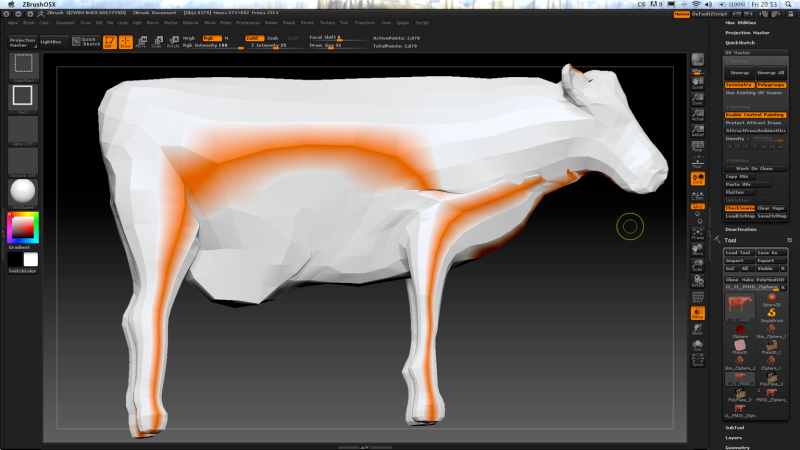
Not too sure whats going wrong here, but whenever I try and make a displacement map so that I can bring my model over to another 3D program, the texture goes all glitchy, and the displacement file doesn’t even look close to correct, its just all grey. Any idea what I’m doing wrong here? Any help id greatly appreciated.

Attachments

cowdisplacement.jpg

This might be caused by your UV map. Check your UV map in ZBrush. Go to Tool > Texture Map and click ‘New From UV Check’ button. If there is any red in it, your UV map is no good. One cause of a bad UV map in ZBrush is UV islands touching the edge of the map. All UV islands have to be set in from the edge a bit.

I don’t quite understand to be honest… I tried the New from UV Map, and yes I got red bits…amongst other colours. In fact, this is what I got. Forgive me, I don’t know much about displacement mapping, or mapping at all to be honest!

cowdisplacement2.jpg

Click ‘New From UV Check’ not ‘New From UV Map’. See image below. Also see my post #10 here.

bad uv.JPG

Okay I did the New for UV check and yeah the hole model turned red. How do I fix this? If I click morph UV it seems to flatten in a way that doesn’t look right. I’m afraid I don’t quite know how to do displacement mapping at all!

If your going to export maps out for use in other 3D apps, you will need UV’s on your model first. I would suggest you watch the UV Master tutorials in ZClassroom.

Thank you very much, you’ve been very helpful so far.

I had a go at the UV Master and played around but the maps I was getting were weirdly shaped, so I followed this tutorial to find out how to do it properly.

ZBrush UV Painting Pipeline
http://www.youtube.com/watch?v=dhO6PGx9x3c

I copied everything he did but on my model, including using a photo to paint from. But for some reason now I can’t apply any of the control painting in UV Master. Neither Protect, nor Attract, show up on my model, it remains completely white!

Any idea why this might be happening?