ZBrushCentral

UV Change From Maya Damages Polypainted Texture.. Please help!

Hi Guys,

Please help. I designed a human character and made the UVs with Maya but they weren’t good enough as you can see with the overlaps in the first image. I ignored this and went on to polypaint all the skin details in ZBrush. After polypainting, I decided to make those UV corrections in Maya by exporting the lowest subdiv out of Zbrush as obj and into Maya. I made the UV corrections in Maya and exported as obj back into Zbrush. I copied the UVs from the modified obj (via UV master) and pasted them into the old subtool, but when I morph UV (second image), it looks completely messed up and checkered!

Please how can I correct this?

Thanks.

Attachments

Screen Shot 2017-01-17 at 10.22.17 AM.png

Screen Shot 2017-01-17 at 10.22.50 AM.png

I might have encoutered the same problem with 3Ds max, but i haven’t find a way to correct it. About the causes, i was only able to find this : http://tech-artists.org/forum/showthread.php?2254-zbrush-gt-3dsmax-gt-zbrush-broken-UVs

My advice would be to recheck you UV in maya make sure of the position of your polygone (somehow it’s like they keep the original form of the UV, but a poly from the hand can be on the head in my case)

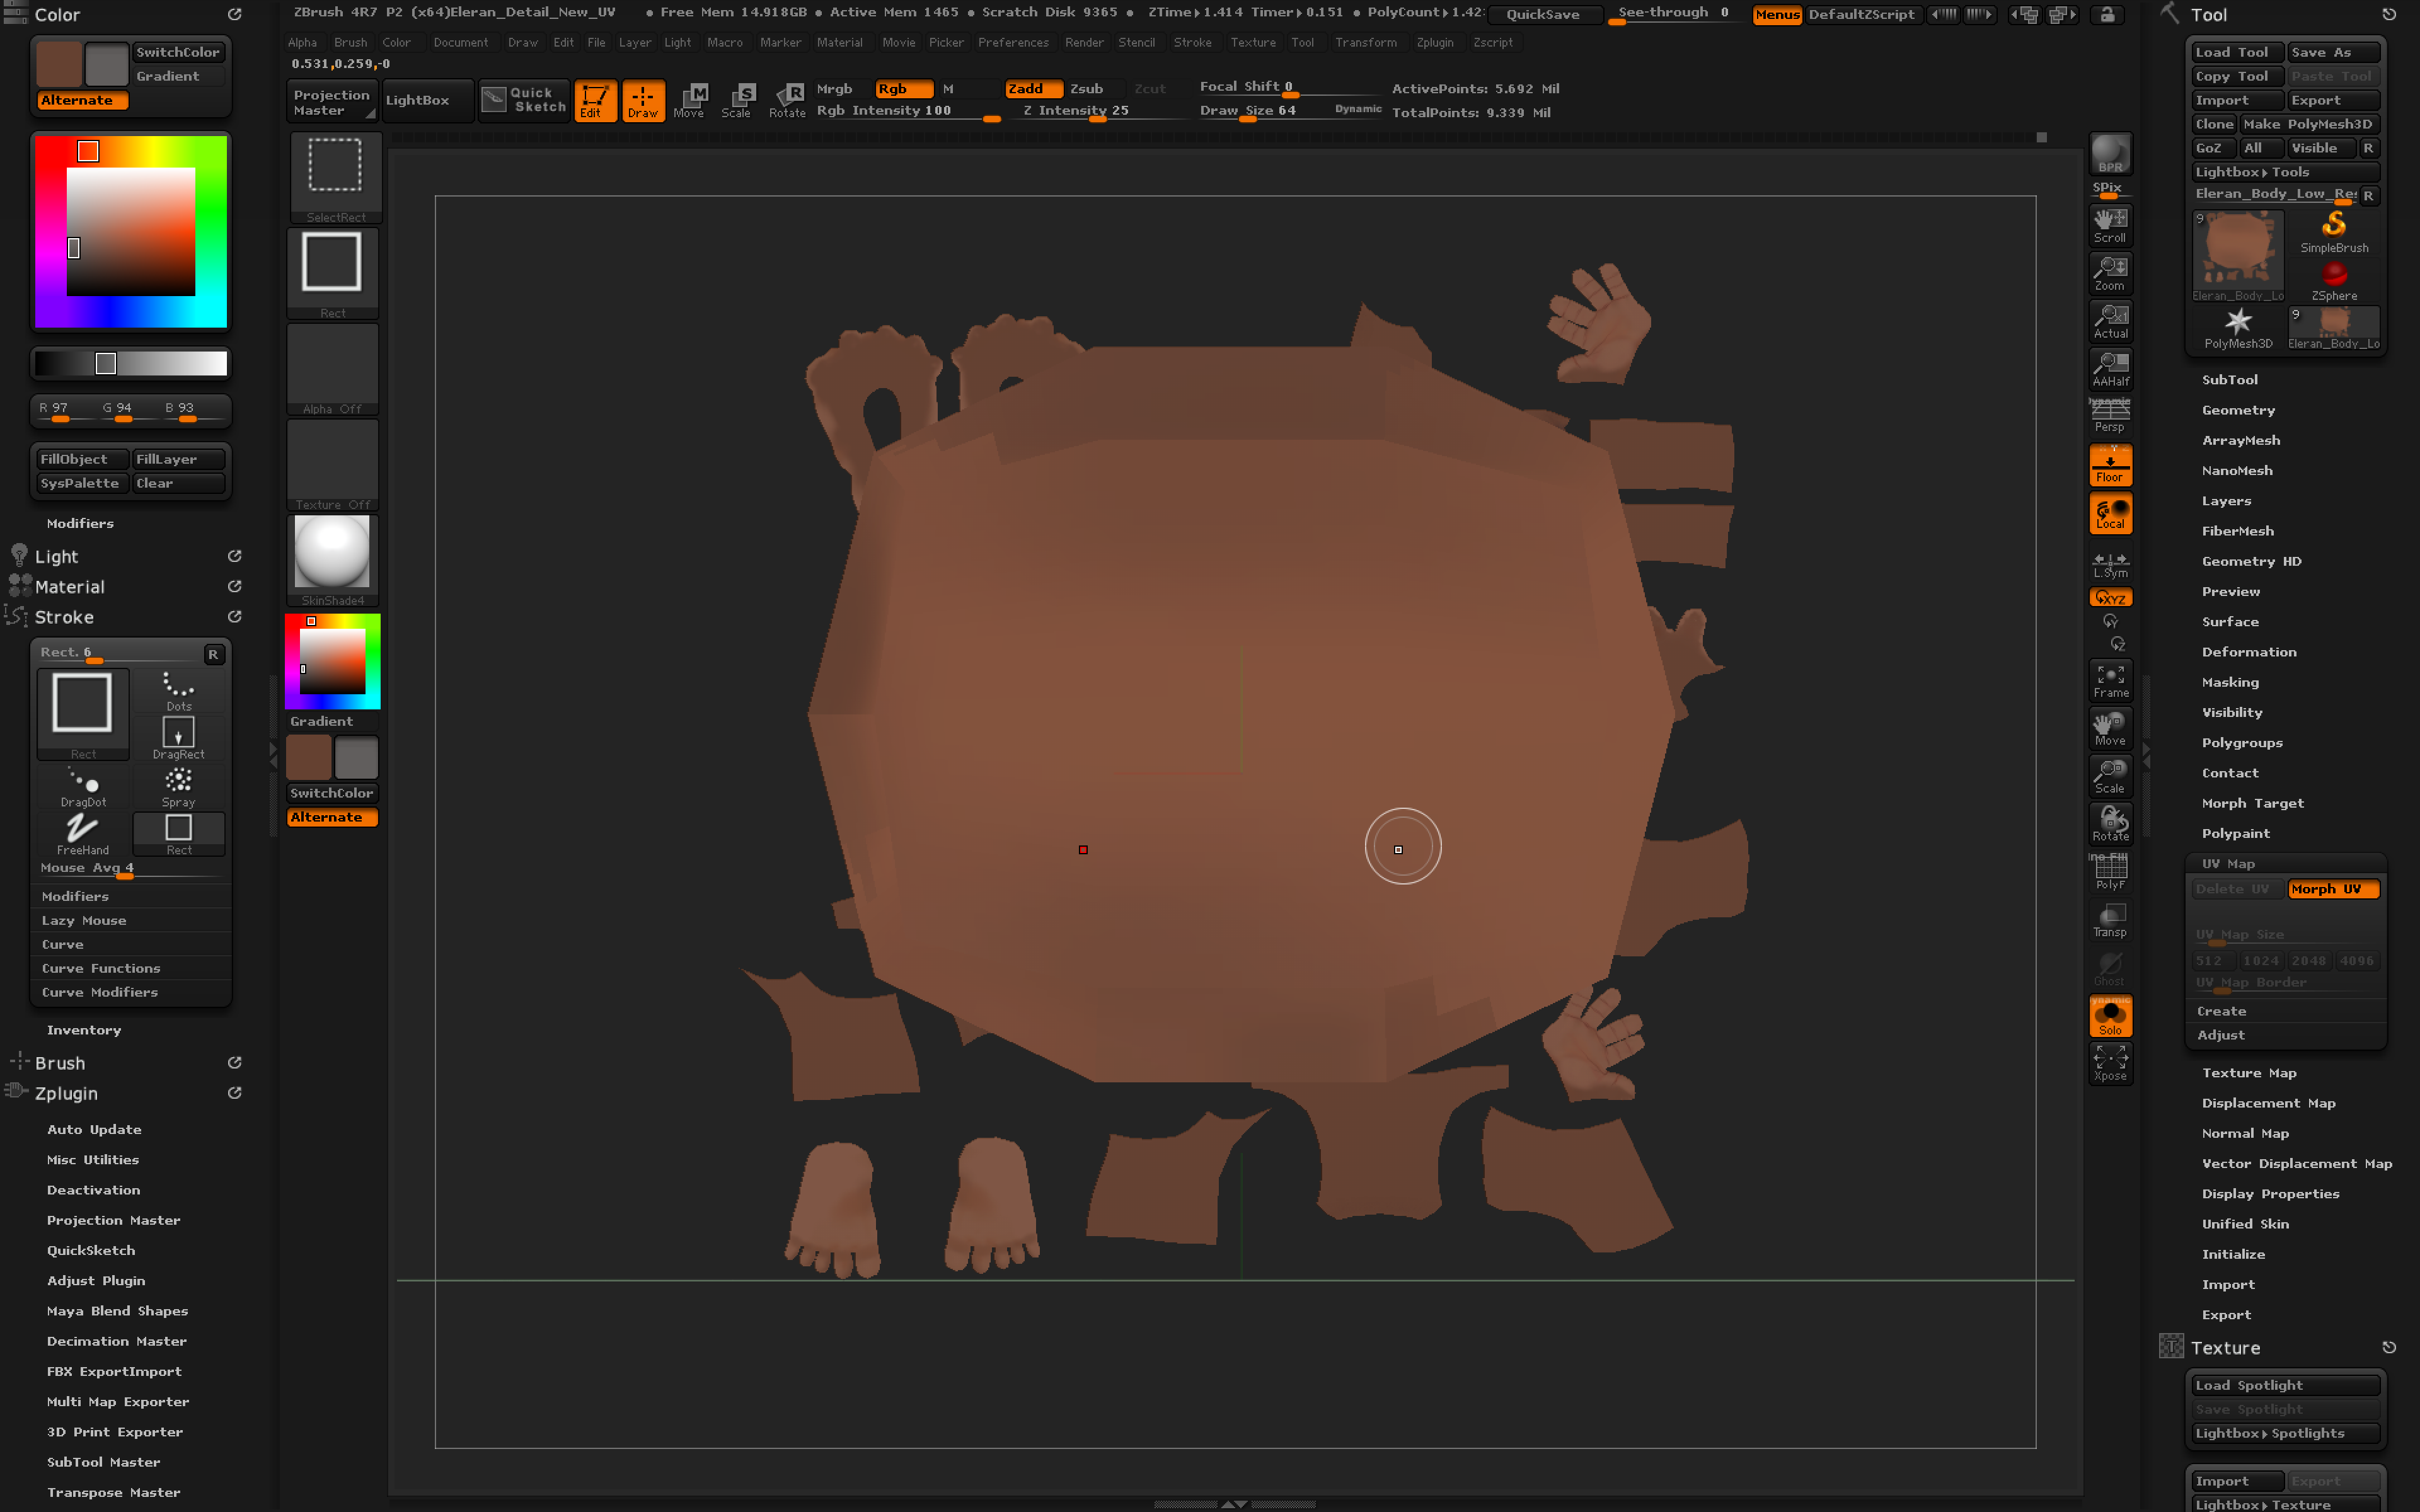
You should not need to copy and paste the UVs using UV Master, by the way. Just by importing the updated OBJ onto the sculpt, zbrush should detect the same number of vertices and will update the UVs automatically. It won’t even tell you it does this, it will only pop up a message if an error occurs. However this (and UV Master as well) will only work if it is the exact same mesh, and by that I mean the “vertex order”. Two models can look perfectly identical to human eyes and contain the exact same number of vertices in each, but if a vertex from one spot is #952 on one model and #005 on the other, then they are different models as far as a computer is concerned.

What more than likely happened is that your vertex order changed between programs. The cause of this can be as simple as using certain modeling tools inside of Maya, or by exporting from zbrush with multiple polygroups (or without Export: GRP turned off). If this happens, you would unknowingly be unwrapping an entirely different model. When it comes time for Zbrush to update the UVs, it will see that you want Vertex#328 to have U: __ V:___ coordinate and will update that information correctly… except vertex #328 is in entirely different position on the sculpt than it is on the new obj. Your UVs might still look like an unwrapped face, but those faces might belong to a foot instead.

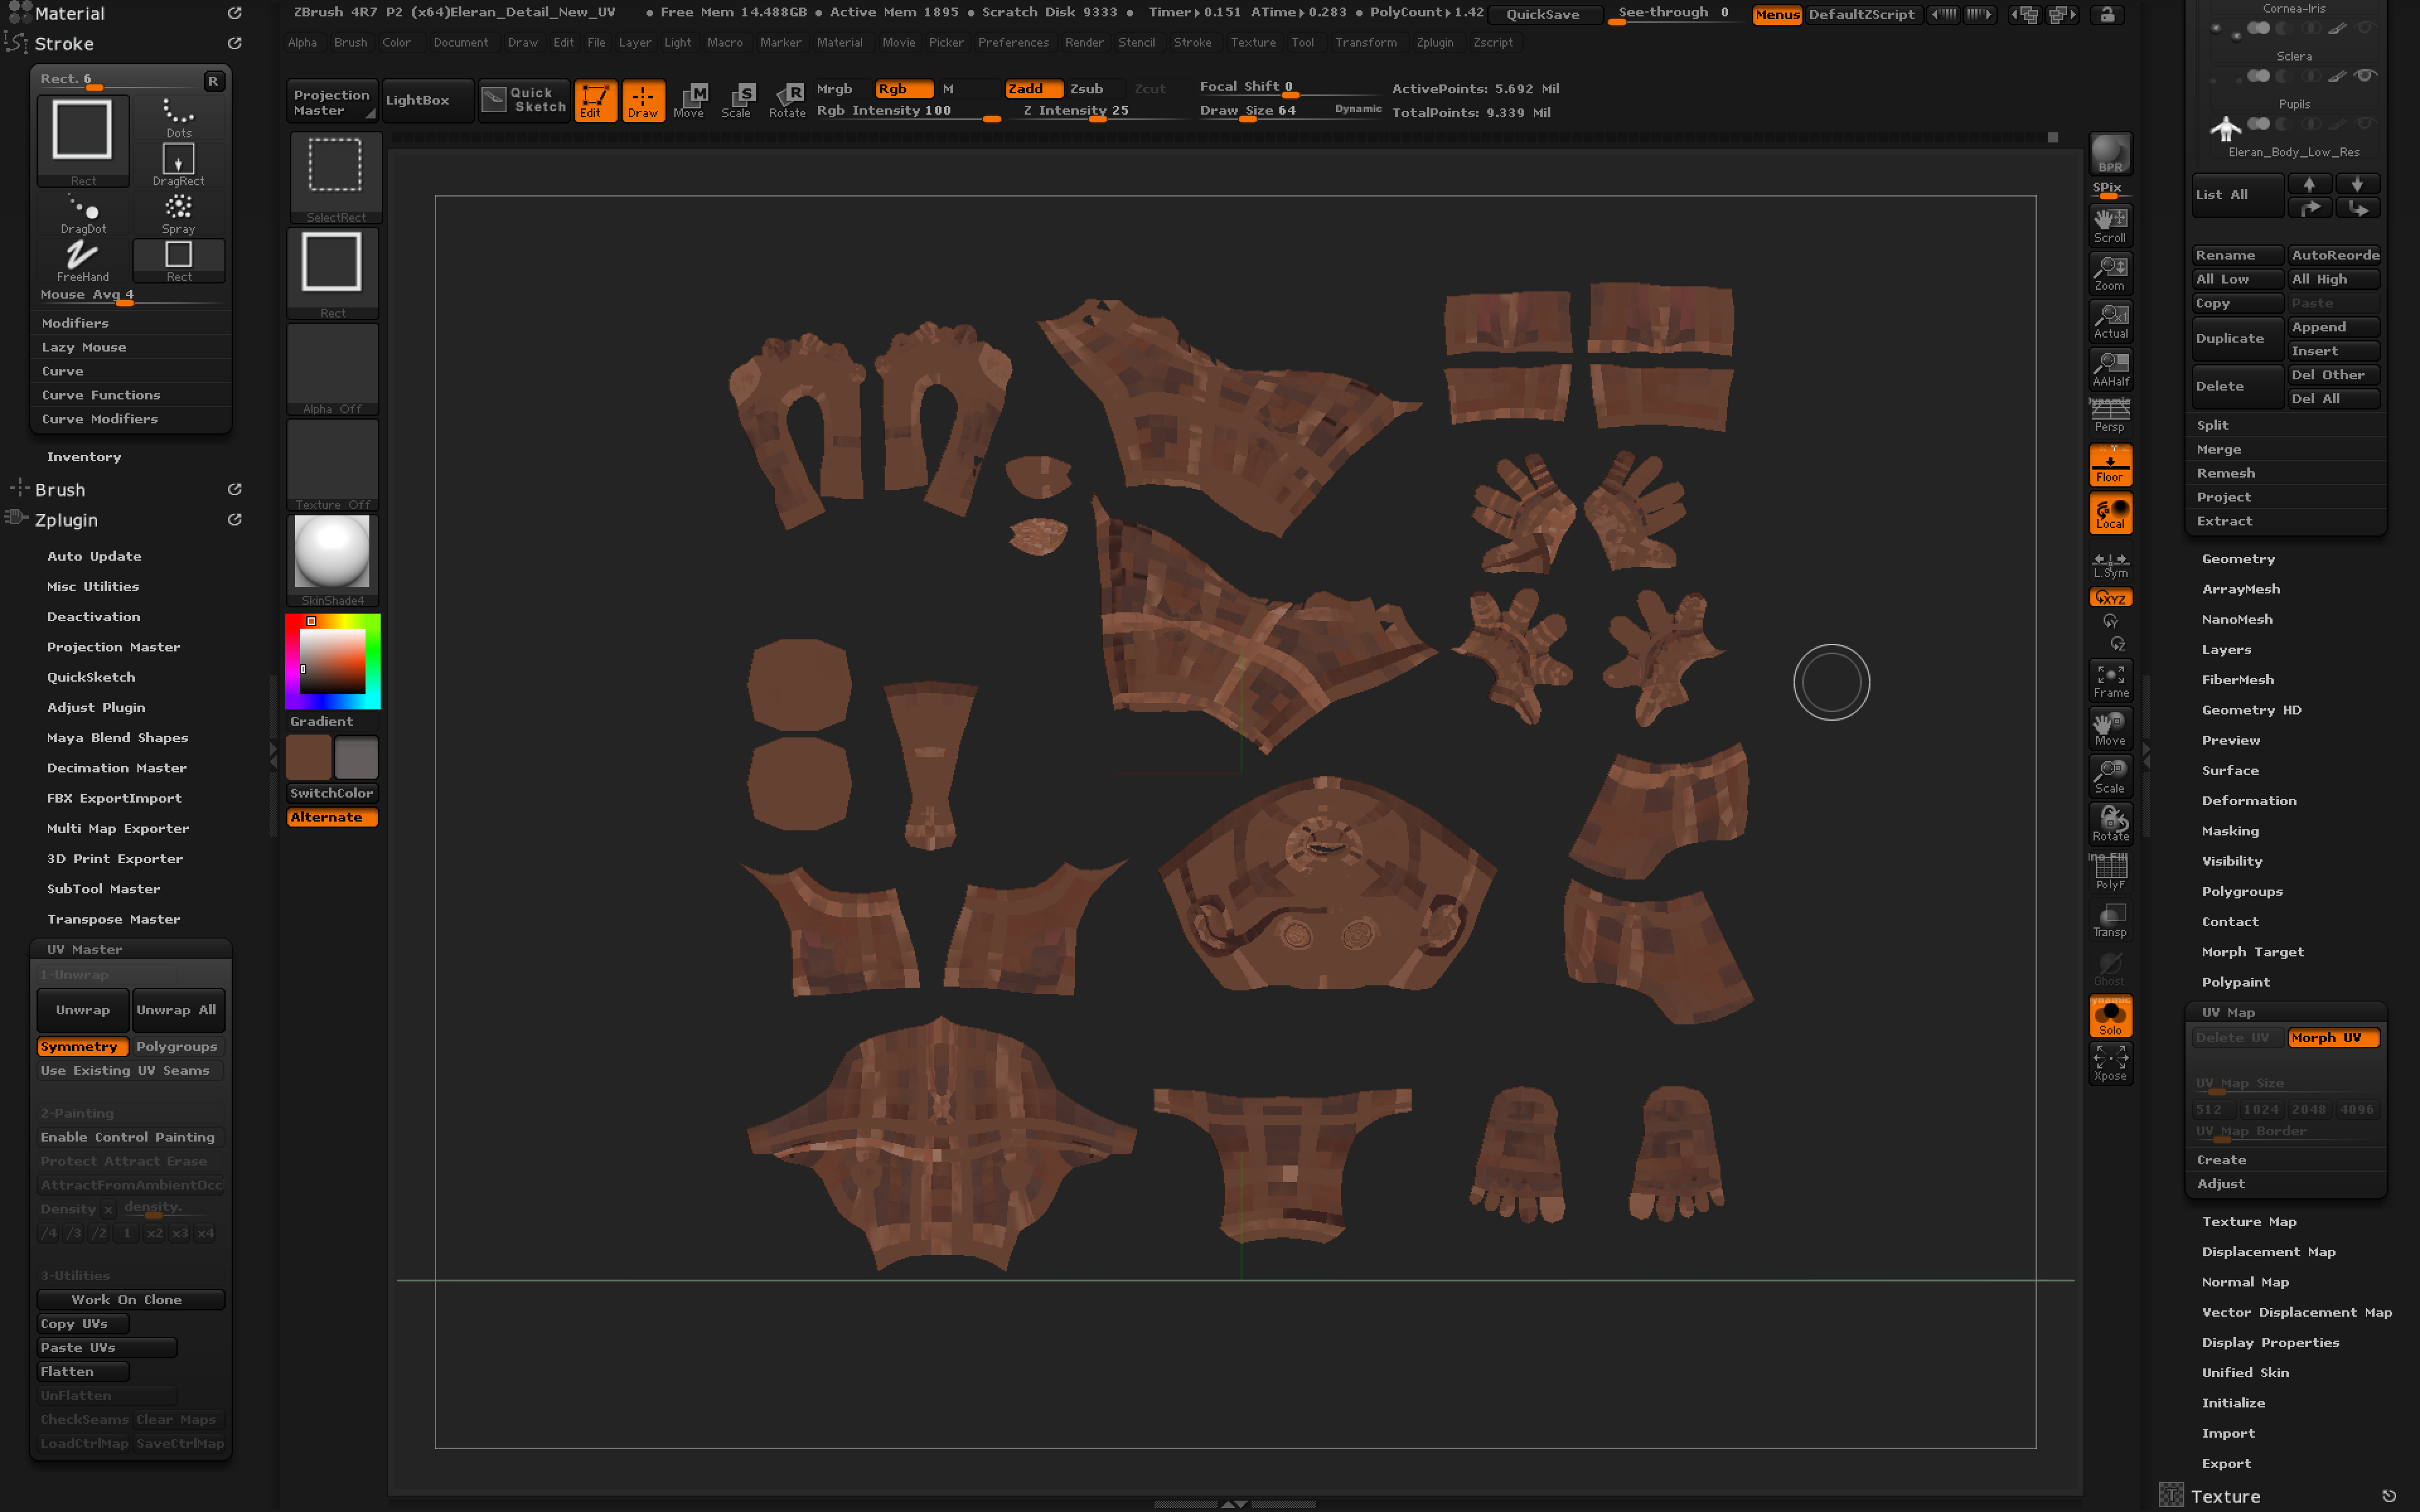
A good thing about polypaint (vertex colors) is that it doesn’t depend on UVs. You can change those around however you want and your polypaint data will still be there in the same state and quality you created it in. A solution would be to export the model back out as a single polygroup (or without GRP), and use Maya to transfer the new UVs onto it (I’m not a Maya user, but I would think it would have the ability to transfer UVs based on nearest vertex rather than copy and paste via vertex number like UV Master would do). Then when you import that model back into zbrush, the UVs should look correct visually and be correct under-the-hood.


Alternatively, there is a different problem that is more common to 3dsMax. In those cases, the vertex order remains the same, but every single UV face is disconnected and flipped. As a result the UVs visually look the same, but every face is flipped creating a faceted look. It’s hard to say which of the two scenarios you are currently facing without knowing more about how the texture is supposed to look in its ungarbled state. Chances are GoZ would fix both issues though.

@tigerheart

Yes, this seems to be the situation here! After pasting the UV, when I click “Morph UV” under UV Map, i see the faces morph in tiny pieces together and end up being mismatched, but it retains the same overall shape of UV shells. How can I match vertex order between Maya & Zbrush?

@Cyrid

Thanks for the suggestions. Let me explain the situation…

The sculpt/subtool has 5 subdiv levels, with sculpted details and it’s also polypainted, hence why I decided to copy and paste the UV from the Obj with modified UVs. If I import this Obj with corrected UVs into Zbrush, it will replace the subtool and I’ll lose all my sculpted details and hard work. I also exported the Obj from Zbrush with GRP turned off.

I need the Polypainted texture from Zbrush to be correct so that I can add details in Photoshop. I understand what you mean by the importance of vertex order, but I don’t understand why just moving UV shells in Maya should affect the vertex order in Zbrush. That’s all I did. I didn’t touch any polygons in Maya.

Attached are some new pics of what the character looks like to support the idea of what the UV ought to look like.

Thanks.

Attachments

Screen Shot 2017-01-19 at 10.24.10 AM.png

Screen Shot 2017-01-19 at 10.25.40 AM.png

What I’m trying to say is that copying and pasting UVs is a completely redundant step. Simply importing the OBJ over top is enough to update any UV coordinates or vertex transforms; everything else (like polypaint and sculpted details) will be smoothly taken care of since it is the same base data. If you run into any issue when importing, then a data mismatch has already occurred. When that is the case then UV Master’s C&P will fail for the exact same reason. In other words if Zbrush already thinks the model is a different sets of data then UV Master will be copying and pasting from a different set of data.

If you find yourself losing sculpted data during import then this is indicative of it being a different issue than the 3DSMax one. That specific error correctly preserves the vertex order but alters the intended UV data. If you have a mismatch during import then your UVs are importing exactly like you created them except the vertex order is different. It’s hard to say where that change happened without seeing every single step taken and setting used during the entire process, but I do know it is easy enough to accidentally change if it’s not actively on your mind, and that the zbrush side of things is fairly predictable / reliable.

You essentially have two options to correct this without losing any work on either model.

Option 1:
You could import the new UV’d model as a subtool and try to project the sculpted geometry and polypaint onto it using Subtool: Project All. However this might give you some headaches with projection errors, especially in tight spaces.

Option 2:
You can load up both models into Maya and use Mesh: Transfer Attributes to transfer the UVs from the new UV’d model onto the original (zbrush identical) model. I’m not actually familiar with Maya, but I do see it has a few Sample Space options that let you use a search method called “Closest to point”. This should allow you to transfer the UVs based on their vertex position rather than their vertex order. Softimage can do this easily enough with GATOR, and Max likely has a similar tool as well. This method should be quick and painless.

Thanks @Cryrid

You have given valid solutions that I can try out if this happens again. But I decided to use the imported Obj from Maya with new UV set as the actual subtool then subdivided it and polypainted it again. I will try as much as possible to avoid making the mistake of sculpting details unto a mesh until I’m satisfied with the UVs.