[attach=126070]1.jpg[/attach]
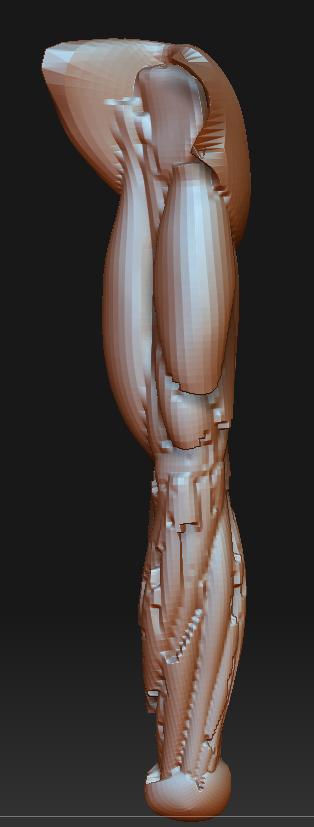
Note: The ball at the end is to close gaps,otherwise the unified skinning would try to skin all of the insides of the arm and it would come out really bad. I also had to inflate the arm so the muscles would be tighter with less gaps between them, just in case. Im just using this arm as an example.
Also step 2 means that you have to make a unified skin, then use project all to project the details from the original (merged version). It’ll look pretty much identical. You might ask yourself, why not save yourself the trouble of making the unified mesh and just project on to the nice and organized quad mesh? Well this is what i got:
[attach=126071]2.jpg[/attach]
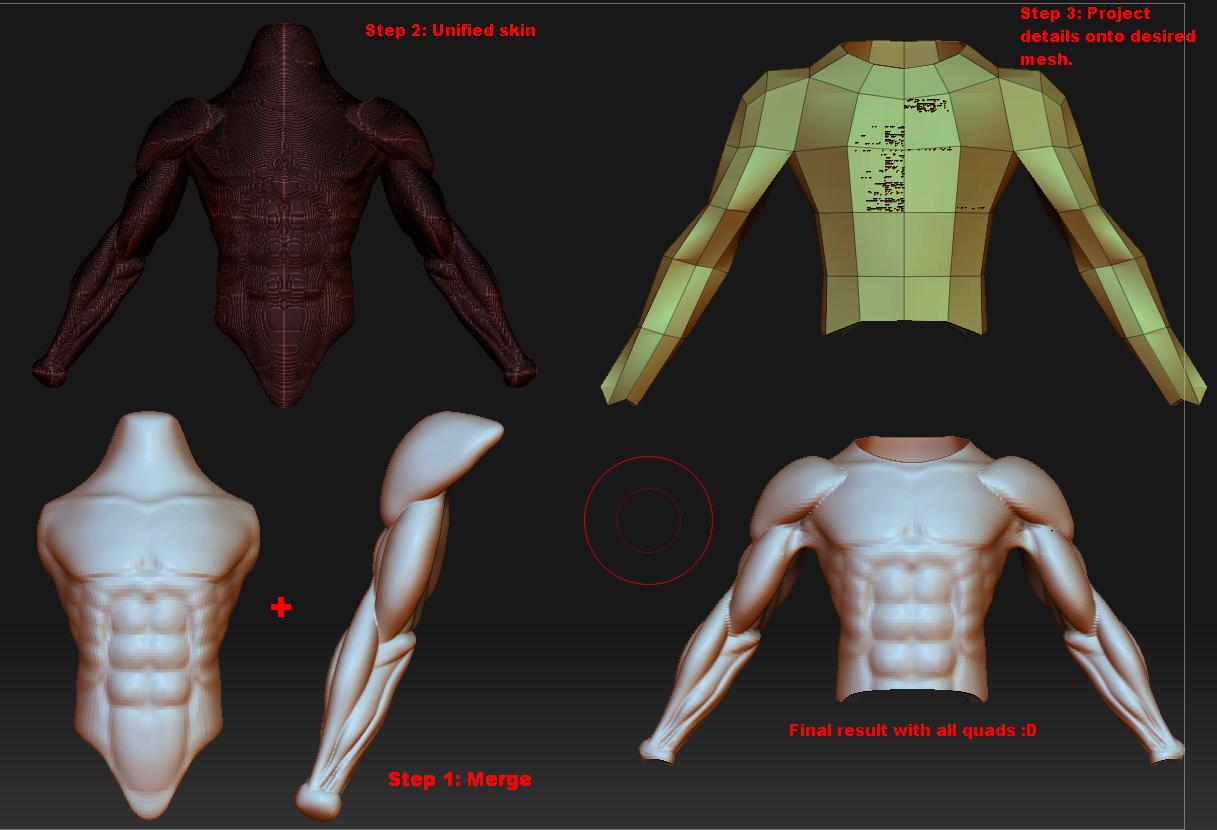
It gives you problems. But if your first create a unified skin then use project all on that unified skin, it won’t.
The resolution for the unified skin, also matters. In some cases you can go with the default 128, or maybe a little more, 256, and then project detail. But in the case of this arm, 128 didn’t work (gave me problems when projecting), I didn’t even try 256, I just moved it up to 512. But later, this won’t matter at all. It doesn’t matter if you end up with a really big unified skin cause you are going to be projecting the details onto your preferred mesh, so the unified one is disposable.
Another tuto >,>:
Step 1: Merge subtools
Step 2: Unify skin
Step 3: Project all
Step 4: Yay!
Note: The figure only looks different in the final result because I hid some polys (it’s a full figure not just torso). I didn’t take the time to really fit my quad mesh inside the unified skin so I had problems with the chest area, as you can see. But it’s mostly because I rushed this and used this mesh that has a different armpit topology, with other styles this won’t happen. Although even with this with some tweaking it’ll work fine.
Hope this was useful…
Attachments