ZBrushCentral

TyrantTR's sculpt and WIP topic

Hello everyone Im TyrantTR, I got a copy of Zbrush for myself on christmas and have sense been attempting to learn the ropes of the program. (I am into game design and intend to turn it into a career, seeing as this program is used ALOT in video game development I figured I ought to learn it.) In this topic I will showcase, and ask for help on my projects.

After messing around with Zspheres and sculpting tools for a bit and watching a wealth of tutorials I am attempting to make my first full ready for game model in Zbrush, retopo, diffuse, spec and normal maps, the works.

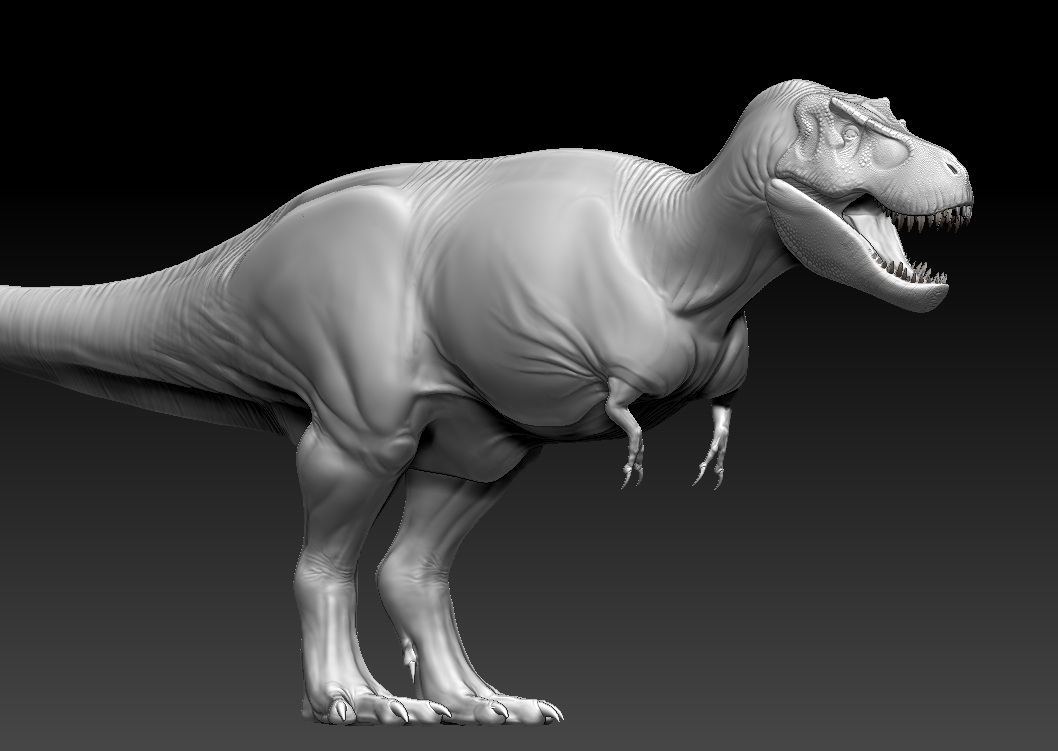
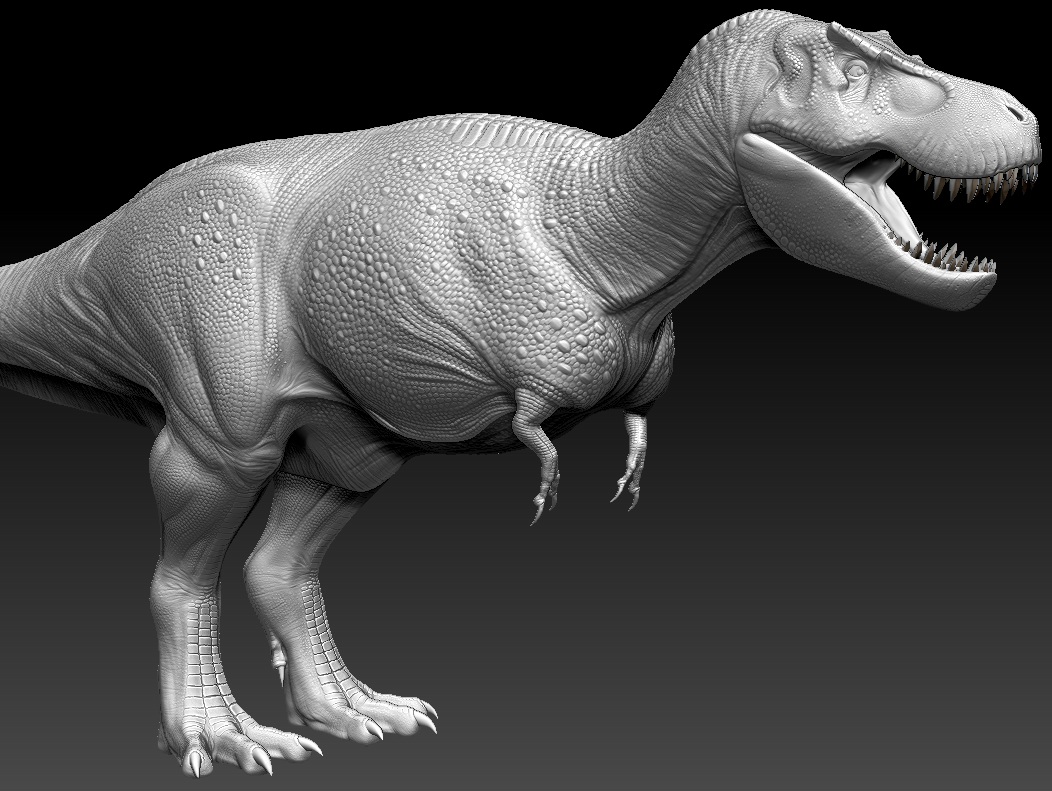
I have decided to make an Albertosaurus (trex’s littler cousin for all you non dino savy folk). And I tried getting as far as I could with the knowledge I gathered on my own. Which unfortunetly wasnt far at all.

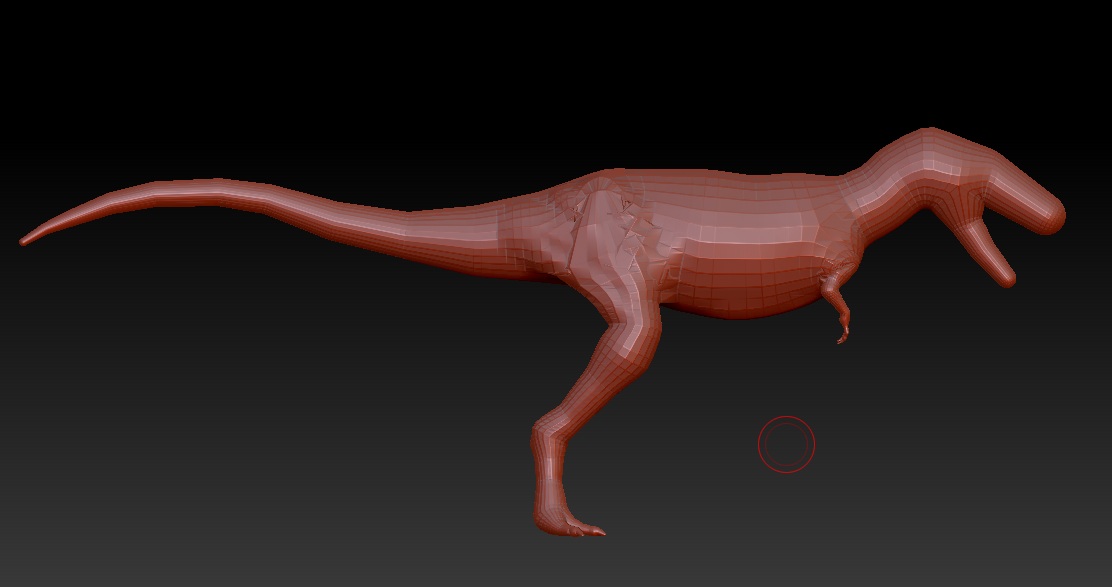
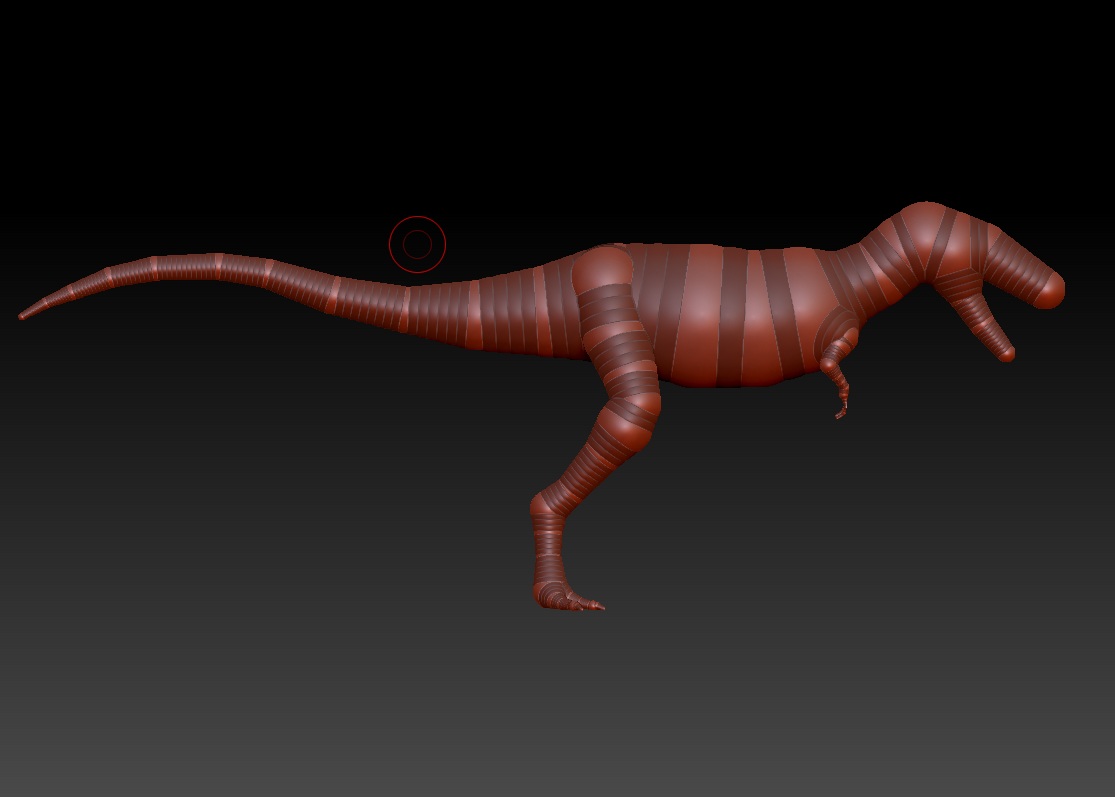
I am attempting to make a good basemesh for the sculpt and its proving difficult. Ive made a thinner version of the dino with armature zspheres, I didnt want to spend extensive time with zspheres (because I prefer the sculpting tools to them) so I used as little as I could to add girth to the thigh as well as make flaps of muscle I just couldnt do with the armature, and smooth out certain areas, around the shoulder and thigh that didnt look good.

If I understood right from the tutorials the adaptive skin is like a combination of the armature skin, and the zsketch skin right? Well though my adaptive skin is fairly reminiscent of the edits I made with zsketching, it is quite disorted and Im wondering if theres a reason for it. Perhaps I could use some guidance from those of you on the forum. Am I going about this wrong? Is there an easier way to accomplish what I want?

Heres some pictures of my problem, the first will be of my armature, the next of the adaptive skin.
Aramture.jpg

It really isnt much to look at, and I hate bad first impressions but I suppose I can alyways prove myself at some other point in the development of this.

Attachments

AdaptSkin.jpg

Hey man, i think the problem your having is that where the arms and legs join the body, they are cutting in to much, when your building with zspheres it doesnt have to be perfect, pull out the basic shape with the zspheres and use the move brush on the adaptive skin to get the proportions right.

Im not that good with Zbrush, as im spending a lot of time just now learning 3ds Max, kinda been neglecting the Zbrush lately, but at a glance i would say thats the problem your having. Go back to your Zspheres and pull the arms and legs out a bit, then use your sculpting brushes to move things back into place, that should tidy it up a bit.

Well see what I tried to do was use Zsketching to make features I couldnt with the normal Zspheres, so I had an easier adaptive skin to work with.

Zsketch.jpg

Heres the zsketch I did to it, shouldnt this transfer over in the adaptive skin a bit better then it did?

Well followed your advice a bit (guess theres no harm in trying) and I managed to get a satisfactory result, I supose I can always improve topology when I get to the retopo stage. So I started sculpting yesterday and some of today.

AlbertSculptWIP.jpg

Thats the result. Im rather fond of it but it has very sloppy lines, any ideas on how to improve this?

More progress pics

AlbertSculptWIP1.jpg

Comments? Complaints?

Attachments

AlbertSculptWIP2.jpg

Welcome to ZBC! Looks like a pretty good start so far.

Head is looking good, ill be watching for updates. :slight_smile:

The head looks good :+1:
But the body is very of balance, it would tip forward.

[attach=232365]centerofgravity.jpg[/attach]

Attachments

centerofgravity.jpg

Heres some more WIP sculpts of the rest of the body. Im trying to even out the detail everywhere before going on to scale and advanced wrinkle details.

AlbertSculptWIP3.jpg

@Santis: I can see what your saying, but I believe this is (in animation terms) called a neutral pose. Dont call me on that I dont know much about animation either, but its just supposed to be easy to manipulate with an armature.

Lol I hate double posting.

Ive finished (for the most part) the basic sculpt. I think before detailing it further Ill retopo it, just so I dont lose any fine details. So is there any tips on how I should go about this?

Been a while sense Ive updated so I thought Id show y’all what I’m up to.

got frustrated with the albertosaurus so I kinda cheated and skipped ahead to my favorite, the trex. Have a look.

[attach=243695]Trex9.jpg[/attach]

Trex8.jpg

And there is a close up of the details.

Attachments

Trex9.jpg

I’ll keep an eye on this. Great job so far. I have a good feeling that this is going to be an epic work

Update on the project.
Trex10.jpg

Im trying to avoid the generic vertical stripes alot of people have on dinosaurs, Ive experimented with tons of different color designs, I’d like some feedback on this one.
[

](")

Attachments

Trex11.jpg

twist the palms of the hands inwards to face each other…latest scientific thinking…excellent model

Made this Dragon thing the other day as a little fun project.

DragonThing.jpg

Thoughts? Criticisms?

Hi :slight_smile:

Dragon looks good I think. Reminds me of blizzard design a bit, which cant be a bad thing now can it! :stuck_out_tongue:

Wow very nice dragon! I love the style and how you can really see those nice hard creases in the rocky parts of this sculpt. The polypaint work is also great. My only critique would maybe do a little more detail work with the rocky parts of the sculpt like putting cracks on it and stuff like that.

@daidda: Thanks, I agree its got the looks of some of the Dragons from WoW.

@Dudeman95: Thanks, I was thinking of adding cracks and such, but it was just an experiment, didn’t feel like going through all the trouble.

Here is a new one for you all. :stuck_out_tongue:

DragonThing3.jpg

Still WIP obviously, should be updated soon. Does anyone know how I could put this head and neck on a sculpted body, WITHOUT there being a giant seam at the base of the neck like there was for my trex?

You can append the body to the head using the subtool menu and then retopologise them into one mesh.
You should find many tutorial about retopology on zbc or youtube. Just google it.

Nice sculpt btw

TrexWIP2.jpg

Hey all been a while since I last posted anything. This is probably like, my 70th version of a trex. :stuck_out_tongue: Pretty much in love with this one. I watched a webinar by David Krentz, which was very insightful as to the anatomy of these creatures. Hopefully I can stick with this design.

My last few looked fine but when I got around to coloring them they looked so painted. Anyone have any useful hints, or tutorial links that deal with coloring organically?