i was allways having problems with the displacement maps in max, as well. untill i found the zbrush to max pipeline guide
http://www.zbrushcentral.com/zbc/showthread.php?t=35390
that schould help
the only thing i have to do different is that i put the extrusion strength to 2,2 not to 220
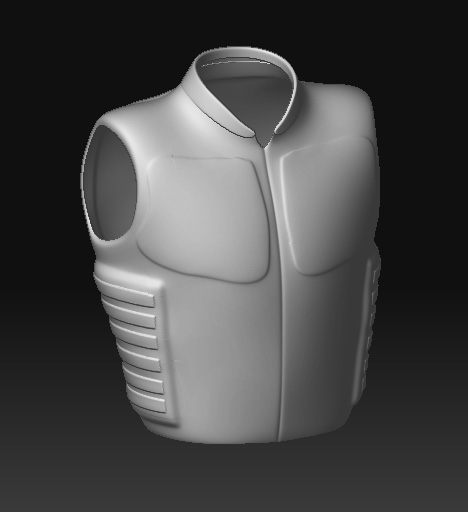
Ok so I tried to use Zbrush to Max guide and this is what I got:

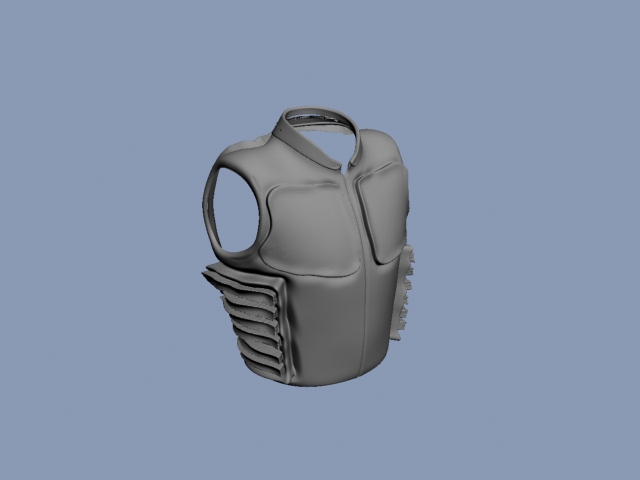
now it looks almost like it should, but I get strange white lines on the model that I dont know where are they from… Maybe something is wrong with Uv’s? This model I made in Zbrush from scratch, so in Texture section I applied AUVTiles, then I pressed Uv Check and there were no red spots so I assume that I made everything right with the mapping? I’m kind of new with all the texturing stuff, so any help would be much appreciate. But maybe problem is in other place? Also it still looses some detail that I made in Zbrush, so if I awant them to be back I should increase Extrusion Strenght in max material editor? Please share your thoughts…
is the base mesh done in max ?
if this is the case you probably have some triangles
if not i don’t now ^^
to be honest i’m still having many troubles with displacement maps as well
No, I made this head from Zspheres…
sorry can’t help you out in this case :-/
This tutorial has been really helpful, but I’m getting problems at step 3.2, importing/exporting the model itself between 3dsmax and zbrush.
While checking my UV groups in zbrush I was trying to figure out why I had so many (in 3dsmax I laid out my uvw’s and arranged them to fit in the regular 1,1 space, so I should have just had 1, but I had many more). Newbie I am I started clicking around in the Texture submenu and got a pattern that looked very similar to the current distortion below (though much more cleanly laid out rectangles). I eventually gave up on trying to fix the UV groups and exported the base mesh. I first noticed something was wrong when my import options looked like this:

Edit: I tried importing through Maya and didn’t have a problem bringing it back to zbrush. Maya seems to discard whatever extra information is riding on the zbrush export (as long as Creat Multiple Objects is set to false in its import options… if it isn’t the model becomes even more distorted upon being brought back to zbrush).
I also did a little test with the original low res base mesh I made in 3dsmax (which hasn’t been touched by zbrush). I imported it back into 3ds max and it also had 2 groups: default and box. Perhaps I exported it incorrectly from the very beginning? Box was just the name of the actual mesh (since I started from a cube).
If you are trying to track down the price of Mental Ray
you get passed of to their resellers. Some of the don’t even
know what Mental Ray is.
This has discouraged me from attempting to use this software.
What other tools are available?
Thank you,
Uncommon artist
actually i had a little fun with the render stuff
although i’m so new to zbrush and i can’t get that thing to work
i did a test with the vray & max to zbrush
but didn’t include a texture >>>not in max or zbrush
model in max
export to zbrush …sculpt >>>> bla bla bla …but get a map out of zbrush
now back to max … i didn’t bring anything but the map
tried it in bump and displacement slots … results are things u don’t wanna here about
so , render system … Vray
and put a vray displacement MODIFIER on the mesh
and things start to work !!!
but that was a very very primitive experiment … and i think that the light position and camera position give different results !!!
ok , don’t mind all that … i’m just a guy who try to figure out how this thing works !
Hi,
I created a model in max8 sp3 and unwrapped it in max (no overlapping). Did the detailing in in zbrush and now i am trying to export the displacement to use in max. But unfortunately i am having some problems with doing it.
My 32bit displacement map which i exported using the quick code has this streak that goes across my tiff file as you can see below. As i am a noob to zbrush i have no idea what to do and pretty much lost. I understand that it might be a vertex gone astray but when i look at the mesh with the details that i have created. it looks fine. So i have no idea where the streak is coming from …?
Can somebody please enlighten me on how to solve this problem, as i have spent alot of time doing the displacement

Encoded: that happens to me all the time, one of your UVW verts got zero’d out. Either reimport your mesh on it’s lowest level or export the lowest level and fix the uvw error.
Hey guys,
I followed the guides that people posted here a lot of times and even tried to make one of my own but none worked for me. PLEASE help.

I made this mushroom in Zbrush, (started from a very low res sphere and going up to 8th subdivision level), and made a displacement map by going to texture>new>height/width 2048>went into the lowest sub level and in the displacement menu I picked adaptive, smoothuv, dpres 2048, and create dismap.
I then exported sub level 4 as OBJ, imported to max, converted to editable poly, checked smoothing iteration 2 (any higher and max crushes when i render), created a texture with 50 dis map, V -1 and output from -1 to 1, switched to mental ray renderer, made it edge length 0.5, max displace 20, max subdiv 16k, and smoothing on.
This is what I get in max (a simple smoothed version of the imported model without any extra details from the displacement)

PLEASE help me. What am I doing wrong?
THANKS in advance.
I’m trying to use multi displacement 2 to export my displacement map (just installed it)- however the button is greyed out and there is a questionmark sign. Did I install it wrong or did I miss something?

Hi yuriythebest
I think is the setting of the plug that is not ok.
I post the setting i use, coming from the pdf guide of the plug.
Important is the Quick code hilighted in the pic, also this is from the guide.
The window on the right side i think is about the strenght of the map, i leave this in the middle and i will experiment different settings…
Hope this can help! 
I still get he same thing:

Hi
seems that something is going wrong in the plug.
Try and reinstall the plug, probably is this the issue…
yeah, turns out I also had to put the *.psd files in the plugin folder, that just fixed the interface and not the problem, though I was finally able figure out how to export using the good ole method.
The Cheshire Cat - in the create displacement map of zbrush try this: uncheck adaptive and set DSubPix =2; move the displacement intensity to ~70%, select smoothUV. Do everything else same as before and play around with the displacement amount in MR. Hope that improved your result somewhat.
Thnx for this " veryfound " small and easy tutorial “CvH” but wanna ask u 2 thing bout ur setting !!!
-
What has to be the strength of the “Displacement map” Defaut is 100 , like its 30 for the bump slot. What is ur setting for the disp box ???
-
I dunno which version u used but the small option in "render setting dialogue box / renderer / Displacement global setting / I did the edge length to .5 its O>K , but in ur screen grabs there an option saying “Max level 6” but mine is saying max Subdiv -16k and theres so many choices, what should I use among them ???
Thnx in advance !!!
Hello! I i need help: i do all like in tutorial on the first page and when i try displacement on the test head - all ok.
But!
This i have in zbrush, after aplying displacement on model
what is wrong?
Attachments
I’m on max 9, and I am in the same spot of trying to figure out the setting for max subd instead of the max level. I can tell you that it WAS NOT the option of ‘64’  as after about half an hour of rendering nothing, Max
crashed.
I will start going through each of these and see what we can come up with so others can have the correct option for version 9. Hopefully that change from ‘level’ to ‘subd’ does not have an effect on other settings. I can only handle one variable here
Will report back!
I’m now thinking the ‘max displace’ needs to be different from CVH’s original post (in which it is 20.0) in addition to the ‘max subdiv’ being a different number than the ‘max level’ since we’re now dealing with Max 9.
If I put in ‘20.0’ for the max displace, the model is blown out - i.e. EXTREMELY over-displaced. I’ve moved it over a decimal place to 2.0, which is much closer to the shape the model should be/ not so much inflation occurs.
However, I am now seeing an interesting problem. It is only displaced negatively and is very deep. Plus, there is little to no detail in the render other than these deep gashes. I’ve changed the output range in the material from -1 to 1 as originally posted. It is interesting that I’m having this prob if Max by default only displaces positively.
My current MR global settings:
View: Checked
Smoothing: Checked
Edge Length: 0.5
Max Displace: 2
Max Subdiv: I’ve tried 4, 16, and 64 all to similar result as described above. Will continue testing this option.
BTW, I am using ZB 2. Yeah yeah, I know. Don’t feel like trying to figure out the zmapper ‘workaround’ people claim is an issue.
I apologize if the answer to this is obvious and/or is covered elsewhere; I’ve been reading many threads on this topic and have not seen it yet.