ZBrushCentral

Trouble with Retopolgizing a ZSphere model.

I have made a model using ZSpheres. (More than likely it’s a jumble of ZSpheres and that might be the root of my problem.) I wanted to retopo a few parts that had some wonky topology from the start. I watch numerous tutorials both here and on Youtube and here’s the steps I took:

  1. Loaded Tool.
  2. Drew it out and switched to edit mode.
  3. Cloned it at the highest sDiv and again at the lowest.
  4. Selected a ZSphere
  5. Went to “Rigging” and “Selected Mesh.” Selected the high sDiv clone.
  6. Went to “Topology” and “Select Topo.” Selected the low sDiv clone.
  7. Clicked “Edit Topo.”

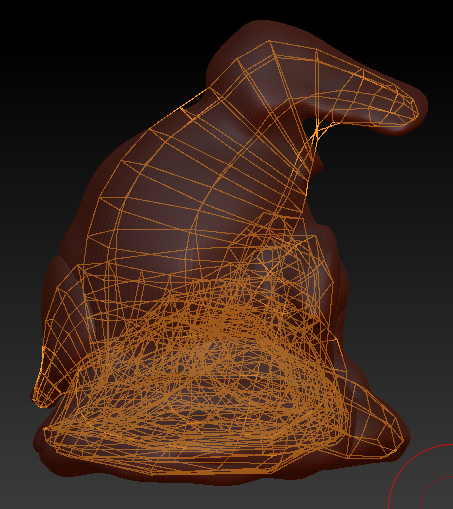
The following image is what I got. You can see the jumble of topography inside the model where a butt load of ZSpheres collide. The model is of a cartoon duck sitting on a rock. I just wanted to add more topo to his tail and feet, but I can’t see them to work on it.

Suggestions?

Thank you!

Attachments

ZSphere_Duck.jpg

-Make a new zsphere model but a simple one this time. No colliding or overlapping zspheres. Your goal is to have a a loose shape that roughly resembles the same volume of the actual sculpt.

-Make Adaptive Skin (Density no greater than 1 or 2.)
-Follow the retopo procedure, but use the new adaptive skin as your low rez model.
-Change the geometry if still desired.
-Use the projection controls to project your high detail onto the new retopologized adaptive skin. (Or use the import method on your high rez model. Which ever you are comfortable with.)

That should take care of it.

Thank you for the response. I’ll give it a go. I did go back and make a simpler ZSphere model. It’s better, but still a bit of a mess to look at. I think I started it a little to high in density. I shall try again.

Thank you for the thoughts!