ZBrushCentral

Tribute to Jordu Schell: Calaracian bust

Hi everyone,
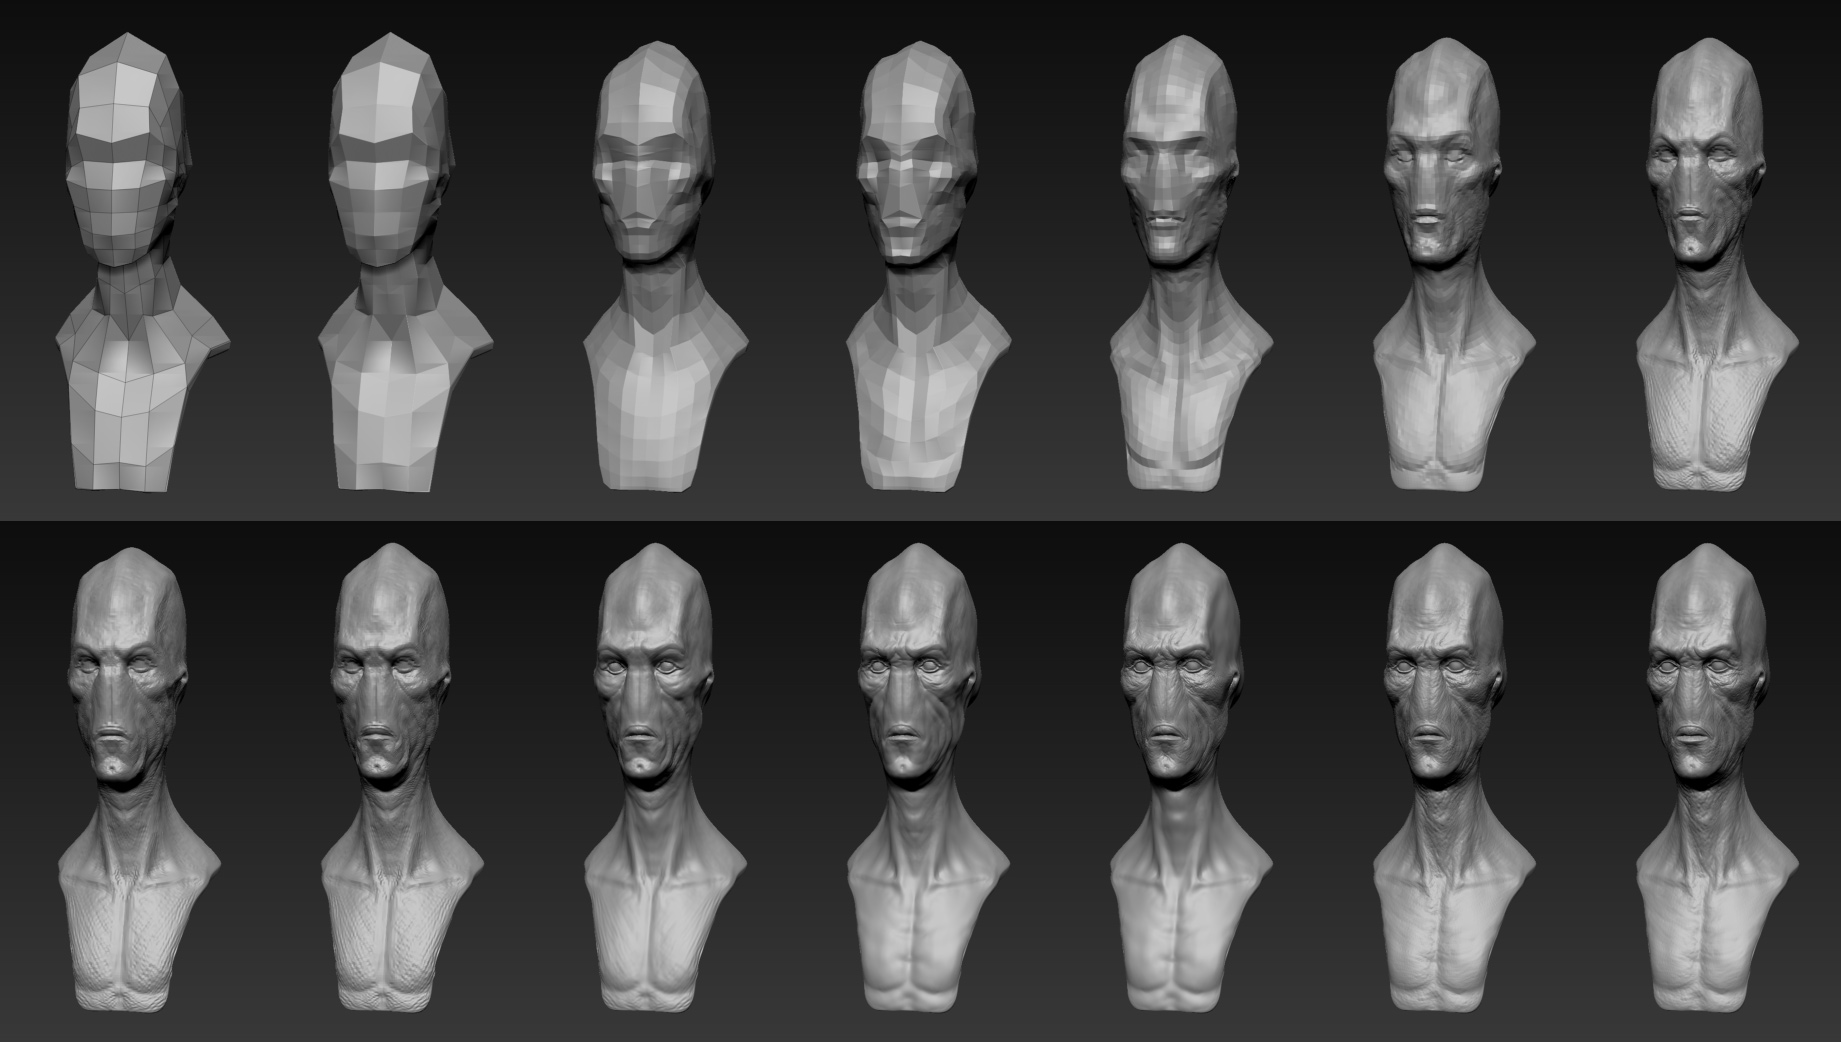
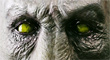
in the last days I’ve been working on this new sculpt, trying to be as close as possible to a bust made by Jordu Schell… I’m sure anyone here knows him :stuck_out_tongue:
The original sculpt could be found here for comparison.
The likeness is not 100% accurate but I’m pretty happy with the final result.
Hope you like it!

[attach=164939]calaracian_web.jpg[/attach]

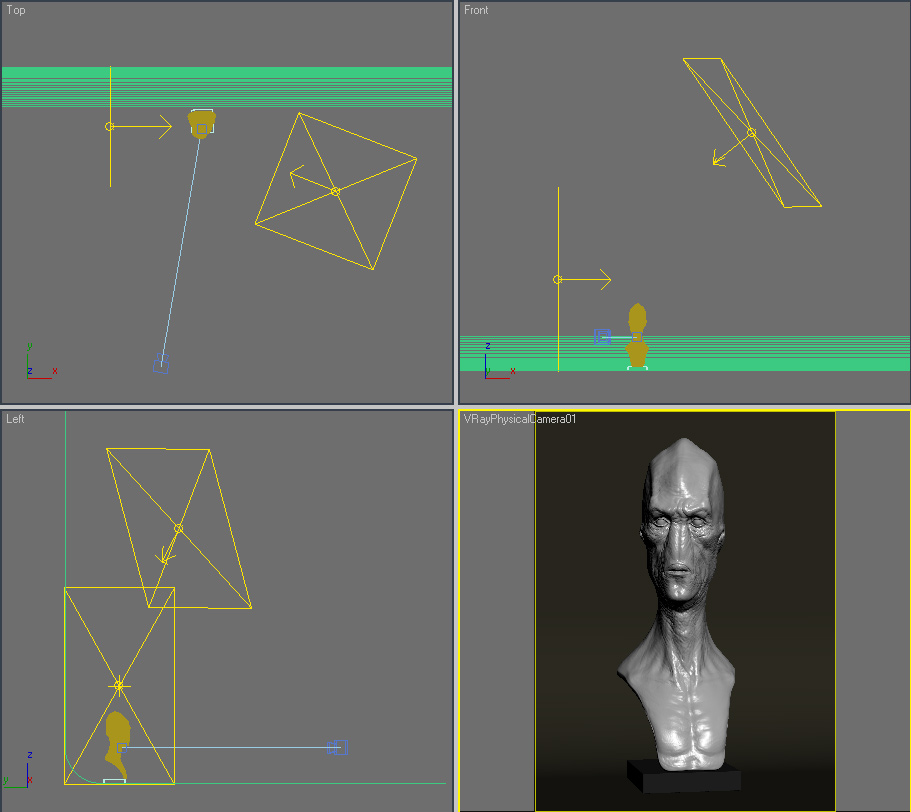
[attach=164940]calaracian_shaded.jpg[/attach]

C&C are welcome :wink:

Thanks,

Fede

calaracian_zbc_thumb01.jpg

Attachments

calaracian_web.jpg

calaracian_shaded.jpg

Very cool work! I like the textures… Keep rocking!
Best regards, Selwy

I can’t see the difference <img src=“http://www.zbrushcentral.com/pixo/atn.gif”>

Great job

Amazing! i love the textures!! fantastic job and the likeness is awesome

You did good with the likeness. Your beauty render blows me away though! Is that Max’s mental ray? Or are you using something else for your renders?

Amazing work!:smiley:

The red lips are a little strange. And the blue markings look like acrylic paint on skin, not the actual color of blue skin. I hope that makes sense.

tutorial please??

excellent work. and very nice render.

Great work, I look forward to seeing more.

love the render! :+1:

Regards M.

Is very good your work, congratulations man!!! A big hug!!!

http://www.stefanuto3d.blogspot.com

Very nice work! I recognized it immediately! Very close to the original.

Great work! :+1:

Thanks a lot for the kind comments to everyone!
@selwy: hey man, how’re you? hope everything’s well :wink: Thank you, I’m working hard to get better :stuck_out_tongue:
@Kayp: Thank you, I used Max + Vray for this one since I know this render engine quite well due to some boring interior renders :confused:
@nerveink: thanks mate, I will put toghether some wip stages and write down something about the workflow soon :wink:

Many thanks to everyone else!

Fede

As promised, here some more info about the project.
I started from a very simple basemesh, though the final piece was already decided (since it’s based on an existent finished piece) I wanted to try a more “traditional” approach working out a rough base.
The trick described by Scoot Spencer in his tutorial about video blur helped me very much during the beginning since almost the final detailing: when it’s matter to be accurate you don’t want to focus on details and blurring the viewport let you see shapes and volumes in a more vague way helping you to concentrate more on what is really important.
I used mainly the move and the rake brush, mostly in the first stages; later I used clay brush and standard to smooth out everything and to finish the piece.
[attach=165024]calaracian_wipStep.jpg[/attach]
I then posed the bust and used Decimator Master to export a 8% version of my sculpt.
Once in max I used a very simple light setup with two Vray lights: one used as a big diffusor from a side and the other to fill the shadow areas.
[attach=165025]max_lightSetup.jpg[/attach]
I used a vray material with the following settings and maps:
[attach=165026]vraymat_settings.jpg[/attach]
[attach=165027]maps.jpg[/attach]

Hope this could be usefull!

Fede

calaracian_zbc_thumb01.jpg

Attachments

calaracian_wipStep.jpg

max_lightSetup.jpg

vraymat_settings.jpg

maps.jpg

cool work , love your style

great stuff!

Great Job Man !!!

awsome!! thank you so much dude. very helpful! :+1: :+1: :+1: :+1: :+1: :+1:

that is frigging gorgeous! Are you still using 3.1? I can’t get decimation master to work in 3.5 R2

Thanks for the behind the scenes. I’ll have to get more serious about Vray one of these days. Again, great work! :smiley: