ZBrushCentral

Tiling issue with projection master caused by UV map gone wrong?

EDIT: More relevant information further down the thread.

Hello everyone, hopefully someone has seen this before and knows a solution.

In projection master, when details are painted they look normal, but afterwards there’s a square tiling on it. As far as I can tell the tiling doesn’t match the underlying polygon flow either. Here’s a pic.

[TILE MESH.jpg]

Here’s the whole background in case it helps:
The model was originally created in Zbrush, exported to lightwave for a little polygon cleanup (at detail level 1), then exported back to Zbrush.

I’ve tried removing and recreating the UV, which I think this has something to do with. This issue only started showing up once the model went to lightwave and back.

Any help or advice someone could offer would be greatly appreciated.

That is strange, but it’s been known to happen. Might be UV layout, might be that the texture used to texture the thing isn’t properly tiled… Can you upload a sample (ztl) file? I can’t seem to reproduce this.

I managed to pinpoint the issue. It is in the creation of the UV map in Zbrush. I even tried this with another model created in lightwave and it did the same wierd sort of box thing. Here are some samples.

[uvmapright.JPG]uvmapwrong.JPG

Here’s what’s going on now. Has anyone seen this?

How many polygons did the model have when you UV mapped it? It looks like you had a huge number of polys, which results in most of your available texture space being used for the spaces between polys rather than the polygons themselves.

The original level 4 UV was generated at around 395000 polys.

The level 1 that I’m using now has 7406.

Oddly enough this has happened with a model now that hadn’t been exported from Zbrush at all. I think I need to look at UV generation in the first place to make sure I’m doing it right.

The last photo above with the red and white squares is how two different models (one worked on in lightwave and one just freshly created in Zbrush) have generated UVs with GUVTiles (Zbrush 2). Has anyone seen something like this before? It seems like every UV generated by Zbrush now is doing this.

Ok, first off 395,000 polygons is WAY too many to UV map and expect decent results. Here’s why:

The square root of 395,000 is 628. We’ll call it 630 for simplicity. That means that a tiled mapping will be 630 tiles by 630. Applied to even a 4096 texture, that results in 6.5 pixels per tile. But you also have to have borders between the tiles, leaving about 2 pixels per tile for the actual texture. In other words, if you create mapping for a 395,000 polygon model, your texture will be more border/dead space than actual texture.

Even if you could paint a decent texture with such mapping, the texture would be hideously vulnerable to the slightest shift on the surface of the model. A variation of so much as a single pixel will result in artifacts.

If you redo your mapping at the new 7406 poly count, you will get MUCH better results.

Also, when painting your textures are you being careful to keep a 1-to-1 ratio between what you paint on the canvas and what that translates to on the texture? See my Precision Texturing Part 2 tutorial for more information about this.

I’m definitely staying with the lower poly count. I actually noticed this issue first at the lower poly count. Going back to the higher count model is out of the question for other reasons anyway.

Here’s the issue redefined:
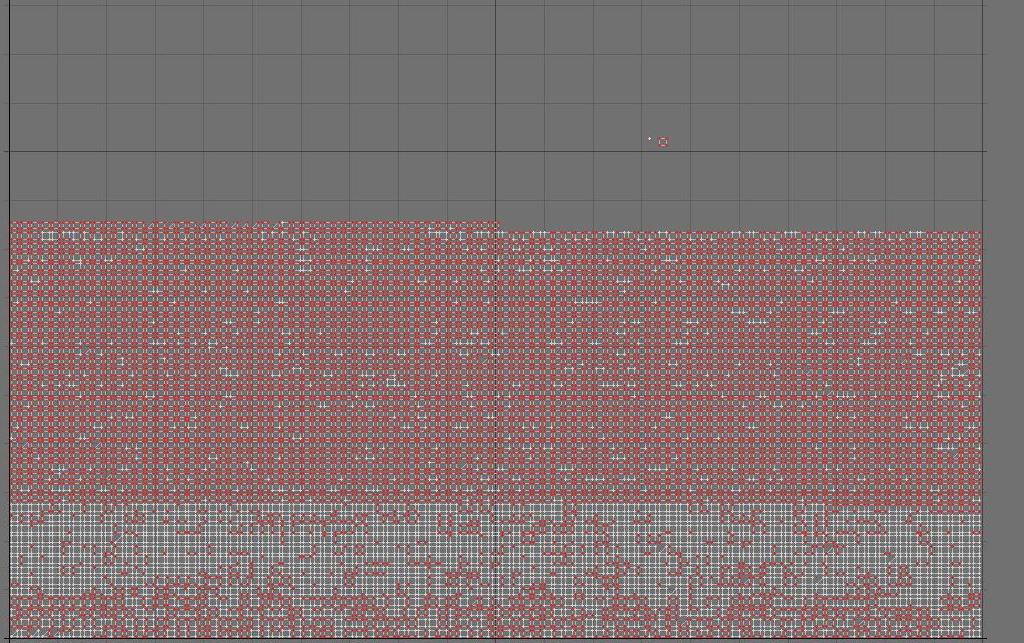
When painting using projection master, everything looks great. When I exit out of projection master, you can see a grid effect that appears to be based on the UV map (AUV tiles.) This effect is easy to miss until I load up the bump surface, at which point it is extremely obvious where the geometry is deformed, and invisible where it isn’t.

This is all in Zbrush. I export to lightwave and see a similar result. Texture only looks good, bump/displacement/normal maps all have the grid effect on it.

Here’s what I’ve tried so far:
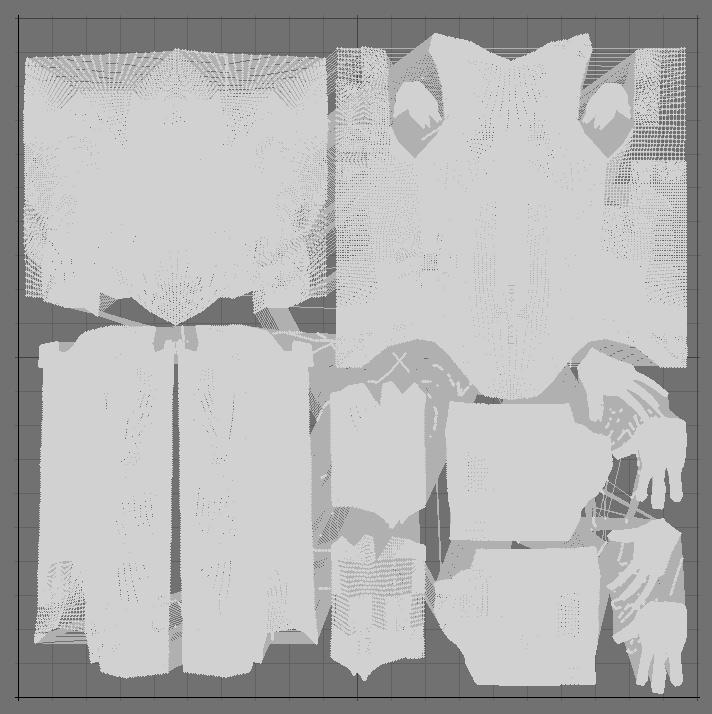
The model was originally created in Zbrush, cleaned up a bit in lightwave, then sent back to Zbrush for texturing. This effect happens with any model I use however, whether it was created in Lightwave, Zbrush, or if it was or was not exported between the two.
Texture size is 4096x4096
AUV Tiles gives the best result. Going back to GUV and testing a new texture looks horrible.

Currently the AUV ratio is set at 1, and I don’t think it would affect this issue, but I’d be willing to try some different numbers there if anyone thinks it would help.

With AUV tiles, I tried to Fix seams with the FS border being 1, 4, 8, and 16. These all produced the same results (the tile effect shown above).

I also tried to fiddle withe the adjU and adjV numbers and had no luck there either.

If anyone has any hints I’d be eternally grateful.
Thank you in advance.

What are the exact steps that you’re following to assign the mapping?

And you still haven’t answered my question regarding the 1-to-1 ratio.

After loading the .obj, I create a texture of size 4096 x 4096.
Then I click auvtiles.
Then I use projection master to texture the object.

As for the 1 to 1 ratio, I wasn’t aware of it being a factor until today, but I will be using your recommendation of setting the palette size to the texture size and making sure the object takes up the entire screen from now on. This does fix the occasional blurry texture I was getting before.

This is a real problem! Please, someone help us with this issue!

This makes Zbrush unusable. :frowning:

Thank you.